Table of Contents
Quick Links
Chapters
Table of Contents
Troubleshooting

Related Manuals for Siemens ADVIA 2120


Summary of Contents for Siemens ADVIA 2120
- Page 1 ADVIA® 2120/2120i Hematology Systems Operator’s Guide 067D0157-01 Rev. , 201 -0...
- Page 2 However, Siemens continues to improve products and reserves the right to change specifications, equipment, and maintenance procedures at any time without notice. If the system is used in a manner differently than specified by Siemens, the protection provided by the equipment may be impaired. See warning and hazard...
- Page 3 Contents CONTENTS ........................I WELCOME TO THE ADVIA 2120 HEMATOLOGY SYSTEM......1-1 ........................1-2 VERVIEW ......................1-3 OMPONENTS ADVIA 2120 H .......... 1-14 OW THE EMATOLOGY YSTEM ORKS ADVIA 2120 S ............. 1-15 OW THE OFTWARE ORKS ........................1-18 ESULTS ......................
- Page 4 ....................8-25 EROXIDASE ETHOD RBC / P ..................8-37 LATELET ETHOD ..................8-58 ETICULOCYTE ETHOD REGULATORY INFORMATION ................9-1 ................... 9-4 ETHODS NTRODUCTION CLSI D M29-A3 ..9-18 OCUMENT IEMENS ETHOD OPICS ROSS EFERENCE CBC M ......................9-21 ETHOD CSF M ......................
- Page 5 ......................13 OUCHSCREEN ..................13 ANUAL ARCODE READER ................... 14 ASTE REMOVAL SYSTEM HOW THE ADVIA 2120/2120I HEMATOLOGY SYSTEM WORKS ..........15 HOW THE ADVIA 2120/2120I SOFTWARE WORKS................. 16 ....................... 16 TATUS LINES ......................... 17 ENUS ..........................18 ..................... 18 SIDE BUTTONS ....................
- Page 6 • Complete blood counts (CBC) • CBC plus white cell differential counts (CBC/diff) • Reticulocyte absolute, percent and indices counts (retic) • CBC/diff plus retic (CBC/diff/retic) • CBC/retic Welcome to the ADVIA 2120/2120i Hematology System...
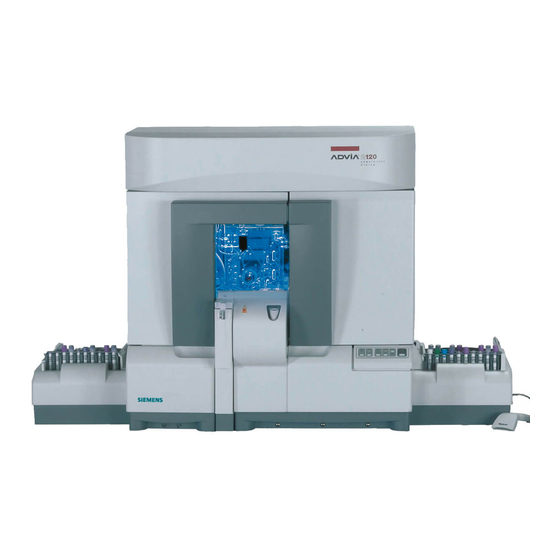
- Page 7 Components The ADVIA 2120/2120i Hematology System is made up of two major components: • The analyzer contains all the electronics, pneumatics, hydraulics, and sampler mechanisms, as well as the on-board reagent storage for all reagents, DEFOAMER, and wash solutions except SHEATH / RINSE. The waste system is a subcomponent of the analyzer.
- Page 8 13 x 75 Becton-Dickinson VACUTAINER 13 x 75 Becton-Dickinson VACUTAINER 13 x 75 Lip-Vac 13 x 78 Venoject II Some of the allowable tube closure types • Standard VACUTAINER • HEMOGARD • Center puncture Safety-Monovette Welcome to the ADVIA 2120/2120i Hematology System...
- Page 9 UFC block, is also acrylic. The pump has one membrane with seven individual pump areas that act as diaphragms that force the reagents into the reaction chambers. Hgb Reaction Chamber Retic Reaction Chamber (Not Visible) Perox Reaction Chamber Welcome to the ADVIA 2120/2120i Hematology System...
- Page 10 Perox Reaction Chamber The perox reaction chamber ( ) is temperature controlled. The mixture of sample and three reagents, PEROX 1, PEROX 2, and PEROX 3, is heated to achieve the desired cytochemical reaction. Welcome to the ADVIA 2120/2120i Hematology System...
- Page 11 The perox optical assembly measures scattering and absorption of a tungsten light beam as it passes through a stream of prepared white blood cells in a flowcell. Tungsten Lamp Sample Stream Absorption PC Board Filter Dark Field Stop Welcome to the ADVIA 2120/2120i Hematology System...
- Page 12 The scattered light is detected by the two scatter photodiodes and generates the following signals: • A high-angle scatter signal corresponding to light scattered at angles between 5° and 15° Welcome to the ADVIA 2120/2120i Hematology System...
- Page 13 HGB method selected. The hemoglobin reaction chamber ( ) is built into the UFC assembly. Hemoglobin concentration is calculated using baseline and sample readings taken at specific intervals during the hemoglobin sample analysis period. Welcome to the ADVIA 2120/2120i Hematology System...
- Page 14 ) and sheath ( ) pumps are located on the right side of the analyzer. The diaphragm pumps for sheath, rinse, and wash (five in all) are located above the reagent containers. 1-10 Welcome to the ADVIA 2120/2120i Hematology System...
- Page 15 ( through the flowcells for analysis. The analyzed sample and sheath are sent to waste ) and the lines, flowcells, and reaction DP1 (V26) chambers are washed and rinsed. Welcome to the ADVIA 2120/2120i Hematology System 1-11...
- Page 16 2.5 minutes, while samples through the autosampler can begin processing within four minutes. Sets the analyzer to a lower power state. To exit, press Standby – Standby 1-12 Welcome to the ADVIA 2120/2120i Hematology System...
- Page 17 The manual barcode reader is used to enter information from labels on sample tubes, reagent containers, controls, and calibrators. As each label is correctly read, the LED on the wand will blink. Welcome to the ADVIA 2120/2120i Hematology System 1-13...
- Page 18 (approximately 8 liters), an error message appears on the Status line on the personal computer monitor. The analyzer will not aspirate any more samples until the waste container is emptied. 1-14 Welcome to the ADVIA 2120/2120i Hematology System...
- Page 19 Stand-alone waste container Automatic Waste Removal How the ADVIA 2120/2120i Hematology System Works Blood samples can be aspirated through the: • Autosampler • Manual closed-tube sampler • Manual open-tube sampler After a sample ( ) is aspirated, it is drawn into the shear valve ( ).
- Page 20 Test results are sent to the computer to be reviewed and edited. How the ADVIA 2120/2120i Software Works The ADVIA 2120/2120i system software is a special-purpose program that runs on the Windows NT operating system. You can navigate through the software and operate the system using the mouse.
- Page 21 The menu appears when you move the pointer over the button. When you click an item on a menu, the corresponding window opens, the button appears to be pressed, and the other functions on the menu appear as tabs arranged beneath the status lines. Welcome to the ADVIA 2120/2120i Hematology System 1-17...
- Page 22 The software has wizards to help you with complicated procedures. Each wizard guides you through a process by giving you information and prompting your input along the way. You also have the option to perform these procedures without the help of a wizard. 1-18 Welcome to the ADVIA 2120/2120i Hematology System...
- Page 23 However, pressing the Print Screen key when there is no printer attached to the system can cause the system to malfunction. Make certain that there is a printer attached before you attempt to print the screen. Welcome to the ADVIA 2120/2120i Hematology System 1-19...
- Page 24 Results The ADVIA 2120/2120i system can run five types of tests: CBC, CBC/DIFF, retic, CBC/retic, and CBC/DIFF/retic. These tests can be selected by: • Setting the test selectivity to default • Requesting the test type from the Manual Sample ID tab •...
- Page 25 User-defined ranges based on age and sex for Normal, Rerun, Panic, and Delta Check criteria • Bi-directional and host query communication protocols • Quality control 3D bar graph Levey-Jennings plot SDI graph Table format Welcome to the ADVIA 2120/2120i Hematology System 1-21...
- Page 26 Laboratory protocols may use these flags internally in their smear review and manual differential specifications. Whenever morphology or quantitative flags are triggered, it is the responsibility of the laboratory to validate the results. 1-22 Welcome to the ADVIA 2120/2120i Hematology System...
- Page 27 3.5", 1.44Mb floppy Drive. - Samsung SFD-321J / ADNR Network Cards Integrated Intel Gigabit LOM Network Interface (10/100/1000) 3COM 3C900B-TPC Combo card with BNC connector. Video controller Intel Extreme Integrated Graphics 2 Welcome to the ADVIA 2120/2120i Hematology System 1-23...
- Page 28 Operating: 18°C to 35°C Storage: -45°C to 70°C Requirements Relative Humidity Operating: 15%–80% (non condensing) Heat Generation Less than 3000 BTU (less than 880 W) Audible Noise Level 65 decibels Installation Category Pollution Degree 1-24 Welcome to the ADVIA 2120/2120i Hematology System...
- Page 29 Azide-free reagents drain into waste container with automatic level-sensor shutoff. Waste per CBC/diff/retic cycle, including rinse: 23 mL The ADVIA 2120/2120i Hematology System is for indoor use only. Operation of the instrument at altitudes of over 2000 meters (6000 feet) is not recommended.
- Page 30 1-26 Welcome to the ADVIA 2120/2120i Hematology System...
- Page 31 TURNING THE SYSTEM ON ..................2 TURNING THE SYSTEM OFF..................4 ............. 4 URNING THE SYSTEM OFF N AN MERGENCY ................. 4 URNING THE SYSTEM OFF OUTINELY ADVIA 2120/2120 ..............4 XITING THE I SOFTWARE Turning the System On / Off...
- Page 32 Overview The ADVIA 2120/2120i Hematology System consists of two main components: the computer and the analyzer. Although there is a main power switch for the system, you must also turn each component on and off individually. Turning the system on 1.
- Page 33 in progress. When the system preparation is complete, log on to the system. During system preparation, the analyzer: • Performs internal diagnostics checks • Prepares the hydraulics • Primes the reagent lines • Begins the Startup process NOTE If any of the internal diagnostic checks fail, the system displays an error message on the status line.
- Page 34 Wait 1–2 minutes while the software shuts down. 3. Set the computer power switch to Off. Exiting the ADVIA 2120/2120i software To exit the ADVIA 2120/2120i software without turning off the computer power 1. At the Operations menu, select Log On / Off 2.
-
Page 35: Table Of Contents
Daily Routine STARTING EACH SHIFT ..................... 2 ................2 MPTYING THE ASTE ONTAINER ................4 MPTYING THE VERFLOW OTTLE ..................... 4 HECKING THE EAGENTS ................ 4 BTAINING THE ACKGROUND OUNTS PROCESSING THE SAMPLES ..................5 ..................5 REATING THE ORKORDERS ................ -
Page 36: Daily Routine
Starting Each Shift Emptying the Waste Container BIOHAZARD WARNING All products or objects that come in contact with human or animal body fluids should be handled, before and after cleaning, as if capable of transmitting infectious diseases. Wear facial protection, gloves, and protective clothing. The operator should follow the recommendations to prevent the transmission of infectious agents in health-care settings as recommended by the Clinical and Laboratory Standards Institute (formerly NCCLS) in Protection of Laboratory Workers from... - Page 37 6. Empty the full container by opening the spigot ( ) into a drain that is capable of accommodating a flow rate of approximately five liters per minute. Total drainage time will be about two and a half minutes. 7. When the waste container is empty, close the spigot and store the container for future use.
-
Page 38: Emptying The Overflow Bottle
1. Use the Startup tab or the Reagent Log tab to check the supply of all reagents except ADVIA 2120/2120i DEFOAMER. 2. Visually check the supply of ADVIA 2120/2120i DEFOAMER. 3. If you need to replace reagents, use the Reagent Log tab. -
Page 39: Processing The Samples
3. The background results are color-coded. Green Within range Out of range If any result is out of range, select at the Startup tab to run another Refresh background count cycle. If any result is still unacceptable, perform a system wash. -
Page 40: Listing The Pending Workorders
Run controls in accordance with your laboratory protocol. • Run multilevel controls at the beginning of each shift. Siemens recommends the use of ADVIA TESTpoint Hematology Controls (Low, Normal, and High) and ADVIA TESTpoint Reticulocyte Control (Low and High). •... - Page 41 To run samples from the autosampler: 1. Load samples in the following order: • Whole blood primer (primer label) • Controls (control label) • Patient samples (sample ID label) a. Insert tube into rack with the barcode label visible above the rack barcode label that indicates the rack number and sample position.
-
Page 42: Viewing The Sample Run
To run samples from the manual open-tube sampler 1. If the Standby indicator is lit, select Standby 2. Run samples in the following order: • Whole blood primer (primer label) • Controls (control label) • Patient samples (sample ID label) 3. -
Page 43: Validating The Results
Validating the Results 1. At the Data Manager menu, select Review / Edit 2. If not already done, select validation mode and access mode to determine which sample records will be reviewed. 3. Review the displayed results. Scroll to view additional results. 4. -
Page 44: Ending Each Shift
Ending Each Shift Washing the System Perform the system wash procedure at the end of each shift or work period (a maximum of eight hours). After the laboratory shift with the largest number of samples, run three system wash cycles; after other shifts, you need to run only one wash cycle. -
Page 45: Logging Off
6. If desired, select the check boxes for any files you want to back up. Verify the destination for the Q.C. file backup. 7. Select the check box. Purge Database 8. Note the values in Total Samples and To be purged fields. In the To be purged field, enter the number of records, if any, you want deleted from the All Complete file. - Page 46 3-12 Daily Routine...
- Page 47 Maintaining the Analyzer SCHEDULE ........................2 SYSTEM WASH......................3 CLEANING THE CENTERING COLLAR ..............3 CLEANING THE SHEAR VALVE AND ASPIRATION PATHWAYS IN THE UFC ........................... 6 CLEANING THE SHEAR VALVE................7 ..8 LEANING THE HEAR ALVE AKING THE HEAR ALVE ACES...
-
Page 48: Maintaining The Analyzer
Schedule To maintain the operating efficiency of your analyzer, you must perform specific procedures according to the frequency listed below. After 1000 samples or daily • Perform a system wash. Perform the system wash procedure at the end of each shift or work period (a maximum of eight hours). -
Page 49: System Wash
System Wash Time: 6.5 minutes Analyzer mode: Ready to Run Perform the system wash procedure at the end of each shift or work period (a maximum of eight hours). After the laboratory shift with the largest number of samples, run three system wash cycles; after other shifts, you need to run only one wash cycle. - Page 50 BIOHAZARD All products or objects that come in contact with human or animal body fluids should be handled, before and after cleaning, as if capable of transmitting infectious diseases. Wear facial protection, gloves, and protective clothing. The operator should follow the recommendations to prevent the transmission of infectious agents in health-care settings as recommended for potentially infectious specimens in Protection of Laboratory Workers from Infectious Disease Transmitted by Blood, Body Fluids, and Tissue, 2d edition;...
- Page 51 6. Attach a piece of 0.030-inch ID tubing to a syringe, then flush each port on the autosampler collar or the waste port on the manual closed-tube sampler collar with water. IMPORTANT To prevent autosampler centering collar lock ups, apply Parker Super O-lube (or equivalent lubricant) to the barrel part ( ) of the centering collar.
-
Page 52: Cleaning The Shear Valve And Aspiration Pathways In The Ufc
1. Tilt the front cover down. 2. Remove the sample line ( ) from the bottom of the needle base. CAUTION You must remove the sample line before the aspirator assembly is tilted forward. If the line stays in place, it can break as the assembly is tilted. 3. -
Page 53: Cleaning The Shear Valve
Materials required: Beaker, household bleach, and water Analyzer mode: Ready to Run To clean the shear-valve and aspiration pathways in the UFC 1. At the menu, select the Exerciser tab. Utilities 2. Select the button on the left. If the arrow on the image of the Syringe Pumps valve under Selector Valve does not point to Open, select on the image until the arrow does point to Open. -
Page 54: Alve Faces Apart
The operator should follow the recommendations to prevent the transmission of infectious agents in health-care settings as recommended for potentially infectious specimens in Protection of Laboratory Workers from Infectious Disease Transmitted by Blood, Body Fluids, and Tissue, 2d edition; Approved Guideline (1997) Document M29-A, National Committee for Clinical Laboratory Standards (NCCLS). -
Page 55: Alve Faces
3. To remove the front shear face ( ), gently rotate the front face until it is loosened, then pull forward and remove. The rear shear face is stationary. CAUTION To avoid damaging the seal that secures the shear valve to the acrylic layer of the UFC, do not use excessive force to remove the front shear face. -
Page 56: Inspecting And Cleaning The Syringe Plungers Pn 067-506-01 And Pn 067-506-02
1. Shake off any excess water, then install the front face on the shaft by aligning the black line on the front face with the black line and the on the rear face. The smaller loops should be at the 9 and 11 o’clock positions and the large loop should be at the 5 o’clock position. - Page 57 Time: 15 minutes for one plunger Analyzer mode: Off BIOHAZARD All products or objects that come in contact with human or animal body fluids should be handled, before and after cleaning, as if capable of transmitting infectious diseases. Wear facial protection, gloves, and protective clothing. The operator should follow the recommendations to prevent the transmission of infectious agents in health-care settings as recommended for potentially infectious specimens in Protection of Laboratory Workers from Infectious...
- Page 58 CAUTION When cleaning the 50 µL syringe, never pull the plunger through the small plastic bushing inside the syringe. This will cause damage to the syringe plunger tip. Use a small hex wrench to pop the bushing all the way out of the syringe, then remove the plunger from the syringe with both bushings still on the plunger stem.
-
Page 59: Replacing The Sampler Needles
Replacing the Sampler Needles There are two needles in the analyzer. One is located in the autosampler and the other is in the manual closed-tube sampler. Materials required: • WARNING Cotton swab • Lens tissue The analyzer must be off; otherwise, personal •... - Page 60 2. Remove the centering collar from the Autosampler or the Manual closed- tube sampler. (See page 4-5 for instructions.) 3. Turn the needle cover counterclockwise to loosen the needle. 4. Discard the needle along with its cover as biohazardous material. 5.
-
Page 61: Replacing The Sheath Filters
CAUTION After repositioning the aspirator assembly, finger-tighten the thumb screws, being careful that they are not cross threaded. Overtightening of the screws can warp the baseplate, which will cause misalignment of the sampler. Mis- threading the thumb screws can cause needle damage. 10. -
Page 62: Replacing The 50 Or 1000 Μl Syringe Plungers Pn 067-506-01 And 067-506-02
3. Disconnect the luer fitting ( ) from the connector at the output port ( ). Do not disconnect the line leading from the luer fitting. 4. Discard the filter according to local environmental laws and regulations. 5. Hold the replacement sheath filter by the body and attach the luer fitting to the connector. - Page 63 last two to three times longer than the sample syringe plungers ( BIOHAZARD All products or objects that come in contact with human or animal body fluids should be handled, before and after cleaning, as if capable of transmitting infectious diseases. Wear facial protection, gloves, and protective clothing. The operator should follow the recommendations to prevent the transmission of infectious agents in health-care settings as recommended for potentially infectious specimens in Protection of Laboratory Workers from Infectious...
- Page 64 4. Use a hexagonal wrench to loosen the set screws ( on the metal bushing ( ) on the plunger stem. Remove and keep the bushing. Discard the plunger 5. Inspect the syringe. If the inside surface is dirty, use a wash bottle with 25% solution of household bleach and water to clean it.
-
Page 65: Cleaning The Air-Circulation Filter
8. Check analyzer performance by: • Checking saline backgrounds • Running a whole blood primer • Running controls If controls do not recover, calibrate the affected channel. Cleaning the Air-Circulation Filter Time: 5 minutes Location of the air filter (1) To clean the air filter 1. -
Page 66: Cleaning The Autosampler Aspirate Assembly
4. If necessary, clean the cap and the vent opening. Use the drill bit included in the flowcell cleaning kit ( ) to clean blockages in the vent PN 113-B711-01 opening. 5. Replace the cap and reconnect the overflow tube. Cleaning the Autosampler Aspirate Assembly Clean the autosampler aspirate assembly if there is a salt buildup. - Page 67 You must remove the sample line before the aspirator assembly is tilted forward. If the line stays in place, it can break as the assembly is tilted. 5. Loosen the thumb screws ( ) and tilt the autosampler aspirator assembly forward, then thoroughly rinse the back side of the assembly with deionized water.
- Page 68 Troubleshooting the Analyzer ALIGNMENTS AND ADJUSTMENTS ................ 2 ................. 2 DJUSTING THE ASELINE ALUE ............3 DJUSTING THE ENGTH OF THE AMPLE ROBE ..............3 DJUSTING THE NEUMATIC EGULATORS ................ 4 AXIMIZING THE EROX UTPUT ............. 5 EPROGRAMMING THE ANUAL ARCODE EADER CLEANING PROCEDURES..................
-
Page 69: Troubleshooting The Analyzer
If you are unable to correct a problem and require service assistance, please contact your local technical support provider or distributor. Alignments and Adjustments Adjusting the Hgb Baseline Value When to adjust the Hgb colorimeter-lamp baseline value • After replacing the lamp. •... -
Page 70: Adjusting The Length Of The Sample Probe
Adjusting the Length of the Sample Probe After each aspiration, the wash block ( ) is lowered and the probe is washed within the block. For a proper wash, the terminal end of the probe ( ) must be between the upper ( ) and lower ( ) ports of the wash block when the block is at its lowest position. -
Page 71: Maximizing The Perox Lamp Output
You have to first pull the 20 and 40 psi pressure regulator knobs, then turn to adjust. Regulator Acceptable Reading Set to 20 ±1 in. Hg 20 in. Hg vacuum 20 +0.5 in. Hg 20 ±1 psi 20 psi pressure 20 +1 psi 5 ±0.5 psi 5 psi pressure... -
Page 72: Reprogramming The Manual Barcode Reader
NOTE Achieve the final maximum lamp value in a clockwise direction only. This will counteract any spring-bounce that might decrease the output level of the lamp over time. 7. Once the value is maximized, tighten the securing screws ( ) to lock the lamp into position. - Page 73 BIOHAZARD All products or objects that come in contact with human or animal body fluids should be handled, before and after cleaning, as if capable of transmitting infectious diseases. Wear facial protection, gloves, and protective clothing. The operator should follow the recommendations to prevent the transmission of infectious agents in health-care settings as recommended for potentially infectious specimens in Protection of Laboratory Workers from Infectious Disease Transmitted by Blood, Body Fluids, and Tissue, 2nd edition;...
-
Page 74: Cleaning The Perox Chamber
WARNING The debris flushed from the drain filters may contain DIRECTION OF biohazardous material and FLOW should be treated as if it is capable of transmitting infectious diseases. 7. Rinse the filter by repeating steps 4 through 6 twice, using deionized water instead of the bleach solution. -
Page 75: Cleaning The Autosampler Rinse-To-Waste Line (V45 Pathway)
Materials required: • Cotton swab • Dental mirror • EZ KLEEN • Flashlight • Pipette, 2-mm ID, disposable Time: 2 minutes Analyzer mode: Ready to Run 1 PEROX CHAMBER CAP 2 PEROX CHAMBER To clean the perox chamber 1. Remove the perox chamber cap ( 2. -
Page 76: Cleaning The Vent Lines, Vacuum Shuttle Chambers, And Reaction Chambers
• Household bleach Time: 4 minutes Analyzer mode: Ready to Run 1. Open the front cover. 2. At the Utilities menu, select the Exerciser tab, and select the Valves button on the left. 3. Remove the tubing from the nipple on the autosampler centering collar. 4. -
Page 77: Flowcell Wash
NOTE Clean one vent line or chamber at a time. 1. Remove the tubing from the overflow bottle that leads to the vent of the pathway or chamber that you want to clean. Or, if there is no overflow tube installed, attach a 12-inch (300.5-mm), 0.081-ID piece of tubing to the vent. -
Page 78: Cleaning The Flowcells On The Analyzer
To wash the RBC/baso/retic flowcell, use a 25% solution of household bleach and water. To wash both flowcells at the same time, use EZ KLEEN. 1. Select to select it. Flowcell Wash 2. Select the flowcell you want to wash by clicking an option in the Flowcell Options area. -
Page 79: Cleaning The Flowcells Off The Analyzer
To clean the perox or RBC flowcell without removing it from the analyzer There are three tubes associated with each flowcell. Typically, only the sample line is cleaned. The rinse and shuttle lines can be cleaned in the same way. PEROX FLOWCELL RBC FLOWCELL SHUTTLE... - Page 80 ♦ Drill bit ♦ Needle cleaning kit, PN 113-B911-01 - Coupling - Disposable syringe - Luer adapter ♦ Pin vise • Household bleach • Lens tissue • One 6 inch (15.2 cm) length of 0.020 inch (0.5 mm) ID C-Flex Tubing, PN 562-3052P02 •...
- Page 81 7. Check analyzer performance. See below for detailed steps. Cleaning the Flowcells off the Analyzer: Step 1 Removing the Perox Flowcell 1. Make sure that the analyzer is in the Standby mode. 2. Open the optics cover. The perox flowcell is on the left. Perox flowcell ( ), RBC flowcell ( 3.
- Page 82 5. Release the flowcell by loosening the release knob located on the right of the flowcell adjustment assembly Flowcell release knob ( Front of analyzer 6. Hold the flowcell by the red threaded fitting located at the top of the flowcell, then gently lift the flowcell out of the optics assembly.
- Page 83 To avoid damage to the eyes, never look directly at the laser beam or at its reflection from a shiny surface. All field service procedures must be followed precisely. Only Siemens-trained field service personnel should perform procedures related to laser assemblies.
- Page 84 SHEATH NIPPLE SAMPLE NIPPLE SHUTTLE NIPPLE 4. Locate hydraulic valve # 23. Unscrew the threaded fitting from the top left- hand side of the valve. 5. Loosen the captive flowcell release screw, then remove the flowcell. Flowcell ( ), flowcell release screw ( 6.
- Page 85 CAUTION To avoid getting fingerprints on the glass windows of the flowcell, always hold the flowcell by the metal slides. Cleaning the Flowcells off the Analyzer: Step 2 Taking the Flowcell Apart 1. Unscrew the locking nut ( ) at the input end of the flowcell assembly.
- Page 86 Cleaning the Flowcells off the Analyzer: Step 4 Flushing the Flowcell and the CFM 1. Reattach the CFM to the flowcell assembly. Do not overtighten the locking nut. 2. To flush each nipple separately, the other two nipples have to be blocked off.
- Page 87 CAUTION Since impure methanol can leave a film on the windows, use only uncontaminated spectrophotometric-grade methanol. 3. Gently wipe one glass surface. Discard the used piece of lens tissue. To prevent formation of a methanol film, completely dry the glass using a clean piece of lens tissue.
-
Page 88: Backflushing The Perox Flowcell And Shuttle And Reaction Chambers
Shuttle line from UFC assembly ( Sample line from syringe ( Sheath line from hydraulic valve ( V15 - perox or V19 - RBC Cleaning the Flowcells off the Analyzer: Step 7 Checking Analyzer Performance IMPORTANT An inspection scope must be available for this procedure. Do not remove the flowcells unless you are trained in how to align and focus them. - Page 89 The operator should follow the recommendations to prevent the transmission of infectious agents in health-care settings as recommended for potentially infectious specimens in Protection of Laboratory Workers from Infectious Disease Transmitted by Blood, Body Fluids, and Tissue, 2nd edition; Approved Guideline (1997) Document M29-A, National Committee for Clinical Laboratory Standards (NCCLS).
-
Page 90: Backflushing The Rbc/Baso/Retic Flowcell And Shuttle And Reaction Chambers
12. At the Valves window of the tab, open V16 and V17 and then Exerciser push the syringe to push EZ KLEEN through the shuttle pathway to the VSC chamber. Repeat with deionized water and then close V16 and V17. 13. - Page 91 1. At the Utilities menu, select Exerciser open the Exerciser tab. 2. Disconnect the waste tubing that comes from the RBC flowcell at V23. This is the white fitting at V23 3. Fill the cleaning syringe 25% household bleach solution and attach it to the white fitting.
-
Page 92: Repair And Replacement
15. Gently push plunger on the cleaning syringe to flush bleach solution through the RBC flowcell . Repeat with deionized water. 16. Reattach the shuttle line to the side of the UFC (10) (11) 17. Refill the syringe with bleach solution. 18. -
Page 93: Replacing The Diaphragm Pumps
7. If air bubbles still appear, disconnect the filter adapter fitting and check for dust or debris in the fitting and in the port. If air bubbles still persist, call Siemens technical support. Replacing the Diaphragm Pumps Time: Replacement - 5 minutes... -
Page 94: Replacing The Drain Filters
If DP1 is replaced, run two saline primers. At the menu, select Operations the Startup tab. Select Refresh and verify that the WBC background count is 0.1 or less (1000 cells/µL). If DP4 is replaced, do a system wash and verify that the reaction chambers are filling up with wash solution to their normal wash levels. - Page 95 4. Turn the analyzer on and run samples in the manual and autosampler modes. Check to ensure that there are no leaks and that fluid passes through the filters properly. Make sure that the lines do not interfere with autosampler aspirator motion.
-
Page 96: Replacing A Perox Check Valve
Replacing a Perox Check Valve Time: Installation and Checkout - 15 minutes Materials required: Check valve, PN 556-1190-01 Analyzer mode: Standby BIOHAZARD All products or objects that come in contact with human or animal body fluids should be handled, before and after cleaning, as if capable of transmitting infectious diseases. - Page 97 BIOHAZARD All products or objects that come in contact with human or animal body fluids should be handled, before and after cleaning, as if capable of transmitting infectious diseases. Wear facial protection, gloves, and protective clothing. The operator should follow the recommendations to prevent the transmission of infectious agents in health-care settings as recommended for potentially infectious specimens in Protection of Laboratory Workers from Infectious Disease Transmitted by Blood, Body Fluids, and Tissue, 2nd edition;...
-
Page 98: Replacing The Fuses
Replacing the fuses IMPORTANT All fuses must be replaced with same rated fuses. Materials required: Flat-head screwdriver Fuse ratings and part numbers: FUSE APPLICATION FUSE RATINGS 220 V FUSE DEVICE 100 V 230 V PROTECTED TYPE 120 V SYSTEMS 240 V SYSTEMS AC Input (L1) 3 AB 15.00A (T) 250V... - Page 99 Both main fuses, F1 and F2, must be replaced if either one is blown. Location: Two main fuses, ); fuses through Analyzer mode: Off, power cord unplugged To replace the 20-mm fuses (F3 through F7) 1. Loosen the fuse holder by turning it counterclockwise.
-
Page 100: Replacing The Hemoglobin Colorimeter Lamp
2. Remove the fuse cap and replace the fuse. 3. Install the fuse cap and tighten it by turning it clockwise. 4. Plug in the power cord and set the power switch to (on). Replacing the Hemoglobin Colorimeter Lamp When to replace the lamp: •... -
Page 101: Replacing The Hydraulic Valves
ELECTRICAL WARNING To avoid exposure to shock hazards and/or damage to the instrument while performing this procedure, power off the analyzer before proceeding. Analyzer mode: Off 1. Remove the screw ( ) that secures the lamp adapter cap, then remove the cap. Be careful not to lose the two washers. - Page 102 ELECTRICAL WARNING To avoid exposure to shock hazards and/or damage to the instrument while performing this procedure, power off the analyzer before proceeding. BIOHAZARD All products or objects that come in contact with human or animal body fluids should be handled, before and after cleaning, as if capable of transmitting infectious diseases.
- Page 103 Perox flowcell connections RBC flowcell connections 7. Run controls. Check for leaks and verify system performance. 5-36 Troubleshooting the Analyzer...
-
Page 104: Replacing The Open-Tube Sampler Probe
Replacing the Open-Tube Sampler Probe Materials required: • Sample probe assembly, PN 113-B646-01 • Scalpel or single-edge razor Time: Replacement - 10 minutes Checkout - 15 minutes Analyzer mode: Off BIOHAZARD All products or objects that come in contact with human or animal body fluids should be handled, before and after cleaning, as if capable of transmitting infectious diseases. -
Page 105: Replacing The Perox Lamp
b. Visually check for bubbles in the open-tube sample line. c. Run enough controls to verify analyzer performance. If control results are not acceptable, check that the probe has been properly installed. If no problem is found, recalibrate the affected channel. Replacing the Perox Lamp WARNING To prevent injury to eyes from shattered glass, wear safety glasses when handling... -
Page 106: Replacing The Perox Flowcell
2. Unscrew the securing cap to which the power cable ( ) is attached. Carefully pull the lamp assembly out of the optics lamp housing. The lamp assembly includes the VIEW FROM lamp, the power cable, and the securing BACK OF PEROX cap. - Page 107 2. Open the optics cover. The perox flowcell is on the left. Perox flowcell ( ), RBC flowcell ( 3. Disconnect the shuttle line ( ), the sample-stream input line ( ), and the sheath-stream input line ( ) from the CFM. Allow these lines to hang freely. 1 SHEATH NIPPLE 2 SAMPLE NIPPLE 3 SHUTTLE NIPPLE...
- Page 108 Flowcell release knob ( Front of analyzer 6. Hold the flowcell by the red threaded fitting located at the top of the flowcell, then gently lift the flowcell out of the optics assembly. CAUTION To avoid getting fingerprints on the glass windows of the flowcell, always hold the flowcell by the metal slides.
-
Page 109: Replacing The Rbc/Baso/Retic Flowcell
6. Run a whole-blood primer, and then run controls to verify analyzer performance. 7. If the control results are acceptable to the laboratory, no additional action is required and normal operation can be resumed. Replacing the RBC/baso/retic flowcell Before you remove the RBC/baso/retic flowcell, read all laser safety precautions. Time: Installation - 15 minutes Checkout - 15 minutes Analyzer mode: Standby... - Page 110 To avoid damage to the eyes, never look directly at the laser beam or at its reflection from a shiny surface. All field service procedures must be followed precisely. Only Siemens-trained field service personnel should perform procedures related to laser assemblies.
- Page 111 5. Loosen the captive flowcell release screw, then remove the flowcell. Flowcell ( ), flowcell release screw ( 6. Hold the flowcell by the red threaded fitting when lifting the flowcell out of the optics assembly. CAUTION To avoid getting fingerprints on the glass windows of the flowcell, always hold the flowcell by the metal slides.
-
Page 112: Replacing The Syringes
To install the flowcell 1. Hold the flowcell by its red threaded fitting and place it gently into the optics assembly. 2. Place the flowcell onto the guide pins. Make sure that it is resting on both pins. The flowcell will be at a 4° angle. Tighten the captive flowcell release screw to lock the flowcell into position. - Page 113 Materials required: The words are imprinted on each filter. FLUID SIDE • Flat-head screwdriver, Location of the filters: large manual ( ) and automatic ( ) waste containers • Paper towels • Vacushield filter PN 518-3146-01 Time: Replacement - 10 minutes Checkout - 10 minutes Analyzer mode: Off BIOHAZARD...
-
Page 114: Replacing The Wash Block
7. If a 19 to 21 reading cannot be reached, check that the lines to the filter are secure. If you are still having difficulty, call Siemens technical support. Replacing the wash block Time: Replacement - 5 minutes... - Page 115 4. Mark the tubes with tape (the top line is rinse and the bottom line is vacuum), then remove the lines. Be careful not to allow the tubes to fall behind the aspirate paddle assembly. If necessary, use hemostats to hold the tubing outside the assembly.
-
Page 116: Troubleshooting Tips
Troubleshooting Tips Autosampler Troubleshooting Tips “ Eject rack” or “Rack in sampler” status line error messages appear when the analyzer is powered off then turned on again. To avoid autosampler errors, you should wait for the following two status-line messages to appear before you turn the power on again: “Communication error with analyzer.”... -
Page 117: Data Manager And Lis
Data Manager and LIS At the host computer, how can I tell controls apart? In the SID that is sent to the host, the first two digits after the C identify the control as follows: Control First Second Type Digit Digit 1, 4, or 7 = Low CBC/DIFF... -
Page 118: Perox Chamber
Perox Chamber PEROX 3 reagent is used up before PEROX 2 reagent bottle is empty. Perox reaction chamber overflows • Check for blockage in the perox reaction chamber cap. Clear any blockage using a drill bit or a paper clip. •... - Page 119 Flags MORPHOLOGY FLAGS ....................3 ........................3 UMMARY (ANISO)....................4 NISOCYTOSIS (ATYP) ................5 TYPICAL YMPHOCYTES (BLASTS) ......................6 LASTS HGB C (HCVAR) ............... 8 ONCENTRATION ARIANCE (HYPER)..................... 8 YPERCHROMIA (HYPO) ....................9 YPOCHROMIA (IG)................. 10 MMATURE RANULOCYTES (LPLT) ..................11 ARGE LATELETS (LS)......................
- Page 120 (RTC-SE, SE)................48 ETIC LOPE RROR (NRCELL, NC) ..........49 USPECT ELLULAR NTERFERENCE (NRLPLT, NP) ..........50 USPECT ARGE NTERFERENCE (NR-LPD, NL) ............50 USPECT IPID NTERFERENCE WBC S (WBCSUB, WS) ................ 51 UBSTITUTION Flags...
-
Page 121: Flags
The ADVIA 2120/2120i system does not enumerate abnormal cells. Despite a high degree of sensitivity and specificity in detecting conditions consistent with the presence of abnormal cells, test results produced by the ADVIA 2120/2120i system are intended for laboratory use only. Whenever morphology or... -
Page 122: Anisocytosis (Aniso)
CBC / CBC / DIFF CBC / RETIC Flag Triggering Criteria DIFF / RETIC RETIC LPLT %LPLT > 10% PLT BASO d/D < 0.15 and ≥ %NEUT ≥ MACRO %MACRO 2.5% MICRO %MICRO ≥ 2.5% MPO-D [%PMN − (%NEUT + (MO) %EOS)] ≥... -
Page 123: Atypical Lymphocytes (Atyp)
Results Flagged none Possible Causes The following list of sample-related causes may not contain all conditions that could cause this flag. Multiple occurrences of this flag, especially for consecutive samples, can indicate a system problem. However, isolated instances of this flag are usually sample related. -
Page 124: Blasts (Blasts)
Perox Cytogram (ATYP +++) Baso Cytogram 2 BLASTS area 1 LUC area Results Flagged none Possible Causes The following list of sample-related causes may not contain all conditions that could cause this flag. Multiple occurrences of this flag, especially for consecutive samples, can indicate a system problem. - Page 125 Default trigger values for the three severity levels are: %BLASTS 1.5% to 5.0% %BLASTS > 5.0% to 10.0% %BLASTS > 10.0% Perox Cytogram Baso Cytogram 2 BLASTS area 1 LUC area The %BLASTS value is intended for flagging and laboratory purposes only. The %BLASTS value is not to be reported as a patient result.
-
Page 126: Hgb Concentration Variance (Hcvar)
HGB Concentration Variance (HCVAR) Definition The Hgb Concentration Variance flag is triggered if the variation in cell hemoglobin concentration (HDW) is equal to or greater than 3.4 g/dL. The Hemoglobin Distribution Width (HDW) parameter is the standard deviation of the cellular hemoglobin concentration distribution on the RBC HC histogram. Default trigger values for the three severity levels are: HDW% = 3.4 g/dL to 3.9 g/dL HDW% = 4.0 g/dL to 4.6 g/dL... -
Page 127: Hypochromia (Hypo)
The %HYPER value is intended for flagging and laboratory purposes only. Results Flagged none Possible Causes The following list of sample-related causes may not contain all conditions that could cause this flag. Multiple occurrences of this flag, especially for consecutive samples, can indicate a system problem. -
Page 128: Immature Granulocytes (Ig)
Sample Related System Related • 1. Check RBC reagents. Iron deficiency anemia· 2. Check the laser sample delivery. • Chronic inflammatory diseases· 3. Check the RBC gains. • Thalassemia· 4. Check the laser flowcell alignment. • Sideroblastic anemias Immature Granulocytes (IG) Definition The presence of immature granulocytes is suspected. -
Page 129: Large Platelets (Lplt)
Results Flagged none Possible Causes The following list of sample-related causes may not contain all conditions that could cause this flag. Multiple occurrences of this flag, especially for consecutive samples, can indicate a system problem. However, isolated instances of this flag are usually sample related. -
Page 130: Left Shift (Ls)
Sample Related System Related • 1. Check the RBC reagents. 2. Check the RBC hydraulics. • Bone marrow transplant 3. Check the RBC and PLT gains. • Chemotherapy 4. Check the laser flowcell alignment Left Shift (LS) Definition The presence of nonsegmented neutrophils (bands) is suspected. The Left Shift flag is triggered if bands obstruct the MN/PMN valley. -
Page 131: Macrocytosis (Macro)
Results Flagged none Possible Causes The following list of sample-related causes may not contain all conditions that could cause this flag. Multiple occurrences of this flag, especially for consecutive samples, can indicate a system problem. However, isolated instances of this flag are usually sample related. -
Page 132: Microcytosis (Micro)
Sample Related System Related • 1. Check the RBC reagents. Macrocytic anemia 2. Check the RBC hydraulics. • Alcoholism 3. Check the RBC gains. • Hemolytic anemia 4. Check the laser flowcell alignment. • Myelodysplastic anemia • Neonatal samples Microcytosis (MICRO) Definition The Microcytosis flag is triggered if the percentage of red blood cells with lower than normal cell volumes (%MICRO) is equal to or greater than 2.5%. -
Page 133: Myeloperoxidase Deficiency (Mpo-D, Mo)
Myeloperoxidase Deficiency (MPO-D, MO) Definition Sample is a weak peroxidase stainer. This flag is triggered if [%PMN - (%NEUT + %EOS)] ≥ 25, the NRBC flag was not triggered, and there is a valid MN-PMN valley (d/D ≥ 0.15). You must perform a manual differential on samples that trigger the Myeloperoxidase Deficiency flag. -
Page 134: Nucleated Red Blood Cells (Nrbc)
Possible Causes The following list of sample-related causes may not contain all conditions that could cause this flag. Multiple occurrences of this flag, especially for consecutive samples, can indicate a system problem. However, isolated instances of this flag are usually sample related. -
Page 135: Platelet Clumps (Plt-Clm, Nw)
Platelet Clumps (PLT-CLM, NW) Definition Presence of clumped platelets is suspected. The Platelet Clumps flag is triggered if the Clumps Count in the PLT Clumps region of the Perox cytogram is greater than 150. The PLT count is flagged to alert the user that the platelet count may not be accurate due to the presence of platelet clumps. -
Page 136: Rbc Fragments (Rbcf)
Sample Related • Traumatic venipuncture· • Anticoagulants· • Autoimmune platelet disorders • Lipemia RBC Fragments (RBCF) Definition The presence of RBC fragments is suspected. This flag is triggered if the number of events in the RBC Fragment area of the PLT Scatter cytogram is greater than 100,000 cells/µL. -
Page 137: Rbc Ghosts (Rbcg)
Possible Causes The following list of sample-related causes may not contain all conditions that could cause this flag. Multiple occurrences of this flag, especially for consecutive samples, can indicate a system problem. However, isolated instances of this flag are usually sample related. - Page 138 Possible Causes The following list of sample-related causes may not contain all conditions that could cause this flag. Multiple occurrences of this flag, especially for consecutive samples, can indicate a system problem. However, isolated instances of this flag are usually sample related.
-
Page 139: Sample/System Flags
Sample/System Flags Summary Through the use of complex flagging algorithms, laboratory personnel are alerted to suspected abnormal sample and/or system conditions. Sample/system flags appear on the Run Screen and the Review / Edit tab. Whenever such flags are triggered, the user should review the results and take the action recommended. - Page 140 Flag Triggering Criteria CBC / CBC / DIFF CBC / RETIC DIFF / RETIC RETIC HGBIFR HGB Sample Flatness (HR) > 1000 HGB-PL HGB baseline is not (PH) between 2.5 and 4.1 LAS-PL(PL) Laser light intensity < 150 NRCELL WBCP / WBCB > 1.1 (NC) NR-LPD 1.
- Page 141 Flag Triggering Criteria CBC / CBC / DIFF CBC / RETIC DIFF / RETIC RETIC PX-NO (NX) 1. Perox % Noise > 60% 2. Flag is not set if there is WBC agreement (no WBC-CE flag) and [(%NEUT + %EOS) - %PMN] is between 0 and 7.5.
- Page 142 Flag Triggering Criteria CBC / CBC / DIFF CBC / RETIC DIFF / RETIC RETIC RTC-FS (FC) 1. Difference between mean and mode RETIC Abs Histogram > 15% 2. Chi-square error for the Gaussian fit > 80,000 RTC-NO Noise Origin > 10% of (NO) gated cells RTC-L (CL)
-
Page 143: Baso Count Suspect (B-Susp, Bc)
Baso Count Suspect (B-SUSP, BC) Definition The Baso Count Suspect flag is triggered if the percentage of events acquired in the region of the Baso cytogram located above the upper MN/PMN threshold and between channels 0 and 49 on the x axis exceeds 5.0%. When cluster analysis is applied, the Baso Count Suspect region of the Baso cytogram is located above the upper MN/PMN threshold. -
Page 144: Baso Irregular Flow Rate (Bifr, Br)
System Related Sample Related • 1. Check baso reagents. High WBC Count 2. Check the baso reaction chamber temperature. • Leukemia 3. Check baso hydraulics. • High Baso count 4. Check baso gains • Aged Blood 5. Check the RBC/Baso/Retic flowcell alignment. •... -
Page 145: Baso Noise (B-No, Nb)
Baso Noise (B-NO, NB) Definition The Baso Noise flag is triggered if the events counted in the Noise area of the Baso cytogram are more than 10% of the baso signals. The B-NO (NB) flag may cause a substitution of the WBC count. The following rules determine if the WBCB or WBCP count is reported for a CBC/Diff sample: •... -
Page 146: Baso No Valley (B-Nv, Vb)
System Related Sample Related • 1. Check baso reagents. Lipemia 2. Check baso hydraulics. • High WBC count 3. Check the pressure and vacuum readings. • Extreme eosinophilia 4. Check sheath delivery. • Malaria parasites 5. Check the baso reaction chamber •... -
Page 147: Baso Saturation (B-Sat, Bs)
Results Flagged Corrective Action Multiple occurrences of this flag, especially for consecutive samples, can indicate a system problem. However, isolated instances of this flag are usually sample related. The following list of sample-related causes may not contain all conditions that could cause this flag. -
Page 148: Baso Temperature Out Of Range (Bto, Tb)
The following rules determine if the WBCB or WBCP count is reported for a CBC/Diff sample: • WBCB is the primary WBC count. • If B-NO or B-SAT flags are triggered, the WBCP count is reported if valid. • If a B-NO flag and a PX-NO or PX-SAT flag are triggered, the WBCB count is reported with a sample/system flag. -
Page 149: Comparison Error Mchc / Chcm (Chcmce, Cc)
Results Flagged WBC, WBCB, %BASO, #BASO, %LYMPH, #LYMPH A four-part WBC differential (basophils excluded) is reported with the measured BASO values displayed and flagged, and with the LYMPH and LUC values also flagged. Corrective Action 1. Check the baso reaction chamber temperature. 2. -
Page 150: Comparison Error Wbcb/Wbcp (Wbc-Ce, Wc)
Comparison Error WBCB/WBCP (WBC-CE, WC) Definition The Comparison Error WBCB/WBCP flag is triggered if the difference in the WBC counts obtained from the baso and perox channels exceeds a preset limit. The WBC count for each sample is independently determined in the baso channel (WBCB) and the perox channel (WBCP). -
Page 151: Hgb Power Low (Hgb-Pl, Ph)
HGB Trans Histogram 1 Sample transmittance 2 Baseline transmittance Results Flagged HGB, MCH and MCHC Corrective Action 1. Check HGB reagents. 2. Check Hgb hydraulics and sample delivery. 3. Check delivery of SHEATH/RINSE. 4. Check the pressure and vacuum readings. Hgb Power Low (HGB-PL, PH) Definition The Hgb Power Low flag is triggered if the HGB baseline transmission is less... -
Page 152: No Perox Nrbc / Lymph Valley (Nrpxnv, Nv)
Corrective Action 1. Flush the RBC/Baso/Retic flowcell 2. Perform the sheath reagent check. 3. Remove and clean the RBC/Baso/Retic flowcell. 4. Replace the laser diode. No Perox NRBC / Lymph Valley (NRPXNV, NV) The No Perox NRBC / Lymph Valley flag is triggered if there is no valley between the nRBC and lymphocyte populations when the system reports an NRBC count. -
Page 153: Perox No Valley (Px-Nv, Vx)
The Perox Rate Histogram displays the arrival rate of the cells in the perox channel. Normal Perox Rate Histogram PXIFR Perox Rate Histogram Results Flagged WBCP, %NEUT, #NEUT, %LYMPH, #LYMPH, %MONO, #MONO, %EOS, #EOS, %LUC, and #LUC Corrective Action 1. Check perox reagents. 2. -
Page 154: Perox Noise (Px-No, Nx)
• WBCB and WBCP agree within specified limits (No WBC-CE flag) • [(%NEUT + %EOS) - %PMN] is between 0 and 7.5 Results Flagged WBCP, %NEUT, #NEUT, %LYMPH, #LYMPH, %MONO, #MONO, %EOS, #EOS, %LUC, and #LUC Corrective Action Multiple occurrences of this flag, especially for consecutive samples, can indicate a system problem. - Page 155 Normal PX-NO Perox Cytogram Perox Cytogram 1 Noise area The PX-NO (NX) flag is not triggered if agreement between the baso and perox results is indicated by both the following conditions: • WBCB and WBCP agree within specified limits (No WBC-CE flag) •...
-
Page 156: Perox Power Low (Px-Pl, Px)
System Related Sample Related • 1. Check perox reagents. Neonatal samples 2. Check peroxidase hydraulics and sample • Aged blood sample delivery. • Malaria parasites 3. Check delivery of SHEATH/RINSE. • Lyse-resistant RBCs 4. Check PEROX SHEATH delivery. 5. Check the pressure and vacuum readings. 6. - Page 157 Normal PX-SAT Perox Cytogram Perox Cytogram 1 Saturation area The PX-SAT (XS) flag is not triggered if WBCB and WBCP agree within specified limits (no WBC-CE flag). The WBCP count does not include events from the Saturation area. Results Flagged WBCP, %NEUT, #NEUT, %LYMPH, #LYMPH, %MONO, #MONO, %EOS, #EOS, %LUC, and #LUC Corrective Action...
-
Page 158: Perox Temperature Out Of Range (Pxto, Tx)
Perox Temperature out of Range (PXTO, TX) Definition The Perox Temperature Out of range flag is triggered if the Peroxidase reaction chamber temperature is not between 58°C and 72.1°C. The PXTO (TX) flag is not triggered if agreement between the baso and perox results is indicated by both the following conditions: •... -
Page 159: Platelet Origin Noise (Pltorn, Ot)
PCT, MPV, and PDW Corrective Action Multiple occurrences of this flag, especially for consecutive samples, can indicate a system problem. • Check RBC/PLT reagents • Contact your Siemens Field Service Representative. RBC Irregular Flow Rate (RBCIFR, RR) Definition Flags 6-41... -
Page 160: Retic - Plt Interference Error (Rtcint, Ct)
The RBC Irregular Flow Rate flag is triggered if the cell counting rate is erratic because of a hydraulic disturbance in the RBC/PLT channel. RBC flow rate is evaluated in terms of the cell counting rate: Sum of the Squared Differences Flow Uniformity = 9 x Mean Cell Counting Rate The flag is triggered if this value is greater than 3.2.The RBC Rate Histogram... -
Page 161: Retic Absorption Distribution Abnormal (Rtcada, Ca)
2. Flush the flowcell. Retic Absorption Distribution Abnormal (RTCADA, CA) Definition The RTCADA flag is triggered if the absorption distribution for the gated cell population is abnormal. The absorption distribution of the histogram is sufficiently abnormal that the reticulocyte population may not be gated correctly. The flag is triggered if: The mode of the calculated Retic Abs... -
Page 162: Retic Absorption Flatness (Rtc-Fl, Rf)
• 1. Check retic reagents. Aged blood 2. Check RBC/Baso/Retic hydraulics. • Transfusion 3. Check retic hydraulics. • Sickle cell anemia 4. Check sheath delivery. • High numbers of NRBCs 5. Check the pressure and vacuum readings. Retic Absorption Flatness (RTC-FL, RF) Definition The Retic Absorption Flatness flag is triggered when the CV (coefficient of variation) for the RETIC ABS Flatness histogram is greater than 3.6. -
Page 163: Retic Fit Suspect (Rtc-Fs, Fc)
Retic Fit Suspect (RTC-FS, FC) Definition The Retic Fit Suspect flag is triggered if: • There is more than a 15% difference between the mean and the mode of the Gaussian fit of the RETIC Absorption Histogram. • The chi-square error for the Gaussian fit exceeds 80,000. Results Flagged %RETIC, #RETIC, CHg, CHr, CHCMg, CHCMr, CHDWg, CHDWr, MCVg, MCVr, RDWg, RDWr... -
Page 164: Retic Noise Origin (Rtc-No, No)
4. Check sheath delivery. 5. Check the pressure and vacuum readings. A partially clogged RBC/baso/retic sheath filter can produce a distinctive “ski slope” effect on the RBC, Baso, and Retic flow rate histograms. Replace the sheath filter. RBC Rate Baso Rate Retic Rate Retic Noise Origin (RTC-NO, NO) Definition... -
Page 165: Retic Rbc Count Low (Rtc-L, Cl)
System Related Sample Related • 1. Check delivery of the sheath reagent. High platelet count 2. Check delivery of SHEATH/RINSE. • RBC fragments 3. Check the RBC/Baso/Retic hydraulics, • Aged blood including the reaction chamber. • Sickle cell anemia 4. Check the retic hydraulics. 5. -
Page 166: Retic Slope Error (Rtc-Se, Se)
Normal Retic Scatter Abs cytogram 1 Saturation area Results Flagged %RETIC, #RETIC, CHg, CHr, CHCMg, CHCMr, CHDWr, CHDWg, MCVg, MCVr, RDWg, RDWr Corrective Action Multiple occurrences of this flag, especially for consecutive samples, can indicate a system problem. However, isolated instances of this flag are usually sample related. -
Page 167: Suspect Cellular Interference (Nrcell, Nc)
Normal Retic Scatter Abs Cytogram Results Flagged %RETIC, #RETIC, CHg, CHr, CHCMg, CHCMr, CHDWr, CHDWg, MCVg, MCVr, RDWg, RDWr Corrective Action The following list may not contain all conditions that could cause this flag, nor is there any intention to associate the flag with specific diagnoses. •... -
Page 168: Suspect Large Plt Interference (Nrlplt, Np)
NRBC Enumeration Histogram Noise-Lymph Histogram Suspect Large Plt Interference (NRLPLT, NP) The Suspect Large Plt Interference flag is triggered if the system counts more than 40,000 large platelets /μL in the RBC/PLT channel. Results Flagged #NRBC, %NRBC, WBC, %NEUT, #NEUT, %LYMPH, #LYMPH, %MONO, #MONO, %EOS, #EOS, %BASO, #BASO, %LUC, #LUC Large platelets may obscure the nRBC NRBC Enumeration Histogram... -
Page 169: Wbc Substitution (Wbcsub, Ws)
Results Flagged #NRBC, %NRBC, WBC, %NEUT, #NEUT, %LYMPH, #LYMPH, %MONO, #MONO, %EOS, #EOS, %BASO, #BASO, %LUC, #LUC The Baso cytogram and NRBC Enumeration Histogram below illustrate the NR- LPD flag. The circled area of the Baso cytogram identifies the lipid pattern. Baso Cytogram NRBC Enumeration Histogram WBC Substitution (WBCSUB, WS) - Page 170 Status-Line Messages % ............................3 2 ............................3 4 ............................4 5 ............................6 8 ............................6 9 ............................6 A ............................7 B............................39 C ............................42 D ............................46 E............................47 F............................49 G ............................49 H ............................50 J ............................
- Page 171 T............................93 U ............................94 V ............................96 W ............................. 98 X ............................99 Y ............................99 Z............................99 Status Line messages...
- Page 172 % Disk Space Used - Alarm Disk space used has risen to the level specified as an alarm criterion, indicating available disk space is low. Corrective Action Increase available disk space by deleting data from any of these files: • Raw Data files •...
- Page 173 Straighten or reconnect lines as necessary. IMPORTANT If problems persist, Call Siemens Service for assistance. Further corrective action must be taken by Siemens service personnel only. 4 Key Not Found The Control Dictionary or the Alarm Dictionary is empty. If the Alarm Dictionary is empty, sample/system flags will appear as exclamation points (!).
- Page 174 Pressure leak Check for crimped or disconnected hydraulic or pneumatic lines. Straighten or reconnect lines as necessary. IMPORTANT If problems persist, Call Siemens Service for assistance. Further corrective action must be taken by Siemens service personnel only. Status Line messages...
- Page 175 Straighten or reconnect lines as necessary. IMPORTANT If problems persist, Call Siemens Service for assistance. Further corrective action must be taken by Siemens service personnel only. 80 Conflict A conflict has occurred on a sample that was accessed by two different tasks (for example, Review and Edit and Host Communication), or you attempted to access a sample at the same time the Data Manager was attempting to access the sample.
- Page 176 A file is missing that has been defined in the list of programs to be saved when running the Program backup through the End of Day functions. Corrective Action Call Siemens Service for assistance. Analyzer Connected The computer has connected with the analyzer.
- Page 177 RINSE reagent container is empty. The waste Empty the waste container. container is full. Pressure or Verify that the vacuum and pressure readings are vacuum levels within range. Adjust as necessary. are out of After about 1 minute, if the status line does not range.
- Page 178 Ethernet cable (from the analyzer - J2 Workstation connection to the computer). The computer Follow these steps to exit the ADVIA 2120/2120i networking software, turn off the analyzer, and then restart: configuration Select in the Log On/Off Shut Down ADVIA has been window.
- Page 179 Replace the needle. damaged Follow the steps in Replacing the Sampler Needles. needle. Faulty Contact your Siemens Field Service representative for Conductivity assistance. Detector Aspiration Failed - Probe Clog - Stop Conductivity detectors did not detect a sample within the 20 seconds of aspiration.
- Page 180 Replace the needle. damaged Follow the steps in Replacing the Sampler Needles needle. Faulty Contact your Siemens Field Service representative for Conductivity assistance. Detector Aspiration Paused The analyzer is unable to perform a sample aspiration or to start a hydraulic cycle when certain menus or tabs are open or when certain error messages are triggered.
- Page 181 Atypical Lymphocytes - Stop The number of consecutive occurrences of this condition has met the criterion specified for a stop message. The autosampler halts at the same time the stop message occurs. The specified stop criterion is user definable in the Customize Menu, System Setup, Alarm/Stop Criteria.
- Page 182 Auto Startup - Started Auto Startup has begun on schedule. Auto Startup Canceled The System canceled the scheduled Auto Startup in accordance with user cancellation. Auto Startup is Due - Will Start at End of Run The scheduled Auto Startup will begin at the end of sample processing or hydraulic cycles.
- Page 183 Installation. Autosampler - Access Door Open The autosampler access door is open (24V interlock switch is open). Corrective Action Close the autosampler access door. The autosampler resets. If the problem persists, call Siemens Service for assistance. 7-14 Status Line messages...
- Page 184 The autosampler received a command to start or eject racks while it was running. Autosampler - Bad Mixer Aspiration Cal Mixer-aspiration calibration failed in diagnostic mode (Exerciser tab). CAUTION Call Siemens Service for assistance. Only Siemens Service personnel are authorized to take these corrective actions. Possible Cause Corrective Action Autosampler Calibrate mixer aspirate position again.
- Page 185 To start the analyzer, initial calibration values for the Car Index position, Mixer Shuttle position and the Mixer Aspirate position must be stored in flash memory. CAUTION Call Siemens Service for assistance. Only Siemens Service personnel are authorized to take these corrective actions. Possible Cause...
- Page 186 Wait about 1 minute and select to restart the analyzer. If the problem persists, call Siemens Service for assistance. Autosampler - Car Motion Failed, Reset Autosampler The autosampler car has failed to move properly. A reset is required.
- Page 187 Wait about 1 minute and select to restart the analyzer. If the problem persists, call Siemens Service for assistance. Autosampler - Centering Collar Extend Denied To prevent the collision of autosampler components, the system did not execute the command to extend the autosampler centering collar.
- Page 188 Wait about 1 minute and select to restart the Error. Full analyzer. Reset is required. If the problem persists, call Siemens Service for assistance. Air lines Open the autosampler access door. supplying the Check for kinked or pinched tubing. Replace if centering necessary.
- Page 189 Close the autosampler access door. The autosampler will reset. If the problem persists, call Siemens Service for assistance. Faulty output- Call Siemens Service for assistance. queue sensor or wiring. Autosampler - Collar Failed to Retract, Reset Autosampler The autosampler centering collar failed to retract properly.
- Page 190 Wait about 1 minute and select to restart the analyzer. If the problem persists, call Siemens Service for assistance. Autosampler - Centering Collar Retract Denied To prevent the collision of autosampler components, the system did not execute the command to retract the autosampler centering collar.
- Page 191 If the problem persists, call Siemens Service for assistance. Autosampler - Extra Rack Ejected This message is for your information only. If the message persists, call Siemens Service for assistance. Autosampler Failure - Stop There has been an autosampler communication error. A reset is required.
- Page 192 Wait about 1 minute and select On to restart the analyzer. If the problem persists, call Siemens Service for assistance. Autosampler - Initialization Required In diagnostic mode, the analyzer sent a position command before the appropriate initialization was performed.
- Page 193 Select at the analyzer touchpad. Wait about 1 minute and select to restart the analyzer. If the problem persists, call Siemens Service for assistance. Autosampler - Input Queue Motion Failed The autosampler input queue failed to move properly. Possible Cause...
- Page 194 At the analyzer touchpad, select Wait about 1 minute and select to restart the analyzer. If the problem persists, call Siemens Service for assistance. Autosampler - Invalid Operation Mode, Reset Autosampler The autosampler was unable to carry out a requested motion. The autosampler might not be in the correct mode.
- Page 195 On the analyzer touchpad, select Wait about 1 minute and select to restart the analyzer. If the problem persists, call Siemens Service for assistance. Autosampler - Mixer Lost Steps, Reset Autosampler The autosampler mixer is not in the expected position. A reset is required.
- Page 196 Wait about 1 minute and select to restart the analyzer. If the problem persists, call Siemens Service for assistance. Autosampler - Mixer Motion Failed, Reset Autosampler The autosampler failed to perform a routine mixer motion during normal rack processing.
- Page 197 At the analyzer touchpad, select Wait about 1 minute and select to restart the analyzer. If the problem persists, call Siemens Service for assistance. Autosampler - Motion Denied, Reset Autosampler The autosampler has failed to execute a command to move and must be reset.
- Page 198 Wait about 1 minute and select On to restart the analyzer. If the problem persists, call Siemens Service for assistance. Autosampler - Needle Extend Denied To prevent the collision of autosampler components, the system did not execute the command to extend the autosampler needle.
- Page 199 Wait about 1 minute and select to restart the analyzer. If the problem persists, call Siemens Service for assistance. 40 PSI line is Check pressure and adjust if necessary. out of range. Check for pinched air lines supplying needle cylinder.
- Page 200 Wait about 1 minute and select to restart the analyzer. If the problem persists, call Siemens Service for assistance. Autosampler - Needle Retract Denied To prevent the collision of autosampler components, the system did not execute the command to retract the autosampler needle.
- Page 201 Make sure output queue moves freely. Feed-motor Call Siemens Service for assistance. failure. Autosampler - Output Queue Motion Denied To prevent the collision of autosampler components, the system did not execute the command to move the autosampler output queue.
- Page 202 Wait about 1 minute and select to restart the analyzer. If the problem persists, call Siemens Service for assistance. Autosampler - Pushpin Retract Denied To prevent the collision of autosampler components, the system did not execute the command to retract the autosampler pushpin.
- Page 203 If problem persists, select at the analyzer touchpad. Wait about 1 minute and select to restart the analyzer. If the problem persists, call Siemens Service for assistance. Pushpin Check rack position in mixer. Adjust if necessary. catches on If the problem persists, call Siemens Service for the bottom assistance.
- Page 204 Pushpin Check rack position in mixer. Adjust if necessary. catches on the If the problem persists, call Siemens Service for bottom of the assistance. mixer. Faulty output- Call Siemens Service for assistance. queue sensor or wiring.
- Page 205 Barcode reader is unable to scan. Possible Cause Corrective Action Faulty barcode At the analyzer touchpad, select reader cabling. Wait about 1 minute and select to restart the analyzer. If the problem persists, call Siemens Service for assistance. 7-36 Status Line messages...
- Page 206 Faulty barcode At the analyzer touchpad, select reader cabling. Wait about 1 minute and select to restart the analyzer. If the problem persists, call Siemens Service for assistance. Faulty barcode See 1a, b, c reader. Autosampler - Shuttle Gate Open Input queue cannot advance the rack because the shuttle gate is not closed.
- Page 207 Corrective Action Open the autosampler access door. Close the autosampler access door. The autosampler resets. If the problem persists, call Siemens Service for assistance. Autosampler - Tube Too High Tube is sitting too high in rack, or tube exceeds specifications, halting autosampler.
- Page 208 Call Siemens Service for assistance. Bad Mixer Cal Value - Reset Autosampler Mixer-aspirate calibration failed while the system was in diagnostic mode (Exerciser). The corrective actions for this error must be performed by Siemens Service personnel only. Possible Cause Corrective Action Autosampler Calibrate the mixer aspirate position again.
- Page 209 Bad Test in Profile An incorrect test code is defined in a profile. Corrective Action Correct the Profile Table using the List menu in the Table Dictionaries window. BASO Count Suspect - Alarm The number of consecutive occurrences of this condition has met the criterion specified for an alarm message.
- Page 210 Corrective Action The stop counter is automatically reset after reagents are replenished and the Reagent Installation window is updated. Go to Logs, Reagent Log, Reagent Installation. Select Start/Stop to continue the run. BASO Reagent Expired Present date is beyond the BASO reagent expiration date, as determined by encoded reagent container barcode label or as calculated from installation date and open container stability.
- Page 211 BASO Temperature Out - Alarm The number of consecutive occurrences of this condition has met the criterion specified for an alarm message. The specified alarm criterion is user definable in the Customize Menu, System Setup, Alarm/Stop Criteria. The counter associated with the Alarm Criteria is automatically reset.
- Page 212 Straighten or reconnect lines as necessary. IMPORTANT If problems persist, Call Siemens Service for assistance. Further corrective action must be taken by Siemens service personnel only. Communications Error with Analyzer Software communication error between the computer and the analyzer.
- Page 213 Restart the analyzer by selecting at the analyzer touchpad. Faulty or Verify that the Ethernet connection is secure. Replace if disconnected necessary. Ethernet cable (from the analyzer - J2 Workstation connection to the computer) Comparison Error MCHC/CHCM - Alarm The number of consecutive occurrences of this condition has met the criterion specified for an alarm message.
- Page 214 (vacushield) is clogged Compressor Call Siemens service for assistance. failure Control Out of Range - Alarm One or more control samples have yielded out of range test results. The number of consecutive occurrences of this condition has met the criterion specified for an alarm message.
- Page 215 After about 1 minute, if the status line does not display Ready to Run and the green ready aspirate light is still off, follow these steps to exit the ADVIA 2120/2120i software, turn off the analyzer, and then restart. Select Shut Down ADVIA at the Log On/Off window.
- Page 216 The same test code is used Remove the duplicate test codes from the twice in the *.par file. *.par file in Tools Modify. DEFOAMER Reagent Empty - Stop The number of consecutive occurrences of this condition has met the criterion specified for a stop message.
- Page 217 Select Shut Down ADVIA in the Log On/Off window. Select CTRL+ALT+DELETE and log back onto the system to restart the software. If the error recurs, check the communication port where the problem occurs (COM 1 or MCA Serial Board). EZ KLEEN Reagent Empty - Stop The number of consecutive occurrences of this condition has met the criterion specified for a stop message.
- Page 218 File Does Not Exist A patient or control result printout has been selected in the Routine Parameters window. But one of the files, Report.par, Prevalid.par, Print.par, or QCreport.par, is not defined. Corrective Action Restore dictionaries in Other Utilities window. File Not Found: C:\Wst\Oen.cnf The default workorder screen configuration file is missing.
- Page 219 CTRL+ALT+DELETE and log back onto the system to restart the software. Restart the analyzer by selecting at the analyzer touchpad. Faulty power Call Siemens Service for assistance. supply, fuse, cable, HGB Interface Node Board, or Can Bus Scrambler Board HGB Concentration Variance - Alarm The number of consecutive occurrences of this condition has met the criterion specified for an alarm message.
- Page 220 HGB Irregular Flow Rate - Alarm The number of consecutive occurrences of this condition has met the criterion specified for an alarm message. The specified alarm criterion is user definable in the Customize Menu, System Setup, Alarm/Stop Criteria. The counter associated with the Alarm Criteria is automatically reset.
- Page 221 HGB Reagent Expired Present date is beyond the HGB reagent expiration date, as determined by encoded reagent container barcode label or as calculated from installation date and open container stability. Corrective Action Replenish expired reagents and update the Reagent Installation window. Go to Logs, Reagent Log, Reagent Installation.
- Page 222 After about 1 minute, if the status line does not display Ready to Run and the green ready-to-aspirate light is still off, follow these steps to exit the ADVIA 2120/2120i software, turn off the analyzer and then restart. Status Line messages...
- Page 223 Scrambler Board, or Switch/Indicator panel. Initialization Failed - During Communication from Analyzer Software communication error. Corrective Action Follow these steps to exit the ADVIA 2120/2120i software and then restart: Select Shut Down ADVIA at the Log On/Off window. Select and log back onto the system to restart the CTRL+ALT+DELETE software.
- Page 224 Corrective Action Follow these steps to exit the ADVIA 2120/2120i software and then restart: Select Shut Down ADVIA at the Log On/Off window. Select CTRL+ALT+DELETE and log back onto the system to restart the software. If the problem persists, call Siemens Service for assistance.
- Page 225 Software communication error or possible faulty Ethernet cable (from the analyzer - J2 Workstation connection to the computer). Corrective Action Follow these steps to exit the ADVIA 2120/2120i software and then restart: Select Shut Down ADVIA at the Log On/Off window.
- Page 226 Corrective Action Call Siemens Service for assistance. Invalid Numerical Result Format A result edited in the Review and Edit window has a format incompatible with the communications protocol. Corrective Action Verify that the format shows four results of one character each.
- Page 227 Large Platelets - Alarm The number of consecutive occurrences of this condition has met the criterion specified for an alarm message. The specified alarm criterion is user definable in the Customize Menu, System Setup, Alarm/Stop Criteria. The counter associated with the Alarm Criteria is automatically reset. Large Platelets - Stop The number of consecutive occurrences of this condition has met the criterion specified for a stop message.
- Page 228 Left Shift - Stop The number of consecutive occurrences of this condition has met the criterion specified for a stop message. The autosampler halts at the same time the stop message occurs. The specified stop criterion is user definable in the Customize Menu, System Setup, Alarm/Stop Criteria.
- Page 229 Matching Not Possible - Mismatch of Sample Types The test request sent by the host and the unmatched sample are not the same type. The test request is refused and the sample remains unmatched. Corrective Action Verify the accuracy of the host test table. Verify type in Test Dictionary. Select Customize menu, System Setup, Tools Modify, Test Dictionary.
- Page 230 Corrective Action Call Siemens Service for assistance. No BASO MN/PMN Valley - Alarm The number of consecutive occurrences of this condition has met the criterion specified for an alarm message. The specified alarm criterion is user definable in the Customize Menu, System Setup, Alarm/Stop Criteria. The counter associated with the Alarm Criteria is automatically reset.
- Page 231 Call Siemens Service for assistance. No Help Available for this Message There is no Help available for this message at this time. If you cannot find sufficient information in the Operator's Guide, contact your Siemens Representative for assistance. No Numerical Result in Result Message The Data Manager cannot convert CBC/DIFF or Retics results into numerical or comment results.
- Page 232 A work order Check if problem exists at the host computer. If problem has not been is not at the host level, call Siemens Service for transmitted for assistance. the current patient sample. No Workorder - Stop No workorder received for current patient sample.
- Page 233 No Working Buffer Initialized This error can occur during the system preparation (initialization) process. Corrective Action Restart the ADVIA 2120/2120i software. If the error recurs, call Siemens Service for assistance. Noise BASO - Alarm The number of consecutive occurrences of this condition has met the criterion specified for an alarm message.
- Page 234 The Delta Check mechanism is not defined in the parameter file. Corrective Action Call Siemens Service for assistance in modifying the parameter file. NULL - Number Max of Rerun Not Defined The number of authorized reruns is not defined in the parameter file.
- Page 235 System Setup Tools Modify Configuration. Port Verify that the Inst1 device is listed as ADVIA 2120/2120i and correct it if necessary. Check the communications port where the problem occurs (COM 1 or MCA Serial board). If the system is using the Host Spec 79 Network connection, Siemens Field...
- Page 236 After about 1 minute, if the status line does not failure display Ready to Run and the green ready-to- aspirate light is still off, follow these steps to exit the ADVIA 2120/2120i software, turn off the analyzer and then restart. Select Shut Down ADVIA in the Log On/Off window.
- Page 237 This error occurs when there is no value defined for the FSE parameter Calculs_PatientQC_Formula. This parameter determines the formula used to calculate the moving average. To define the parameter, contact your Siemens Field Service Representative. The possible settings for the parameter are: 0 = parameter not active 1 = Bull’s Algorithm...
- Page 238 The file containing the customer parameters does not exist. A substitute file using default values has been created. Corrective Action Call Siemens Service for assistance. PEROX 1 Reagent Empty - Stop The number of consecutive occurrences of this condition has met the criterion specified for a stop message.
- Page 239 PEROX 2 Reagent Empty - Stop The number of consecutive occurrences of this condition has met the criterion specified for a stop message. The reagent is empty, and the autosampler has halted. The specified alarm criterion is user definable in the Customize Menu, System Setup, Alarm/Stop Criteria, Reagent Conditions.
- Page 240 PEROX 3 Reagent Expired Present date is beyond the PEROX 3 reagent expiration date, as determined by encoded reagent container barcode label or as calculated from installation date and open container stability. Corrective Action Replenish expired reagents and update the Reagent Installation window. Go to Logs, Reagent Log, Reagent Installation.
- Page 241 PEROX Follow the steps in Replacing the Syringe Plungers. sample syringe incorrectly assembled. Faulty power Call Siemens Service for assistance. supply, fuse, cable, pump assembly, Can Bus Scrambler Board, or Dual Servo Pump Control Board. 7-72...
- Page 242 After about 1 minute, if the status line does not home position. display Ready to Run and the green ready-to- aspirate light is still off, follow these steps to exit the ADVIA 2120/2120i software, turn off the analyzer and then restart. Select at the Log On/Off Shut Down ADVIA window.
- Page 243 PEROX SHEATH Reagent Empty - Stop The number of consecutive occurrences of this condition has met the criterion specified for a stop message. The reagent is empty, and the autosampler has halted. The specified alarm criterion is user definable in the Customize Menu, System Setup, Alarm/Stop Criteria, Reagent Conditions.
- Page 244 PEROX Temperature Out - Stop The number of consecutive occurrences of this condition has met the criterion specified for a stop message. The autosampler halts at the same time the stop message occurs. The specified stop criterion is user definable in the Customize Menu, System Setup, Alarm/Stop Criteria.
- Page 245 Allow the system to cool down for 15 minutes. exceeds the Restart the system. maximum limit If the problem persists, call Siemens Service for assistance. Fans are not Verify fan operation. If you suspect that a fan is not functioning working properly, call Siemens Service for assistance.
- Page 246 Restart the analyzer by selecting at the analyzer touchpad. Pressure out of Verify pressure readings and adjust if necessary. range. Faulty power Call Siemens Service for assistance. supply, fuse, cable, Pressure/Switc h Node Board, or Can Bus Scrambler Board.
- Page 247 Printer Problem - Alarm A printer problem has occurred. The number of consecutive occurrences of this condition has met the criterion specified for an alarm message. The specified alarm criterion is user definable in the Customize Menu, System Setup, Alarm/Stop Criteria. The counter associated with the Alarm Criteria is automatically reset.
- Page 248 Replace the needle. damaged Follow the steps in Replacing the Sampler Needles needle Faulty Contact your local Siemens technical support provider Conductivity for assistance. Detector QC Sample Deleted Before Validation A control sample that was not validated has been deleted.
- Page 249 Faulty barcode Call Siemens Service for assistance. reader. RBC Fragments - Alarm The number of consecutive occurrences of this condition has met the criterion specified for an alarm message. The specified alarm criterion is user definable in the Customize Menu, System Setup, Alarm/Stop Criteria.
- Page 250 RBC Irregular Flow Rate - Alarm The number of consecutive occurrences of this condition has met the criterion specified for an alarm message. The specified alarm criterion is user definable in the Customize Menu, System Setup, Alarm/Stop Criteria. The counter associated with the Alarm Criteria is automatically reset.
- Page 251 RBC sample Follow the steps in Replacing the Syringe Plungers. syringe incorrectly assembled. Faulty power Call Siemens Service for assistance. supply, fuse, cable, pump assembly, Can Bus Scrambler Board, or Dual Servo Pump Control Board. RBC Sheath Pump Error - Reset Required RBC Sheath syringe pump not in home position, failed to respond, or a transmission error occurred.
- Page 252 RBC Sheath Follow the steps in Replacing the Syringe syringe Plungers. incorrectly assembled. Faulty power Call Siemens Service for assistance. supply, fuse, cable, pump assembly, Can Bus Scrambler Board or Dual Servo Pump Control Board. Ready to Run The system is ready to accept the aspiration of a sample or the start of a hydraulic cycle.
- Page 253 RETIC Absorption Distribution Abnormal - Alarm The number of consecutive occurrences of this condition has met the criterion specified for an alarm message. The specified alarm criterion is user definable in the Customize Menu, System Setup, Alarm/Stop Criteria. The counter associated with the Alarm Criteria is automatically reset.
- Page 254 RETIC Noise Origin - Alarm The number of consecutive occurrences of this condition has met the criterion specified for an alarm message. The specified alarm criterion is user definable in the Customize Menu, System Setup, Alarm/Stop Criteria. The counter associated with the Alarm Criteria is automatically reset.
- Page 255 RETIC RBC Count Low - Stop The number of consecutive occurrences of this condition has met the criterion specified for a stop message. The autosampler halts at the same time the stop message occurs. The specified stop criterion is user definable in the Customize Menu, System Setup, Alarm/Stop Criteria.
- Page 256 Barcode reader Call Siemens Service for assistance. faulty. Sample ID Not Read - Stop Sample-tube barcode label is unreadable or missing. The number of consecutive occurrences of this condition has met the criterion specified for a stop message, and the autosampler has halted.
- Page 257 Barcode reader Call Siemens Service for assistance. faulty. Sample Rejected: SID # The results for the last aspiration of this sample have been rejected. This sample record is full. A sample record can hold only 110 results, including C.Res.
- Page 258 At the analyzer touchpad, select Faulty barcode reader cabling Wait about 1 minute and select to restart the analyzer. If the problem persists, call Siemens Service for assistance. Faulty barcode See 1a, b, c reader SD Not Defined For Test# xx Control# xxyyzzz No standard deviation is defined for this test and for this control in the Control Dictionary.
- Page 259 After about 1 minute, if the status line does not display Ready to Run and the green ready-to- aspirate light is still off, follow these steps to exit the ADVIA 2120/2120i software, turn off the analyzer and then restart. Select...
- Page 260 Replace SHEATH/RINSE reagent and use the message is empty. icon to Remove the error message. Faulty level Call Siemens Service for assistance. sensor. SHEATH / RINSE Reagent Expired Present date is beyond the SHEATH/RINSE reagent expiration date, as determined by encoded reagent container barcode label or as calculated from installation date and open container stability.
- Page 261 Call Siemens Service for assistance. System Preparation Failed An error occurred during the initial system preparation phase. Possible Cause Corrective Action Software Follow these steps to exit the ADVIA 2120/2120i communication software and then restart. failure Select in the Log On/Off Shut Down ADVIA window.
- Page 262 System Preparation in Progress When the ADVIA 2120/2120i is first powered on or the software is restarted, the analyzer and the computer go through a preparation process which includes the following: • Software initialization • Internal diagnostic checks • Priming of reagent lines •...
- Page 263 Check the sample status and the contents of the file before attempting to retransmit this sample. The problem may be an acknowledgement problem at the host level. The communication line should be checked by Siemens Service personnel. Type Not Found The type of workorder sent by the host is unknown to the Data Manager.
- Page 264 Straighten or reconnect lines as necessary. IMPORTANT If problems persist, Call Siemens Service for assistance. Further corrective action must be taken by Siemens service personnel only. Unable to Process Results - Check Instrument Parameterization The image result does not match the numeric result.
- Page 265 Check the length of the sample ID. Unknown Host Test Number xx A workorder from the host contains a test that is not defined in the Test Dictionary or contains an incorrect host number. Corrective Action Modify the Test Dictionary or correct the host test table. Do not modify the Test Dictionary while samples remain in the database.
- Page 266 CTRL+ALT+DELETE system to restart the software. Restart the analyzer by pressing at the analyzer touchpad. Faulty power Call Siemens Service for assistance. supply, fuse, cable, Valve Driver 1 Board, or Can Bus Scrambler Board Valve Node 2 Error - Reset Required Potential software communication error or a hardware failure associated with the Valve Driver 2 Board.
- Page 267 Restart the analyzer by selecting at the analyzer touchpad. Faulty power Call Siemens Service for assistance. supply, fuse, cable, Valve Driver 2 Board, or Can Bus Scrambler Board Waste Container - Full Waste level in the container has reached the level sensor indicating that the container is full.
- Page 268 Wrong Sample Type for Test Number xx The type defined in the Test Dictionary for this test is not consistent with the sample type in process. Corrective Action Check the Test Dictionary and the pending sample for the proper sample type. Wrong Test Group Defined A test has been defined in several test groups, or it has been defined in a test group but not in the Test Order Table.
- Page 269 7-100 Status Line messages...
- Page 270 Methods BASOPHIL / LOBULARITY METHOD..............3 ..................3 YTOCHEMICAL EACTIONS ............3 ASOPHIL OBULARITY EMPERATURE ONTROL ADVIA 2120/2120 BASO R ................3 EAGENT ADVIA 2120/2120 SHEATH / RINSE................. 3 ......................4 EASUREMENT BASO R ....................4 ISTOGRAM BASO X H ....................
- Page 271 ARAMETERS ............... 53 ALCULATING LATELET ARAMETERS NRBC A ......................56 NALYSIS RETICULOCYTE METHOD ..................58 ..................58 YTOCHEMICAL EACTIONS ADVIA 2120/2120 RETIC ................58 I AUTO ......................58 EASUREMENT ..............59 ETICULOCYTE ETHOD OMENCLATURE RETIC R .................... 59 ISTOGRAM RETIC A ................
-
Page 272: Basophil / Lobularity Method
Basophil / Lobularity Method Cytochemical Reactions The basophil/lobularity cytochemical reactions consist of two steps: Red blood cells and platelets are lysed using the ADVIA 2120/2120i Step 1 BASO reagent. All white blood cells except basophils are stripped of their cytoplasm... -
Page 273: Measurement
The nuclear configuration, which is a combination of the nuclear shape and cell density ADVIA 2120/2120i SHEATH/RINSE encases the sample stream as the two fluids pass through the flowcell. The optical signals from the flowcell are converted to electrical pulses by photodiodes. -
Page 274: Baso X Histogram
The rate histogram data consists of 50 points, one taken every 200 milliseconds. Each point represents the number of valid cells counted during the last 200 milliseconds. BASO X Histogram The BASO X histogram displays the event distributions that correspond to the entire x axis of the BASO cytogram. -
Page 275: Baso Cytogram: Cluster Analysis
BASO Cytogram: Cluster Analysis The BASO cytogram is divided into 50 counting channels on each axis. When the high-angle light scatter (nuclear configuration) is plotted on the x axis, and the low-angle light scatter (cell size) is plotted on the y axis, distinct populations or clusters are formed. -
Page 276: Baso Cytogram: Histogram Analysis
Polymorphonuclear Cluster In normal samples, the PMN population contains eosinophil and neutrophil nuclei. BASO Cytogram: Histogram Analysis If the cluster analysis does not agree with a normal archetype due to a low cell count, or if there is only one identifiable cell population, the following cell populations are identified using histogram analysis: Basophils, MN (mononuclear cells), PMN (polymorphonuclear cells), Blasts, Noise, and Baso Saturation area. - Page 277 Baso Noise Threshold This threshold (shown as a red line) is set at channel 4 on the y axis. Events below this threshold are counted as noise, while cells above the threshold are included in the white cell count (WBCB). Basophil Threshold This threshold (shown as a red line) separates the...
-
Page 278: Abnormal Cell Locations
Blast Threshold This threshold (shown as a red line) is set at channel 8 on the x axis and between channels 4 and 21 on the y axis. All cells below (to the left of) this threshold are counted as Blasts, which are monitored for flagging purposes only. - Page 279 Location of Atypical Lymphocytes on the BASO Cytogram Atypical Lymphocytes appear within the mononuclear (MN) area (1) on the BASO cytogram. Location of Immature Granulocytes on the BASO Cytogram Immature Granulocytes appear within the MN area on the BASO cytogram. Location of NRBCs on the BASO Cytogram Nucleated Red Blood appear...
-
Page 280: Calculating Parameters
Location of Bands on the BASO Cytogram appear between the Bands mononuclear (MN) and polymorphonuclear (PMN) populations. Calculating Parameters Reported Parameters The following parameters are available for patient reporting: Parameter Explanation RawWBC x (BasoCalFactor ÷ [1-FracDT ]) WBCB 100 x (BASO Count ÷ BASO PHA Cells ) %BASO (%BASO ÷... - Page 281 Parameter Explanation 100 x (BASO Saturation ÷ BASO PHA BASO % Saturation Cells ) BASO Flatness Sum of theSquared Differences 9 × Mean Cell Counting Rate PMNx ÷ MNx Peak X channel of Mononuclear cluster Peak Y channel of Mononuclear cluster PMNx Peak X channel of Polymorphonuclear cluster...
- Page 282 BASO PHA Cells (B-acq) The total number of events in the BASO cytogram excluding the Noise area. BASO PHA Total (B-tot) The total number of events in the BASO Cytogram including the Noise area. BASO Valid Cells (B-vc) The number of valid electronic pulse signals detected from flowcell events. BASO Saturation The number of events in the Saturation area (1) of the BASO cytogram.
- Page 283 Blasts The number of events in the Blasts area (1) of the BASO cytogram. The number of events in the PMN area (1) of the BASO cytogram. The number of events in the MN area (1) of the BASO cytogram. 8-14 Methods...
- Page 284 Noise The number of events in the Noise area (1) of the BASO cytogram. BASO Suspect The number of events in the Baso Suspect area (1) of the BASO cytogram. RawWBC ÷ BASO Valid Cells x (BASO PHA Cells BASO PHA Total) BasoCalFactor The sampler-specific calibration factor: BasoCalFactor = BASO WBC (AS) x 0.0012475...
-
Page 285: Csf Method
CSF samples by counting and distinguishing certain cell types. When using the ADVIA 22120/2120i/22120/2120ii CSF Assay, the CSF sample is mixed with ADVIA 2120/2120i CSF Reagent, which spheres and fixes the cells. After a minimum 4-minute to 4-hour incubation period, the prepared sample is then aspirated directly into the ADVIA 22120/2120i/22120/2120ii system. -
Page 286: Calculating Parameters
Calculating Parameters Reported Parameters The following parameters are available for patient reporting: Parameter Explanation CSF WBC CSF WBC/μL = (CSF PHA WBC / CSF PHA Total x CSF PHA Cells) / (1- Fractional Dead Time) x Perox Nominal Factor %CSF PMN %CSF PMN = 100 x CSF PMN / CSF #CSF PMN #CSF PMN/μL = (CSF PHA PMN / CSF... - Page 287 Additional Parameters The following parameters are for research or laboratory use only and are not for patient reporting: Parameter Explanation %CSF Eos %CSF Eos = 100 x CSF Eos / CSF WBC #CSF Eos #CSF Eos/μL = (CSF PHA Eos / CSF PHA Total x CSF PHA Cells) / (1-Fractional Dead Time) x Perox Nominal Factor CSF PHA Total...
- Page 288 Parameter Explanation CSF R Count The number of cells falling in the Red Cell Region of the CSF Scatter/Scatter cytogram. Parameter Key CSF WBC The reportable CSF white blood cell count (WBC/μL). # CSF PMN The reportable CSF absolute polymorphonuclear cell count. %CSF PMN The reportable CSF differential percentage polymorphonuclear cell count.
- Page 289 #CSF Neut The reportable CSF absolute neutrophil cell count. %CSF Neut The reportable CSF differential percentage neutrophil cell count. #CSF Lymph The reportable CSF absolute lymphocyte cell count. %CSF Lymph The reportable CSF differential percentage lymphocyte cell count. #CSF Mono The reportable CSF absolute monocyte cell count.
-
Page 290: Hemoglobin Method
Step 1 Red blood cells are lysed to release hemoglobin. Step 2 The heme iron in the hemoglobin is oxidized from the ferrous to the ferric state, and is then combined with cyanide in the ADVIA 2120/2120i HGB reagent to form the reaction product. -
Page 291: Bibliography
HGB Trans 1. ADVIA 2 120/2120i SHEATH/RINSE reading from previous cycle 2. Draining of the ADVIA 2120/2120i SHEATH/RINSE, and refilling with the reaction solution consisting of sample and ADVIA 2120/2120i HGB reagent 3. Reaction solution readings (15.5s to 18.0s) - Sample Mean 4. -
Page 292: Calculating Parameters
Sample readings (3): sample and ADVIA 2120/2120i HGB reagent ∑ Sample Counts Sample Mean Baseline readings (5): ADVIA 2120/2120i SHEATH/RINSE ∑ Baseline Counts Baseline Mean Calculating Parameters Reported Parameters The following parameters are available for patient reporting: Parameter Explanation log (Sample Mean ÷ Baseline Mean) x Hgb Cal Factor x 50.0... - Page 293 Parameter Key Measured hemoglobin concentration Mean Corpuscular Hemoglobin MCHC Mean Corpuscular Hemoglobin Concentration Calculating the HGB Result Using CHCM The Corpuscular Hemoglobin Concentration Mean (CHCM) and Mean Corpuscular Hemoglobin Concentration (MCHC) both provide a measurement of the average corpuscular hemoglobin concentration in the sample. The CHCM is a directly measured parameter based on a cell-by-cell analysis, while the MCHC is a calculated parameter based on the HGB, MCV, and RBC results.
-
Page 294: Peroxidase Method
NOTE: PEROX 1 reagent, please see Chapter 8. ADVIA 2120/2120i PEROX 1 is the first reagent added to whole blood sample in the heated peroxidase reaction chamber. Its function is to lyse the red blood cells and fix the white blood cells. -
Page 295: Advia 2120/2120 Perox 2
The 4-Chloro-1-naphthol in ADVIA 2120/2120i PEROX 2 serves as a substrate that enables the hydrogen peroxide in ADVIA 2120/2120i PEROX 3 to form a dark precipitate at endogenous sites of peroxidase activity in the granules of... -
Page 296: Perox Rate Histogram
ADVIA 2120/2120i PEROX SHEATH encases the sample stream as the two fluids pass through the flowcell. The light-scatter and the light-absorption signals are detected and electronically amplified. After processing, the following information is available: histogram displays the arrival rate of cells in the Perox channel. -
Page 297: Peroxy Histogram
Perox Y Histogram PEROX Y histogram displays the light scattering values for all events, including those from the noise area. Increasing channel numbers on the PEROX Y histogram 1 Noise correspond to greater cell 2 Lymphocytes size (volume). 3 Large Unstained Cells (LUC) Noise–Lymph Histogram The Noise-Lymph histogram provides the light scattering values for the noise, lymphocyte, and large unstained cells (LUC) areas. - Page 298 The following PEROX cytograms were obtained from a representative patient specimen. 1 Noise 5 Large Unstained Cells 2 Nucleated Red Blood Cells 6 Monocytes 3 Platelet Clumps 7 Neutrophils 4 Lymphocytes and Basophils 8 Eosinophils Noise This area contains Platelets, RBC stroma, and debris that are excluded from the Total White Count (WBCP) and WBC differential.
-
Page 299: Abnormal Cell Locations
Abnormal Cell Locations If abnormal cells are present, their size and peroxidase activity determine their location on the PEROX cytogram. Location of nRBCs on PEROX Cytogram Nucleated Red Blood appear in Cells (nRBCs) the NRBC cluster (1), which is located between the Noise and Lymphocyte areas. - Page 300 Location of Immature Granulocytes on PEROX Cytogram Immature Granulocytes are large cells with high peroxidase activity that can appear in the neutrophil area (1) and the saturation area (2). Location of Bands on PEROX Cytogram appear within the the Bands Neutrophil population (1) due to their similar size and degree of peroxidase...
-
Page 301: Calculating Parameters
Location of Unlysed RBCs on PEROX Cytogram with no Unlysed RBCs peroxidase activity appear along the left side of the PEROX cytogram. e Method Calculating Parameters Reported Parameters Parameter Explanation RawWBC x (PeroxCalFactor ÷ [1-FracDT ]) WBCP (100 x Neutrophil Count) ÷ PHA Cells %NEUT (%NEUT ÷... - Page 302 Additional Parameters The following parameters are for research or laboratory use only and are not for patient reporting: Parameter Explanation 100 x (HPX ÷ PHA Cells ) %HPX Clumps Count Number of events in the Platelet Clumps area of the PEROX cytogram Valley Count Number of events in the NRBC area of the PEROX cytogram...
- Page 303 Neutrophil Count The number of events in the Neutrophil area (1) of the PEROX cytogram. %LYMPH The percent of lymphocytes. #LYMPH The absolute count of lymphocytes. Lymphocyte Count The number of events in the Lymphocyte area (1) of the PEROX cytogram. %MONO The percent of monocytes.
- Page 304 %EOS The percent of eosinophils. #EOS The absolute count of eosinophils. Eosinophil Count The number of events in the Eosinophil area (1) of the PEROX cytogram. %LUC The percent of large unstained cells. #LUC The absolute count of large unstained cells. Large Unstained Cell Count The number of events in the LUC area (1) of the...
- Page 305 FracDT The fraction of time that the channel is busy processing flowcell events. While the perox channel is busy identifying a particular flowcell event, it is unable to process any additional events that might occur. By measuring this "dead time", the analyzer can compensate for these events.
-
Page 306: Rbc / Platelet Method
RBCs and platelets are fixed. Step 2 ADVIA 2120/2120i RBC / PLT For more detailed information on the contents of ADVIA 2120/2120i NOTE: RBC / PLT reagent, please see Chapter 8. ADVIA 2120/2120i RBC/PLT reagent contains sodium dodecyl sulfate (SDS) and glutaraldehyde, which causes sphering of the red blood cells and platelets. -
Page 307: Measurement
(2° to 3°) and high-angle light scatter (5° to 15°) signatures of each cell are measured. ADVIA 2120/2120i SHEATH/RINSE encases the sample stream as the two fluids pass through the flowcell. The two light-scatter signals are detected, electronically amplified, and split into four signals: •... -
Page 308: Bibliography
Using the Mie theory of light scattering for homogeneous spheres, the low-angle, high-gain light scatter measurement is converted into cell volume and the high- angle, high-gain light scatter measurement is converted into refractive index (n). The following histograms and cytograms are used for platelet analysis: histogram is formed from the high-angle (5°... -
Page 309: Rbc Rate Histogram
RBC Rate Histogram The RBC Rate histogram shows the uniformity of the cell-counting rate. The rate histogram data consists of 50 points, one taken every 200 milliseconds. Each point represents the number of valid cells counted during the last 200 milliseconds RBC Volume Histogram The RBC Volume histogram represents the distribution of red blood cells by cell... - Page 310 RBC Volume histogram (microcytic sample) 1 Microcytic region 2 Normocytic region 3 Macrocytic region 4 60 fL marker 5 120 fL marker In samples with increased numbers of microcytic red blood cells, the histogram curve shifts to the left, indicating an increase in the percentage of the cells with volumes less than 60 fL.
-
Page 311: Rbc Hc Histogram
RBC HC Histogram The RBC hemoglobin concentration (RBC HC) histogram represents the distribution of red blood cells by cellular hemoglobin concentration. The histogram has a range of 0 g/dL to 50 g/dL. RBC HC histogram (normal sample) 1 Hypochromic region 2 Normochromic region 3 Hyperchromic region 4 28 g/dL marker... -
Page 312: Rbc Ch Histogram
In samples with increased numbers of hyperchromic RBCs, the histogram curve shifts to the right, indicating an increase in the percentage of the cells with hemoglobin concentrations greater than 41 g/dL. RBC HC histogram (Hgb variance sample) 1 Hypochromic region 2 Normochromic region 3 Hyperchromic region 4 28 g/dL marker... -
Page 313: Rbc Volume / Hemoglobin (V / Hc) Cytogram
1 Low-angle light scatter (2° to 3°) 2 High-angle light scatter (5° to 15°) 3 Mie map containing RBCs 4 Platelets detected in RBC method Using the Mie theory of light scattering for homogeneous spheres, the low-angle and high-angle light scatter signals for each cell are transformed into volume and hemoglobin concentration values. -
Page 314: Rbc Matrix
1 60 fL volume marker 2 2120/2120i fL volume marker 3 28 g/dL HC marker 5 41 g/dL HC marker Markers organize the cytogram into 9 distinct areas of red blood cell morphology. On the x axis, hemoglobin concentration markers are set at 28 g/dL (3) and 41 g/dL (4). -
Page 315: Plateletx Histogram
Since the histogram analysis uses calibration factors that are not applied to the RBC V/HC cytogram, there can be a discrepancy between the RBC matrix values and the corresponding %Micro, %Macro, %Hypo, and %Hyper values obtained from the histograms based on the value of the calibration factors. The closer the MCV and CHCM calibration factors are to 1.0, the smaller the discrepancies are. -
Page 316: Platelet Pc Histogram
The histogram has a range of 0 pg to 5.0 pg. Platelet PC Histogram The Platelet PC histogram of the two-dimensional PLT analysis shows the distribution of platelets according to the refractive index (platelet component concentration [PC]). The histogram has a range of 0 pg to 5.0 pg PLT Scatter Cytogram The PLT Scatter cytogram is the graphical representation of two light-scatter measurements: the high-angle (5°... -
Page 317: Plt Volume / Pc Cytogram
The PLT map shows the relationship between the light-scatter measurements and the cell-by-cell characteristics of volume and refractive index. The map grid encompasses volumes between 0 fL and 30 fL, and refractive index between 1.3500 and 1.4000. The platelet count includes platelets (1) and large platelets (2). RBC fragments (4) and RBC ghosts (5) are not included in the platelet count but are enumerated for flagging purposes. -
Page 318: Calculating Rbc Parameters
• Large platelets are also identified on the RBC Scatter cytogram (area 3 below) based on their refractive index values (1.35 to 1.40) and a volume less than 60 fL. The Platelet VOL histogram contains platelets and large platelets with volumes up to 60 fL. - Page 319 Mean of RBC CH histogram (RBC x MCV) ÷ 10 (HGB ÷ RBC) x 10 (HGB ÷ [RBC x MCV]) x 1000 MCHC Additional Parameters The following parameters are for research or laboratory use only and are not for patient reporting: Parameter Explanation CHDW...
- Page 320 %MICRO ÷ %HYPO %MICRO/ %HYPO RATIO Parameter Key Dilution Factor The dilution factor for the RBC channel is 83.33333E-6. Red blood cell count Mean Corpuscular Volume Red Cell Volume Distribution Width CHCM Corpuscular Hemoglobin Concentration Mean Cellular Hemoglobin Content Hemoglobin Concentration Distribution Width Hematocrit Number of red cells (RBC R Count x RBC Valid Cells) ÷...
- Page 321 RBC P Count Number of cells in the platelet area (1) of the RBC Scatter Cytogram. CHDW Cell Hemoglobin Distribution Width RBC % Dead Time Percent of analysis time when the channel is busy and cannot detect flowcell events RBC Coin Level RBC Coincidence Level RBC Coin Count RBC Coincidence Count...
-
Page 322: Calculating Platelet Parameters
Calculating Platelet Parameters Reported Parameters Parameter Explanation Corrected PLT Count x RBC Cal Factor x PLT Cal Factor x Dilution Factor Mean of Platelet VOL histogram Additional Parameters The following parameters are for research or laboratory use only and are not for patient reporting: Parameter Explanation... - Page 323 Parameter Explanation RBC Fragments Count of RBC Fragments RBC Ghosts Count of RBC Ghosts Parameter Key Dilution Factor The dilution factor for the PLT channel is 83.33333E-3. Platelet count Mean Platelet Volume Large PLT The count of platelets with volumes greater than 20 fL is derived from the Platelet Volume histogram based on Integrated Analysis.
- Page 324 RBC Ghosts This count includes events in the RBC Ghost area of the PLT Scatter cytogram that have refractive indexes lower than 1.350. 1 RBC Ghost area 2 Platelet area 3 RBC Fragment area The RBC Ghosts Count is in the same units selected for RBC on the Unit Set Configuration window of the System Setup tab.
-
Page 325: Nrbc Analysis
NRBC Analysis NRBC Method Description The ADVIA 22120/2120i/22120/2120ii NRBC analysis method reports NRBC counts for whole blood samples with either 200 or more nRBC/μL or with at least 2% nRBCs with a WBC count of at least 3000/μL. The method reports both an absolute nRBC count (10 /L) and a percentage count (#NRBC/100 WBC). - Page 326 The method generates four NRBC counts for every sample. Histo count The NRBC count from analysis of the unstained region of the Peroxidase Channel Y-axis histogram Gaussian count The NRBC count from making a gaussian fit to the nRBC section of the unstained region of the Peroxidase Channel Y-axis Residual count The NRBC count from subtracting the noise and lymphocytes from the unstained...
-
Page 327: Reticulocyte Method
Reticulocytes are differentially stained based on their RNA content. Step 2 ADVIA 2120/2120i autoRETIC For more detailed information on the contents of ADVIA 2120/2120i NOTE: autoRETIC reagent, please see Chapter 8. The ADVIA 2120/2120i autoRETIC reagent contains a zwitterionic detergent (surfactant) that isovolumetrically spheres the red cells. -
Page 328: Reticulocyte Method Nomenclature
"Gated" refers to the total population of RBCs containing both mature RBCs and reticulocytes. Negative versus Positive Cell Populations Since reticulocytes have RNA and stain with ADVIA 2120/2120i autoRETIC reagent, they are the positive cell population. Mature RBCs do not stain, and they are the negative cell population. -
Page 329: Retic Abs Flatness Histogram
RETIC Abs Flatness Histogram The RETIC Abs Flatness histogram data consists of 50 points, one taken every 200 milliseconds. Each point represents the mean absorption for the last 200 milliseconds. This histogram provides a visual indication of the absorption signal "flatness" to monitor the laser performance. -
Page 330: Retic Hc Histogram
%MICROm Percentage of mature RBC population with cell volumes less than 60 fL %MICROg Percentage of gated cell population with cell volumes less than 60 fL MCVr Mean Corpuscular Volume is the mean of the RETIC Volume histogram for the reticulocyte population. - Page 331 RETIC HC Histogram Parameters %HYPERr Percentage of reticulocyte population with cellular hemoglobin concentration greater than 41 g/dL %HYPERm Percentage of mature RBC population with cellular hemoglobin concentration greater than 41 g/dL %HYPERg Percentage of gated cell population with cellular hemoglobin concentration greater than 41 g/dL %HYPOr Percentage of reticulocyte population with cellular hemoglobin concentration less than...
-
Page 332: Retic Ch Histogram
RETIC CH Histogram The RETIC cellular hemoglobin (RETIC CH) histogram represents the overlaid distributions of mature RBCs and reticulocytes by the actual weight or mass of hemoglobin present in each cell. The histogram has a range from 0 pg to 100 pg. Mature RBC population (red) Reticulocyte population... -
Page 333: Retic Scatter Abs Cytogram
CHDWg Cellular Hemoglobin Distribution Width is the standard deviation (SD) of the RETIC CH histogram for the gated cells. CHDW Delta CHDWr - CHDWm RETIC Scatter Abs Cytogram The RETIC Scatter ABS cytogram is the graphical representation of the absorption and light-scatter measurements: the high-gain, absorption (cell maturation) is plotted along the x axis and the high-angle, low-gain light scatter (cell size) is plotted along the y axis. -
Page 334: Retic V / Hc Cytogram
1. The analyzer scans for the absorption mode between channels 2 and 25 on the x axis. 2. The standard deviation (SD) of the six channels on either side of the mode is calculated. 3. The RTC threshold is set 3.2 SD from the mode channel to separate the mature RBCs from the reticulocytes. -
Page 335: Bibliography
Using the Mie theory of scattering for homogeneous spheres , the low-angle and high-angle light scatter signals for each cell are transformed into volume and hemoglobin concentration values. RBCs have cell volumes between 30 fL and 180 fL, and hemoglobin concentrations between 19 g/dL and 49 g/dL. Bibliography Tycko DH, Metz MH, Epstein EA, Grinbaum: Flow-cytometric light scattering measurement of red blood cell volume and hemoglobin concentration. - Page 336 Parameter Explanation 100 x (Outlier Cells ÷ #RTC Cells RTC % Noise Analyzed) Mean Absorption Mean of the RETIC Abs histogram for the reticulocyte population ABS Low Cell Count Counts in x axis channels 1 to 3 of the RETIC Scatter Abs cytogram ABS Mode Mode channel of the Absorption population...
- Page 337 Parameter Explanation 100 x ([#HRetic + #MRetic] ÷ RETIC IRF-M+H Count) RTC Mean X Mean x channel of the RETIC Scatter cytogram RTC Mean Y Mean y channel of the RETIC Scatter cytogram #RTC Cells Acquired Number of Valid Signals Obtained #RTC Cells Analyzed Cells on RTC Scatter cytogram with nonzero volume and hemoglobin...
- Page 338 RTC % Noise Percent of events from the outlier areas Outlier Cells The outlier cell count includes cells with high- scatter values less than the RTC Platelet threshold, and cells with high-scatter values greater than the RTC Coincidence threshold. RTC Gated Cells The number of cells between the RTC platelet and RTC coincidence thresholds in the...
- Page 339 Number of Reticulocytes in the gated population The total number of cells in the three reticulocyte areas of the Retic Scatter Abs cytogram. Retic Count Count of reticulocytes in the gated population Number of Low Absorption Reticulocytes The number of gated cells (1) between the RTC and Low/Medium RTC thresholds of the Retic...
- Page 340 %MRetic Percent of medium absorption reticulocytes Number of High Absorption Reticulocytes The number of gated cells (1) to the right of the Medium/High RTC threshold of the Retic Scatter Abs cytogram. #HRetic Count of high absorption reticulocytes %HRetic Percent of high absorption reticulocytes Methods 8-71...
- Page 341 8-72 Methods...
- Page 342 YSTEM ETHOD NFORMATION XPECTED ALUES ......17 YSTEM ETHOD NFORMATION ERFORMANCE HARACTERISTICS CLSI DOCUMENT M29-A3 AND SIEMENS METHOD TOPICS CROSS REFERENCE......................... 18 CBC METHOD......................21 ......................21 NTENDED ................... 22 RINCIPLES OF THE ROCEDURE ................... 22 EMOGLOBIN ONCENTRATION ........................23 EAGENTS .....................
- Page 343 CSF METHOD....................... 33 ......................33 NTENDED ................... 33 RINCIPLES OF THE ROCEDURE ........................34 EAGENT ..................... 35 TORAGE AND TABILITY ...................... 35 DJUSTMENT ....................... 35 ALIBRATION ...................... 35 AMPLE ANDLING ..............36 ATERIALS EQUIRED BUT NOT ROVIDED CSF S ..............36 ROCEDURE FOR UNNING AMPLES...
- Page 344 ..........61 ERFORMANCE HARACTERISTICS ORRELATION ............61 ERFORMANCE HARACTERISTICS ARRYOVER ..........62 ERFORMANCE HARACTERISTICS NALYTICAL ANGE METHOD DATA SUMMARY..................63 CBC M ....................63 ETHOD WBC DIFF M ..................64 ETHOD RETIC M ....................65 ETHOD Regulatory Information...
-
Page 345: Regulatory Information
Unless otherwise stated, the performance data for the methods were NOTE: obtained using ADVIA 2120/2120i instruments, software, reagents, standards, and controls designed for or intended for use on the ADVIA 2120/2120i Hematology System. Statement of Content The Introduction contains information on ancillary reagents, controls, and calibrators for the ADVIA 2120/2120i Hematology System. -
Page 346: Calibrator And Control Products
B or C viruses, HIV, or other infectious agents are absent, these products should be handled according to established good laboratory practices. Siemens supplies control and calibrator products for use with the ADVIA 2120/2120i Hematology System. Refer to the current Price List, and the product package insert for additional information. - Page 347 Product Symbol Contents Amount Number (mL) T03-4418-01 Hematology Control 4.0 mL Abnormal 2 ADVIA 120 TEST Point 3-in-1 Hematology Control Normal Product Symbol Contents Amount Number (mL) 01964346 T03-4416-54 Hematology Control 4 x 4.0 mL Normal T03-4416-01 Hematology Control 4.0 mL Normal ADVIA 120 TESTpoint Hematology Control High Product...
- Page 348 The System Specific Target Values (SSV) are assigned for ADVIA 120 SETpoint Hematology Calibrator and ADVIA 120 TESTpoint Hematology Control products by assaying each lot on an ADVIA 2120/2120i Hematology System that was calibrated using fresh, normal, whole-blood samples that were assigned RBC, WBC, Plt, Hct, and Hgb values using the methods described above.
-
Page 349: Ancillary Reagents
EZ KLEEN 810 mL ADVIA 120 DEFOAMER Product Symbol Contents Amount Number (mL) 09119084 T01-3625-54 DEFOAMER 4 x 125 mL T01-3625-01 DEFOAMER 125 mL Operation To run samples on your ADVIA 2120/2120i Hematology System, refer to the Daily Routine. Regulatory Information... -
Page 350: Calculation Of Results
In no event shall Siemens be liable for errors that are introduced by, or result from, any modification or alteration of the computer disks and/or the programs contained on such disks by the user, or for any direct or indirect consequences resulting from such modification or alteration. -
Page 351: Waste Disposal Requirements
Any malfunction of a Siemens diagnostic product (for example, failure to meet a performance specification or to perform as intended) should be appropriately addressed by laboratory personnel. - Page 352 0.52 1.03 2.52 halide (mg/dL of Cl) DMF was calculated by Siemens based on the dilution of the autoRETIC reagent in the system waste. Volatile Organic Compounds in System Waste Concentrations are μg/L (ppb) unless otherwise noted. < indicates that the concentration is below the limit of detection.
- Page 353 Determinand CBC/Diff CBC/Diff/Retic Chloroform 1,1,1 - Trichloroethane <5 <5 <5 Carbon tetrachloride <1 <1 <1 Benzene <1 <1 <1 1,2 - Dichloroethane <1 <1 <1 Trichloroethene <1 <1 <1 Bromodichloromethane <1 <1 <1 Dibromochloromethane <1 <1 <1 1,1,2,2 - <1 <1 <1 Tetrachloroethane...
-
Page 354: System Method Information
(formerly NCCLS) in Protection of Laboratory Workers from Occupationally Acquired Infections; Approved Guideline - Third Edition. 2005. CLSI Document M29-A3. Siemens Method information is presented in a consistent format organized into the following categories or section headings: Intended Use Principles of the Procedure... -
Page 355: System Method Information: Intended Use
(e.g., eye protection, gloves, lab coats). Users should follow the handling and safety precautions specified in the Material Safety Data Sheets available from Siemens. Reagent and Calibrator Preparation Reagents and calibrators are ready-to-use and require no preparation. -
Page 356: System Method Information: Storage And Stability
System Method Information: Quality Control This section specifies recommended quality control material and quality control frequency for the individual method. In general, Siemens recommends that ADVIA 2120/2120i Hematology Systems be monitored using the ADVIA TESTpoint Hematology Controls (Low, Normal, and High) and ADVIA TESTpoint Reticulocyte Control (Low and High). -
Page 357: System Method Information: Calibration
Calibration Procedure The system must be calibrated for all parameters except % Retics. Siemens recommends the use of ADVIA SETpoint Calibrator (Prod.No. T03-3685-01). Calibration should be performed in each of the following cases: •... -
Page 358: System Method Information: Expected Values
System Method Information: Expected Values Ranges of expected values can vary depending on age, sex, diet, location, etc; therefore, it is recommended that each laboratory establish its own range of expected values. System Method Information: Performance Characteristics These topics provide technical information related to method performance characteristics, including imprecision, correlation data, analytical range, and carryover. -
Page 359: Clsi Document M29-A3 And Siemens Method Topics Cross Reference
CLSI Document M29-A3 and Siemens Method Topics Cross Reference CLSI Approved Guideline M29-A3 Siemens Method Topics 5.1.2 Title 5.1.2.1 Title 5.1.2.2 Type of Specimen Intended Use 5.1.2.3 Method or instrumentation Intended Use in subtitle 5.1.3 Principle 5.1.3.1 Type of reaction(s) involved Principles of the Procedure 5.1.3.2... - Page 360 CLSI Approved Guideline M29-A3 Siemens Method Topics 5.1.7.2 Instructions for preparing Control Package Insert and handling control materials 5.1.7.3 Control frequency Quality Control 5.1.7.4 Description of control Control Package Insert tolerance limits 5.1.7.5 Corrective actions to be According to Individual...
- Page 361 CLSI Approved Guideline M29-A3 Siemens Method Topics 5.1.9.2 Give the equation Calculations 5.1.9.3 Give an example Calculations 5.1.10 Reporting results 5.1.10.1 State reference ranges Expected Values 5.1.10.2 Identify procedures to be According to Individual used in reporting results to Laboratory Practice the physician 5.1.10.3...
-
Page 362: Cbc Method
Research including supporting data for validation of methods CBC Method Intended Use The ADVIA 2120/2120i Hematology System Complete Blood Count (CBC) method is intended to quantitatively measure the following hematological parameters: White Blood Cell count (WBC) Red Blood Cell count (RBC) -
Page 363: Principles Of The Procedure
Red cells and platelets are counted from the signals from a common detector with 2 different gain settings. On the ADVIA 2120/2120i Hematology system the platelet signals are amplified considerably more than the RBC signals. Coincidence correction is made to each of the counts so that accurate counts are made over a wide range of each cell type. - Page 364 68:506-513 (1986) Reagents The following ready-to-use reagents are required to perform the CBC method and maintain the ADVIA 2120/2120i Hematology System. You must use either the CBC TIMEPAC or the CN-FREE CBC TIMEPAC along with the SHEATH/RINSE. ADVIA 120 CBC TIMEPAC...
- Page 365 Product Number Symbol Contents Amount (mL) T01-3627-01 RBC/PLT 2 x 2700 mL T01-3629-01 BASO 2 x 1100 mL T01-4288-01 CN-FREE HGB 2 x 1100 mL ADVIA 120 SHEATH/RINSE Product Number Symbol Contents Amount (L) 02337140 T01-3664-01 SHEATH/RINSE 10 L 01554628 T01-3623-01 SHEATH/RINSE 20 L...
- Page 366 ADVIA 120 HGB (PN T01-3628-01) 2 x 1100 mL ADVIA 120 HGB contains: Potassium cyanide, 23 mmol/L Dimethyl laurylamine oxide, 2.0% HARMFUL! Harmful by inhalation, in contact with skin, and if R20/21/22 swallowed. Avoid contact with skin and eyes. Wear S24/25, S29, S36/37, S45 suitable protective clothing and gloves.
-
Page 367: Reagents
The gain adjustment procedure is used to adjust the amplification signals in a channel to properly position the cell signatures within a cytogram. Calibration The system must be calibrated for all parameters except %RETIC. Siemens recommends the use of the ADVIA SETpoint Calibrator (PN T03-3685-01). Calibration procedure should be performed: •... -
Page 368: Sample Handling
Sample Handling Sample Collection Collect whole blood in an evacuated blood collection tube containing EDTA as an anticoagulant. Blood samples should be refrigerated at a temperature between 2°C to 8°C if they will not be analyzed within eight (8) hours of phlebotomy. If a specimen has been refrigerated, allow it to equilibrate slowly to room temperature (15°C to 30°C) before mixing. -
Page 369: Materials Required But Not Provided
ADVIA OPTIpoint, and other reagents or equipment specified in the "Methods Introduction" section. Procedure To run samples on your ADVIA 2120/2120i Hematology System, refer to the Daily Routine. Quality Control It is recommended that the system be controlled using ADVIA TESTpoint Hematology Controls. -
Page 370: Limitations Of The Procedure
Limitations of the Procedure The limitations of the procedure are as listed: 1. Some irreversibly sickled cells that occur in cases of sickle cell anemia may not completely sphere in the system, resulting in an elevated RDW and therefore an underestimation of the MCV. Sickled cells may cause erroneous results in other RBC parameters. - Page 371 Parameter Low Value High Value MCV (fL) MCH (pg) MCHC (g/dL) CH (pg) CHCM (g/dL) RDW (%) HDW (g/dL) PLT (10³/µL) MPV (fL) Performance Characteristics: Imprecision A total of 18 runs were performed using multiple samples. The following estimates of imprecision were obtained by taking 25 aspirations from each whole-blood sample.
- Page 372 The following Regression statistics were computed using a protocol similar to that recommended in the NCCLS document EP9-A, Method Comparison and Bias Estimation Using Patient Samples; Approved Guideline (1995). Comparative System Regression Parameter or Method Equation (y=) Sy.x WBC (10³/µL) Technicon H•3 RTC 1.06x - 0.74 0.997 1.42 RBC (10...
- Page 373 0.1% Performance Characteristics: Analytical Range The analytical range for the ADVIA 2120/2120i Hematology System was established by making serial dilutions of samples specially prepared to have high analyte values. Multiple assays of the specially prepared pools were performed on the system.
-
Page 374: Csf Method
CSF Method Intended Use The ADVIA 2120/2120i Hematology Cerebrospinal Fluid (CSF) assay is intended for in vitro diagnostic use in the quantitative determination of blood cells in cerebrospinal fluid (CSF) specimens. The CSF assay provides leukocyte (CSF WBC) and erythrocyte (CSF RBC) counts as well as absolute and percentage counts for the CSF WBC differential. -
Page 375: Reagent
Bibliography Lee GR, Bithell TC, Foerster J, Athens JW, Lukens JN. Wintrobe’s Clinical Hematology, Ninth edition. Malverne, PA, Lea & Febiger, pp 1071, 1809, and 1812 (1993) Werman HA, Brown CG. White blood cell count and differential count. Emergency Medicine Clinics of North America 4:41-58 (1986) Aune MW, Sandberg S. -
Page 376: Storage And Stability
HARMFUL! IRRITANT! Contains 2% (Wt) formaldehyde. Limited evidence of a carcinogenic R40, R43 effect. May cause sensitization by skin contact. Wear suitable protective S36/37 clothing and gloves. For in vitro diagnostic use. Storage and Stability Reagents When stored between 18°C and 30°C: •... -
Page 377: Materials Required But Not Provided
Materials Required but not Provided For the ADVIA 2120/2120i Hematology System, the other materials required to perform the ADVIA 120 CSF method are the various control materials, calibrators, ADVIA OPTIpoint, and other reagents or equipment specified in the "Methods Introduction"... - Page 378 1. If the Standby indicator is lit, press the Standby button to put the system into Ready to Run mode. 2. Using the Order Entry tab, create a workorder for each CSF sample preparation to be analyzed. Include sample physical characteristics in the field and, if necessary, the dilution factor in the field.
- Page 379 10. Aspirate the sample. a. Position tube so that the sample probe is immersed into the well-mixed sample. The sample probe should not contact test tube surface, which could block the free flow of sample into the probe. b. Press the aspirate plate. The sampling light flashes during aspiration. Complete sample aspiration takes approximately 6 seconds and will consume almost the entire prepared sample.
-
Page 380: Results
(samples prepared 1:1 with CSF reagent) and displays them on the Run Screen. ADVIA 2120/2120i results should be reviewed for conditions listed in the Limitations of the Procedure. If a sample displays any of the listed conditions, the results should be confirmed. -
Page 381: Interfering Substances
aspiration on the ADVIA 120 ♦ Incomplete sample aspiration on the ADVIA 120 ♦ Incomplete incubation time • Samples with total protein content 500 – 1000 mg/dL should be analyzed within 1 hour after preparation with CSF reagent. Increased protein concentrations may cause precipitation of cells and proteins in the prepared sample. -
Page 382: Performance Characteristics: Precision
Expected Parameter Value 0-10 MN (cells/μL) PMN (cells/μL) Performance Characteristics: Precision Within run precision on the ADVIA 120 CSF Assay was evaluated by performing replicate aspirations of 16 CSF patient samples with adequate volume. Volume permitting, CSF samples were aspirated 2–10 times. Results from the 16 samples were pooled giving a total sample size of n=65. -
Page 383: Performance Characteristics: Accuracy
Performance Characteristics: Accuracy The accuracy of the CSF WBC count was evaluated by comparing manual counts from 90 samples to counts from the ADVIA 120 Hematology System. Accuracy statistics are found in the tables below. CSF WBC Count The accuracy of the CSF WBC count was evaluated by comparing manual counts from 90 samples to counts from the ADVIA 120 Hematology System. -
Page 384: Performance Characteristics: Carryover
Manual ADVIA 120 t-test % Within Parameter Mean Mean p-value Binomial Limit % MN 72.7 72.2 0.992 100% % PMN 26.9 25.6 0.800 100% % Neut 26.6 22.3 0.383 % Lymph 63.2 54.6 0.088 % Mono 17.6 0.15 Performance Characteristics: Carryover Because of the low number of cells counted in CSF analysis, the ADVIA 120 hydraulic cycles were designed to eliminate carryover when assaying CSF samples. - Page 385 CSF RBC Low Level Linearity Pool Observed Expected Absolute (% of reference level) Deviation Deviation 0.00% 0.05% 0.1% 0.2% 1.0% 10.0% 100% (reference level) 2880 2880 Although RBC linearity has been demonstrated up to 2880 RBC/μL, NOTE: samples with greater than 1500 RBC/μL should be diluted to ensure the accuracy of the white count.
-
Page 386: Wbc Diff Method
WBC DIFF Method Intended Use The ADVIA 2120/2120i Hematology System White Blood Cell Differential ) methods, consisting of both the Peroxidase method and the WBC DIFF Basophil/Lobularity method, are intended to quantitatively measure the following WBC hematological parameters: percentage of WBC (%NEUT) and absolute count (#NEUT) - Page 387 During the second step, ADVIA 120 PEROX 2 reagent and ADVIA 120 PEROX 3 reagent are added to the peroxidase reaction chamber. The 4-chloro-1-naphthol in ADVIA 120 PEROX 2 reagent and the hydrogen peroxide in ADVIA 120 PEROX 3 reagent stain the sites of peroxidase activity in the granules of neutrophils, eosinophils, and monocytes.
- Page 388 Bibliography Cremins J and Orlik J: Leukocyte differential method. US Patent 5,518,928 (1996) Reagents The following ready-to-use reagents are required to perform the DIFF methods and maintain the ADVIA 2120/2120i Hematology System: DIFF TIMEPAC Product Number Symbol Contents Amount (mL)
- Page 389 HARMFUL! Contains formaldehyde. Potential cancer hazard. Harmful by inhalation, R20/21/22, R36/37/38, R40, R43 in contact with skin, and if swallowed. Irritating to eyes, respiratory S26, S36/37, S45, S51 system, and skin. Possible risk of irreversible effects. May cause sensitization by skin contact. In case of contact with eyes, rinse immediately with plenty of water and seek medical advice.
-
Page 390: Reagents
Calibration The system must be calibrated for all parameters except %RETIC. Siemens recommends the use of ADVIA SETpoint Calibrator (Prod. No. T03-3685-01). Please refer to page 5 for product descriptions. -
Page 391: Sample Handling
%LUC Materials Required but not Provided For the ADVIA 2120/2120i Hematology System, the other materials required to perform the ADVIA 120 WBC DIFF method are the various control materials, calibrators, ADVIA OPTIpoint, and other reagents or equipment specified in the "Methods Introduction"... -
Page 392: Procedure
Procedure To run samples on your ADVIA 2120/2120i Hematology system, refer to the Daily Routine. Quality Control It is recommended that the system be controlled using ADVIA TESTpoint Hematology Controls. Please refer to page 9-5 for product descriptions. These controls are intended to be integrated into a clinical laboratory’s own quality control program and procedures. -
Page 393: Expected Values
5. In certain abnormal specimens (specifically lymphoid disorders and leukemias), erroneously elevated basophil counts may be observed. Expected Values The range of expected values can vary depending on age, sex, diet, and location. It is recommended that each laboratory establish its own range of expected values. -
Page 394: Performance Characteristics: Correlation Data
Performance Characteristics: Correlation Data The performance of the ADVIA 120 Hematology System was compared with the performance of the Technicon H•3 RTC System (x) using whole blood from 60 normal donors and 70 hospital donors with each sample run in duplicate (n = 260). -
Page 395: Reticulocyte Method
Reticulocyte Method Intended Use The ADVIA 2120/2120i Hematology System Reticulocyte Count (RETIC) method is intended to quantitatively measure the following reticulocyte parameters: • Reticulocyte concentration (#RETIC) • Reticulocyte percentage (%RETIC) • Reticulocyte Cell Hemoglobin Content (CHr) Principles of the Procedure... -
Page 396: Reagents
Fishbane S, et al: Reticulocyte hemoglobin content in the evaluation of iron status in hemodialysis patients. Kidney Intl 52:217-222 (1997) Reagents The following ready-to-use reagents are required to perform the Reticulocyte method and maintain the ADVIA 2120/2120i Hematology System: ADVIA 120 autoRETIC ADVIA 120 SHEATH/RINSE ADVIA 120 EZ KLEEN... -
Page 397: Storage And Stability
ADVIA 120 EZ KLEEN Product Number Symbol Contents Amount (mL) 05101601 T01-3624-54 EZ KLEEN 4 x 810 mL T01-3624-01 EZ KLEEN 810 mL As formulated contains: Sodium hydroxide, 50 mmol/L 2-(2-Ethoxyethoxy)ethanol, 894 mmol/L Surfactant For in vitro diagnostic use. For a product description of SHEATH/RINSE, please refer to page 25. For a product description of DEFOAMER, please refer to page 24. -
Page 398: Gain Adjustment
Product Number Symbol Contents Amount (mL) T03-3690-01 Reticulocyte Control 4.0 mL Protect product from freezing. When stored at 2°C to 8°C, unopened ADVIA OPTIpoint (Prod. No. T03-3682- 01), ADVIA SETpoint Calibrator (Prod. No. T03-3685-01), and ADVIA TESTpoint Reticulocyte Controls (Prod. No. T03-3690-01, Low; and T03-3691- 01, High, respectively) are stable until the last day of the month (expiration date) printed on the product label, unless otherwise stated. -
Page 399: Sample Handling
ADVIA 120 reticulocyte method are the various control materials, calibrators, ADVIA OPTIpoint, and other reagents or equipment specified in the "Methods Introduction" section. Procedure To run samples on your ADVIA 2120/2120i Hematology System, refer to the Daily Routine. 9-58 Regulatory Information... -
Page 400: Quality Control
Quality Control It is recommended that the system be controlled using ADVIA TESTpoint Reticulocyte Controls. These controls are intended to be integrated into a clinical laboratory’s own quality control program and procedures. Control materials should be assayed: • At the beginning of each shift or at some other interval chosen by the laboratory. -
Page 401: Results
Results The system automatically performs all calculations necessary for obtaining final results. Through the use of complex flagging algorithms, laboratory personnel are alerted to suspected abnormal conditions. These conditions are indicated by the appropriate flag (such as *, +, and/or color highlighting). Whenever flags occur, the user should review the results and take appropriate action. - Page 402 = ADVIA 120 Hematology system Performance Characteristics: Carryover Sample carryover for the ADVIA 2120/2120i Hematology System is expressed as the percentage of a high-level sample lost to a trailing low-level sample. Carryover was determined for the RBC count obtained from the reticulocyte channel (RTC RBC).
- Page 403 Performance Characteristics: Analytical Range The analytical range for %RETIC parameter is: Maximum Observed Parameter Range Evaluated Deviation %RETIC 0.2 - 24.9 9-62 Regulatory Information...
- Page 404 Method Data Summary CBC Method Data The sample stability, expected ranges, and performance characteristics for the CBC method are listed in the following Table. Sample Stability Expected Imprecision Correlation Data Observed Analytical Range Room Temp Refrigerated Values Mean Sy.x Carryover Range Deviation WBC (10³/µL)
- Page 405 WBC DIFF Method Data The sample stability, expected ranges, and performance characteristics for the WBC DIFF method are listed in the following Table. Sample Stability Expected Imprecision Correlation Data Room Temp Refrigerated Values Mean Sy.x %NEUT 36 h 72 h 40 to 77 55.0 1.02x - 0.6...
- Page 406 RETIC Method Data The sample stability, expected ranges, and performance characteristics for the RETIC method are listed in the following Table. Sample Stability Expected Imprecision Correlation Data Observed Analytical Range Room Temp Refrigerated Values Mean Sy.x Carryover Range Deviation %RETIC 72 h 0.8 to 2.1 0.16...
- Page 407 ® ADVIA Autoslide Slide Maker Stainer OVERVIEW........................2 LOADING REAGENTS....................11 LOADING SLIDE RACKS................... 12 LOADING SLIDES ....................... 12 EMPTYING THE STAIN WASTE CONTAINER ............ 13 RUNNING THE DAILY STARTUP MANUALLY ........... 13 ORDERING A SLIDE MANUALLY ................14 STAINING MANUALLY SMEARED SLIDES ............14 RESETTING THE AUTOSLIDE MODULE..............
-
Page 408: Overview
The optional ADVIA Autoslide Slide Maker Stainer is connected to the ADVIA 2120/2120i Hematology System and controlled by the ADVIA 2120/2120i system software. It can automatically prepare and stain a high-quality blood smear on a microscope slide for white blood cell (WBC) differential analysis and microscope examination. - Page 409 Slide dispenser WARNING Do not try to empty the slide dispenser! Finger injuries may occur if slides are removed from the slide-dispenser assembly. Avoid any unnecessary contact with the slide- dispenser mechanical device. The slide-dispenser cover cannot be removed without using a tool.
- Page 410 Do not replace hoses. Contact your local technical service provider or distributor for this procedure. Stainer access door WARNING BIOHAZARD To avoid operator injury, the access doors on ADVIA Autoslide Slide Maker Stainer are equipped with sensors that stop Autoslide operation when opened. Wear personal protective equipment.
- Page 411 Main power switch and power supply connection CAUTION The power switch and input voltage supply connection should always be accessible. When positioning the system for operational use, leave the required amount of space for easy accessibility to these items. Installation, connection, and disconnection of the ADVIA Autoslide Slide Maker Stainer must be performed by authorized personnel only.
- Page 412 ADVIA Autoslide Slide Maker Stainer-specific symbols: Rinse Buffer Water Water Sensor Stain Waste Sensor Methanol Stain 1 Stain 2 Stain Waste Main Supply Connection Do not Obstruct Glass Particle Slide Orientation Tray Autoslide Safety Information and Warnings IMPORTANT Installation, connection, and disconnection of the ADVIA Autoslide Slide Maker Stainer must be performed by authorized personnel only.
- Page 413 The operator should follow the recommendations to prevent the transmission of infectious agents in health-care settings as recommended for potentially infectious specimens in Protection of Laboratory Workers from Infectious Disease Transmitted by Blood, Body Fluids, and Tissue, 2d edition; Approved Guideline (1997) Document M29- A, National Committee for Clinical Laboratory Standards (NCCLS).
- Page 414 Highly Flammable! Highly flammable. Keep away from sources of ignition. No smoking. 10-8 ADVIA Autoslide Slide Maker Stainer...
- Page 415 Theory of Operation 1 Slide dispenser 6 Printer 11 Rack transfer 2 Drop needle 7 Stainer assembly 12 Slide transfer / grabber 3 Slide carrier 8 Reagent syringes 13 Manual inlet 4 Sampling syringes 9 Rack out queue 14 Rack loader 5 Smearer 10 Verticalizer ADVIA Autoslide Slide Maker Stainer...
- Page 416 1. The drop needle dispenses a drop of the sample on a slide. It dispenses the rest of the sample into the drop needle rinse bath and then is rinsed with rinse. 2. The smearing assembly wedge and smearing ribbon create the smear using the surface tension of the blood.
-
Page 417: Loading Reagents
Autoslide Daily Routine 1. Check the level of the stain waste container. Empty the container if necessary. 2. Check the levels and expiration dates of the autoslide reagents. Load reagents if necessary. Remember to prime the lines for any new reagent. Check the water level if your system uses it. -
Page 418: Loading Slide Racks
5. Select 6. When prompted to prime lines, select . The system allows only one prime cycles; select 7. If bubbles remain in the reagent lines, prime the lines again using the Reagent Inventory window. Loading Slide Racks • Load at least two racks into the rack loader. -
Page 419: Emptying The Stain Waste Container
• Use slides provided by Siemens approved vendors only. 76 x 26 x 1mm Size: ground edges, Description: rounded corners, super frost • Avoid touching slide surfaces with your fingers. • Control-painted areas of the slides are all facing up. -
Page 420: Ordering A Slide Manually
You can use the Autoslide module to stain slides that have been manually smeared away from the system. 1. Make sure the ADVIA 2120/2120i system is not processing samples and is idle. 2. At the Operations menu, select Autoslide Control 3. -
Page 421: Stopping The Autoslide Module (Fast Stop)
Click this button to reset the Autoslide module. This function is intelligent and will reset only those autoslide mechanisms that require resetting. This may be necessary when troubleshooting Autoslide module errors. Depending on the state of the system, this may take up to 16 minutes. Stopping the Autoslide Module (Fast Stop) button displays on some autoslide-related software tabs and windows, Fast Stop... - Page 422 NOTE: 2. Place the ADVIA 2120/2120i system in Standby. 3. Select Off on the control panel to shut off the ADVIA 2120/2120i system. This prevents any further system function. The system displays the following message, “communication error with autoslide”. The Autoslide icon remains green.
- Page 423 5. Pry open the protective conduit tubing where the vacuum ( ) and pressure ( ) lines reside. Figure 2. Vacuum and Pressure Lines ADVIA Autoslide Slide Maker Stainer 10-17...
- Page 424 6. Push the metal lever and pull the vacuum line ( ) to disconnect. Figure 3. Vacuum Line 7. Push the metal lever and pull the pressure line ( ) to disconnect. Figure 4. Pressure Line ADVIA Autoslide Slide Maker Stainer 10-18...
- Page 425 8. Loosen the 2 screws where the slots are on the Autoslide cart bracket so you can move the support structure. Figure 5. Autoslide cart bracket with loosened screws 9. Move the support structure forward up to 0.3 m (1 ft), ensuring that the electrical cables are not stretched to far.
-
Page 426: Autoslide Methods
12. Replace and connect all lines disconnected in steps 4-8. 13. When the reconnection is complete turn the ADVIA 2120/2120i system back The Autoslide icon turns grey. Wait until the Autoslide established communication with the analyzer. The icon goes from grey to orange, and then to green. - Page 427 3. Partial draining of May-Grünwald Stain (Stain 1) (AN2). 4. Dispensing Buffer to dilute May-Grünwald Stain (Stain1) (DN3). 5. Draining (AN3). 6. Dispensing diluted Giemsa Stain (Stain 2) (DN3). 7. Draining (AN7). 8. Dispensing rinsing solution (distilled water) (DN7). 9. Draining (AN7). 10.
- Page 428 Cell Type Cell Component Color Cytoplasm Pink Granules Light purple-violet Lymphocytes Nuclei Deep purple Cytoplasm Blue Monocytes Nuclei Light purple Cytoplasm Blue-gray Granules Fine pink to violet Eosinophils Nuclei Pale purplish-blue Cytoplasm Bluish-pink Granules Orange Basophils Nuclei Purplish-blue, Cytoplasm Faint pink Granules Deep purple Platelets...
- Page 429 Reagents are ready to use and require no preparation. Contents Symbols Amount 00283949 May-Grünwald 4 x 2.5 L Stain 1 00327415 (Japan) 00283167 Giemsa Stain 2 6 x 0.5 L 00327733 (Japan) May-Grünwald 00284988 4 x 2.5 L Giemsa Buffer 00286794 Methanol 4 x 2.5 L...
- Page 430 15°C and 30°C. Once opened, reagents are stable for 45 days. Do not refrigerate. Refer to the online ADVIA 2120/2120i Operator’s Guide for information on specimen collection. 10-24 ADVIA Autoslide Slide Maker Stainer...
-
Page 431: Modified Wright Method
76 x 26 x 1mm Size: ground edges, rounded corners, super frost Description: Use slides provided by Siemens approved vendors only. Limitations May-Grünwald Giemsa reagents produce high quality stained blood films. However, there may be personal preferences in shades and intensities of staining not satisfied by the system. - Page 432 The ADVIA Autoslide Slide Maker Stainer is a smart, fully automated system. It is capable of producing stained smears on all specimens run on the ADVIA 2120/2120i or only on samples with predefined criteria (i.e. flags or parameter threshold). The Autoslide provides also a direct access port to the stainer for pre- smeared slides.
- Page 433 Staining Protocol The following is a brief description of the staining protocol: 1. Dispensing Modified Wright or Wright-Giemsa Stain (DN1). 2. Slide introduction. 3. Draining Modified Wright or Wright-Giemsa Stain (AN3). 4. Dispensing diluted Modified Wright or Wright-Giemsa Stain (DN3). 5.
- Page 434 Duration Long Principle of the Procedure The stained smear is examined microscopically; the nucleus and the cytoplasm of neutrophils, lymphocytes, monocytes, eosinophils, and basophils show a characteristic blue or red coloration. Cells are then manually differentiated and quantified. Cell Type Cell Component Color Neutrophils...
- Page 435 Promyelocyte Granules Dark blue to reddish blue Auer Rods Purplish-red Causes of RBC Artifacts • Post-stain rinsing too short • Reagents expired • Stain open for extended period • Dirty stainer • Room temperature too high • Humidity too high •...
- Page 436 Highly flammable. Keep away from sources of Highly Flammable! ignition – No smoking. Contains methanol. Modified Wright Buffer • Phosphate buffer • Surfactant Methanol • Methyl Alcohol ≥ 99.8 % Toxic: danger of very serious irreversible effects through Toxic! inhalation, in contact with skin, and if swallowed. Keep container tightly closed.
- Page 437 15°C and 30°C. Once opened, reagents are stable for 45 days. Do not refrigerate. Refer to the online ADVIA 2120/2120i Operator’s Guide for information on specimen collection. Material required but not provided...
-
Page 438: Wright Giemsa Method
2. White WL, Erickson MM, Stevens SC. Practical Automation for the Clinical Laboratory. St. Louis, MO, CV Mosby Co., pp 476-487 (1972) 3. Moss ED. Automated Slide Staining in Haematology. Can. J. Med. Tech. 30 (5): 169 (1968) Wright Giemsa Method Intended Use The Wright Giemsa method is for in vitro diagnostic use in the differential staining of blood, bone marrow and body fluid smears on the ADVIA Autoslide... - Page 439 7. Draining (AN7). 8. Dispensing rinsing solution (distilled water) (DN7). 9. Draining (AN4). 10. Dispensing methanol (DN4). 11. Slide removal. Needle Position Action DN1 (Undil. Stain 1) DN2 (Buffer) DN3 (Dil. Stain 2) DN4 (Methanol) DN7 (Rinse) Needles AN2 and DN2 in position 22 are unused in this protocol. NOTE: Methanol Volume (mL) Stain Volume (mL)
- Page 440 Cell Type Cell Component Color Cytoplasm Bluish-pink Granules Reddish-orange, large and spherical in shape Basophils Nuclei Purplish-blue, can have reddish tone Cytoplasm Faint pink Granules Distinct deep purplish-blue to purplish-black Platelets Cytoplasm Distinct light blue Granules Small blue to violet-blue, tend to aggregate in center Red Blood Cells Biconcave disks...
- Page 441 08097532 4 x 3.8 L (1 gallon) Wright Giemsa Buffer Methanol 08096412 4 x 3.8 L (1 gallon) 00096669 (Japan) ADVIA Autoslide 06837687 10 L Rinse Wright Giemsa Stain • Methanol, > 99 % • Polychrome methylene blue-eosin stain Toxic: danger of very serious irreversible effects through Toxic! inhalation, in contact with skin, and if swallowed.
- Page 442 15°C and 30°C. Once opened, reagents are stable for 45 days. Do not refrigerate. Refer to the online ADVIA 2120/2120i Operator’s Guide for information on specimen collection. Material required but not provided...
-
Page 443: Periodic Maintenance
Periodic Maintenance To ensure the operating efficiency of your Autoslide, be sure to follow the simple maintenance procedures scheduled below: Weekly • Clean glass particle waste • Clean the stain overflow tray • Perform Weekly shutdown and startup After processing 3000 Slides •... - Page 444 2. Discard the glass particles according to your standard laboratory procedures. 3. Replace the tray securely under the slide dispenser. 10-38 ADVIA Autoslide Slide Maker Stainer...
-
Page 445: Cleaning The Stain Overflow Tray
Cleaning the Stain Overflow Tray BIOHAZARD All products or objects that come in contact with human or animal body fluids should be handled, before and after cleaning, as if capable of transmitting infectious diseases. Wear facial protection, gloves, and protective clothing. The operator should follow the recommendations to prevent the transmission of infectious agents in health-care settings as recommended for potentially infectious specimens in Protection of Laboratory Workers from Infectious... -
Page 446: Performing Weekly Shutdown And Startup
In case of accident or if you feel unwell, seek medical advice immediately. FLAMMABLE Methanol is flammable. Keep away from sources of ignition - no smoking. To perform a weekly shutdown 1. On the ADVIA 2120/2120i software menu, select , then select Procedures Clean Autoslide The Clean Autoslide window opens. - Page 447 Materials required: • Methanol • Laboratory tray • Paper towels Time: 15 minutes Analyzer mode: Standby NOTE It is recommended that the stainer wells be replaced once a year. Check the Replaceable Parts section of the Operator's Guide for ordering information. TOXIC Methanol is toxic.
- Page 448 CAUTION Do not put too much force on the staining wells, when removing them. Pulling up or out too hard may damage the wells. They should be clipped gently into and out of place on the stainer plate. Place the stainer wells in a tray with enough methanol to completely cover them.
-
Page 449: Cleaning The Fan Filter
6. While manually rotating the stainer plate, replace each stainer well with the notch on the bottom closest to the edge of the plate. Make sure that the wells are seated properly, all at the same level, in the stainer tray. 7. - Page 450 Analyzer mode: Standby To replace the smearing tape 1. At the Operations menu select Autoslide Control The Autoslide Control window opens. 2. Under the Special Functions section, select Smearing Tape 3. Under Smearing Tape Options, select Replace Tape 4. Open the Autoslide lower front cover. 5.
-
Page 451: Replacing The Printer Ribbon
9. Close the tape holder plate. 10. At the Autoslide Control window, select to tighten the tape. Start Replacing the Printer Ribbon Materials required: New print cartridge Time: 2 minutes Analyzer mode: Standby To replace the print ribbon CAUTION Make sure all slides are processed and transferred to the output queue, before turning off the Autoslide. -
Page 452: Replacing The Autoslide Fuses
Replacing the Autoslide Fuses IMPORTANT Do not attempt to replace the Autoslide fuses. For replacement of all Autoslide fuses, call your Siemens technical support provider or distributor. 10-46 ADVIA Autoslide Slide Maker Stainer... -
Page 453: Error Messages And Suggested Actions
30 seconds for a response from the system. This is due to communication restraints between the ADVIA 2120/2120i system and the Autoslide. It is important to allow time for the system to respond - DO NOT keep clicking the mouse. - Page 454 Aspiration needle failed to retract Perform Mechanical Initialization to retract timeout in time. reset autoslide, check autosampler - if necessary, perform an autosampler reset or power the ADVIA 2120/2120i system off/on. ASL - Command Timeout Failure Command timeout on autoslide. Perform Mechanical Initialization to...
- Page 455 ASL - Impossible to rinse Failure Unable to rinse sample or drop Perform a mechanical initialization; If deposit lines; Other command is problem persists, call Siemens. processing. ASL - Internal software Failure Software initialization problem or Enter correct information; Run a error incorrect data entered.
- Page 456 If not successful, autosampler inoperable or unavailable power the ADVIA 2120/2120i system off/on. Call Siemens. ASL - Autoslide is not Warning Autoslide is not ready for use. Perform daily/weekly maintenance as available to make slides required, and try again.
- Page 457 Event Text Severity Probable Cause Suggested Action Autoslide Command Error Warning Autoslide command error, or Retry the command. EEPROM failed. Autoslide Daily Shutdown Warning An error occurred that prevented Check message log for errors, correct Incomplete the autoslide daily shutdown from any problems, and retry the daily completing.
-
Page 458: Autoslide Specifications
From 100V to 240V ± 10% Maximum: 200 VA Slide Requirements super frost, rounded corner, ground edges 76 mm x 26 mm x 1 mm Use slides provided by Siemens approved vendors only. Sample Requirement 75 μL whole blood 10-52 ADVIA Autoslide Slide Maker Stainer... - Page 459 Legal Information LIMITED INSTRUMENT WARRANTY AND SERVICE DELIVERY POLICY .. 2 ....................... 2 ARRANTY ERIOD ..................2 DDITIONAL ERVICE ERIOD ................2 ERVICE URING ORMAL OURS ..................3 XTENT OF A ERVICE ................3 ERVICE UTSIDE ORMAL...
-
Page 460: Legal Information
Limited Instrument Warranty and Service Delivery Policy Siemens and its authorized distributors may provide customers who acquire new Siemens instruments with a limited warranty either in a specific agreement or in standard language on their invoices. This limited warranty is designed to protect... -
Page 461: Extent Of A Service Call
Customer Maintenance Items for any specific model of instrument. Design Changes and Retrofitting of Instruments Siemens reserves the right to change the design or construction of specific models of instruments at any time without incurring any obligation to make such changes available to individual customers or instruments. -
Page 462: Osha Requirements (Us Only)
OSHA Requirements (US only) When service is required at a customer location, the customer must provide the Siemens representative with adequate facilities that comply with the regulations of the Secretary of Labor under the Occupational Safety and Health Act (OSHA) of 1970, as amended. -
Page 463: Contact Information
Siemens or its authorized distributors can invoice customers, at current standard labor and parts rates, for instruments repaired to correct damage or malfunctions due to any of the reasons listed above. OTHER THAN AS STATED ABOVE, THERE ARE NO OTHER... - Page 464 Warnings and Safety Information WARNINGS ........................2 SAFETY INFORMATION ..................... 3 REGULATORY COMPLIANCE .................. 3 ..................3 TANDARDS OR REGULATIONS ....................3 MARK REQUIREMENTS ................... 4 OISE LIMIT REQUIREMENT DOCUMENTATION....................... 4 SYSTEM SYMBOLS....................... 4 INTERPRETATION OF RESULTS................9 EXPLANATION OF THE WARNING LABELS ON THE AC POWER BOX..10 EXPLANATION OF THE WARNING LABELS ON THE MANUAL CLOSED- TUBE SAMPLER ......................
-
Page 465: Warnings And Safety Information
Regular strength household bleach is 5% sodium hypochlorite. Extra-strength household bleach is 6% sodium hypochlorite. Either strength may be used with the ADVIA 2120/2120i Hematology System. When handling bleach, which can be used as a cleaning and antiviral agent, wear protective clothing, gloves, and safety glasses. -
Page 466: Safety Information
Safety Information Safety features have been incorporated into the ADVIA 2120/2120i system to protect the operator from injury, the analyzer from damage, and the test results from inaccuracies. Regulatory Compliance Standards or regulations The ADVIA 2120/2120i conforms to the following safety standards or... -
Page 467: Noise-Limit Requirement
Noise-limit requirement The ADVIA 2120/2120i conforms to the following noise-limit requirement: EN27779: 1989 Measurement of Airborne Noise Emitted By Computer and Business Equipment (61 dBA) Documentation In the printed and online documentation, all hazards (except those associated with reagents) are categorized as follows:... - Page 468 Warnings and Cautions • A Warning indicates the risk of personal injury or loss of life if operating procedures and practices are not correctly followed. • A Caution indicates the possibility of loss of data or damage to or destruction of equipment if operating procedures and practices are not strictly observed.
- Page 469 This symbol indicates the number used for ordering a part or product. This symbol indicates the serial number of a part or product. This symbol indicates the batch code for a product. This symbol indicates the name and location of the product manufacturer.
- Page 470 This is the Off symbol. This is the Start symbol. This is the Standby symbol. This symbol indicates the switch position for normal system operation of the waste container. This symbol indicates the switch position for emptying the waste container. This symbol indicates the need to empty the waste container.
- Page 471 This is the eject rack symbol. This is the network symbol. This is the monitor symbol. This symbol indicates the maximum level. This is the knob symbol. This is the fuse symbol. This is the filter symbol. This is the vacushield symbol. This is the CPU symbol.
-
Page 472: Interpretation Of Results
Interpretation of Results System operators and laboratory supervisors are responsible for operating and maintaining Siemens products in accordance with the procedures described in the applicable Product Labeling (online documentation, package inserts, bulletins), and for determining that product performance conforms to the applicable claims. -
Page 473: Explanation Of The Warning Labels On The Ac Power Box
Any malfunction of a Siemens diagnostic product (for example, failure to meet a performance specification or to perform as intended) should be appropriately addressed by laboratory personnel. -
Page 474: Explanation Of The Warning Labels On The Manual Closed-Tube Sampler
Explanation of the warning labels on the manual closed-tube sampler Sampler Door Manual Closed-Tube Sampler Never put your finger into the To avoid injury when removing manual closed-tube sampler or replacing the manual closed- centering collar. tube sampler needle or centering collar, the system must be off. -
Page 475: Protecting Yourself From Lasers
Protecting yourself from lasers The ADVIA 2120/2120i Hematology System is classified as a Class I laser product as defined by the National Center for Devices and Radiological Health (CDRH) regulations 21 CFR 1040 and by EN-60825. RBC laser optical assembly The RBC laser optical assembly is classified as a Class II laser device which has a maximum power output of 800 μW at 670 nm (nominally) and a continuous... -
Page 476: Autosampler Barcode Reader
All field service procedures must be followed precisely to prevent possible eye injury from the laser radiation. Only Siemens-trained field service personnel should perform procedures related to the ADVIA 2120/2120i laser optics bench. - Page 477 B-14 Warnings and Safety Information...