
Related Manuals for Mitsubishi Electric SD Series


Summary of Contents for Mitsubishi Electric SD Series
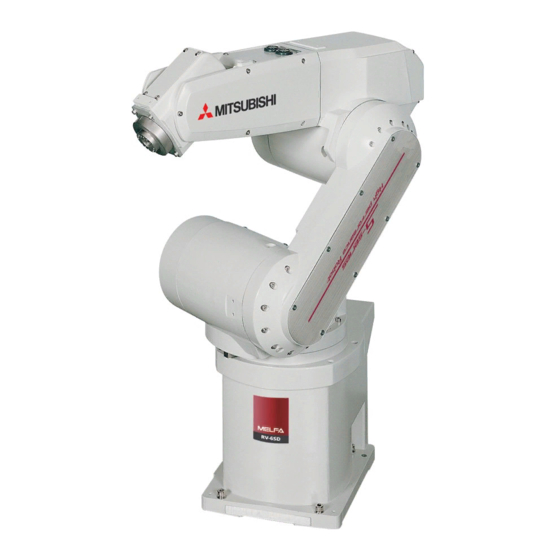
- Page 1 MITSUBISHI ELECTRIC MELFA Industrial robots Installation description RV-SD/RH-SDH RV-SQ/RH-SQH Art. No.: 231407 06 01 2010 INDUSTRIAL AUTOMATION MITSUBISHI ELECTRIC Version A...
- Page 3 Short operating instructions Industrial robot RV-SD/RH-SDH, RV-SQ/RH-SQH Article No.: 231407 Version Changes / Additions / Corrections 11/2009 pdp – gb —...
- Page 5 (see cover page). Current information as well as answers to frequently asked questions are located on the internet at: http://www.mitsubishi-automation.com. MITSUBISHI ELECTRIC EUROPE B.V. reserves the right to make technical alterations to this manual at any time without notice. © 11/2009...
- Page 7 Only those auxiliary units and expansion units recommended by MITSUBISHI ELECTRIC may be used together with the SD and SQ robot systems. Any and all other use is determined as not in accordance to the instructions.
- Page 8 Safety-relevant regulations During planning, installation, startup, maintenance and testing/checking of the units, the safety and accident-prevention regulations valid for the case in question must be observed. ATTENTION: A safety manual is included with the robot. This manual deals with the safety aspects of installation/set up, startup and maintenance.
- Page 9 Comments on the hazard instructions There are instructions within this manual that are important for the correct and safe handling of the robot. The individual instructions mean the following: DANGER: Means that there is a danger to life and health of the user, e. g. from electrical voltage, e.g. when the appropriate safety measures have not been taken.
- Page 10 General hazard instructions and safety measures The following hazard instructions should be understood as general regulations for handling the robot system. These instructions must always be observed in the planning, installation and operation of the robot system. DANGER: ● The safety and accident-prevention regulations that apply to the specific use must be observed.
- Page 11 DANGER: ● Before using the robot together with a linear unit or a lifting table, you must replace the lines with a highly-flexible alternative (trailing cable) to ensure that no cable break results in the standard connection cables. ● If mounting an articulated robot on to the wall, then you must limit the range of movement of the J1 axle.
- Page 12 Symbols used in the manual The use of instructions Instructions concerning important information is are marked separately and are displayed as follows: NOTE Text of instruction Use of numbering in the figures Numbering within the figures is displayed by white numbers within black circles and is explained in a table following it using the same number, e.g.: Use of handling instructions Handling instructions are steps that must be carried out in their exact sequence during startup,...
-
Page 13: Table Of Contents
SD series ........ - Page 14 Table of contents Installation Unpacking the robot system ............3-1 3.1.1 Unpack the articulated arm robot .
- Page 15 Table of contents Startup Calibrate the robot system............5-1 5.1.1 Work flow .
- Page 16 Table of contents...
-
Page 17: Introduction
This manual describes the unpacking, installation, connection and initial startup of the SD and SQ series robots. This manual is a translation of the original German manual from MITSUBISHI ELECTRIC B.V. The operating steps shown in this manual refer to the Teaching Box R32TB. -
Page 18: Name Of Model
L: long arm model empty: J4 and J6 are not equipped with a brake B: all axles with brake Series SD: SD series SQ: SQ series Load bearing capacity in kg RV: vertical articulated arm robot Fig. 2-1: Model name of vertical articulated arm robot... -
Page 19: Basic Safety Instructions
Introduction Basic safety instructions Basic safety instructions The MELFA robot has been constructed according to the state-of-the-art and has been configured for operational safety. Nonetheless, dangers/hazards may arise from the robot if is is not operated by trained personnel or at least by instructed personnel, or if it is used in an improper manner or not compliant to its intended use. -
Page 20: Environmental Conditions For Operation
Environmental conditions for operation Introduction Environmental conditions for operation Because the environmental conditions have a significant effect on the operational life of the equipment, you should not install the robot system in the following conditions: ● Power supply Do not use when –... -
Page 21: System Overview
All devices and system parts belonging to the industrial robots from the MELFA series SD and SQ and that are required for basic operation of the robot are described in this chapter. Options and spare parts are listed in the technical manual. Scope of delivery 2.1.1 SD series 6-axle articulated arm SCARA 5-axle articulated arm Fixing screws... -
Page 22: Sq Series
Scope of delivery System overview 2.1.2 SQ series SCARA 6-axle articulated arm 5-axle articulated arm Fixing screws (with washers and snap rings) Cable set Transport locks Technical documentation Drive unit R001431E Fig. 2-2: Scope of delivery of robot systems RV-SQ and RH-SQH 2 - 2... -
Page 23: System Configuration
Cable set Control unit Teaching Box R32TB (optional) R001511E Fig. 2-3: Configuration of an SD series robot system NOTE The Teaching Box is an optional extra. It is required for basic operation of the robot. SD-/SQ series 2 - 3... -
Page 24: Sq Series
System configuration System overview 2.2.2 SQ series 6-axle articulated arm SCARA 5-axle articulated arm Cable set Drive unit Robot CPU Teaching Box R32TB (optional) R001512E Fig. 2-4: Configuration of an SQ series robot system NOTE The Teaching Box is an optional extra. It is required for basic operation of the robot. 2 - 4... -
Page 25: Components Of Robot Arm
System overview System configuration Components of the robot arm 2.2.3 Forearm J4 axle Wrist Elbow block − J5 axle − J6 axle − − Elbow J3 axle Upper arm Shoulder − J2 axle − J1 axle Base R001292E Fig. 2-5: Components of the robot arm on the vertical articulated arm robot The 5-axle robot does not have a J4 axle. - Page 26 System configuration System overview J2 axle J4 axle J1 axle Ball- screw J3 axle Arm 1 Arm 2 Base R001433E Fig. 2-6: Components of the robot arm in the SCARA 2 - 6...
-
Page 27: Control Units
System overview Control units Control units 2.3.1 Control panel The following figure shows the front view of the control panel of control units CR D and CR Q. ¸ µ ¹ R001434E Fig. 2-7: Front view of control panel Name Function Start a program and operate the robot [START] key... - Page 28 Control units System overview Name Function Operation can be carried out via the control unit or external devices. Operation via external signals or the Teaching Box is deactivated. The connection between the control unit and AUTOMATIC external devices must be enabled by the parameter for assigning operating rights.
-
Page 29: Cr2D Components
System overview Control units 2.3.2 CR2D components ¸ µ ¹ R001436E Fig. 2-8: Rear of CR2D control unit Name Function Connection fro servo power supply For robot power supply cable (CN1) Connection for signal cable (CN2) For robot control cable Input for EMERGENCY-STOP Connection for EMERGENCY-STOP pushbutton pushbutton (EMGIN) -
Page 30: Cr3D Components
Control units System overview 2.3.3 CR3D components µ ¸ ¹ CR 3D-TR 52 M ITSUBISHI R700CPU R001437E Fig. 2-9: CR3D control unit Name Function Input for EMERGENCY-STOP Connection for EMERGENCY-STOP pushbutton pushbutton (EMGIN) Output for EMERGENCY-STOP state Output of current EMERGENCY-STOP state (EMGOUT) Special stop input (SKIP) Immediate robot stop... -
Page 31: Cr2Q Components
System overview Control units 2.3.4 CR2Q components The CR2Q control unit is comprised of the robot CPU Q172DRCPU and the DU2 drive unit. R001438E Fig. 2-10: Rear of DU2-700 drive unit Name Function Connection fro servo power supply For robot power supply cable (CN1) Connection for signal cable (CN2) For robot control cable... -
Page 32: Cr3Q Components
Control units System overview 2.3.5 CR3Q components The CR3Q control unit is comprised of the robot CPU Q172DRCPU and the DU3 drive unit. CR 3Q-TR 52 M ITSUBISHI R001439E Fig. 2-11: DU3 drive unit Name Function Input for EMERGENCY-STOP Connection for EMERGENCY-STOP pushbutton pushbutton (EMGIN) Output for EMERGENCY-STOP state Output of current EMERGENCY-STOP state... -
Page 33: Robot Cpu (Sq Series Only)
System overview Robot CPU (SQ series only) Robot CPU (SQ series only) The control units of the SQ series have an external CPU, which can be added to an already existing SQ system. µ Q172DRCPU ¹ STOP CAUTION FRONT ACFAIL ¸... -
Page 34: Teaching Box
Teaching Box. System overview Teaching Box. 2.5.1 R28TB Weight: approx. 0.5 kg R000743E Fig. 2-13: Views of Teaching Box R28TB 2 - 14... - Page 35 System overview Teaching Box. Name Function EMERGENCY-STOP pushbutton with locking function [EMG.STOP] pushbutton If you press the pushbutton then the robot arm stops instantaneously. The servo switch power supply is switched off The pushbutton switch is unlocked by turning it clockwise.
-
Page 36: R32Tb
Teaching Box. System overview 2.5.2 R32TB Weight: 0,9 kg µ ¸ ¸ ¹ ¹ R001440E Fig. 2-14: Views of Teaching Box R32TB Name Function EMERGENCY-STOP pushbutton with locking function [EMG.STOP] pushbutton If you press the pushbutton then the robot arm stops instantaneously. The servo switch power supply is switched off The pushbutton switch is unlocked by turning it clockwise. - Page 37 System overview Teaching Box. Name Function Press the [SERVO] key with the ENABLE] key pressed halfway down to switch on the ¸ [SERVO] key servo power supply. ¹ [MONITOR] key Switches to monitor mode and pops up the monitor menu [JOG] key Switches to jog mode and pops up the jog menu [HAND] key...
-
Page 38: R46Tb And R56Tb
Teaching Box. System overview 2.5.3 R46TB and R56TB Weight: 1.25 kg R001513E Fig. 2-15: Views of Teaching Boxes R46TB and R56TB Name Function The operator device is switched on by this pushbutton switch. A white LED lights up when the TEACH pushbutton switch is locked on. Enable control via the operator device Press the pushbutton until it locks on ("ENABLE"... - Page 39 System overview Teaching Box. Name Function The servos are started by simultaneously pressing the SERVO key and the enable [SERVO] key switch. A green LED lights up when the servos are switched on. µ [RESET] key If an error occurs, this is reset by pressing the RESET key. A limit switch can be ignored in JOG mode by pressing this key.
- Page 40 Teaching Box. System overview 2 - 20...
-
Page 41: Installation
Installation Unpacking the robot system Installation This chapter describes all preparations required for a successful use of the robot system, from unpacking right up to installation. Unpacking the robot system ATTENTION: ● Always unpack the robot only on a stable and even surface. If you do not hen the robot may fall and be damaged. - Page 42 Unpacking the robot system Installation RV-12SD/SDL and RV-12SQ/12SQL The robot arm is packaged in a wooden frame. The following figure shows you step-by-step how to unpack the robot arm. Place the wooden frame on an even surface. To open, remove the nails from the wooden frame. Remove the wooden frame and the packaging material.
-
Page 43: Unpack The Scara Robot
Installation Unpacking the robot system 3.1.2 Unpack SCARA robot The robot arm us fixed to a wooden frame and packaged in a box. The following figure shows you step-by-step how to unpack the robot arm. Place the box on an even surface. Use a knife or similar object to open the packaging tape, as shown in Remove Part A of the packaging as shown in Remove the four fixing screws with which the base is screwed onto the wooden frame (see... -
Page 44: Transport Robot Arm
Transport robot arm Installation Transport robot arm 3.2.1 RV-3SD/3SDJ and RV-3SQ/3SQJ ATTENTION: ● Two persons are always required to transport the robot arm. The transport locks must not be removed before transport. ● Always carry the robot arm at holding points . - Page 45 Installation Transport robot arm Upper Transport lock Shoulder Transport lock J1 Base Front view Side view R001298E Fig. 3-5: Transport 6-axle robot arm RV-3SD or RV-3SQ Never carry the robot arm at its side or at the axles without holding points because this could result in damages.
-
Page 46: Rv-6Sd/6Sdl, Rv-6Sq/6Sql, Rv-12Sd/12Sdl And Rv-12Sq/12Sql
Transport robot arm Installation 3.2.2 RV-6SD/6SDL, RV-6SQ/6SQL, RV-12SD/12SDL and RV-12SQ/12SQL ATTENTION: ● Always use a crane to transport the robot arm. The transport lock must not be removed before transport. ● The fixing screws of the transport lock and the transport bracket must be removed after transport. - Page 47 Installation Transport robot arm Transport lock Wire rope Eyes Transport bracket Transport lock Allen head screws R001137E Fig. 3-6: Fix the transport bracket SD-/SQ series 3 - 7...
-
Page 48: Rh-6Sdh/6Sqh
Transport robot arm Installation 3.2.3 RH-6SDH/6SQH ATTENTION: ● The transport locks must not be removed before transport. ● Two persons are always required to carry the robot arm. ● Always carry the robot arm at holding points . Never carry the robot arm at the covers because this may result in damages. -
Page 49: Rh-12Sdh/18Sdh And Rh-12Sqh/18Sqh
Installation Transport robot arm 3.2.4 RH-12SDH/18SDH and RH-12SQH/18SQH ATTENTION: ● To avoid faults, the wire rope of the crane must be attached as shown in Fig. 3-8. ● Always use four supporting ropes to transport the robot with a crane. NOTE Keep the transport and support brackets as well as the transport locks and their fixing screws in a safe place for any later transport. -
Page 50: Set Up The Robot Arm
Set up the robot arm Installation Set up the robot arm 3.3.1 Set up the articulated arm robot The table below shows how to set up and fix the articulated arm robot. The base area of the robot arm has been leveled by machine. If the bas area is too uneven then this may result in robot arm malfunctions. - Page 51 Installation Set up the robot arm Robot arm Fixture View from below 4- 14 fixing boreholes Front side of the Fixing robot arm RV-12SD/12SDL, screws (4) M12 x 45 Allen screw RV-12SQ/12SQL Installation side Snap ring Washer R001445E R001446E Tab. 3-1: Set up the robot arm (2) RV-3SD/3SDJ, RV-6SD/6SDL, RV-12SD/12SDL,...
-
Page 52: Set Up The Scara Robot
Set up the robot arm Installation 3.3.2 Set up the SCARA robot The table below shows how to set up and fix the SCARA robot. The base area of the robot arm has been leveled by machine. If the bas area is too uneven then this may result in robot arm malfunctions. Fix the robot arm above the assembly boreholes on the four outer edges of the base area using the supplies Allen head screws. - Page 53 Installation Set up the robot arm RH-6SDH, RH-12SDH/18SDH, Load RH-6SQH RH-12SQH/18SQH Moment of tilt M [Nm] 1310 Torsional moment M [Nm] 1440 Translational forces on 1900 horizontal plane F Translational forces on 1280 vertical plane F Tab. 3-4: Reaction forces on the base area of the robot ATTENTION: When installing the robot, make sure that there is enough space remaining at the rear of the robot arm to connect the cable used and to replace the backup battery.
-
Page 54: Handling The Control Unit
Handling the control unit Installation Handling the control unit This section describes the handling and set up of the control unit. 3.4.1 Transport control unit CR2D and drive unit DU2 ATTENTION: Two persons are always required to carry the control unit or the drive unit. To lift, take hold of the front side and the rear side. -
Page 55: Transport Control Units Cr3D And Drive Units Du3
Installation Handling the control unit 3.4.2 Transport control units CR3D and drive units DU3 ATTENTION: Either use a dolly or a crane to transport the control unit or the drive unit. Two persons are always required to transport the control unit or the drive unit. Lifting eyes Transport with a dolly Transport with a crane... -
Page 56: Set Up Control Unit Cr2D And Drive Unit Du2
Handling the control unit Installation 3.4.3 Set up control unit CR2D and drive unit DU2 Set up of control unit CR2 and drive unit DU2 is shown in the following figure. Observe the following points: ● The control unit and the drive unit can be installed both horizontally and vertically. Only horizontal installation is described in this manual. -
Page 57: Set Up Control Unit Cr3D And Drive Unit Du3
Installation Handling the control unit 3.4.4 Set up control unit CR3D and drive unit DU3 Set up of control unit CR3D and drive unit DU3 is shown in the following figure. Please thereby observe the following points: ● Place the control unit or the drive unit on the foot rails. ●... -
Page 58: Installation Of Robot Cpu Q172Drcpu
Installation of robot CPU Q172DRCPU Installation Installation of robot CPU Q172DRCPU Notes on installation ● Always install the rack horizontally because only this ensures that there is enough ventilation. R001054E Fig. 3-13: Correct assembly of the rack ● The units must not be assembled lying flat or vertically, because this would prevent sufficient ventilation. -
Page 59: Installation And Removal Of Modules
Installation Installation of robot CPU Q172DRCPU 3.5.1 Installation and removal of modules This section shows you how to assemble modules onto the rack such as, e.g. power supply unit, a PLC or a robot CPU. ATTENTION: ● The mains voltage must always be switched off before installing a module. ●... - Page 60 Installation of robot CPU Q172DRCPU Installation Removal ATTENTION: ● The mains voltage must always be switched off before removing a module. ● When removing a module, make sure that any fixing screw is release and that the catch on the module is not longer inserted into the guide. Otherwise, the mounting devices on the module may be damaged.
-
Page 61: Grounding The Robot System
Installation Grounding the robot system Grounding the robot system General instructions on grounding the robot system Three ways of grounding are shown in Fig. 3-18 . ● Separate grounding is the best solution. – The robot arm is grounded at an M4 threaded hole (see Fig. 3-19) on the base area. –... - Page 62 Grounding the robot system Installation Grounding the robot arm Use a grounding cable with a minimum cross-section of 3.5 mm². Check the area around the grounding screw (A) for deposits and remove any using a file. Fix the grounding cable with the grounding screw (M4 x 10) to the grounding connection of the robot arm (see here Fig.
-
Page 63: Connection
Connection Connection of the connection cable Connection This chapter explains how to connect the connection cable, the mains connection, the connection of the EMERGENCY-STOP switch and the connection of the Teaching Box. Connection of the connection cable 4.1.1 Connect the robot arm to the control unit The following figure shows the connection of the connection cable between the robot arm and the control unit. - Page 64 Connection of the connection cable Connection Make sure that the control unit or the drive unit is switched off. The [POWER] switch must be in the "OFF" position. Connect the power and control cable to the robot arm and the control unit or the drive unit. To do this, push the lock forwards and plug the plug into the jack.
-
Page 65: Connection Of Robot Cpu To The Drive Unit
Connection Connection of the connection cable 4.1.2 Connection of robot CPU to the drive unit Connection of robot CPU Q172DRCPU to drive unit DU2 ATTENTION: ● Always place the protective cap on the SSCNET-III connection when no cable is connected. Otherwise, soiling may lead to an impairment in the transmission and to malfunctions. - Page 66 Connection of the connection cable Connection Connection of robot CPU Q172DRCPU to drive unit DU3 ATTENTION: ● Always place the protective cap on the SSCNET-III connection when no cable is connected. Otherwise, soiling may lead to an impairment in the transmission and to malfunctions. ●...
-
Page 67: Mains Connection And Grounding
Connection Mains connection and grounding Mains connection and grounding Refer to Section 3.6on how to ground the robot arm. ATTENTION: Only carry out connection work at the control unit or the drive unit when the main switch for the power supply is switched off and protected against being switched back on. 4.2.1 Control unit CR2D and drive unit DU2 Make sure that the mains voltage and the power switch of the control unit or the drive unit are... -
Page 68: Control Unit Cr3D And Drive Unit Du3
Mains connection and grounding Connection 4.2.2 Control unit CR3D and drive unit DU3 Make sure that the mains voltage and the power switch of the control unit or the drive unit are switched off. Release the two screws of the door , rotate the [POWER] switch to the "OFF"... -
Page 69: Emergency-Stop Connection
Connection EMERGENCY-STOP connection EMERGENCY-STOP connection Connection for EMERGENCY-STOP pushbutton ● on control unit CR2D and on drive unit DU2 using the plug on the rear of the unit, ● on control unit CR3D and on drive unit DU3 using the plug on the safety module. The EMERGENCY-STOP inputs are normally blank (see Fig. - Page 70 EMERGENCY-STOP connection Connection ATTENTION: Do not carry out a surge voltage test. Control unit or drive unit User User EMG. stop EMG. stop EMGOUT1 EMGIN1 +24 V Output for robot Wire bridge error message Output for Relay EMERGENCY-STOP operating mode Output for control of Wire bridge auxiliary axle (AXCM1)
- Page 71 Connection EMERGENCY-STOP connection Connection to the terminals Remove approx. 7 mm of the line shielding Twist the end of the line in before the connection. Press down the retaining spring with a Philips screwdriver (cut: 1.4 mm to 2.4 mm). Connect the EMERGENCY-STOP switch to terminals 3A-4A, 3B-4B,the door closing contact to terminals 8A-9A, 8B-9B and the activation unit to terminals 10A-11A, 10B-11B an.
-
Page 72: Safety Circuits
Safety circuits Connection Safety circuits Example 1 The following figure provides an example of the configuration of a safety circuit when using two control units, one external power supply, one door closing contact and one activation unit. Peripheral units Control unit 1 EMERGENCY- Output for EMGIN1/2... - Page 73 Connection Safety circuits EMERGENCY-STOP input connected ✔ External EMERGENCY-STOP switch E = I (input) ✔ Door contact E = I (input) ✔ Activation unit input E = I (input) Error output A = O (output) — Auxiliary axle output A = O (output) —...
- Page 74 Safety circuits Connection EMERGENCY-STOP input connected ✔ External EMERGENCY-STOP switch E = I (input) ✔ Door contact E = I (input) ✔ Activation unit input E = I (input) Error output A = O (output) — Auxiliary axle output A = O (output) —...
-
Page 75: Teaching Box Connection
Connection Teaching Box connection Teaching Box connection This section describes how to connect the Teaching Box with the supply voltage turned off. If the connection is established or terminated with the supply voltage turned on then an error message is issued. - Page 76 Teaching Box connection Connection 4 - 14...
-
Page 77: Startup
Startup Calibrate the robot system Startup Calibrate the robot system 5.1.1 Work flow This section provides you step-by-step instructions on how to switch on the control voltage and the Teaching Box. It then describes how to adjust and save the home position. ATTENTION: To ensure perfect function of the robot the home position must first be set and must always be carried out after unpacking or reconfiguring (robot arm or control unit). - Page 78 Calibrate the robot system Startup Switch the [POWER] switch on the front side of the control unit to the "ON" position. The control LEDs on the control unit flash briefly. "o.100" appears on the STATUS NUMBER display. Control unit CRD or drive unit DU2 [POWER] switch Control unit CRD or...
- Page 79 Startup Calibrate the robot system Step 2: Switch on the Teaching Box Set the [MODE] switch of the control unit or the drive unit to "MANUAL". MODE MANUAL AUTOMATIC R001468E Fig. 5-2: Set [MODE] switch to "MANUAL" Set the [ENABLE/DISABLE] switch of the Teaching Box to "ENABLE". The main menu appears on the display.
- Page 80 Calibrate the robot system Startup Step 3: Enter the serial number Error message C0150 is issued the first time you switch on the control unit or the drive unit. In this case, enter the serial number of the robot arm in the RBSERIAL parameter. The serial number is located on the type plate on the rear of the robot arm.
- Page 81 Startup Calibrate the robot system Press the key for the "CLOSE" box [F1]. The main menu appears on the display.
-
Page 82: Set The Home Position (Zero Point)
Calibrate the robot system Startup 5.1.3 Set the home position (zero point) The home position is set after delivery of the robot by means of data entry. The data from the manufacturer for the stipulated home position is on the product insert in the robot arm box. The data is also contained on a sticker on the robot: ●... - Page 83 Startup Calibrate the robot system First make the settings as described in the instructions in section 5.1.2. Then select the "Setting by data entry" menu. To do so, proceed as follows: Step 1: Select the setting (adjustment) method Press key [4] to call up the "ORIGIN/BRK" menu.
-
Page 84
Calibrate the robot system Startup Step 2: Enter the home position The menu for entering the home position is displayed after the power supply to the servo drive is switched off. The entry fields shown correspond to the fields on the product insert.
... -
Page 85
Startup Calibrate the robot system Enter "!". To do this, keep the [CHARACTER] key pressed and then press the [, %] key 5 times. A "!" appears
DATA D:(V! ) J2( ) J3( ) J5( ) J6( ) J8( CLOSE R001481E Enter the remaining characters in the same way. - Page 86 Calibrate the robot system Startup 5 - 10...
-
Page 87: Operation Of Teaching Box R32Tb
Operation of Teaching Box R32TB Menu tree Operation of Teaching Box R32TB This section describes the operation of the Teaching Box and the functions of the individual menus . Menu tree Main menu Start screen MELFA CRnD-7xx Ver. P2T -
Page 88
Menu tree Operation of Teaching Box R32TB A 2. RUN menu Jog mode
SLOT 1 1. CHECK 2. TEST RUN 1 Mov P1 [ CHECK] 2 Mov P2 3 Mov P3 4 Mov P4 CLOSE 123 Jump SLOT ⇒... -
Page 89
Operation of Teaching Box R32TB Menu tree B D C C 4. ABS method
ABS [ABS] J1: ( J2:( J3:( J4: ( J5:( J6:( J7: ( J8:( CLOSE 3. USER menu USER J1: ( J2: ( J3: ( [ USER] J4: ( J5: (... -
Page 90: Enter A Character
Enter a character Operation of Teaching Box R32TB Enter a character Every time you press the [CHARACTER] key, the write mode switches between entry of numbers and letters. The current mode is displayed at the bottom in the middle of the display Enter numbers Numbers are entered in number mode using the keys on which the appropriate number as well as the minus sign and the full stop are shown at the bottom left. - Page 91 Operation of Teaching Box R32TB Enter a character Clear a character Clear an incorrectly entered character by placing the cursor on the character and pressing the [CLEAR] key. Example Letter "B" of string "ABY" is to be changed to an "M", resulting in the new string "AMY". Move the cursor with the [ ] key to the "B"...
-
Page 92: Select A Menu Item
Select a menu item Operation of Teaching Box R32TB Select a menu item There are two ways to call up a menu: ● Select a menu by entering a number ● Select the menu with the cursor an press the [EXE] key Running Both possibilities are displayed in the following example by selecting menu item "1. - Page 93 Operation of Teaching Box R32TB Select a menu item ● Select a menu by entering a number Select the "FILE/EDIT" menu by entering "1". The "FILE/EDIT" menu is displayed.
-
Page 94: Move Robot Is Jog Mode
Move robot is JOG mode Operation of Teaching Box R32TB Move robot is JOG mode The robot can be moved in steps by the JOG mode. This section describes the JOG mode based on a 6-axle vertical articulated arm robot. Axle configuration depends on the robot type used A detailed description on the individual types of robot is contained in the technical manual of the respective robot 6.4.1... - Page 95 Operation of Teaching Box R32TB Move robot is JOG mode Operating mode Mode Description 3-axle XYZ JOG mode Execute the three points listed above. The position of the tipped tool can be moved along the axles in the XYZ coordinate system Press the function key twice to switch to the in 3-axle XYZ JOG mode.
- Page 96 Move robot is JOG mode Operation of Teaching Box R32TB 6 - 10...
-
Page 97: Troubleshooting And Maintenance Instructions
Troubleshooting and maintenance instructions Faults in automatic mode Troubleshooting and maintenance instructions Faults in automatic mode DANGER: ● Operation must be stopped immediately if you observe slight deviations when operating the robot or the auxiliary equipment. If immediate shutdown would result in concomitant dangers and hazards, then you must select a suitable time. -
Page 98: Error Diagnosis
Error diagnosis Troubleshooting and maintenance instructions Error diagnosis When an error occurs, a 5-digit error code is shown on the display "STATUS.NUMBER" (e.g. C0010). The LED on the RESET pushbutton lights up. A 4-digit error number appears on the display of the Teaching Box. The first character of the error number is not shown. -
Page 99: Replace The Fuses
Troubleshooting and maintenance instructions Replace the fuses Replace the fuses An error message is issued if a fuse on the interface card for the pneumatically operated gripper hand, or on the control board, is defective. The error message contains information on which fuse has to be replaced 7.4.1 Fuse and error messages... -
Page 100: Fuse Of Power Supply Of Pneumatic Gripper Hand
Replace the fuses Troubleshooting and maintenance instructions 7.4.3 Fuse of power supply of pneumatic gripper hand Control unit CR2D / drive unit DU2 If you see error message "H0083" replace fuse S5 (rated current: 1.6 A) in the module for installation of the optional units. -
Page 101: Instructions On Maintenance
Troubleshooting and maintenance instructions Instructions on maintenance Instructions on maintenance ATTENTION: All maintenance work on the robot must only be carried in full compliance to the following safety directives! ● Use the "Maintenance Forecast" function of the RT ToolBox2 robot programming software to determine the expected maintenance intervals. - Page 102 Instructions on maintenance Troubleshooting and maintenance instructions 7 - 6...
-
Page 103: Annex
Annex Dimensions Annex Dimensions A.1.1 Working areas of the robot The following figure shows the range of motion of the 5-axle robot arms RV-3SDJB and RV-3SQJB. Weight: 33 kg All dimensions in mm R001498E Fig. A-1: Range of motion of robot arms RV-3SDJB and RV-3SQJB NOTE The working area stipulated refers to the P point of the robot arm without gripper hand. - Page 104 Dimensions Annex The following figure shows the range of motion of the 6-axle robot arms RV-3SDB and RV-3SQB. Weight: 37 kg All dimensions in mm R001499E Fig. A-2: Range of motion of robot arms RV-3SDB and RV-3SQB NOTE The working area stipulated refers to the P point of the robot arm without gripper hand. A - 2...
- Page 105 Annex Dimensions The following figure shows the range of motion of robot arms RV-6SD and RV-6SQ. Weight: approx. 58 kg All dimensions in mm R001500E and RV-6SQ Fig. A-3: Range of motion of robot arms RV-6SD NOTE The working area stipulated refers to the P point of the robot arm without gripper hand. SD-/SQ series A - 3...
- Page 106 Dimensions Annex The following figure shows the range of motion of robot arms RV-6SDL and RV-6SQL. Weight: approx. 60 kg All dimensions in mm R001501E Fig. A-4: Range of motion of robot arms RV-6SDL and RV-6SQL NOTE The working area stipulated refers to the P point of the robot arm without gripper hand. A - 4...
- Page 107 Annex Dimensions The following figure shows the range of motion of robot arms RV-12SD and RV-12SQ. Weight: approx. 93 kg All dimensions in mm R001150E Fig. A-5: Range of motion of robot arms RV-12SD and RV-12SQ NOTE The working area stipulated refers to the P point of the robot arm without gripper hand. SD-/SQ series A - 5...
- Page 108 Dimensions Annex The following figure shows the range of motion of robot arms RV-12SDL and RV-12SQL. Weight: approx. 98 kg All dimensions in mm R001160E Fig. A-6: Range of motion of robot arms RV-12SDL and RV-12SQL NOTE The working area stipulated refers to the P point of the robot arm without gripper hand. A - 6...
- Page 109 Annex Dimensions The following figure shows the external dimensions and the range of motion of robot arms RH-6SDH3520 and RH-6SQH3520. Weight: 20 kg Installation surface View A All dimensions in mm R001409E Fig. A-7: External dimensions and range of motion of robot arms RH-6SDH3520 RH-6SQH3520 SD-/SQ series A - 7...
- Page 110 Dimensions Annex The following figure shows the external dimensions and the range of motion of robot arms RH-6SDH4520 and RH-6SQH4520. Weight: 21 kg Installation surface View A All dimensions in mm R001410E Fig. A-8: External dimensions and range of motion of robot arms RH-6SDH4520 RH-6SQH4520 A - 8...
- Page 111 Annex Dimensions The following figure shows the external dimensions and the range of motion of robot arms RH-6SDH5520 and RH-6SQH5520. Weight: 21 kg Installation surface View A All dimensions in mm R001391E Fig. A-9: External dimensions and range of motion of robot arms RH-6SDH5520 RH-6SQH5520 SD-/SQ series A - 9...
- Page 112 Dimensions Annex The following figure shows the external dimensions and the range of motion of robot arms RH-6SDH3517C and RH-6SQH3517C. Weight: 20 kg Installation surface View A All dimensions in mm R001411E Fig. A-10: External dimensions and range of motion of robot arms RH-6SDH3517C RH-6SQH3517C A - 10...
- Page 113 Annex Dimensions The following figure shows the external dimensions and the range of motion of robot arms RH-6SDH4517C and RH-6SQH4517C. Weight: 21 kg Installation surface View A All dimensions in mm R001412E Fig. A-11: External dimensions and range of motion of robot arms RH-6SDH4517C RH-6SQH4517C SD-/SQ series A - 11...
- Page 114 Dimensions Annex The following figure shows the external dimensions and the range of motion of robot arms RH-6SDH5517C and RH-6SQH5517C. Weight: 21 kg Installation surface View A All dimensions in mm R001413E Fig. A-12: External dimensions and range of motion of robot arms RH-6SDH5517C RH-6SQH5517C A - 12...
- Page 115 Annex Dimensions The following figure shows the external dimensions and the range of motion of robot arms RH-6SDH3517M and RH-6SQH3517M. Weight: 20 kg Installation surface View A All dimensions in mm R001411E Fig. A-13: External dimensions and range of motion of robot arms RH-6SDH3517M RH-6SQH3517M SD-/SQ series A - 13...
- Page 116 Dimensions Annex The following figure shows the external dimensions and the range of motion of robot arms RH-6SDH4517M and RH-6SQH4517M. Weight: 21 kg Installation surface View A All dimensions in mm R001412C Fig. A-14: External dimensions and range of motion of robot arms RH-6SDH4517M RH-6SQH4517M A - 14...
- Page 117 Annex Dimensions The following figure shows the external dimensions and the range of motion of robot arms RH-6SDH5517M and RH-6SQH5517M. Weight: 21 kg Installation surface View A All dimensions in mm R001413E Fig. A-15: External dimensions and range of motion of robot arms RH-6SDH5517M RH-6SQH5517M SD-/SQ series A - 15...
- Page 118 Dimensions Annex The following figure shows the external dimensions and the range of motion of robot arms RH-12SDH5535 and RH-12SQH5535. Weight: 41 kg Installation surface View A All dimensions in mm R001414E Fig. A-16: External dimensions and range of motion of robot arms RH-12SDH5535 RH-12SQH5535 A - 16...
- Page 119 Annex Dimensions The following figure shows the external dimensions and the range of motion of robot arms RH-12SDH7035 and RH-12SQH7035. Weight: 43 kg Installation surface View A All dimensions in mm R001415E Fig. A-17: External dimensions and range of motion of robot arms RH-12SDH7035 RH-12SQH7035 SD-/SQ series A - 17...
- Page 120 Dimensions Annex The following figure shows the external dimensions and the range of motion of robot arms RH-12SDH8535 and RH-12SQH8535. Weight: 45 kg Installation surface View A All dimensions in mm R001392E Fig. A-18: External dimensions and range of motion of robot arms RH-12SDH8535 RH-12SQH8535 A - 18...
- Page 121 Annex Dimensions The following figure shows the external dimensions and the range of motion of robot arms RH-12SDH5530C and RH-12SQH5530C. Weight: 41 kg Installation surface View A All dimensions in mm R001416E Fig. A-19: External dimensions and range of motion of robot arms RH-12SDH5530C RH-12SQH5530C SD-/SQ series A - 19...
- Page 122 Dimensions Annex The following figure shows the external dimensions and the range of motion of robot arms RH-12SDH7030C and RH-12SQH7030C. Weight: 43 kg Installation surface View A All dimensions in mm R001417E Fig. A-20: External dimensions and range of motion of robot arms RH-12SDH7030C RH-12SQH7030C A - 20...
- Page 123 Annex Dimensions The following figure shows the external dimensions and the range of motion of robot arms RH-12SDH8530C and RH-12SQH8530C. Weight: 45 kg Installation surface View A All dimensions in mm R001418E Fig. A-21: External dimensions and range of motion of robot arms RH-12SDH8530C RH-12SQH8530C SD-/SQ series A - 21...
- Page 124 Dimensions Annex The following figure shows the external dimensions and the range of motion of robot arms RH-12SDH5530M and RH-12SQH5530M. Weight: 41 kg Installation surface View A All dimensions in mm R001416E Fig. A-22: External dimensions and range of motion of robot arms RH-12SDH5530M RH-12SQH5530M A - 22...
- Page 125 Annex Dimensions The following figure shows the external dimensions and the range of motion of robot arms RH-12SDH7030M and RH-12SQH7030M. Weight: 43 kg Installation surface View A All dimensions in mm R001417C Fig. A-23: External dimensions and range of motion of robot arms RH-12SDH7030M RH-12SQH7030M SD-/SQ series A - 23...
- Page 126 Dimensions Annex The following figure shows the external dimensions and the range of motion of robot arms RH-12SDH8530M and RH-12SQH8530M. Weight: 45 kg Installation surface View A All dimensions in mm R001418E Fig. A-24: External dimensions and range of motion of robot arms RH-12SDH8530M RH-12SQH8530M A - 24...
- Page 127 Annex Dimensions The following figure shows the external dimensions and the range of motion of robot arms RH-18SDH8535 and RH-18SQH8535. Weight: 47 kg Installation surface View A All dimensions in mm R001502E Fig. A-25: External dimensions and range of motion of robot arms RH-18SDH8535 RH-18SQH8535 SD-/SQ series A - 25...
- Page 128 Dimensions Annex The following figure shows the external dimensions and the range of motion of robot arms RH-18SDH8530C and RH-18SQH8530C. Weight: 47 kg Installation surface View A All dimensions in mm R001503E Fig. A-26: External dimensions and range of motion of robot arms RH-18SDH8530C RH-18SQH8530C A - 26...
- Page 129 Annex Dimensions The following figure shows the external dimensions and the range of motion of robot arms RH-18SDH8530M and RH-18SQH8530M. Weight: 47 kg Installation surface View A All dimensions in mm R001504E Fig. A-27: External dimensions and range of motion of robot arms RH-18SDH8530M RH-18SQH8530M SD-/SQ series A - 27...
-
Page 130: Dimensions Of The Control Units, The Drive Units And The Cpu
Dimensions Annex A.1.2 Dimensions of the control units, the drive units and the CPU Control unit CR2D and drive unit DU2 Weight: CR2D: approx. 21 kg DU2: approx. 20 kg All dimensions in mm R001505E Fig. A-28: Dimensions of control unit CR2 and drive unit DU2 A - 28... - Page 131 Annex Dimensions Control unit CR3D and drive unit DU3 Weight: approx. 60 kg View A - A All dimensions in mm R001506E Fig. A-29: Dimensions of control unit CR3D and drive unit DU3 SD-/SQ series A - 29...
- Page 132 Dimensions Annex Robot CPU Q172DRCPU Weight: 0-33 kg All dimensions in mm R001508E Fig. A-30: Dimensions of robot CPU Q172DRCPU A - 30...
- Page 133 SD series ........2-1...
- Page 134 Index Annex A - 32...
- Page 160 Phone: +31 (0)180 – 46 60 04 Fax: +31 (0)180 – 44 23 55 MITSUBISHI ELECTRIC Mitsubishi Electric Europe B.V. /// FA - European Business Group /// Gothaer Straße 8 /// D-40880 Ratingen /// Germany Tel.: +49(0)2102-4860 /// Fax: +49(0)2102-4861120 /// [email protected] /// www.mitsubishi-automation.com FACTORY AUTOMATION...