Table of Contents
Quick Links
Table of Contents

Related Manuals for Emerson Liebert DS Series


Summary of Contents for Emerson Liebert DS Series
-
Page 3: Table Of Contents
TABLE OF CONTENTS ..........1 MPORTANT AFETY NSTRUCTIONS... - Page 4 Reassembly—Upflow Unit ........... . 66 Reassembly Checklist.
- Page 5 13.2 Blower Drive System—Centrifugal Fans ........132 13.2.1 Upflow Motor Access .
- Page 6 FIGURES Figure 1 Downflow model component locations ..........3 Figure 2 Upflow model component locations .
- Page 7 Figure 37 Using rigging to lift Liebert DS off skid ..........42 Figure 38 Setting the unit on a floor stand .
- Page 8 Figure 72 Piping schematic—GLYCOOL with scroll compressor models ......99 Figure 73 Piping schematic—water/glycol with digital scroll compressor models....100 Figure 74 GLYCOOL with digital scroll compressor models.
- Page 9 TABLES Table 1 Shipping dimensions—domestic and export, inches (mm) ....... 10 Table 2 Shipping weights—approximate, kg .
- Page 10 Table 40 Component weights—upflow, water/glycol/GLYCOOL, 28-42kW (8-12 ton), all compressor models ............... . 69 Table 41 Component weights—upflow air-cooled 53-77kw (15-22 ton), semi-hermetic compressor models .
-
Page 11: Important Safety Instructions
MPORTANT AFETY NSTRUCTIONS SAVE THESE INSTRUCTIONS This manual contains important safety instructions that should be followed during the installation ™ and maintenance of the Liebert DS . Read this manual thoroughly before attempting to install or operate this unit. Only qualified personnel should move, install or service this equipment. Adhere to all warnings, cautions and installation, operating and safety instructions on the unit and in this manual. - Page 12 Do not locate unit directly above any equipment that could sustain water damage. Emerson recommends installing leak detection equipment for unit and supply lines. NOTICE Risk of a leaking coil due to freezing and/or corrosion. Can cause equipment and serious building damage.
-
Page 13: Liebert Ds Components And Nomenclature
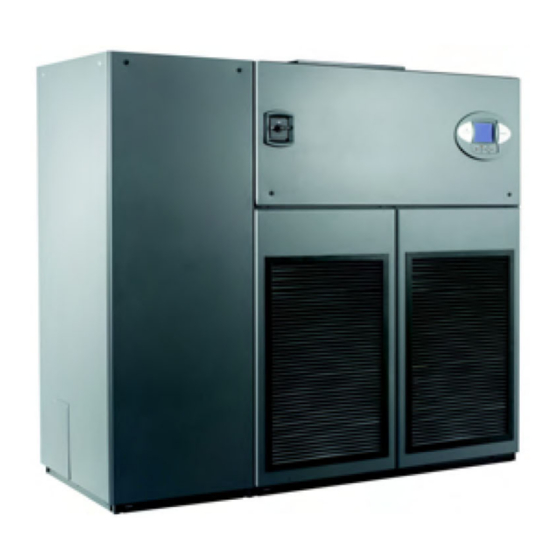
Liebert DS Components and Nomenclature DS C IEBERT OMPONENTS AND OMENCLATURE Figure 1 Downflow model component locations 16 10 1. Liebert iCOM 10. Infrared Humidifier, optional 2. Electric Box 11. Disconnect, optional 3. Filters 12. Condensate Pump, optional 4. Evaporator Coil 13. -
Page 14: Figure 2 Upflow Model Component Locations
Liebert DS Components and Nomenclature Figure 2 Upflow model component locations 1. Liebert iCom Control Display 9. Compressor Section 2. Electric Box 10. Infrared Humidifier (optional) 3. Filters 11. Disconnect (optional) 4. Evaporator Coil 12. Condensate Pump (optional) 5. Motor 13. -
Page 15: Figure 3 Liebert Ds Model Number Nomenclature
Liebert DS Components and Nomenclature Figure 3 Liebert DS model number nomenclature Air Distribution Factory Configuration Number DS = Downflow Standard VS = Upflow Standard Nominal kW Humidification 028,035, 042, 053, 0 - None 070, 077, 105 I - Infrared Cooling Type S - Steam Generating Canister... -
Page 16: Cooling Configurations
Cooling Configurations OOLING ONFIGURATIONS NOTE All field-installed piping must comply with applicable local, state and federal codes. Air-Cooled Glycol-Cooled Air-cooled unit piping is spun closed from Glycol-cooled units are factory-charged and the factory and contain a nitrogen holding tested. Field-installed piping is required from the charge. -
Page 17: Pre-Installation Guidelines
• Install the units as close as possible to the largest heat load. • Allow at least the minimum recommended clearances for maintenance and service. See Figures 6 through 21 for dimensions. • Emerson recommends installing an under-floor water detection system. Contact your local Emerson representative for information. Air Distribution—Downflow Units •... -
Page 18: Air Distribution-Upflow Units
Pre-Installation Guidelines Air Distribution—Upflow Units Various configurations are available: • Front return • Rear return • Top-front supply • Top-rear supply For in-room applications with supply and return grilles, several feet of clearance must be maintained at the intake and discharge of the unit. Upflow rear-return configurations use a filter box attached to the back of the Liebert DS. -
Page 19: Connections And System Setup
• Three-phase electrical service is required for all models. Electrical service must conform to national and local electrical codes. See equipment nameplate for details. • If seismic requirements apply, consult your local Emerson representative for information about a seismic-rated floor stand. -
Page 20: Liebert Ds Dimensions And Weights
Liebert DS Dimensions and Weights DS D IEBERT IMENSIONS AND EIGHTS Table 1 Shipping dimensions—domestic and export, inches (mm) 028 / 035/ 042 053/ 070 / 077 Model Number L x W xH, in (mm) L xW x H, in (mm) Lx W x H, in (mm) DS/VSAS, DS/VSAD, DS/VSAR, DS/VSAG, 102x42x82... -
Page 21: Figure 6 Cabinet And Floor Planning Dimensions-Downflow, Air-Cooled, 28-42Kw (8-12 Ton)
Liebert DS Dimensions and Weights Figure 6 Cabinet and floor planning dimensions—downflow, air-cooled, 28-42kW (8-12 ton), semi-hermetic compressor models Secondary Refrigerant Piping Entrance 56-7/8" Opening (1445mm) Notes: Filters are accessible through top of unit only. 33" (838mm) 24-3/8" Opening Downflow electrical Air Inlet Opening (619mm) 35"... -
Page 22: Scroll Compressor Models
Liebert DS Dimensions and Weights Figure 7 Cabinet and floor planning dimensions—downflow, air-cooled, 28-42kW (8-12 ton), scroll compressor models Secondary Refrigerant Piping Entrance Notes: Filters are accessible 56-7/8" Opening through top of unit only. (1445mm) Downflow electrical connections can be made 24-3/8"... -
Page 23: Figure 8 Cabinet And Floor Planning Dimensions-Downflow, Water/Glycol/Glycool, 28-42Kw
Liebert DS Dimensions and Weights Figure 8 Cabinet and floor planning dimensions—downflow, water/glycol/GLYCOOL, 28-42kW (8-12 ton), all compressor models Condenser Cleanout Access 56-7/8" Opening (1445mm) Notes: Filters are accessible through top of unit only. Downflow electrical 33" 24-3/8" connections can be made (838mm) (619mm) from top or bottom of unit. -
Page 24: Figure 9 Cabinet And Floor Planning Dimensions-Downflow, Air-Cooled, 53-77Kw (15-22 Ton)
Liebert DS Dimensions and Weights Figure 9 Cabinet and floor planning dimensions—downflow, air-cooled, 53-77kW (15-22 ton), semi-hermetic compressor models Second Refrigerant Piping Entrance 80" Opening (2032mm) Notes: Filters are accessible through top of unit onl y. Downflow electrical 33" connections can be made 24-3/8"... -
Page 25: Scroll Compressor Models
Liebert DS Dimensions and Weights Figure 10 Cabinet and floor planning dimensions—downflow, air-cooled, 53-77kW (15-22 ton), scroll compressor models Secondary Refrigerant Notes: Filters are accessible Piping Entrance 80" Opening only through top of unit. (2032mm) Downflow electrical connections can be made from top or bottom of unit. -
Page 26: Figure 11 Cabinet And Floor Planning Dimensions-Downflow, Water/Glycol/Glycool, 53-77Kw
Liebert DS Dimensions and Weights Figure 11 Cabinet and floor planning dimensions—downflow, water/glycol/GLYCOOL, 53-77kW (15-22 ton), all compressor models Condenser Cleanout Access 80" (2032mm) Opening Notes: Filters are accessible 33" through top of unit onl y. 24-5/8" (625mm) (838mm) Air Inlet Opening Downflow electrical Opening 35"... -
Page 27: Figure 12 Cabinet And Floor Planning Dimensions-Downflow, Air-Cooled, 105Kw (30 Ton), All
Liebert DS Dimensions and Weights Figure 12 Cabinet and floor planning dimensions—downflow, air-cooled, 105kW (30 ton), all compressor models Secondary Refrigerant Notes: Filters are accessible Piping Entrance only through top of unit. 102-13/16" (2611mm) Downflow electrical Opening connections can be made from top or bottom of unit. -
Page 28: Figure 13 Cabinet And Floor Planning Dimensions-Downflow, Water/Glycol/Glycool, 105Kw
Liebert DS Dimensions and Weights Figure 13 Cabinet and floor planning dimensions—downflow, water/glycol/GLYCOOL, 105kW (30 ton), all compressor models Condenser Cleanout Access Notes: Filters are accessible 102-13/16" (2611mm) through top of unit onl y. Opening Downflow electrical connections can be made from top or bottom of unit 33"... -
Page 29: Figure 14 Cabinet And Floor Planning Dimensions-Upflow, Air-Cooled 28-42Kw (8-12 Ton)
Liebert DS Dimensions and Weights Figure 14 Cabinet and floor planning dimensions—upflow, air-cooled 28-42kW (8-12 ton), semi-hermetic compressor models Alternate Refrigerant Piping Entrance Note: Front air return unit shown. For rear return unit, in addition to front service area shown, also include 25" (635mm) on one side of unit for access to rear return filter box. -
Page 30: Scroll Or Digital Scroll Compressor Models
Liebert DS Dimensions and Weights Figure 15 Cabinet and floor planning dimensions—upflow, air-cooled 28-42kW (8-12 ton), scroll or digital scroll compressor models Alternate Refrigerant Piping Entrance Note: Front air return unit shown. For rear return unit, in addition to front service area shown, also include 25"... -
Page 31: Figure 16 Cabinet And Floor Planning Dimensions-Upflow, Water/Glycol/Glycool, 28-42Kw
Liebert DS Dimensions and Weights Figure 16 Cabinet and floor planning dimensions—upflow, water/glycol/GLYCOOL, 28-42kW (8-12 ton), all compressor models Condenser Cleanout Access Note: Front air return unit shown. For rear return unit, in addition to front service area shown, also include 25" (635mm) on one side of unit for access to rear return filter box. -
Page 32: Figure 17 Cabinet And Floor Planning Dimensions-Upflow, Air-Cooled, 53-77Kw (15-22 Ton)
Liebert DS Dimensions and Weights Figure 17 Cabinet and floor planning dimensions—upflow, air-cooled, 53-77kW (15-22 ton), semi-hermetic compressor models Note: Front air return unit shown. For rear Alternate Refrigerant return unit, in addition to front service area Piping Entrance shown, also include 25" (635mm) on one side of unit for access to rear return filter box. -
Page 33: Scroll Or Digital Scroll Compressor Models
Liebert DS Dimensions and Weights Figure 18 Cabinet and floor planning dimensions—upflow, air-cooled, 53-77kW (15-22 ton), scroll or digital scroll compressor models Note: Front air return unit shown. For rear return unit, in addition to front service Alternate Refrigerant area shown, also include 25" (635mm) on Piping Entrance one side of unit for access to rear return filter box. -
Page 34: Figure 19 Cabinet And Floor Planning Dimensions-Upflow, Water/Glycol/Glycool, 53-77Kw
Liebert DS Dimensions and Weights Figure 19 Cabinet and floor planning dimensions—upflow, water/glycol/GLYCOOL, 53-77kW (15-22 ton), all compressor models Note: Front air return unit shown. For rear return unit, in addition to front service area Condenser Cleanout Access shown, also include 25" (635mm) on one side of unit for access to rear return filter box. -
Page 35: Figure 20 Cabinet And Floor Planning Dimensions-Upflow, Air-Cooled, 105Kw (30 Ton), All
Liebert DS Dimensions and Weights Figure 20 Cabinet and floor planning dimensions—upflow, air-cooled, 105kW (30 ton), all Note: Front air return unit shown. For rear Alternate Refrigerant return unit, in addition to front service area Piping Entrance shown, also include 25" (635mm) on one side of unit for access to rear return filter 33"... -
Page 36: Figure 21 Cabinet And Floor Planning Dimensions-Upflow Water/Glycol/Glycool 105Kw (30 Ton)
Liebert DS Dimensions and Weights Figure 21 Cabinet and floor planning dimensions—upflow water/glycol/GLYCOOL 105kW (30 ton), all compressors Note: Front air return unit shown. For rear return unit, in addition to front service area Alternate Refrigerant shown, also include 25" (635mm) on one Piping Entrance side of unit for access to rear return filter box. -
Page 37: Figure 22 Floor Stand Dimensions-Downflow, 28-42Kw (8-12 Ton) Models
Liebert DS Dimensions and Weights Figure 22 Floor stand dimensions—downflow, 28-42kW (8-12 ton) models A+1-1/2" (38mm) (with feet) 47-15/16" 4-1/2" (1218mm) (114mm) 33" 16-3/4" (838mm) (425mm) 34-1/2" (876mm) Supply air (with feet) discharge opening 1" (25mm) TYP. Supply air discharge Gussets supplied on floor stands opening 12"... -
Page 38: Figure 23 Floor Stand Dimensions-Downflow, 53-77Kw (15-22 Ton) Models
Liebert DS Dimensions and Weights Figure 23 Floor stand dimensions—downflow, 53-77kW (15-22 ton) models A+1-1/2" (38mm) (with feet) 69-3/4" 4-1/2" (1772mm) (114mm) 34-1/2" 16-3/4" (876mm) (425mm) (with feet) 33" (838mm) Supply air discharge opening Supply air 1" discharge opening (25mm) TYP. Gussets supplied on floor stands 12"... -
Page 39: Figure 24 Floor Stand And Floor Planning Dimension, Downflow 53-77Kw (15-22 Tons) Models With
Liebert DS Dimensions and Weights Figure 24 Floor stand and floor planning dimension, downflow 53-77kW (15-22 tons) models with EC fans Piping access area 3/4" (19mm) 31-1/2" 32" (813mm) (800mm) Center Feet 62-3/4" (1594mm) 3/4" (19mm) 95-1/2" (2426mm) Support Feet Centers 97"... -
Page 40: Figure 25 Floor Stand Dimensions-Downflow, 105Kw (30 Ton) Models
Liebert DS Dimensions and Weights Figure 25 Floor stand dimensions—downflow, 105kW (30 ton) models 132-1/2" (3366mm) (with feet) 131" (3327mm) 4-1/2" 26" 91-3/4" (660mm) (114mm) (2330mm) 16-3/4" 34-1/2" (425mm) (876mm) (with feet) 33" (838mm) 1" Supply air Supply air (25mm) TYP. discharge discharge opening opening... -
Page 41: Figure 26 Floor Stand And Floor Planning Dimension, Downflow 105Kw (30 Tons) Models With Ec Fans
Liebert DS Dimensions and Weights Figure 26 Floor stand and floor planning dimension, downflow 105kW (30 tons) models with EC fans 132-1/2" (3366mm) (with feet) 131" (3327mm) 25" (635mm) 34-1/2" (876mm) 33" (with feet) (838mm) 1" (25mm) Typ. 74" (1880mm) Gussets supplied on floor stands 12"... -
Page 42: Figure 27 Blower Outlet And Deck Dimensions-Upflow, 28-42Kw (8-12 Ton)
Liebert DS Dimensions and Weights Figure 27 Blower outlet and deck dimensions—upflow, 28-42kW (8-12 ton) 73" (1854mm) or 86" (2184mm) Ref Blower Outlet * 35" (889mm) Blower Outlet Location - Top View * Duct flange not provided Top of Unit Blower Deck 1-1/2"... -
Page 43: Figure 28 Blower Outlet And Deck Dimensions-Upflow, 53-77Kw (15-22 Ton)
Liebert DS Dimensions and Weights Figure 28 Blower outlet and deck dimensions—upflow, 53-77kW (15-22 ton) 97" (2464mm) or 108" (2743mm) Blower Outlets* 35" (889mm) Blower Outlet - Top View Front of Unit Preferred Connection Location 2-1/8" (54mm) 35" Ref. (889mm) Blower Deck - Top of Unit Front of Unit * Duct flanges not provided. -
Page 44: Figure 29 Blower Outlet And Deck Dimensions-Upflow 105Kw (30Ton)
Liebert DS Dimensions and Weights Figure 29 Blower outlet and deck dimensions—upflow 105kW (30ton) 132" (3353mm) Blower Outlets * 35" (889mm) Front of Unit Blower Outlet Location – TOP VIEW * Duct Flanges Not Provided Top of Unit Blower Deck 1-1/2"... -
Page 45: Figure 30 Rear Return Filter Box Dimensions
Liebert DS Dimensions and Weights Figure 30 Rear return filter box dimensions Filter Filter Access Access Door Door 7-15/16" (202mm) 76" 40" (1930mm) (1016mm) " 38-1/4 (971mm) Duct Size 3-1/2" (89mm) D Duct Size NOTES: 1. Filters can be accessed from either side. DPN001196 2. -
Page 46: Figure 31 Upflow Unit Plenum Dimensions
Liebert DS Dimensions and Weights Figure 31 Upflow unit plenum dimensions Rear Views – Check One (1): Front Views – Check One (1): With Grille With Grille Panel removable for condenser cleanout Without Grille Without Grille access (water/glycol / GLYCOOL models only) 34"... -
Page 47: Equipment Inspection And Handling
Carefully inspect all items for damage, either visible or concealed. For initial access use a 7/32" Allen wrench for panel removal. Damage should be immediately reported to the carrier and a damage claim filed with a copy sent to Emerson Network Power or to your sales representative. Packaging Material All material used to package this unit is recyclable. -
Page 48: Unpacking The Unit
Equipment Inspection and Handling If possible, transport the Liebert DS with a forklift or pallet jacks. If that is not possible, use a crane with belts or cables, slings and spreader bars. • If using a forklift or pallet jack, make sure that the forks (if adjustable) are spread to the widest allowable distance that will fit under the skid. -
Page 49: Removing The Unit From The Skid With A Forklift
Equipment Inspection and Handling 5.2.1 Removing the Unit from the Skid With a Forklift 1. Align a forklift with either the front or rear side of the unit. WARNING Risk of improper moving. Can cause equipment damage, injury or death. Use the center of gravity indicators on the unit to determine the entry points for the tines (see Figure 36). -
Page 50: Moving The Unit To The Installation Location With Piano Jacks
Equipment Inspection and Handling 5.2.2 Moving the Unit to the Installation Location with Piano Jacks 1. With the Liebert DS elevated, place two piano jacks into position—one at either end of the unit. 2. Lower the unit to a height suitable for the piano jacks and place protective material between the Liebert DS and the piano jacks. -
Page 51: Removing Liebert Ds From Skid Using Rigging
Equipment Inspection and Handling 5.2.4 Removing Liebert DS from Skid Using Rigging WARNING Risk of improper moving. Can cause equipment damage, injury or death. Use the center of gravity indicators (see Figure 36) on the unit to determine the position of the slings. -
Page 52: Figure 37 Using Rigging To Lift Liebert Ds Off Skid
Equipment Inspection and Handling Figure 37 Using rigging to lift Liebert DS off skid Lifting Lifting Sling Sling Equal Equal Distance Distance 181659P1 Rev. 5... -
Page 53: Semi-Hermetic Compressor Spring Isolation System
Equipment Inspection and Handling Semi-Hermetic Compressor Spring Isolation System Shipping blocks under all semi-hermetic compressors must be removed and the springs must be adjusted before startup. 1. Loosen nuts at each of the four compressor feet and remove the two shipping blocks. 2. -
Page 54: Ec Fans -Lowering And Removing
• cable tie cutter 1. Remove the middle and bottom panels from the front of the unit. 2. For ease of fan lowering, Emerson recommends removing the infrared humidifier using the approved infrared humidifier removal procedure. 3. Position the factory-supplied jack and jack support under the fan to be lowered. -
Page 55: Figure 39 Lowering Ec Fans Into Floor Stand, Steps 1 Through 6
EC Fans—Lowering and Removing Figure 39 Lowering EC fans into floor stand, Steps 1 through 6 Remove Middle Panel from Front of Unit Jack Location Remove Infrared Humidifier Remove Bottom Tabs Panel from Front of Unit Detail A Section Raise Jack Not Shown to Support Fan Deck... -
Page 56: Figure 40 Lowering Ec Fans Into Floor Stand, Steps 7 Through 9
EC Fans—Lowering and Removing 7. Using the jack, lower the fan module slowly until it rests on the frame of the unit. NOTICE Risk of equipment snagging cables and wiring. Can damage the Liebert DS components. Monitor the position of the fan harnesses and other parts while lowering the fan to be sure that they are not caught or pinched. -
Page 57: Removing The Ec Fans
1. Remove the middle and bottom panels from the front of the unit. 2. For ease of fan removal, Emerson recommends removing the infrared humidifier using the approved infrared humidifier removal procedure. -
Page 58: Figure 41 Removing The Ec Fans, Steps 1 Through 5
EC Fans—Lowering and Removing Figure 41 Removing the EC fans, Steps 1 through 5 Remove Middle Panel from Front of Unit Remove Infrared Humidifier Remove Bottom Panel from Front of Unit Raise Jack to Support Position Jack Floor Stand Partially to Support Fan Hidden Position Jack... -
Page 59: Figure 42 Removing The Ec Fans, Steps 6 Through 9
EC Fans—Lowering and Removing Figure 42 Removing the EC fans, Steps 6 through 9 Front Frame Channel Raise Fan Module With Jack Disconnect Hign- and Low-Voltage Wiring Field-Supplied Front Frame Rear Frame Fan-Removal Channel Channel Devices Right Side Panel Not Shown DPN001695 Page 2, Rev. -
Page 60: Disassembling The Liebert Lds For Transport
Disassembling the Liebert DS for Transport ISASSEMBLING THE IEBERT RANSPORT The Liebert DS has a modular frame construction that allows separating the unit into three sections. Each of these sections is more easily maneuvered through tight spaces or placed in small elevators. A qualified service technician with the required tools and recommended assistance can disassemble an air-cooled unit in about four hours, assuming refrigerant evacuation is not required. -
Page 61: Disassembly-Downflow Units
Disassembling the Liebert DS for Transport Disassembly—Downflow Units For detailed views of downflow units, see Figures 43 through 51. 1. Remove the unit from its shipping skid before beginning (refer to 5.2 - Unpacking the Unit). 2. Remove all panels except the top front accent. 3. -
Page 62: Remove The Compressor Assembly
NOTICE Risk of compressor oil contamination with moisture. Can cause equipment damage. Emerson recommends front-seating the compressor service valves. Front-seating the valves keeps the nitrogen or refrigerant charge in the compressor and prevents moisture from contaminating the compressor oil. This is particularly important with units using R-407C refrigerant. -
Page 63: Remove The Filter And Electric Box Assembly
• The filter and electric box section should be moved forward and set on the floor. • Make sure to lift the coil plate over the Schrader fittings on the headers. Emerson recommends using four people to remove this section. Special care is required when moving this section because the legs are not designed to withstand strong shocks. -
Page 64: Reconnecting Piping, Charging And Replacing Panels
Disassembling the Liebert DS for Transport 7.3.1 Reconnecting Piping, Charging and Replacing Panels 1. Piping must be reassembled in accordance with local codes. 2. Move insulation and plastic bushings away from the brazing area. 3. Wrap piping with wet cloths. Use copper fittings where required. 4. -
Page 65: Figure 43 Component Dimensions-Downflow, Air-Cooled, 28-42Kw (8-12 Ton), Semi-Hermetic
Disassembling the Liebert DS for Transport Figure 43 Component dimensions—downflow, air-cooled, 28-42kW (8-12 ton), semi-hermetic compressor models Drawing views are simplified with panels removed to show overall dimensions. See disassembly and handling instructions in installation manual. Filter & Electric Box Assembly 39"... -
Page 66: Figure 44 Component Dimensions-Downflow, Air-Cooled, 28-42Kw (8-12 Ton), Scroll/Digital Scroll
Disassembling the Liebert DS for Transport Figure 44 Component dimensions—downflow, air-cooled, 28-42kW (8-12 ton), scroll/digital scroll compressor models Drawing views are simplified with panels removed to show overall dimensions. See disassembly and handling instructions in installation manual. Filter & Electric Box Assembly 39"... -
Page 67: Compressor Models
Disassembling the Liebert DS for Transport Figure 45 Component dimensions—downflow, water/glycol/GLYCOOL, 28-42kW (8-12 ton), all compressor models Drawing views are simplified with panels removed to show overall dimensions. See disassembly and handling instructions in installation manual. Filter & Electric Box Assembly 39"... -
Page 68: Compressor Models; Forward-Curved And Ec Fan
Disassembling the Liebert DS for Transport Figure 46 Component dimensions—downflow, air-cooled, 53-77kW (15-22 ton), semi-hermetic compressor models; forward-curved and EC fan Drawing views are simplified with panels removed to show overall dimensions. See disassembly and handling instructions in installation manual. Filter &... -
Page 69: Figure 47 Component Dimensions-Downflow Air-Cooled, 53-77Kw (15-22 Ton), Scroll/Digital Scroll
Disassembling the Liebert DS for Transport Figure 47 Component dimensions—downflow air-cooled, 53-77kW (15-22 ton), scroll/digital scroll compressor models; forward-curved and EC fan Drawing views are simplified with panels removed to show overall dimensions. See disassembly and handling instructions in installation manual. Filter &... -
Page 70: Figure 48 Component Dimensions-Downflow Water/Glycol, Glycool, 53-77Kw (15-22 Ton), All
Disassembling the Liebert DS for Transport Figure 48 Component dimensions—downflow water/glycol, GLYCOOL, 53-77kW (15-22 ton), all compressor models; forward-curved and EC fan Drawing views are simplified with panels removed to show overall dimensions. See disassembly and handling instructions in installation manual. Filter &... -
Page 71: Figure 49 Component Dimensions-Downflow, Air-Cooled, 105Kw (30 Ton), Semi-Hermetic Compressor
Disassembling the Liebert DS for Transport Figure 49 Component dimensions—downflow, air-cooled, 105kW (30 ton), semi-hermetic compressor models; forward-curved and EC fan Drawing views are simplified with panels removed to show overall dimensions. See disassembly and handling instructions in installation manual. Filter and Electric Box Assembly 39"... -
Page 72: Figure 50 Component Dimensions-Downflow, Air-Cooled, 105Kw (30 Ton), Scroll Compressor Models
Disassembling the Liebert DS for Transport Figure 50 Component dimensions—downflow, air-cooled, 105kW (30 ton), scroll compressor models; forward-curved and EC fan Drawing views are simplified with panels removed to show overall dimensions. See disassembly and handling instructions in installation manual. Filter &... -
Page 73: Figure 51 Component Dimensions-Downflow, Water/Glycol/Glycool, 105Kw (30 Ton), Forward-Curved And Ec Fan, All Compressor Models; Forward-Curved And Ec Fan
Disassembling the Liebert DS for Transport Figure 51 Component dimensions—downflow, water/glycol/GLYCOOL, 105kW (30 ton), forward-curved and EC fan, all compressor models; forward-curved and EC fan Drawing views are simplified with panels removed to show overall dimensions. See disassembly and handling instructions in installation manual. -
Page 74: Disassembly-Upflow Units
NOTICE Risk of compressor oil contamination with moisture. Can cause equipment damage. Emerson recommends front-seating the compressor service valves. Front-seating the valves keeps the nitrogen or refrigerant charge in the compressor and prevents moisture from contaminating the compressor oil. This is particularly important with units using R-407C refrigerant. -
Page 75: Remove Compressor Assembly
Risk of improper handling. May cause damage to the Liebert DS. • The blower and electric box assembly should be moved forward and set on the floor. • Emerson recommends using four people to remove this section. • The motor end will be significantly heavier than the other end. -
Page 76: Reassembly-Upflow Unit
Disassembling the Liebert DS for Transport Reassembly—Upflow Unit 1. Reattach the top section using thread-cutting bolts; there are four on each side. Torque the bolts to 225 in-lb (25Nm). 2. Reinstall the motor access plate. Do not replace the left end coil access plates until brazing is finished. 3. -
Page 77: Figure 52 Component Dimensions-Upflow, Air-Cooled, 28-42Kw (8-12 Ton), Semi-Hermetic Compressor
Disassembling the Liebert DS for Transport Figure 52 Component dimensions—upflow, air-cooled, 28-42kW (8-12 ton), semi-hermetic compressor models Drawing views are simplified with panels removed to show overall dimensions. See disassembly and handling instructions in installation manual. Blower & Electric Box Assembly 31-1/4"... -
Page 78: Figure 53 Component Dimensions-Upflow, Air-Cooled, 28-42Kw (8-12 Ton), Scroll/Digital Scroll
Disassembling the Liebert DS for Transport Figure 53 Component dimensions—upflow, air-cooled, 28-42kW (8-12 ton), scroll/digital scroll compressor models Drawing views are simplified with panels removed to show overall dimensions. See disassembly and handling instructions in installation manual. Blower & Electric Box Assembly 31-1/4"... -
Page 79: Figure 54 Component Dimensions-Upflow, Water/Glycol/Glycool, 28-42Kw (8-12 Ton), All
Disassembling the Liebert DS for Transport Figure 54 Component dimensions—upflow, water/glycol/GLYCOOL, 28-42kW (8-12 ton), all compressor models Drawing views are simplified with panels removed to show overall dimensions. See disassembly and handling instructions in installation manual. Blower & Electric Box Assembly 31-1/4"... -
Page 80: Figure 55 Component Dimensions-Upflow, Air-Cooled, 53-77Kw (15-22 Ton), Semi-Hermetic
Disassembling the Liebert DS for Transport Figure 55 Component dimensions—upflow, air-cooled, 53-77kw (15-22 ton), semi-hermetic compressor models Drawing views are simplified with panels removed to show overall dimensions. See disassembly and handling instructions in installation manual. Blower & Electric Box Assembly 31-1/4"... -
Page 81: Figure 56 Component Dimensions-Upflow, Air-Cooled, 53-77Kw (15-22 Ton), Scroll/Digital Scroll
Disassembling the Liebert DS for Transport Figure 56 Component dimensions—upflow, air-cooled, 53-77kw (15-22 ton), scroll/digital scroll compressor models Drawing views are simplified with panels removed to show overall dimensions. See disassembly and handling instructions in installation manual. Blower & Electric Box Assembly 31-1/4"... -
Page 82: Figure 57 Component Dimensions-Upflow Water/Glycol/Glycool 53-77Kw (15-22 Ton), All
Disassembling the Liebert DS for Transport Figure 57 Component dimensions—upflow water/glycol/GLYCOOL 53-77kw (15-22 ton), all compressor models Drawing views are simplified with panels removed to show overall dimensions. See disassembly and handling instructions in installation manual. Blower & Electric Box Assembly 31-1/4"... -
Page 83: Figure 58 Component Dimensions-Upflow, Air-Cooled, 105Kw (30 Ton), Semi-Hermetic Compressor
Disassembling the Liebert DS for Transport Figure 58 Component dimensions—upflow, air-cooled, 105kW (30 ton), semi-hermetic compressor models Drawing views are simplified with panels removed to show overall dimensions. See disassembly and handling instructions in installation manual. Blower & Electric Box Assembly 31-1/4"... -
Page 84: Figure 59 Component Dimensions-Upflow, Air-Cooled, 105Kw (30 Ton), Scroll/Digital Scroll
Disassembling the Liebert DS for Transport Figure 59 Component dimensions—upflow, air-cooled, 105kW (30 ton), scroll/digital scroll compressor models Drawing views are simplified with panels removed to show overall dimensions. See disassembly and handling instructions in installation manual. Blower & Electric Box Assembly 31-1/4"... -
Page 85: Figure 60 Component Dimensions-Upflow, Water/Glycol/Glycool, 105Kw (30 Ton), All
Disassembling the Liebert DS for Transport Figure 60 Component dimensions—upflow, water/glycol/GLYCOOL, 105kW (30 ton), all compressor models Drawing views are simplified with panels removed to show overall dimensions. See disassembly and handling instructions in installation manual. Blower & Electric Box Assembly 31-1/4"... -
Page 86: Electrical Connections
Electrical Connections LECTRICAL ONNECTIONS Three-phase electrical service is required for all models. Electrical service must conform to national and local electrical codes. Refer to equipment nameplate regarding wire size and circuit protection requirements. Refer to electrical schematic when making connections. Refer to Figure 61 for electrical service entrances into unit. -
Page 87: Figure 61 Electrical Field Connections For Upflow And Downflow Models
Electrical Connections Figure 61 Electrical field connections for upflow and downflow models Liebert IntelliSlot Housing OVERCURRENT PROTECTION DEVICES CONTACTORS 60 Hz Downflow CONTACTORS & RELAYS 50 Hz DOWNFLOW LOW-VOLTAGE SECTION AND OVERLOAD PROTECTORS Note: Typical orientation of components shown. Component location varies by option and unit size. CAUTION: UPFLOW Risk of broken or shorted low-voltage... -
Page 88: Table 47 Electrical Field Connection Descriptions
STANDARD ELECTRICAL CONNECTIONS 14.Three-phase electrical service - Terminals are on top of disconnect 1. Primary high voltage entrance - 2.50" switch. Three-phase service not by Emerson. (64mm); 1.75" (44mm); 1.375" (35mm) 15.Smoke sensor alarm - Factory-wired dry contacts from smoke diameter concentric knockouts in bottom of box. -
Page 89: Variable Speed Drive
The VSD is factory-programmed for proper operation. Altering the VSD program without authorization from the factory may void the warranty. NOTE Emerson requires the Liebert DS to have a grounded supply. The VSD may be damaged if it is operated on an ungrounded supply. 8.1.1 VSD Power Supply—Field-Adjustment May Be Required... -
Page 90: Delta-Connected Power Supply
Electrical Connections 8.1.3 Delta-Connected Power Supply For Delta-connected power, the EMC filter must be removed from the VSD unit during installation. The size of the inverter (C, D, or 2) must be determined by Table 48, based on the unit’s electrical requirements and horsepower. -
Page 91: Figure 64 Disconnecting Emc Filter For Operation With Delta-Connected Power Size C & D Inverters
Electrical Connections Figure 64 Disconnecting EMC filter for operation with Delta-connected power size C & D inverters Internal EMC filter Tab fully inserted: EMC filter fitted Internal EMC filter Tab fully extended: EMC filter disconnected DPN001946 Rev. 0 Remove EMC Filter for Delta-Connected Power for Type 2 inverters The EMC filter on the VSD must be disconnected if the Liebert VSD control DS unit will be operated with Delta-connected power. -
Page 92: Piping
Do not locate unit directly above any equipment that could sustain water damage. Emerson recommends installing leak detection equipment for unit and supply lines. NOTE Seal openings around piping and electrical connection to prevent air leakage. Failure to do so could reduce the unit’s cooling performance. -
Page 93: Figure 66 Gravity Drain For Downflow And Upflow Units
Piping Figure 66 Gravity drain for downflow and upflow units DOWNFLOW DS UNIT UPFLOW DS UNIT INTERNAL DRAIN EXTERNAL INTERNAL UNIT DRAIN DRAIN UNIT EXTERNAL DRAIN CONTINUOUS DOWNWARD SLOPE CONTINUOUS DOWNWARD SLOPE CORRECT CORRECT INTERNAL INTERNAL EXTERNAL DRAIN DRAIN UNIT DRAIN UNIT EXTERNAL... -
Page 94: Humidifier Supply Water-Optional Infrared
Piping 9.1.2 Humidifier Supply Water—Optional Infrared • 1/4" supply line; maximum water pressure is 150 psi (1034kPa) • Size humidifier supply line for 1 gpm (3.8 l/m), with a minimum water pressure of 20 psi (138kPa) • Do not supply de-ionized water to the humidifier 9.1.3 Humidifier Supply Water—Optional Steam Generating •... -
Page 95: Refrigeration Piping
Liebert unit fluid circuits should be checked for leaks at installation as described below. NOTE During leak checking of field-installed piping, Emerson recommends that the unit be isolated using field-installed shutoff valves. When the Liebert units are included in a leak test, use of fluid for pressure testing is recommended. -
Page 96: Piping Guidelines-Air-Cooled Units
Piping 9.2.1 Piping Guidelines—Air-Cooled Units • Indoor unit ships with a nitrogen holding charge; do not vent the evaporator until all refrigerant piping is in place, ready for connection to the unit and condenser • Use copper piping with high temperature brazed joints •... - Page 97 Piping Table 51 Interconnecting piping refrigerant charge R-22, lb/100 ft. (kg/30m) R-407C, lb/100 ft. (kg/30m) Line Size, O.D., in. Liquid Line Hot Gas Line Liquid Line Hot Gas Line 7.3 (3.3) — 6.9 (3.1) — 11.7 (5.3) 2.1 (1.0) 11.0 (5.0 2.2 (1.0) 16.6 (7.5) 3.0 (1.4)
-
Page 98: Scroll And Digital Scroll-Additional Oil Requirements
(1276) (1502) (1729) (1956) DS105 For system charges over 200lb (90.7kg), consult your Emerson representative. NOTICE Risk of improper compressor lubrication. Can cause compressor and refrigerant system damage. Failure to use oil types, viscosities and quantities recommended by the compressor manufacturer may reduce compressor life and void the compressor warranty. -
Page 99: Dehydration/Leak Test And Charging Procedures For R-407C And R-22
Piping Dehydration/Leak Test and Charging Procedures for R-407C and R-22 9.3.1 Air-Cooled Condenser with Variable Fan Speed Head Pressure Control Systems The Variable Fan Speed Control systems (FSC & VFD) use pressure activated electronic fan speed control systems and remotely located thermostat(s) to ensure operation at ambient temperatures as low as 0°F (-18°C). -
Page 100: Table 54 Fan Speed Suction Pressure Transducer Settings
When adding liquid refrigerant to an operating system, it may be necessary to add the refrigerant through the compressor suction service valve. Care must be exercised to avoid damage to the compressor. Emerson recommends connecting a sight glass between the charging hose and the compressor suction service valve. This will permit adjustment of the cylinder hand valve so that liquid can leave the cylinder while allowing vapor to enter the compressor. -
Page 101: Air-Cooled Condenser With Liebert Lee-Temp "Flooded Condenser" Head Pressure
Piping 9.3.2 Air-Cooled Condenser with Liebert Lee-Temp “Flooded Condenser” Head Pressure Control System The Liebert Lee-Temp system consists of a modulating type head pressure control valve and insulated receivers with heater pads to ensure operation at ambient temperatures as low as -30°F (-34.4°C). The Liebert Lee-Temp system can be used with any Liebert DS compressor choice. -
Page 102: Table 55 Lee-Temp Suction Pressure Transducer Settings
When adding liquid refrigerant to an operating system, it may be necessary to add the refrigerant through the compressor suction service valve. Care must be exercised to avoid damage to the compressor. Emerson recommends connecting a sight glass between the charging hose and the compressor suction service valve. This will permit adjustment of the cylinder hand valve so that liquid can leave the cylinder while allowing vapor to enter the compressor. -
Page 103: Water/Glycol Cooled System
Piping Lee-Temp Receiver Refrigerant Level On each receiver at the condenser are two refrigerant-level sight glasses. Refrigerant level will vary with outside temperature. Check refrigerant level after the unit has been on for at least 15 minutes. Sight Glass Levels 40°F (4.5°C) and lower—bottom sight glass is 3/4 full 40 to 60°F (4.5 to 15.5°C)—bottom sight glass is full 60°F (15.5°C) and higher—top sight glass is 3/4 full. -
Page 104: Piping Schematics
* Components are not supplied NOTES: Schematic representation shown. Do not use for specific connection locations. than 5ft. (1.5m) by Emerson but are recommended for Two refrigeration circuits provided. Single refrigeration circuit shown for clarity. proper circuit operation and maintenance... -
Page 105: Figure 68 Piping Schematic-Air-Cooled, Scroll Compressor Models
NOTES: Schematic representation shown. Do not use for specific connection locations. than 5ft. (1.5m) * Components are not supplied Two refrigeration circuits provided. Single refrigeration circuit shown for clarity. by Emerson but are recommended for proper circuit operation and REFRIGERANT PIPING maintenance... -
Page 106: Figure 69 Piping Schematic-Water/Glycol, Semi-Hermetic Compressor Models
Piping Schematics Figure 69 Piping schematic—water/glycol, semi-hermetic compressor models For systems with drycoolers, refer to 13.14.3 - Drycooler Settings. Optional Dual Pump System Shown Liebert Expansion Customer Heat Rejection Heat Rejection Tank** Glycol Pumps Check Valves * (on Dual Pump Pressure Drycooler Systems only) -
Page 107: Figure 70 Piping Schematic-Water/Glycol With Scroll Compressor Models
Piping Schematics Figure 70 Piping schematic—water/glycol with scroll compressor models For systems with drycoolers, refer to 13.14.3 - Drycooler Settings. Optional Dual Pump System shown LIEBERT EXPANSION HEAT REJECTION TANK** CUSTOMER GLYCOL PUMPS HEAT REJECTION Check Valves* (on Dual Pump DRYCOOLER Pressure Systems only) -
Page 108: Figure 71 Piping Schematic-Glycool Semi-Hermetic Compressor Models
Piping Schematics Figure 71 Piping schematic—GLYCOOL semi-hermetic compressor models Optional Dual Pump System shown LIEBERT EXPANSION For systems with drycoolers, HEAT REJECTION TANK** GLYCOL refer to 13.14.3 - Drycooler Settings. PUMPS Check Valves* (on Dual Pump Pressure DRYCOOLER Systems only) Port* (Glycol) Gate Valves*... -
Page 109: Figure 72 Piping Schematic-Glycool With Scroll Compressor Models
Piping Schematics Figure 72 Piping schematic—GLYCOOL with scroll compressor models Optional Dual Pump System shown EXPANSION LIEBERT TANK** HEAT REJECTION GLYCOL PUMPS For systems with drycoolers, refer to 13.14.3 - Drycooler Settings. Check Valves* (on Dual Pump Systems only) DRYCOOLER Pressure (Glycol) Gate Valves*... -
Page 110: Figure 73 Piping Schematic-Water/Glycol With Digital Scroll Compressor Models
Piping Schematics Figure 73 Piping schematic—water/glycol with digital scroll compressor models Optional Dual Pump System shown LIEBERT EXPANSION CUSTOMER TANK** GLYCOL HEAT REJECTION HEAT REJECTION PUMPS Check Valves* (on Dual Pump Systems only) DRYCOOLER Pressure (Glycol) COOLING TOWER Port* Gate Valves* AND PUMP Aquastat SYSTEM... -
Page 111: Figure 74 Glycool With Digital Scroll Compressor Models
Piping Schematics Figure 74 GLYCOOL with digital scroll compressor models Optional Dual Pump System shown LIEBERT EXPANSION TANK** HEAT REJECTION GLYCOL PUMPS Check Valves* (on Dual Pimp Pressure DRYCOOLER Systems only) Port* (Glycol) Gate Valves* Aquastat Sensing Bulb Pressure Port* Hose Air Vents Shut-Off Valve*... -
Page 112: Figure 75 Optional Piping Schematic For Econ-O-Coil
Piping Schematics Figure 75 Optional piping schematic for Econ-O-Coil Return Supply Return Supply Thermistor * Thermistor * Actuator Actuator Return Return Supply Supply Econ-O-Coil Econ-O-Coil Optional Econ -O-Coil (2-Way Valve) Optional Econ-O-Coil (3-Way Valve) Factory Piping * Supplied with 10 feet (3m) extra thermistor wire for installation Field Piping on field supply line . -
Page 113: Figure 76 Primary Connection Locations-Downflow, Air-Cooled, 28-42Kw (8-12 Ton), Semi-Hermetic
Piping Schematics Figure 76 Primary connection locations—downflow, air-cooled, 28-42kW (8-12 ton), semi-hermetic compressor models NOTE: Drawing not to scale. ALL DIMENSIONS FROM Tolerance on REAR CORNER OF UNIT all piping dimensions INCLUDING PANELS is ± 1/2" (13mm). FRONT VIEW SECTION A-A 16-1/16"... -
Page 114: Figure 77 Primary Connection Locations-Downflow, Air-Cooled, 28-42Kw (8-12 Ton) With Scroll
Piping Schematics Figure 77 Primary connection locations—downflow, air-Cooled, 28-42kW (8-12 ton) with scroll compressor models NOTE: Drawing not to scale. Tolerance on all piping dimensions ALL DIMENSIONS FROM is ± 1/2" (13mm). REAR CORNER OF UNIT INCLUDING PANELS FRONT VIEW SECTION A-A 16-1/16"... -
Page 115: Figure 78 Primary Connection Locations-Downflow Water/Glycol/Glycool 28-42Kw (8-12 Ton)
Piping Schematics Figure 78 Primary connection locations—downflow water/glycol/GLYCOOL 28-42kW (8-12 ton), all compressor models NOTE: Drawing not to scale. Tolerance on all piping dimensions ALL DIMENSIONS FROM is ± 1/2" (13mm). REAR CORNER OF UNIT INCLUDING PANELS FRONT VIEW SECTION A-A 16-1/16"... -
Page 116: Figure 79 Primary Connection Locations-Downflow, Air-Cooled, 53-77Kw (15-22 Ton), Semi-Hermetic
Piping Schematics Figure 79 Primary connection locations—downflow, air-Cooled, 53-77kW (15-22 ton), semi-hermetic compressor models All dimensions from rear corner of unit including panels NOTE: Drawing not to scale. FRONT VIEW Tolerance on all piping dimensions is ± 1/2" (13mm). SECTION A-A BLOWER BLOWER 16-1/16"... -
Page 117: Figure 80 Primary Connection Locations Downflow Air Cooled 53-77Kw (15-22 Tons) Semi-Hermetic
Piping Schematics Figure 80 Primary connection locations downflow air cooled 53-77kW (15-22 tons) semi-hermetic compressor models, with EC fan All dimensions from rear corner of unit including panels Note: Drawing not to scale. FRONT VIEW Tolerance on all piping dimensions is ± 1/2" (13mm). SECTION A-A BLOWER L1 L2 G1 G2... -
Page 118: Figure 81 Primary Connection Locations-Downflow, Air-Cooled, 53-77Kw (15-22 Ton) With Scroll
Piping Schematics Figure 81 Primary connection locations—downflow, air-Cooled, 53-77kW (15-22 ton) with scroll compressor models All dimensions from rear corner of unit including panels NOTE: Drawing not to scale. FRONT VIEW Tolerance on all piping dimensions is ± 1/2" (13mm). SECTION A-A 16-1/16"... -
Page 119: Compressor Models, With Ec Fan
Piping Schematics Figure 82 Primary connection locations—downflow, air-Cooled, 53-77kW (15-22 ton) with scroll compressor models, with EC fan All dimensions from rear corner of unit including panels Note: Drawing not to scale. Tolerance on all piping FRONT VIEW dimensions is ± 1/2" (13mm). SECTION A-A L1 L2 G1 G2 BLOWER... -
Page 120: Figure 83 Primary Connection Locations-Downflow, Water/Glycol/Glycool, 53-77Kw (15-22 Ton)
Piping Schematics Figure 83 Primary connection locations—downflow, water/glycol/GLYCOOL, 53-77kW (15-22 ton), all compressor models All dimensions from NOTE: Drawing not to scale. rear corner of unit Tolerance on all piping including panels FRONT VIEW dimensions is ± 1/2" (13mm). SECTION A-A BLOWER 3-1/2"... -
Page 121: All Compressor Models, With Ec Fan
Piping Schematics Figure 84 Primary connection locations—downflow, water/glycol/GLYCOOL, 53-77kW (15-22 ton), all compressor models, with EC fan All dimensions from rear corner of unit including panels Note: Drawing not to scale. FRONT VIEW Tolerance on all piping dimensions is ± 1/2" (13mm). SECTION A-A 3-1/2"... -
Page 122: Figure 85 Primary Connection Locations-Downflow, Air-Cooled, 105Kw (30 Ton), All Compressor
Piping Schematics Figure 85 Primary connection locations—downflow, air-cooled, 105kW (30 ton), all compressor models ALL DIMENSIONS FROM NOTE: Drawing not to scale. FRONT VIEW REAR CORNER OF UNIT Tolerance on INCLUDING PANELS all piping dimensions SECTION A-A is ± 1/2" (13mm). BLOWER BLOWER BLOWER... -
Page 123: Figure 86 Primary Connection Locations-Downflow, Air-Cooled, 105Kw (30 Ton), All Compressor
Piping Schematics Figure 86 Primary connection locations—downflow, air-cooled, 105kW (30 ton), all compressor models, with EC fan All dimensions from Note: Drawing not to scale. rear corner of unit FRONT VIEW Tolerance on all piping including panels dimensions is ± 1/2" (13mm). SECTION A-A BLOWER G1G2... -
Page 124: Figure 87 Primary Connection Locations-Downflow, Water/Glycol/Glycool, 105Kw (30 Ton), All
Piping Schematics Figure 87 Primary connection locations—downflow, water/glycol/GLYCOOL, 105kW (30 ton), all compressor models ALL DIMENSIONS FROM FRONT VIEW NOTE: Drawing not to scale. REAR CORNER OF UNIT Tolerance on all piping INCLUDING PANELS SECTION A-A dimensions is ± 1/2" (13mm). 8"... -
Page 125: Figure 88 Primary Connection Locations Downflow Water/Glycol/Glycool 105Kw (30 Tons) All
Piping Schematics Figure 88 Primary connection locations downflow water/glycol/GLYCOOL 105kW (30 tons) all compressor models, with EC fan FRONT VIEW Note: Drawing not to scale. All dimensions from Tolerance on all piping rear corner of unit dimensions is ± 1/2" (13mm). including panels SECTION A-A 8"... -
Page 126: Figure 89 Primary Connection Locations-Upflow, Air-Cooled, 28-42Kw (8-12 Ton), Semi-Hermetic
Piping Schematics Figure 89 Primary connection locations—upflow, air-cooled, 28-42kw (8-12 ton), semi-hermetic compressor models All dimensions from rear corner of unit 22-1/2" NOTES: including panels (572mm) 1. Drawing not to scale. 2. Tolerance on all piping dimensions Blower is ± 1/2" (13mm). 15-3/16"... -
Page 127: Compressor Models
Piping Schematics Figure 90 Primary connection locations—upflow, air-Cooled, 28-42kW (8-12 ton), semi-hermetic compressor models All dimensions from rear corner of unit 10-1/8" NOTES: including panels (257mm) 1. Drawing not to scale. 2. Tolerance on all piping dimensions 4-1/8" (105mm) is ± 1/2" (13mm). BL OWER Field routed alternatives for refrigerant OU TLE T... -
Page 128: Figure 91 Primary Connection Locations-Upflow, Water/Glycol/Glycool, 28-42Kw (8-12 Ton)
Piping Schematics Figure 91 Primary connection locations—upflow, water/glycol/GLYCOOL, 28-42kW (8-12 ton), all compressor models NOTES: 1. Drawing not to scale. All dimensions 2. Tolerance on all piping dimensions is ± 1/2" (13mm). from rear corner 3. Field-routed alternatives for water/glycol connections. of unit including 4. -
Page 129: Figure 92 Primary Connection Locations-Upflow, Air-Cooled, 53-77Kw (15-22 Ton), Semi-Hermetic
Piping Schematics Figure 92 Primary connection locations—upflow, air-cooled, 53-77kW (15-22 ton), semi-hermetic compressor models All dimensions from 22-1/2" rear corner of unit (572mm) including panels NOTES: Blower Blower 15-3/16" 1. Drawing not to scale. Outlet Outlet 35" (386mm) 2. Tolerance on all piping dimensions (889mm) is ±... -
Page 130: Figure 93 Primary Connection Locations-Upflow, Air-Cooled, 53-77Kw (15-22 Ton), Scroll Compressor
Piping Schematics Figure 93 Primary connection locations—upflow, air-cooled, 53-77kW (15-22 ton), scroll compressor models All dimensions from rear corner of unit including panels NOTE Blower Blower 4" 1. Drawing not to scale. Outlet Outlet (102mm) 2. Tolerance on all piping dimensions 35"... -
Page 131: Figure 94 Primary Connection Locations-Upflow, Water/Glycol/Glycool, 53-77Kw (15-22 Ton)
Piping Schematics Figure 94 Primary connection locations—upflow, water/glycol/GLYCOOL, 53-77kW (15-22 ton), all compressor models All dimensions from rear corner of unit including panels NOTES: Blower 1. Drawing not to scale. Blower Outlet Outlet 2. Tolerance on all piping dimensions 8" is ±... -
Page 132: Figure 95 Primary Connection Locations-Upflow, Air-Cooled, 105Kw (30 Ton), All
Piping Schematics Figure 95 Primary connection locations—upflow, air-cooled, 105kW (30 ton), all All dimensions from rear corner of unit 22-1/2" including panels (572mm) Blower Blower Blower 15-3/16" Outlet Outlet Outlet (386mm) 35" (889mm) 16-7/16" 4" (418mm) (102mm) NOTES: 1. Drawing not to scale. E1 E2 2. -
Page 133: Figure 96 Primary Connection Locations-Upflow, Water/Glycol/Glycool, 105Kw (30 Ton), All
Piping Schematics Figure 96 Primary connection locations—upflow, water/glycol/GLYCOOL, 105kW (30 ton), all All dimensions from rear corner of unit including panels Blower Blower Blower Outlet Outlet Outlet 8" 35" (203mm) (889mm) 2-7/8" (73mm) NOTES: 3-1/2" 1. Drawing not to scale. (89mm) 2. -
Page 134: Checklist For Completed Installation
Checklist for Completed Installation 11.0 C HECKLIST FOR OMPLETED NSTALLATION 11.1 Moving and Placing Equipment ___ 1. Unpack and check received material. ___ 2. Proper clearance for service access has been maintained around the equipment. ___ 3. Equipment is level and mounting fasteners are tight. ___ 4. -
Page 135: Other
Checklist for Completed Installation 11.4 Other ___ 1. Ducting complete (if required), maintain access to filters. ___ 2. Filters installed. ___ 3. Check fasteners that secure compressors, reheats, humidifier and motors—some may have become loose during shipment. ___ 4. Verify water detection is properly installed around all units (recommended). ___ 5. -
Page 136: Initial Startup Checks And Commissioning Procedure For Warranty Inspection
This information must be completed and forwarded to Emerson to validate warranty. • Contact your local Emerson sales representative or Liebert Air Product Support if you have any questions or problems during unit startup and commissioning. • Local Emerson Sales offices and Liebert Air Product Support contacts can be found at www.liebert.com... -
Page 137: Information For Warranty Inspection-Remove Power From Unit Disconnect
Initial Startup Checks and Commissioning Procedure for Warranty Inspection 12.1 Information for Warranty Inspection—Remove Power From Unit Disconnect Complete the following items on the warranty inspection form: • Installer name and address • Owner name and address • Site contact name and phone number •... -
Page 138: Startup
Initial Startup Checks and Commissioning Procedure for Warranty Inspection 12.3 Startup 1. Turn On the Main Disconnect. 2. Check voltage at disconnect and record. L1-L2 _________________ L2-L3 _________________ L1-L3 _________________ 3. Check control voltage transformers for proper output. Secondary voltage(s) should not exceed 27VAC under load. -
Page 139: Commissioning Procedure With Panels On
19. Complete the warranty inspection form with sign-off data. Return Completed Startup Form to Your Local Emerson Sales Office Local Emerson sales offices and air product support contacts can be found on the Liebert Web site: www.liebert.com or call 1-800-LIEBERT for Precision Cooling product support. -
Page 140: Maintenance
• See the Liebert iCOM user manual, SL-18835, for instructions on how to utilize the unit controller to predict some service maintenance intervals. • Emerson recommends the use of trained and authorized service personnel, extended service contracts and factory-specified replacement parts. Contact your local Emerson representative. -
Page 141: Filters
Pleat direction is non-standard. Use only short-pleat filters (see Figure 97). Long-pleat filters are subject to collapse at high airflows. To maximize the performance and reliability of Liebert DS equipment, use only Liebert filters. Contact your local Emerson representative to order replacement filters. Table 59 Filter quantities, downflow units... -
Page 142: 13.1.1 Filter Replacement Procedure-Downflow Units
Maintenance 13.1.1 Filter Replacement Procedure—Downflow Units 1. Disconnect power from the Liebert DS. 2. Using a stepladder, remove filters from the top of the unit. The optional downflow return air plenum includes a filter access door. 3. Replace with new filters—install the filters in the proper direction of the airflow (see Figure 97). 4. -
Page 143: 13.2.1 Upflow Motor Access
Maintenance 13.2.1 Upflow Motor Access 1. Remove the lateral support (sheet metal channel) under electric box by removing two screws at each end. 2. Removed the hinged deadfront panel (30-ton units have open access to the motor). 3. Remove two screws on the right side of the low-voltage electric box that secure the low volt electric box to the sheet metal shoulder. -
Page 144: 13.2.3 Belt Installation And Tensioning
1. Select the appropriate replacement of belts (matched set) and position on drive package. To maximize performance and reliability of Liebert DS equipment, use only Liebert belts. Contact your local Emerson representative for replacement belts. 2. Ensure pulley grooves are properly aligned. If adjustment is required, loosen (do not remove) four nuts in adjustment slots (see Figure 99) holding motor base to unit frame and slide motor base assembly into alignment. -
Page 145: 13.2.4 Electronic Variable Speed Drive - Inverter
Blower Motor Lubrication • Motor comes pre-lubricated from factory and does NOT require initial lubrication. • Emerson recommends a 5-year lubrication interval for motor bearings that have grease fittings. • Greases of different bases may not be compatible when mixed. -
Page 146: Humidifier-Infrared
(see Liebert iCOM user manual SL-18835 for autoflush setup). To help reduce excessive scaling in locations with difficult water quality, the use of Vapure is recommended (contact your local Emerson representative). 13.4.1 Cleaning Humidifier Pan and Float Switch Before turning off unit: 1. -
Page 147: 13.4.2 Changing Humidifier Lamps
Maintenance Figure 100Correct orientation of float switch Correct Switch Orientation Incorrect Switch Orientation DPN000996 Rev. 0 13.4.2 Changing Humidifier Lamps NOTE Touching quartz lamps with bare hands will severely shorten bulb life. Skin oils create hot spots on lamp surface. Wear clean cotton gloves when handling lamps. 1. -
Page 148: Humidifier-Steam Generating
Maintenance 13.5 Humidifier—Steam Generating The humidifier drains and refills to maintain a current setpoint and alert the operator when the humidifier canister needs to be replaced. Figure 102Steam generating humidifier canister 13.5.1 Replacing the Steam Generating Humidifier Canister WARNING Risk of electric shock. Can cause injury or death. Disconnect local and remote power supplies before working within. -
Page 149: Figure 103Removing The Old Canister
Maintenance The steam cylinder is disposable and must be replaced at the end of the cylinder’s life. Cylinder life will vary according to water supply conditions and humidifier usage. WARNING Risk of humidifier canister meltdown, smoke and fire. Can cause fire suppression system activation, fire and smoke alarm activation, serious equipment and building damage, injury and death. -
Page 150: Figure 104Drain Valve Assembly
Maintenance Mandatory Cleaning of the Drain Valve Always clean the drain valve before installing a new cylinder. Figure 104 shows an exploded view of the drain valve for reference to clean it. 1. Remove old cylinder as previously described. 2. Note that the ring terminal for the drain valve green ground wire is sandwiched between the drain valve and the drain pan. -
Page 151: Figure 105Canister Plugs
Maintenance Installing the New Canister 1. The reverse procedure should be followed to install a new cylinder. The main electrical disconnect is to be left open until the cylinder is completely installed and reconnected. 2. The blue sensor plug on all units is for the high water sensor pin, which always goes on the single pin with collar offset from the others. -
Page 152: Table 62 Steam Generating Humidifier Status Lamps: Causes, Corrective Action
Maintenance Table 62 Steam generating humidifier status lamps: causes, corrective action Unit Status Lamp Yellow Green Symptom Corrective Actions This usually happens on initial startup after replacing the cylinder (normal). Maximum water level Water is concentrated with minerals inside the cylinder. inside cylinder. -
Page 153: Condensate Drain And Condensate Pump Systems
Maintenance Figure 106Circuit board diagram PCB is configured for: MES-L To configure the PCB to the proper voltage, the jumpers should be set as follows: (* = Factory setting; do not adjust) 200V/208V: J6, J9, J15*, J17*, J19*, J10*, J23*, P11 pin (2-3)* 230V: J5, J9, J15*, J17*, J19*, J10*, J23*, P11 pin (2-3)* 380V/415V: J3, J8, J15*, J17*, J19*, J10*, J23*, P11 pin (2-3)* 460V: J2, J8, J15*, J17*, J19*, J10*, J23*, P11 pin (2-3)*... -
Page 154: Air-Cooled Condenser And Drycoolers
Maintenance 13.7 Air-Cooled Condenser and Drycoolers • Clear coil surface of all debris that will inhibit airflow. • Check for bent or damaged coil fins and correct. • Do not permit snow to accumulate around or under outdoor unit. • Periodically consider commercial cleaning of coil surface •... -
Page 155: 13.10 Compressor
13.11 Compressor Replacement Replacement compressors are available through your local Emerson office. Compressors are shipped in reusable packaging. If unit is under warranty, complete and include Liebert Service Credit Application (LSCA) with the compressor that is being returned. -
Page 156: Digital Compressor Unloading Solenoid(S)
Maintenance 13.11.2Digital Compressor Unloading Solenoid(s) Models 028, 035 and 042 When replacing a digital scroll compressor, digital solenoid valve and coil must be replaced. Compressor and valve kit are shipped separately. Valve kit must be field-brazed to top of compressor in proper orientation and supported with original factory bracket. -
Page 157: 13.13.1 Cleaning Instructions
Maintenance 13.13.1 Cleaning Instructions Refer to Figure 1 - Downflow model component locations. 1. Disconnect power to unit. 2. Close field-installed isolation valves to isolate this unit’s condenser system from facility water or glycol circuit. 3. Remove access panel from front of compressor section. 4. -
Page 158: Motor Ball Valve-Digital Scroll Compressors
Maintenance Testing Function of Valve First, turn off the refrigeration system. When the refrigeration system has been off for approximately 10 to 15 minutes, the water flow should stop. If the water continues to flow, the valve is either improperly adjusted (with head pressure too low) or the pressure-sensing capillary is not connected properly to the condenser. -
Page 159: Drycooler Settings
Maintenance 13.14.3Drycooler Settings Applications with the Optional Stat Setting require field piping to be insulated to prevent condensation. Table 66 shows acceptable applications where stats must be adjusted to Optional Setting. Aquastats must be field-adjusted to Optional Setting for: • GLYCOOL/Dual Cool applications •... -
Page 160: Hvac Maintenance Checklist
HVAC Maintenance Checklist 14.0 HVAC M AINTENANCE HECKLIST Inspection Date Job Name Indoor Unit Model # Indoor Unit Serial Number # Condenser/Drycooler Model # Condenser/Drycooler Serial # Room Temperature/Humidity ° Ambient Temperature ° Filters ___ 1. Check/replace filters ___ 2. Grille area unrestricted ___ 3. - Page 161 HVAC Maintenance Checklist Condensate Pump ___ 1. Check for debris in sump ___ 2. Check operation of float(s) (free movement) Refrigeration Piping ___ 1. Check refrigerant lines (clamps secure/no rubbing/no leaks) ___ 2. Check for moisture (sight glass) Water-Cooled Condensers ___ 1.
- Page 162 HVAC Maintenance Checklist Controls ___ 1. Check/Verify Control Operation (Sequence) ___ 2. Check humidifier high water alarm operation ___ 3. Check operation of the air safety switch ___ 4. Check setting/operation of the filter clog switch ___ 5. Check/test changeover device(s) ___ 6.
- Page 163 ____________________________________________________________________________________________ ____________________________________________________________________________________________ ____________________________________________________________________________________________ ____________________________________________________________________________________________ ____________________________________________________________________________________________ Signature ___________________________________________________________________________________ Company ____________________________________________________________________________________ Make photocopies for your records. Compare readings / information to previous maintenance worksheet. To locate your local Emerson representative for Liebert-engineered parts, check the Liebert Web site: www.liebert.com or call 1-800-LIEBERT.
- Page 164 HVAC Maintenance Checklist NOTES...
- Page 165 HVAC Maintenance Checklist...
- Page 166 HVAC Maintenance Checklist...
-
Page 167: Compliance With European Union Directives
OMPLIANCE WITH UROPEAN NION IRECTIVES Liebert Corporation 1050 Dearborn Drive P.O. Box 29186 Columbus, OH 43229 Il Produttore dichiara che, se munito di marchio CE, il prodotto è conforme alle direttive dell'Unione europea: The Manufacturer hereby declares that this product, when bearing the CE mark, conforms to the European Union directives: Der Hersteller erklärt hiermit, dass das vorliegende Produkt, sollte es die CE‐Kennzeichnung tragen, den folgenden Richtlinien der Europäischen Union entspricht: Le fabricant déclare par la présente que ce produit, portant la marque CE, est conforme aux directives de l'Union européenne : El fabricante declara por la presente que si este producto lleva el marcado CE es conforme con las directivas de la Unión Europea: O fabricante declara por este meio que este produto, quando ostenta a marca CE, está em conformidade com as directivas da União Europeia: Tillverkaren tillkännager härmed att den här produkten, när den är CE‐märkt, överensstämmer med EU:s direktiv: De fabrikant verklaart hierbij dat dit product, indien het van de CE‐markering is voorzien, conform de EU‐richtlijnen is: Valmistaja vakuuttaa täten, että mikäli tuotteessa on CE‐merkintä, se täyttää seuraavien EU‐direktiivien vaatimukset: Produsenten erklærer herved at dette produktet, når det er CE‐merket, er i samsvar med EU‐direktiver: Producenten erklærer hermed, at dette produkt overholder EU's direktiver, når det bærer CE‐mærket: Ο Κατασκευαστής δηλώνει ότι το προϊόν αυτό, το οποίο φέρει σήμανση CE, είναι σύμμορφο με τις οδηγίες της Ε.Ε.: 2006/42/EC; 2004/108/EC; 2006/95/EC; 97/23/EC...