Emerson Rosemount 2110 Quick Start Manual
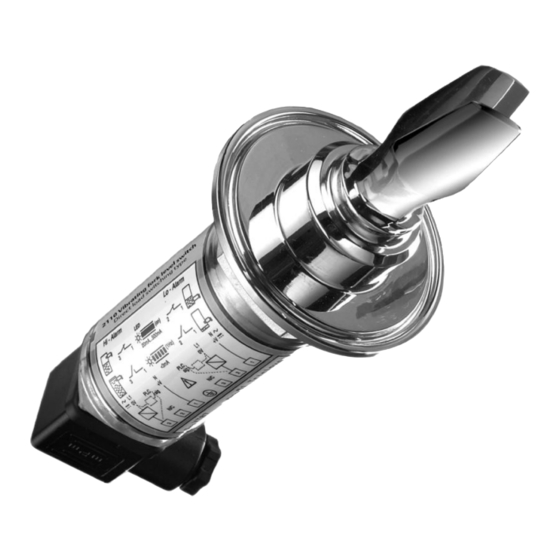
Level switch, vibrating fork
Hide thumbs
Also See for Rosemount 2110:
- Reference manual (38 pages) ,
- Reference manual (38 pages) ,
- Quick start manual (24 pages)

Related Manuals for Emerson Rosemount 2110


Summary of Contents for Emerson Rosemount 2110
- Page 1 Quick Start Guide 00825-0100-4029, Rev CC March 2022 ™ Rosemount 2110 Level Switch Vibrating Fork...
-
Page 2: Table Of Contents
Quick Start Guide March 2022 Contents About this guide...........................3 Installation........................... 5 Prepare the electrical connections....................10 Connect wiring and power up.....................18 Product certifications......................... 21 Rosemount 2110 Level Switch... -
Page 3: About This Guide
March 2022 Quick Start Guide About this guide This Quick Start Guide provides basic guidelines for the Rosemount 2110. Refer to the Rosemount 2110 Reference Manual for more instructions. The manual and this guide are also available electronically at Emerson.com/Rosemount. - Page 4 This is true for all systems used within the facility. CAUTION Hot surfaces The flange and process seal may be hot at high process temperatures. Allow to cool before servicing. Rosemount 2110 Level Switch...
-
Page 5: Installation
March 2022 Quick Start Guide Installation Fork alignment in a pipe installation The fork is correctly aligned by positioning the groove or notch as indicated (Figure 2-1). Figure 2-1: Correct Fork Alignment for Pipe Installation A. Tri Clamp process connections have a circular notch B. - Page 6 2. Screw the level switch into the process connection. Note Tighten using the hexagon nut only. Figure 2-3: Vertical Installation A. Gasket for BSPP (G) threaded connection Figure 2-4: Horizontal Installation A. Gasket for BSPP (G) threaded connection Rosemount 2110 Level Switch...
- Page 7 March 2022 Quick Start Guide 2.3.2 Threaded flange connection Procedure 1. Place the customer-supplied flange and gasket on the vessel (tank) nozzle. A. Gasket (customer supplied) 2. Tighten the bolts and nuts with sufficient torque for the flange and gasket. 3.
- Page 8 Quick Start Guide March 2022 4. Screw the level switch into the flange thread. Note Tighten using the hexagon nut only. A. Gasket for BSPP (G) threaded connection Rosemount 2110 Level Switch...
- Page 9 A. Seal (supplied with Tri Clamp) 2. Fit the Tri Clamp. Note The Tri Clamp and seal are supplied in an accessory kit that has to be ordered separately. See the Rosemount 2110 Product Data Sheet ordering information. Quick Start Guide...
-
Page 10: Prepare The Electrical Connections
Maximum peak load 5 A for 40 ms maximum Minimum switched load 20 mA continuous Voltage drop 6.5 V @ 24 Vdc or 5 V @ 240 Vac Current draw (load off) < 3 mA continuous Rosemount 2110 Level Switch... - Page 11 March 2022 Quick Start Guide Figure 3-2: PNP Switching – Electronics Option Code 1 Table 3-2: Electrical Parameters – Electronics Option Code 1 Parameter Value PNP output PNP for PLC/SPS connection Maximum switched load 500 mA Maximum peak load 5 A for 40 ms maximum Voltage drop <...
- Page 12 Quick Start Guide March 2022 Figure 3-3: Wiring Connections Orientation A. Orientation cut-out B. PE (ground) Rosemount 2110 Level Switch...
- Page 13 March 2022 Quick Start Guide Table 3-3: Mode Selection By Customer Wiring – Electronics Option Code 0 Mode: dry on, high level alarm Mode: wet on, low level alarm (21-264 Vac, 50/60 Hz) (21-264 Vac, 50/60 Hz) (21-264 Vdc) (21-264 Vdc) R = external load (must be wired) Quick Start Guide...
- Page 14 Mode: wet on, low level alarm PLC input (18-60 Vdc) PLC input (18-60 Vdc) R = external load Functions Table 3-5 shows the switched electrical outputs from the PNP and Direct Load electronics for each mode selection. Rosemount 2110 Level Switch...
- Page 15 March 2022 Quick Start Guide Table 3-5: Functions Mode: dry on, high level alarm Mode: wet on, low level alarm PLC (positive output) ∆U ∆U <100µA <100µA <3V <3V PNP dc ∆U ∆U <100µA <100µA <3V <3V Load switching ac/dc L /+V ∆U <3 mA...
- Page 16 For direct load switching, a DPST (Double Pole, Single Throw) (on/off) switch must also be fitted for safe disconnection of the power supply. Fit the DPST switch as near to the Rosemount 2110 as possible, keeping the switch free of obstructions. Label the switch to indicate it is the supply disconnection device for the Rosemount 2110.
- Page 17 March 2022 Quick Start Guide 3.7.2 Signal cable shield grounding at instrument end Make sure the instrument cable shield is: • Trimmed close and insulated at the power supply end. • Continuously connected throughout the segment. • Connected to the potential earth (ground) terminal at the instrument end.
-
Page 18: Connect Wiring And Power Up
Quick Start Guide March 2022 Connect wiring and power up The Rosemount 2110 meets IP66 and IP67 weatherproof ratings when correctly assembled with the supplied connector and suitable cable. Ensure seals are in place to maintain the weatherproof ratings. Procedure Verify the power supply is disconnected. - Page 19 March 2022 Quick Start Guide a) The plug cover can be re-fitted in any one of four positions. A. Fork alignment indicator B. Optional plug positions b) Ensure the cable gland is pointing downwards or sideways. c) Secure the plug cover with the plug screw and washer, and tighten cable gland.
- Page 20 Quick Start Guide March 2022 d) If possible, arrange the wiring with a drip loop. 7. Connect the power supply when ready to apply power. Rosemount 2110 Level Switch...
-
Page 21: Product Certifications
Canadian Registration Number (CRN) Certificate 0F04227.2C The requirements of CRN are met when a Rosemount 2110 is configured with a NPT threaded process connection. Technical Regulations Customs Union (TR-CU) TR TC 032/2013 "On the safety equipment of high pressure"... - Page 22 Quick Start Guide March 2022 Instructions for hygienic installations The following instructions are for a Rosemount 2110 Level Switch (“level switch”) with a 51 mm Tri Clamp fitting covered by 3-A authorization 3626 and EHEDG certificate C2200010, and ASME-BPE and FDA compliance: 1.
- Page 23 March 2022 Quick Start Guide • Lens: Nylon 12 • Seals: Nitrile rubber • Connector: Nylon (PA6) 6. It is the responsibility of the user to ensure: a. The materials listed in instruction are suitable for the media and cleaning (sanitisation) processes. b.
- Page 24 Quick Start Guide March 2022 EU Declaration of Conformity Figure 5-1: EU Declaration of Conformity Rosemount 2110 Level Switch...
- Page 25 March 2022 Quick Start Guide Quick Start Guide...
- Page 26 O: Indicate that said hazardous substance in all of the homogeneous materials for this part is below the limit requirement of GB/T 26572. GB/T 26572 X: Indicate that said hazardous substance contained in at least one of the homogeneous materials used for this part is above the limit requirement of GB/T 26572. Rosemount 2110 Level Switch...
- Page 27 March 2022 Quick Start Guide Quick Start Guide...
- Page 28 For more information: Emerson.com © 2022 Emerson. All rights reserved. Emerson Terms and Conditions of Sale are available upon request. The Emerson logo is a trademark and service mark of Emerson Electric Co. Rosemount is a mark of one of the Emerson family of companies.