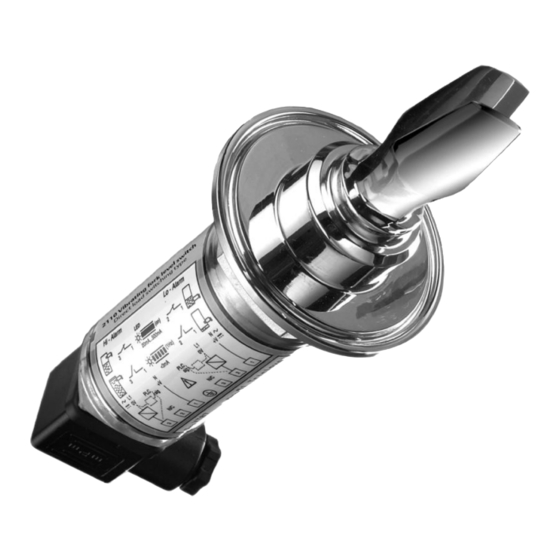
Emerson Rosemount 2110 Quick Start Manual
Vibrating fork
Hide thumbs
Also See for Rosemount 2110:
- Reference manual (38 pages) ,
- Reference manual (38 pages) ,
- Quick start manual (28 pages)

Related Manuals for Emerson Rosemount 2110


Summary of Contents for Emerson Rosemount 2110
- Page 1 Quick Start Guide 00825-0100-4029, Rev CB November 2020 ™ Rosemount 2110 Level Switch Vibrating Fork...
-
Page 2: Table Of Contents
Quick Start Guide November 2020 Contents About this guide...........................3 Installation........................... 5 Prepare the electrical connections....................9 Connect wiring and power up.....................14 Product certifications......................... 17 Rosemount 2110 Level Switch... -
Page 3: About This Guide
November 2020 Quick Start Guide About this guide This Quick Start Guide provides basic guidelines for the Rosemount 2110. Refer to the Rosemount 2110 Reference Manual for more instructions. The manual and this guide are also available electronically at Emerson.com/ Rosemount. - Page 4 Equipment ratings and certifications are no longer valid on any products that have been damaged or modified without the prior written permission of Emerson. Any continued use of product that has been damaged or modified without the written authorization is at the customer’s sole risk and expense.
-
Page 5: Installation
November 2020 Quick Start Guide Installation Fork alignment in a pipe installation Figure 2-1: Correct Fork Alignment for Pipe Installation A. Tri Clamp process connections have a circular notch B. Threaded process connections have a groove Fork alignment in a vessel (tank) installation Figure 2-2: Correct Fork Alignment for Vessel (Tank) Installation A. - Page 6 A gasket may be used as a sealant for BSPP (G) threaded connections. 2.3.2 Threaded vessel (tank) or pipework connection • Vertical installation. • Horizontal installation. A. Tighten using the hexagon nut only B. Gasket for BSPP (G) threaded connection Rosemount 2110 Level Switch...
- Page 7 November 2020 Quick Start Guide 2.3.3 Threaded flange connection Procedure 1. Place the customer-supplied flange and gasket on the vessel (tank) nozzle. A. Gasket (customer supplied) 2. Tighten the bolts and nuts with sufficient torque for the flange and gasket. 3.
- Page 8 A. Seal (supplied with Tri Clamp) 2. Fit the Tri Clamp. Note The Tri Clamp and seal are supplied in an accessory kit that has to be ordered separately. See the Rosemount 2110 Product Data Sheet ordering information. Rosemount 2110 Level Switch...
-
Page 9: Prepare The Electrical Connections
November 2020 Quick Start Guide Prepare the electrical connections Note See the Rosemount 2110 Product Data Sheet for all electrical specifications. Cable selection Twisted-pairs and shielded wiring is recommended for environments with high EMI (electromagnetic interference). Two wires can be safely connected to each terminal screw. - Page 10 I maximum continuous: 500 mA Voltage drop: 6.5 V @ 24 Vdc or Voltage drop: less than 3 V 5.0 V @ 240 Vac I load off: less than 3 mA I load off: less than 0.5 mA Rosemount 2110 Level Switch...
- Page 11 November 2020 Quick Start Guide Functions Table 3-2 shows the switched electrical outputs from the PNP and Direct Load electronics for each mode selection. Table 3-2: Functions Mode: dry on, high level alarm Mode: wet on, low level alarm PLC (positive ∆U ∆U output)
- Page 12 Connected to a good earth ground at the power supply end. Figure 3-1: Signal Cable Shield Grounding at Power Supply End A. Trim shield and insulate B. Minimize distance C. Trim shield D. Connect shield back to the power supply ground Rosemount 2110 Level Switch...
- Page 13 November 2020 Quick Start Guide Figure 3-2: Signal Cable Shield Grounding at Instrument End A. Trim shield and insulate B. Minimize distance C. Trim shield D. Connect shield back to the power supply ground Quick Start Guide...
-
Page 14: Connect Wiring And Power Up
Quick Start Guide November 2020 Connect wiring and power up The Rosemount 2110 meets IP66 and IP67 weatherproof ratings when correctly assembled with the supplied connector and suitable cable. Ensure seals are in place to maintain the weatherproof ratings. Procedure Verify the power supply is disconnected. - Page 15 November 2020 Quick Start Guide 5. Ensure proper grounding (see Grounding). Make sure grounding is done according to national and local electrical codes. Failure to do so may impair the protection provided by the equipment. 6. Re-fit the plug cover and tighten the cable gland. a) The plug cover can be re-fitted in any one of four positions.
- Page 16 November 2020 c) Secure the plug cover with the plug screw and washer, and tighten cable gland. d) If possible, arrange the wiring with a drip loop. 7. Connect the power supply when ready to apply power. Rosemount 2110 Level Switch...
-
Page 17: Product Certifications
DIBt/WHG regulations. Certified under safety devices for tanks and piping related to water pollution control. Canadian Registration Number 0F04227.2C The requirements of CRN are met when a Rosemount 2110 is configured with a NPT threaded process connection. Technical Regulation Customs Union (EAC), ordinary locations mark Certificate TCRU C-GB.AB72.B.01385... - Page 18 4. If the level switch is installed in a stub then, to ensure clean-ability, the length (L) must not exceed the diameter (D) with a minimum diameter (D) of 46 mm. Rosemount 2110 Level Switch...
- Page 19 November 2020 Quick Start Guide 5. The certification of the level switch relies upon the following materials used in its construction: a. Product contact surfaces Probe: Stainless steel 316/316L b. Non-product contact surfaces Enclosure: Stainless steel 304 type Lens: Nylon 12 Seals: Nitrile rubber Connector:...
- Page 20 Assumption of conformity is based on the application of the harmonized standards and, when applicable or required, a European Union notified body certification, as shown in the attached schedule. Manager Product Approvals (signature) (function) 9/3/2020 Dajana Prastalo (name) (date of issue) Rosemount 2110 Level Switch...
- Page 21 November 2020 Quick Start Guide Figure 5-2: EU Declaration of Conformity (Page 2) EU Declaration of Conformity No: RMD 1069 Rev. H EMC Directive (2014/30/EU) Rosemount 21100****; Rosemount 21101**** Harmonized Standards: EN 61326-1:2013, EN 61326-2.3:2013 LV Directive (2014/35/EU) Rosemount 21100**** Harmonized Standards: EN 61010-1:2010 RoHS Directive (2011/65/EU) The Model 2110***** is in conformity with Directive 2011/65/EU of the European...
- Page 22 O: Indicate that said hazardous substance in all of the homogeneous materials for this part is below the limit requirement of GB/T 26572. 意为在该部件所使用的所有均质材料里,至少有一类均质材料中该有害物质的含量高于 GB/T 26572 所规定的限量要求. X: Indicate that said hazardous substance contained in at least one of the homogeneous materials used for this part is above the limit requirement of GB/T 26572. Rosemount 2110 Level Switch...
- Page 23 November 2020 Quick Start Guide Quick Start Guide...
- Page 24 The Emerson logo is a Twitter.com/Rosemount_News trademark and service mark of Emerson Electric Facebook.com/Rosemount Co. Rosemount is a mark of one of the Emerson Youtube.com/user/ family of companies. All other marks are the RosemountMeasurement property of their respective owners.