Honeywell Dolphin 7800 Quick Start Manual
Hide thumbs
Also See for Dolphin 7800:
- Product data (8 pages) ,
- User manual (178 pages) ,
- Quick start manual (17 pages)
Table of Contents
Quick Links
See also:
Product Data, User Manual
QUESTIONS?
Ask the experts at POSMicro.com.
1.800.241.6264
Live Chat Now
Monday - Friday 6 AM to 5 PM Pacific Time
1.800.241.6264
Honeywell Dolphin
7800 Quick Start
More information available at
BULk DISCOUNTS
FREE SHIPPING*
*Free ground shipping to the continental USa on orders over $100.
For Help Call
POSMicro.com
SE HaBLa
ESpañOL
Table of Contents

Related Manuals for Honeywell Dolphin 7800


Summary of Contents for Honeywell Dolphin 7800
- Page 1 For Help Call 1.800.241.6264 Honeywell Dolphin 7800 Quick Start More information available at POSMicro.com QUESTIONS? BULk DISCOUNTS SE HaBLa Ask the experts at POSMicro.com. ESpañOL FREE SHIPPING* 1.800.241.6264 Live Chat Now [email protected] Monday - Friday 6 AM to 5 PM Pacific Time...
-
Page 2: Quick Start Guide
™ Dolphin 7800 Quick Start Guide Aller à www.honeywellaidc.com pour le français. Vai a www.honeywellaidc.com per l'italiano. Für Deutsch gehe zu www.honeywellaidc.com. Ir a www.honeywellaidc.com para español. Para Português, acesse www.honeywellaidc.com.br. Перейти на русскоязычный сайт www.honeywellaidc.com. Pro češtinu jdi na www.honeywellaidc.com. Pre slovenčinu choď... -
Page 3: Technical Assistance
Disclaimer Honeywell International Inc. (“HII”) reserves the right to make changes in specifications and other information contained in this document without prior notice, and the reader should in all cases consult HII to determine whether any such changes have been made. -
Page 4: Front Panel
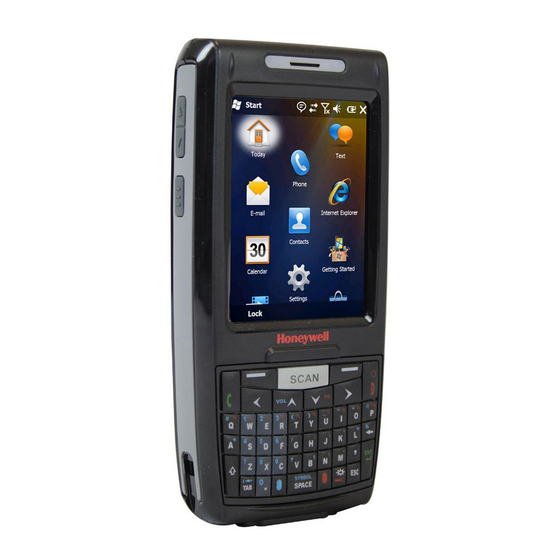
Front Panel Note: Your Dolphin model may differ from the model illustrated in this guide; however, the features noted are standard for all 7800 models unless otherwise indicated. Front Speaker Charge Indicator General Notification LED Touch Panel Volume Control Display Buttons Left Scan/ Right Scan/... -
Page 5: Back Panel
Back Panel Scan/Imaging Engine Window* Stylus/Stylus Slot Rear Speaker Camera Flash Stylus Tether/ Color Camera Lanyard Slot Lens Battery Release Button Battery Lock Hand Strap SIM/Memory Card Socket (located under battery) Battery Pack * LED and Laser Aimer Aperture Releasing the Hand Strap... -
Page 6: Installing The Battery Pack
We recommend use of Honeywell Li-ion battery packs. Use of any non- Honeywell battery may result in damage not covered by the warranty. Once the battery is installed, connect the terminal to one of the Dolphin 7800 charging peripherals to charge the battery pack. - Page 7 Mating wet components may cause damage not covered by the warranty. HomeBase (Model 7800-HB) The 7800-HB charger is designed for use with Dolphin 7800 model terminals, standard battery pack model 7800-BTSC (Li-ion 3.7V, 8.9 watt hour), and extended battery pack models 7800-BTXC and 7800-BTXCW (Li-ion 3.7V, 14.8 watt hour) manufactured for Honeywell International Inc.
- Page 8 The internal temperature of the auxiliary battery is too Flashing hot or there is a battery error. Charge the auxiliary battery in a cooler environment or replace the battery with a new Honeywell battery. USB Port Communication Green A USB connection is established with the host...
- Page 9 Charging/Communication Cables (Model 7800-DEX, 7800-USB, and 7800-USBH) Use only a UL Listed power supply, which has been qualified by Honeywell with output rated at 5VDC and 3A with the device. Plug Adapter Plug Adapter Power Adapter Cable Host Device Client...
-
Page 10: Turning The Device On/Off
Turning the Device On/Off Press the Power key to turn the terminal ON. Press and hold the Power key for approximately 5 seconds to turn the terminal OFF . Note: You should always turn the device OFF before removing the battery. Suspend Mode The terminal automatically enters Suspend Mode when the device is inactive for a programmed period of time. - Page 11 Installing the SIM Card and/or Memory Card 1. Turn OFF the terminal. 2. Release the hand strap and remove the battery pack. 3. Remove the screws and the protective shield covering the SIM/memory card socket. 4. Unlock the SIM card latch by sliding the latch toward the stylus slot. 5.
- Page 12 9. Close and lock the memory card latch. 10. Insert the SIM card. Align the chamfered corner of the card with the chamfered corner of the socket. 11. Close and lock the SIM card latch. 12. Reinstall the shield and screws to protect the socket. 13.
- Page 13 Modifier and Navigation Keys Function The blue and red keys are used in combination with other keys to type special characters and perform system func- Blue tions. The keyboard is color-coded to indicate the character typed or function performed when specific keys are pressed immediately after the blue or red modifier key.
-
Page 14: Function Keys
Function Keys Function Activates the scan and wakes the terminal from Suspend Mode. The key location allows convenient one- handed image-taking and/or bar code decoding. Answers a phone call or initiates a phone call. Ends and diconnects a phone call. Turns the keyboard backlight ON or OFF. -
Page 15: Aiming Beam
Using the Scan Engine 1. Tap > Demos > Scan Demo 2. Point the Dolphin terminal at the bar code. 3. Press and hold the SCAN key. The aiming beam or pattern appears and the general notification LED illuminates red. 4. -
Page 16: Resetting The Terminal
There are three types of system resets: a soft reset, a hard reset, or a factory reset. The soft and hard resets preserve all data stored in the file system. Contact a Honeywell technical support representative for more information on how to perform a factory reset. -
Page 17: Hard Reset (Cold Boot)
For additional information on ActiveSync or Windows Mobile Device Center visit www.microsoft.com. We recommend use of Honeywell peripherals, power cables, and power adapters. Use of any non-Honeywell peripherals, cables, or power adapters may cause damage not covered by the warranty.