Honeywell Dolphin CT60 Series User Manual
Hide thumbs
Also See for Dolphin CT60 Series:
- User manual (124 pages) ,
- Quick start manual (19 pages) ,
- Manual (17 pages)

Related Manuals for Honeywell Dolphin CT60 Series


Summary of Contents for Honeywell Dolphin CT60 Series
- Page 1 Dolphin™ CT60 Series CT60, CT60 NI, and CT60 models for Hazardous Locations Mobile Computer powered by Android ™ User Guide...
- Page 2 Disclaimer Honeywell International Inc. (“HII”) reserves the right to make changes in specifications and other information contained in this document without prior notice, and the reader should in all cases consult HII to determine whether any such changes have been made. The information in this publication does not represent a commitment on the part of HII.
-
Page 3: Table Of Contents
TABLE OF CONTENTS Customer Support ........................vii Technical Assistance ......................vii Product Service and Repair ....................vii Dolphin CT60 Non-Incentive (NI) Versions Only (CT60-L0N-xxxxx1F, CT60-L1N-xxxxx1F) ..............vii Dolphin CT60 Models for use in Hazardous Locations (CT60-L0N-xSxxx1E, CT60-L1N-xSxxx1E)..............vii Limited Warranty ........................viii Chapter 1 - About the Computer Features........... - Page 4 Restore Default Button Action ..................28 View and Manage Notifications ..................28 Open Quick Settings ......................29 Customize the Home Screen ....................29 Customize the Favorites Tray ...................30 Use Google™ Search......................30 About Screen Gestures .......................30 Set the Time Zone........................31 About Honeywell Applications....................32 Dolphin CT60 Mobile Computer...
- Page 5 Applications You Can Download to the Mobile Computer ..........33 About Honeywell Enterprise Browser ..............33 About Honeywell Launcher..................34 Unlock Developer Options......................34 Chapter 3 - Use the Image Engine ...............35 About the Image Engine......................35 About the Scan Wedge Feature..................35 Change the Scanner Settings ....................36 Change the Bluetooth Scanner Settings ..............36...
- Page 6 Answer the Phone........................52 Switch Apps During a Phone Call ...................53 Make an Emergency Phone Call....................53 Configure Phone Settings......................53 Chapter 5 - Use the Camera................55 About the Color Camera......................55 How to Zoom..........................55 Take a Photo...........................55 Change Camera Settings......................56 Record a Video ..........................57 Change Video Settings ......................57 Chapter 6 - Configure the Computer............
- Page 7 About Software Updates ......................85 About Transferring Files via USB Connection............85 Install Software Updates with AutoInstall................86 Optional microSD Card Method ..................86 About the Honeywell Upgrader ....................87 Install OTA Updates ......................87 Restart (Reboot) the Computer ....................88 About an Enterprise Data Reset .....................89 Before You Begin........................89...
- Page 8 Enterprise Data Reset the Computer ................89 About a Factory Data Reset .....................90 Before You Begin ........................90 Factory Data Reset the Computer ..................90 Clean the Computer........................91 Computer Agency Information....................93 Label Locations ........................93 Physical and Environmental Specifications ..............94 Bar Code Symbologies.......................94 N6603SR Slim Imager Engine Reading Distances ............95 N6603SR Slim Imager Engine Field of View/Resolution ........96 N6703SR Slim Imager Engine Reading Distances ............96 N6703SR Slim Imager Engine Field of View/Resolution ........98...
-
Page 9: Customer Support
For our latest contact information, see www.honeywellaidc.com/locations. Product Service and Repair Honeywell International Inc. provides service for all of its products through service centers throughout the world. To find your service center, go to www.honeywellaidc.com and select Support. -
Page 10: Limited Warranty
Limited Warranty For warranty information, go to www.honeywellaidc.com and click Get Resources > Product Warranty. viii Dolphin CT60 Mobile Computer... -
Page 11: Chapter 1 - About The Computer Features
(GPS) receiver that supports GPS protocols including, Simultaneous GNSS Receiver Support for GPS, GLONASS, Galileo and Beidou GPS. Honeywell also offers CT60 models for use in hazardous environments. Note: Throughout this manual, all versions of the mobile computer are referred to as the CT60 unless information is specific to a particular model. - Page 12 Integrated ambient light sensor, proximity sensor, accelerometer, gyroscope, magnetometer, and pressure sensor Choice of Honeywell N6603 or N6703 High performance 2D imager with ergonomic scan buttons WLAN IEEE 802.11a/b/g/n/ac radio; Wi-Fi certified Bluetooth™ V5.0 and Bluetooth Low Energy (BLE) technology support...
-
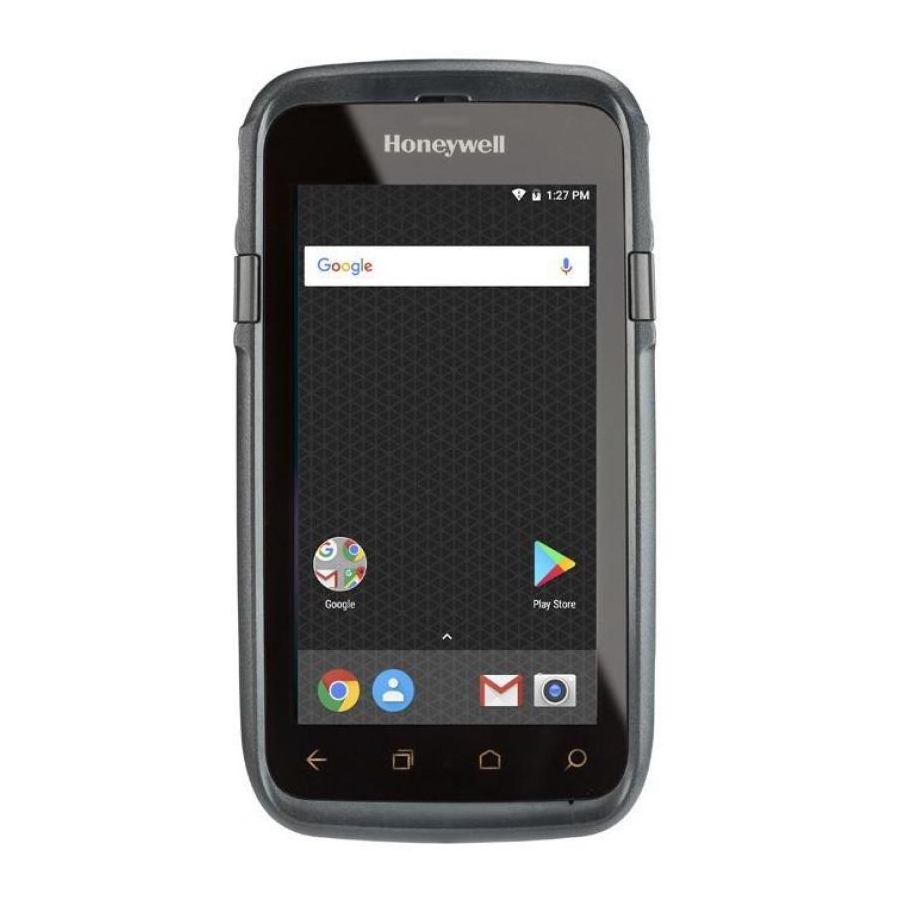
Page 13: Features Of The Ct60
Features of the CT60 Power Button Speaker Good Read LED Scan Buttons Battery Status / Notification LED Volume Buttons Touch Panel Navigation Panel Microphone Dolphin CT60 Mobile Computer... - Page 14 Note: Hand strap not shown. Imager (LED / Laser Aperture) Laser Safety Label Location Camera Lens SIM Card 1 Door* Camera Button microSD Card Door SIM Card 2 Door Battery Latch (CT60L1N Models Only) I/O Connector Battery * Phone feature is available only on CT60L1N models. For all models, when using a UICC card for NFC Secure Element NFC link encryption, install the card in SIM slot 1.
-
Page 15: About The Battery
Dolphin CT60 computers are designed for use with battery model CT50-BTSC manufactured for Honeywell International Inc. For a list of compatible accessories for the CT60 mobile computer series and their part numbers, see the Dolphin CT60 Accessory Guide, available for download from the CT60 product page at www.honeywellaidc.com. -
Page 16: About Ct60 Models For Use Hazardous Locations (Ct60-L0N-Xsxxx1E, Ct60-L1N-Xsxxx1E)
To charge the battery before you install it in the computer: • Insert the battery into the Honeywell Quad Battery Charger or the battery well of a CT50 HomeBase or eHomeBase. To charge the battery after installing it in the computer: •... -
Page 17: Battery Replacement
Battery Replacement If your battery power is low, you need to either charge the battery in the computer or replace it with a charged battery. Warning: If you have a CT60 model certified for use in hazardous locations, read Important Information on page 5. -
Page 18: Replace The Battery
Replace the Battery Warning: If you have a CT60 model certified for use in hazardous locations, read Important Information on page 5. 1. Depending on your model type, either power off the CT60 or place the unit in Swap Battery mode. To learn how, see Swap Battery Mode. -
Page 19: About The Battery Status
4. Lift up on the edge of the battery and remove it from the computer. 5. Insert the charged battery into the computer. 6. Apply pressure to the battery and slide the lock toward the top of the computer into the locked position. 7. -
Page 20: Change The Battery Status Led Behavior
The Battery status LED in the upper right corner of the computer indicates the charging status of the battery. Battery LED Honeywell Battery LED Behavior (Factory Default/Out-of-Box Configuration) Connected to Power LED State Description Blinking amber Battery level is below 20%... -
Page 21: Check The Battery Level And Usage
3. Choose one of these options: • Default Battery LED (optional Android OS configuration) • Honeywell Battery LED (factory default, out-of-box configuration) • No Battery LED Check the Battery Level and Usage In addition to the Battery status icon and LED, you can monitor the battery status from the Settings app. -
Page 22: Battery Recommendations And Safety Precautions
• Avoid dropping the battery or computer. If you suspect that the battery or computer is damaged, send it to Honeywell service center for inspection. • Replace the battery only with another CT50-BTSC model battery. This battery has been tested in accordance with applicable safety standards. -
Page 23: Enable Airplane Mode
• Do not drop the battery or apply mechanical shocks or pressure to it. • Do not disassemble or open, crush, bend or deform, puncture, shred or burn the battery. • Do not incinerate, microwave, throw into a fire, or expose batteries to temperatures above the documented maximum rating. -
Page 24: Unlock The Screen
Once you complete the Setup Wizard, the Welcome screen no longer appears when you power on the computer and Provisioning mode is automatically turned off (disabled). Scanning a bar code to install of applications, certificates, configuration files, and licenses on the computer is restricted. To learn more About Provisioning Mode, see page 79. -
Page 25: Select A Touch Screen Profile To Optimize Performance
Note: Maximum glove thickness of 2 mm (0.08 inches) for touch screen response. 1. Swipe up from the bottom of the Home screen to access all apps. 2. Tap Settings > Honeywell Settings > Touch Screen Profile. 3. Choose one of the following options: •... -
Page 26: About The Audio Features
Good Read LED Good Read LED Descriptions LED Color Description Green Good read of a bar code. Blinking green The data collection engine is processing or starting up. About the Audio Features The CT60 has a speaker, a microphone, and several software tools to configure sound volume or enable vibration feedback. -
Page 27: Audio Settings
Depending on OS version: 1. Press the Volume down button until the computer vibrates. 2. To turn on the Alarms only feature, press the Volume Down button again with the volume slider open. 1. Press one of the Volume buttons until the volume slider appears. 2. -
Page 28: Insert A Microsd Card
Insert a microSD Card You can use a microSD card to increase file storage capacity or to install software. Honeywell recommends the use of Single Level Cell (SLC) industrial grade microSD or microSDHC memory cards with the computer for maximum performance and durability. - Page 29 4. Disconnect one end of the hand strap from the computer. 5. Press and hold down the small button on the battery latch, and then slide the latch toward the bottom of the computer to unlock the battery. 6. Lift up on the edge of the battery and remove it from the computer. Dolphin CT60 Mobile Computer...
- Page 30 7. Lift up the edge of the SD card access door. 8. Press down gently and slide the card holder toward the open access door. Lift the edge of the holder up. 9. Insert the microSD card into the card holder with the contacts facing out. Dolphin CT60 Mobile Computer...
- Page 31 10. Close the holder with the card inserted. Press down gently on the card holder and slide it into the locked position. 11. Close the SD card access door. 12. Install the battery and slide the battery latch toward the top of the computer to engage the lock.
-
Page 32: How To Transfer Files
How to Transfer Files To transfer files you need to physically connect the CT60 mobile computer to your workstation (e.g., laptop or desktop computer) through a USB connection. When the mobile computer is connected and USB is configured for file or photo transfer, use a file browser (e.g., File Explorer or Windows Explorer) on your workstation to transfer files between the two computers. - Page 33 Accessory Description Battery Replacement or spare 3.6 V Li-ion rechargeable battery for the CT60 (Model CT50-BTSC) (P/N 318-055-001 and 318-055-005). eHomeBase Use the eHomeBase to hold a computer with a battery installed, charge (Model CT50-EB) a spare battery pack, charge the main battery pack, and provide power to the mobile computer.
- Page 34 Dolphin CT60 Mobile Computer...
-
Page 35: Chapter 2 - About The User Interface And Applications
ABOUT THE USER INTERFACE AND APPLICATIONS Use this chapter to learn about the user interface and how to interact with the screen. You can also use this chapter to learn about the Honeywell applications on the computer. About the User Interface The Android operating system provides a touch-friendly and easy- to-navigate user interface. -
Page 36: Navigation And Function Buttons
Home Screen Features Item Description Notifications panel / Status icons to the left tell you when an app has sent notifications, such Status bar as an arriving message. System icons to the right display the current wireless and network connection state and battery level. Search bar Search the Internet or the computer using Google™. -
Page 37: About Status Bar Icons
1. Swipe up from the bottom of the Home screen to access all apps. 2. Tap Settings > Honeywell Settings > Key Remap. 3. Tap the plus sign (+). 4. Press the button you want to remap or select one of the virtual buttons. -
Page 38: Restore Default Button Action
1. Swipe up from the bottom of the Home screen to access all apps. 2. Tap Settings > Honeywell Settings > Key remap. 3. Tap the clean icon 4. Choose the remapped button(s) you want restored to the default setting. -
Page 39: Open Quick Settings
When a notification icon appears in the status bar at the top of the screen: 1. Swipe down from the top of the screen to open the notifications panel. 2. Respond to the notification. You can take one of the following actions: •... -
Page 40: Customize The Favorites Tray
Customize the Favorites Tray Modify the Favorites tray to contain the apps you use the most. 1. Tap and hold the app icon you want to replace on the Favorites tray. 2. Drag and drop the app on “X Remove” at the top of the screen. 3. -
Page 41: Set The Time Zone
Slowly move your finger across the screen, without pausing when you first touch. For example, you can slide a notification to the left until the Settings gear is revealed. • Double-tap Tap quickly twice on a web page, map, or other screen to zoom in. Double-tap again to zoom out. -
Page 42: About Honeywell Applications
Honeywell applications help you troubleshoot and connect your computer to other devices and networks. Some of the applications in this table are located in the Power Tools app. To learn more about Honeywell Power Tools, go to www.honeywellaidc.com to download the Dolphin Power Tools User Guide. -
Page 43: Applications You Can Download To The Mobile Computer
Applications You Can Download to the Mobile Computer You can download Honeywell applications to extend the capabilities of the computer. You may need to purchase an license to run some applications. To learn more about the applications described in this section and other Honeywell software solutions, go to www.honeywellaidc.com... -
Page 44: About Honeywell Launcher
You can also use Honeywell Launcher together with Honeywell Enterprise Browser to create a single-purpose device configuration. If Launcher is not included on your computer model, you can download a trial version of the software for evaluation. -
Page 45: Chapter 3 - Use The Image Engine
You can modify the Default Profile or create new profiles for custom applications from Settings > Honeywell Settings > Scanning. Use the imager as a camera to capture black and white images, such as signatures or pictures of damaged inventory. -
Page 46: Change The Scanner Settings
Changes you make to the Default profile apply to all applications with no profile assigned. 1. Swipe up from the bottom of the Home screen to access all apps. 2. Tap Settings > Honeywell Settings > Scanning. 3. Tap Internal Scanner > Default Profile. 4. Select from the following: Data Processing Settings, •... -
Page 47: Default Scan Settings
1. Open the Default profile. 2. Tap in the upper right corner of any of the scan settings screens for the profile. 3. Tap Restore all defaults. Default Scan Settings Use the following sections to understand the scan settings available for scanner profiles. -
Page 48: Symbology Settings
‘//’ ACTION '$' extra-data Where: ACTION and extra-data are any string of characters. Launches an application listening for the intent. Intent action: “com.honeywell.scantointent.intent.action.” + ACTION Intent extra: “com.honeywell.scantointent.intent.extra.DATA” contains the remainder of the bar code data after the first ‘$’ character. - Page 49 To view a list of default settings for supported symbologies, see page Dolphin CT60 Mobile Computer...
-
Page 50: Decode Settings
Tap the check box to toggle the feature on or off. • Select Center Decode to adjust the Window dimensions. • Honeywell recommends leaving the settings at 50 (default) to define the “center” area for the bar code. Configurable parameters: •... -
Page 51: Imager Settings
Setting Description Default Region of Interest Set the ROI for decoding. Options include: Disabled • Disable ROI is disabled and the entire original image is sent to the decoder. • Standard Use the aimer position to weight activity. Activity calculated on the row and the column in the middle of each cell. -
Page 52: Notification Settings
To create a scan setting profile for a custom app on the computer: 1. Swipe up from the bottom of the Home screen to access all apps. 2. Tap Settings > Honeywell Settings > Scanning > Internal Scanner. 3. Tap in the upper right corner of the app screen. -
Page 53: Delete A Scan Setting Profile
1. Swipe up from the bottom of the Home screen to access all apps. 2. Tap Settings > Honeywell Settings > Scanning > Internal Scanner. 3. Tap and hold the profile you want to delete, and then select Delete. About the Optional Digital Scan Button By default, the imager is enabled for scanning with the left and right scan buttons configured to trigger the imager. -
Page 54: Scan Bar Codes
(360°) bar code scanning and an aiming beam is provided to help assist with targeting bar codes. Before you start scanning bar codes, go into Settings > Honeywell Settings > Scanning > Internal Scanner and modify the scan profile to enable only the bar code symbologies that you need. -
Page 55: About Scanning Configuration Bar Codes
3. Center the aiming beam over the bar code. Make sure the entire bar code is inside of the illumination frame. 4. Release the Scan button when the computer beeps, and the Good Read LED briefly turns on. The bar code information is entered into the application in use. Note: Not all bar code symbologies are enabled by default. -
Page 56: Change The Scan Demo Symbology Settings
7. Release the Scan button when the computer beeps, and the Good Read LED briefly turns on. Bar code information appears on the screen. Note: In the Scan Demo app, not all bar code symbologies are enabled by default. If a bar code does not scan, the correct symbology may not be enabled. -
Page 57: Chapter 4 - Use The Phone
CHAPTER USE THE PHONE You can use the phone feature to make and receive phone calls and establish mobile data connections through wireless wide-area networks (WWANs). Note: Phone and mobile data features are only supported on CT60 WWAN models (CT60L1N). About the Phone Phone features on the computer include a speaker and a microphone. -
Page 58: Select A Sim Card Slot
Select a SIM Card Slot CT60 WWAN mobile computers (model CT60L1N) come equipped with two SIM card slots. The dual slots give you the flexibility to install two micro-SIM cards in the computer so that you can then activate and switch between them whenever you choose. - Page 59 4. Disconnect one end of the hand strap from the computer. 5. Press and hold down the small button on the battery latch, and then slide the latch toward the bottom of the computer to unlock the battery. 6. Lift up on the edge of the battery and remove it from the computer. 7.
- Page 60 8. Press down gently and slide the card holder into the unlocked position. Lift the edge of the card holder up. 9. Insert the card in the holder with the contacts facing out. 10. Close the holder with the card installed. Press down gently on the holder and slide it into the locked position.
- Page 61 11. Close the SIM card access door. 12. Install the battery and slide the battery latch toward the top of the computer to engage the lock. 13. Install the hand strap. 14. Press the Power button to turn on the computer. Dolphin CT60 Mobile Computer...
-
Page 62: Make A Phone Call
Make a Phone Call Once the phone is activated, you can make a phone call. 1. Tap in the favorites tray to open the phone app. 2. Use one of the methods below to enter the telephone number you want to call. •... -
Page 63: Switch Apps During A Phone Call
Switch Apps During a Phone Call You can multitask while a phone call is in progress. For example, you can use the Calendar app to check your schedule during a call. Note: Depending on your WWAN connection and carrier, apps that need a data connection may be unable to access online data while the phone call is in progress. - Page 64 Dolphin CT60 Mobile Computer...
-
Page 65: Chapter 5 - Use The Camera
CHAPTER USE THE CAMERA Use this chapter to learn how to take pictures and record videos with the color camera. About the Color Camera The CT60 comes equipped with a 13-megapixel color camera, 4K video with image stabilization, and advanced software features for enhanced exposure control for taking pictures and videos. -
Page 66: Change Camera Settings
3. The camera automatically adjusts the focus but you can tap the screen to modify the focal point. By default, the camera senses the lighting in the environment and turns the flash on, if needed. 4. Press the Camera button or tap to take a photo. -
Page 67: Record A Video
Record a Video This section explains how to record video with the camera in the computer. 1. Tap the Snapdragon Camera icon in the favorites tray or press the Camera button on the left side of the computer. 2. Tap mode selection in the bottom right corner of the app. - Page 68 Dolphin CT60 Mobile Computer...
-
Page 69: Chapter 6 - Configure The Computer
CHAPTER CONFIGURE THE COMPUTER Use this chapter to learn about the available methods for configuring your mobile computer. You can also use this chapter to learn how to configure network communications and wireless security. How to Configure the Computer You can configure many parameters on the computer such as the bar code symbologies it decodes or the network settings. -
Page 70: About The Structure Of The Settings App
About the Structure of the Settings App Use this section to learn about the structure of the Settings app so you can find parameters quickly. Note: The Settings app varies by computer model and OS version. Your computer may not include all the features outlined in this section. - Page 71 Setting Description Set the password parameters for a virtual private network (VPN) connection. Airplane mode Turn Airplane mode On or Off. Private DNS Select Private DNS Mode. Connected Devices In the Settings app, select Connected devices to view current connected devices and to access the following settings.
- Page 72 Setting Description Notifications • Manage notifications (e.g., turn notifications On/Off). • Set rules for notifications on the screen lock. • Turn notification dots On/Off. • Turn LED blink notification On/Off. • Set the default sound for all notifications. Default apps View and manage default app use.
- Page 73 Setting Description Wallpaper Set the wallpaper. Advanced Sleep Set the inactivity time limit before the unit automatically turns of the screen to save battery power (seconds or minutes). Auto-rotate screen Set the screen to switch from portrait to landscape when the unit is rotated.
- Page 74 Automatically sync data Turn auto-sync On or Off for accounts. Turning the feature On allows apps to refresh data automatically. Honeywell Settings In the Settings app, select Honeywell Settings to access the following settings. Setting Description Battery LED Configures the battery LED behavior. To learn more see,...
- Page 75 Enable and configure the optional digital scan button. To learn more, see Button About the Optional Digital Scan Button on page 43. Honeywell Power Turn attended mode on or off. Setting HXLogger The HXLogger is an advanced diagnostic log service that provides a basic log service, plug-ins for modified log services, and a log manager.
- Page 76 Setting Description Staging Hub Use this agent and settings to connect the computer to the Honeywell Staging Agent Hub Foundation software platform; a centralized software platform IT integrators and administrators can use as a solution for managing, monitoring and deploying Honeywell devices in a connected workspace environment.
- Page 77 Setting Description Interaction Set interaction controls that may aid physical accessibility levels. controls • Accessibility Menu provides large on-screen menus. • Configure Switch Access. • You can use a switch or keyboard to control your device • Set the Dwell timing (Click after pointer stops moving) delay. •...
-
Page 78: About Network Communications
Setting Description Reset options Select from the following reset options: • Reset Wi-Fi, Mobile & Bluetooth Use to reset all network settings, including Wi-Fi, Mobile data and Bluetooth. • Reset app preferences. Use reset app preference back to defaults. This apps you disabled, notification changes, default app actions set, background data restrictions for apps and permission restrictions. -
Page 79: Configure Proxy Settings For A Wi-Fi Network
To add a network if it does not appear on the list: a. Navigate to the end of the discovered network list, and then tap Add network. b. Type the Wi-Fi network name (SSID). c. Choose a security protocol and add any required information. d. -
Page 80: Disable Wi-Fi Notifications And Set Wlan Radio Sleep Parameter
Disable Wi-Fi Notifications and Set WLAN Radio Sleep Parameter By default, when Wi-Fi is enabled, you receive notifications in the Status bar when the computer discovers a wireless network. You can disable these notifications. 1. Swipe up from the bottom of the Home screen to access all apps. 2. -
Page 81: Add A Vpn
Add a VPN Before you can connect to a VPN, you must create a VPN profile. 1. Swipe up from the bottom of the Home screen to access all apps. 2. Tap Settings > Network & Internet > Advanced > VPN. 3. -
Page 82: About Certificates
Wi-Fi Protected Access (WPA) • 802.1x Honeywell recommends WPA2 security with PSK (Personal) or 802.1x (Enterprise) key management. Before you set security, you need to enable the radio, set the date, and set the SSID on your computer. To use 802.1x security, you need to load a root certificate on your computer. -
Page 83: Disable Or Remove Certificates
Disable or Remove Certificates If a user or system certificate is compromised, or your organization chooses not to trust it, you can disable or remove the certificate. 1. Swipe up from the bottom of the Home screen to access all apps. 2. -
Page 84: Rename The Computer
• Verify the pairing PIN is the same on both device, and then tap Pair. • If the pairing request requires a PIN, enter the PIN, and then tap Pair. When the device is successfully paired with the computer, the device name appears under Paired devices. -
Page 85: Rename Or Unpair A Paired Device
3. Tap Device Name to change the device name. Type the new name and then tap Rename. Rename or Unpair a Paired Device You can rename a paired device to make it easier to identify on the list or unpair the device to remove it from the paired list. -
Page 86: Unpair A Paired Scanner
4. For Honeywell branded scanners tap Honeywell or for Intermec branded scanners tap Intermec. 5. Scan the Scan to connect barcode displayed on screen. 6. When the scanner is successfully paired with the computer, the scanner name appears under Connected Device. -
Page 87: About Serial And Usb Communications
USB Troubleshooting • If you have a problem with your workstation computer recognizing the USB device, try downloading and installing the Honeywell-aidc-usb-driver. The driver is part of the Honeywell_Mobility SDK_Android software.zip file. To learn where to get the software, see Developer Information on page 79. -
Page 88: Minimum Requirements For Bluetooth Tethering
5. Select USB tethering to initiate the shared data connection. Note: To stop sharing the connection, tap USB tethering again to turn Off the feature or disconnect the USB accessory. Minimum requirements for Bluetooth Tethering • All devices must support Bluetooth communication. Set up and Connection 1. -
Page 89: Developer Information
Configuration bar codes do not scan and process. • \honeywell\autoinstall folders are inaccessible. Note: To learn more about network and security for Honeywell mobile computers with Android operating systems, go to www.honeywellaidc.com. Enable or Disable Provisioning Mode 1. Swipe up from the bottom of the Home screen to access all apps. -
Page 90: About Wi-Fi Staging
About Wi-Fi Staging Overview You can use the Honeywell Wi-Fi Staging app to quickly set up new devices by configuring one device and using it to stage others. Wi-Fi Staging can also be used to enroll devices in an Mobile Device Management (MDM) system by connecting units to a specified network and downloading and installing the specified MDM client app. - Page 91 Basic configuration includes the most common system settings. 1. Launch the Wi-Fi Staging app on the server device by tapping Settings > Honeywell Settings > Wi-Fi Staging. 2. Tap Basic Configs to start the configuration wizard. 3. System language: Tap to add a language.
-
Page 92: Advanced Configuration
Note: Do not change the default names of .xml files. (For example, DeviceConfig.xml is acceptable, but DeviceConfig1.xml is not.) 1. Choose one device to act as the server. 2. Launch Wi-Fi Staging app on the server by tapping Settings > Honeywell Settings > Wi-Fi Staging. 3. Tap Advanced Configs. -
Page 93: Set Up Client Devices
1. Set up a server device (see page 80). 2. Turn on the client device and launch the Wi-Fi Staging app by tapping Settings > Honeywell Settings > Wi-Fi Staging. 3. Tap To be Staged. 4. A message will display notifying you that the Wi-Fi settings on the client device will be reset as part of the staging process. -
Page 94: Log Files
Log Files Wi-Fi Staging saves a key process and exception log on the device in the following directory: /sdcard/honeywell/Android/data/com.honeywell.wifistaging/Log/ This directory can be accessed through USB if Provisioning Mode is enabled. See your device’s user guide for more information. -
Page 95: Chapter 7 - Manage And Maintain The Computer
4. Create an account if you have not already created one. You must login to download the software. 5. Install the Honeywell Download Manager tool on your workstation (e.g., laptop or desktop computer) prior to trying to download any files. -
Page 96: Install Software Updates With Autoinstall
1. Swipe up from the bottom of the Home screen to access all apps. 2. Tap Settings > Honeywell Settings > Provisioning mode. 3. Tap the toggle button to turn Provisioning mode On. 4. Save the upgrade file (*.zip or *.apk) in one of the following folders on the CT60 mobile computer: •... -
Page 97: About The Honeywell Upgrader
9. Once installation is complete, turn Provisioning mode Off. About the Honeywell Upgrader Use the Honeywell Upgrader app (HUpgrader) to check for and install OTA updates, and view the current OTA version installed on the computer. Install OTA Updates... -
Page 98: Restart (Reboot) The Computer
3. Tap , and then tap Select OTA from storage. 4. Select the storage location (i.e., Internal Storage) where you saved the file. 5. Tap the OTA update file. The computer examines the file, and then starts the installation. 6. Once the installation is complete (100%), select OK when prompted to Reboot the computer. -
Page 99: About An Enterprise Data Reset
About an Enterprise Data Reset You can perform an Enterprise data reset if a Reboot did not improve the condition and all other troubleshooting methods have not resolved the issue. This method provides a clean configuration for troubleshooting by erasing all data from the Internal shared storage location on the computer. -
Page 100: About A Factory Data Reset
About a Factory Data Reset A Factory Data Reset should only be performed if you have exhausted all other troubleshooting options. This method reverts the computer back to the factory state by erasing all data in Internal shared storage and the IPSM Card storage locations on the computer. -
Page 101: Clean The Computer
Clean the Computer To keep the computer in good working order, you may need to clean the scanner window, color camera window, and the touch screen. Clean the windows and the touch screen as often as needed for the environment in which you are using the computer. - Page 102 Dolphin CT60 Mobile Computer...
-
Page 103: Computer Agency Information
APPENDIX SPECIFICATIONS Computer Agency Information Dolphin CT60 mobile computers meet or exceed the requirements of all applicable standards organizations for safe operation. The best way to ensure safe operation is to use the mobile computer according to the agency guidelines on the product regulatory sheet, quick start guide, battery insert and in this user guide. -
Page 104: Physical And Environmental Specifications
Physical and Environmental Specifications 1. Go to www.honeywellaidc.com. 2. Type CT60 in the Search box and then press Enter. 3. Select the Products tab. 4. Click the red arrow under the Dolphin CT60 Handheld Computer description. 5. Select one of the following: •... -
Page 105: N6603Sr Slim Imager Engine Reading Distances
1D Symbologies 2D Symbologies Postal Codes Default Default Default UPC/EAN Disabled UPC-A Enabled UPC-E Enabled UPC-E1 Disabled Note: To learn about changing the symbology settings, see Change the Scanner Settings page 36. N6603SR Slim Imager Engine Reading Distances The guaranteed depth of field measurements were taken using these parameters: •... -
Page 106: N6603Sr Slim Imager Engine Field Of View/Resolution
Symbology Near Distance Far Distance 100% UPC 16.5 6.7 mil PDF 417 10 mil DataMatrix/ Aztec N6603SR Slim Imager Engine Field of View/Resolution Focus Standard Range (SR) Horizontal Field Angle (degrees) ±21.2 ±3.5° Vertical Field Angle (degrees) ±16.5 ±3.5° Note: DPI can be calculated based on the following formula: Horizontal DPI = 832 pixels/width of horizontal field of view (inches) Vertical DPI = 640 pixels/width of vertical field of view (inches) N6703SR Slim Imager Engine Reading Distances... - Page 107 15 mil Code 128 1.42 22.52 10 mil Data Matrix 3.27 9.29 5 mil PDF417 4.68 6.97 6.7 mil PDF417 3.78 9.29 6.7 mil QR 4.84 5.79 15 mil QR 1.30 15.35 Typical Specs (200 lux) Symbology Near Distance Far Distance 5 mil Code 39 2.75 11.85...
-
Page 108: N6703Sr Slim Imager Engine Field Of View/Resolution
N6703SR Slim Imager Engine Field of View/Resolution Focus Standard Range (SR) Horizontal Field Angle (degrees) 48 ±2° Vertical Field Angle (degrees) 31 ±2° Note: DPI can be calculated based on the following formula: Horizontal DPI = 832 pixels/width of horizontal field of view (inches) Vertical DPI = 640 pixels/width of vertical field of view (inches) Dolphin CT60 Mobile Computer... - Page 110 Honeywell 9680 Old Bailes Road Fort Mill, SC 29707 www.honeywellaidc.com ™ CT60-A-EN-UG-01 Rev B 11/19...