Table of Contents
Table of Contents

Related Manuals for Honeywell ScanPal EDA52


Summary of Contents for Honeywell ScanPal EDA52
- Page 1 ScanPal™ EDA52 Mobile Computer powered by Android™ User Guide...
- Page 2 Disclaimer Honeywell International Inc. (“HII”) reserves the right to make changes in specifications and other information contained in this document without prior notice, and the reader should in all cases consult HII to determine whether any such changes have been made. HII makes no representation or warranties regarding the information provided in this publication.
-
Page 3: Table Of Contents
TABLE OF CONTENTS Customer Support ........................ix Technical Assistance ......................ix Product Service and Repair ....................ix Limited Warranty ........................ix Chapter 1 - About the Computer Features........... 1 About the Mobile Computer....................... 1 EDA52 Model Overview......................2 Mobile Computer Features ....................3 About the Battery ........................... - Page 4 Customize the Favorites Tray ...................28 Use Google™ Search......................28 About Screen Gestures .......................28 Set the Time Zone........................29 About Honeywell Applications....................30 Applications You Can Download to the Mobile Computer ..........31 Unlock Developer Options .......................33 Chapter 3 - Use the Imager................35 About the Imager .........................35 About the Scan Wedge Feature ..................35...
- Page 5 Change the Bluetooth Scanner Settings ..............36 Restore Default Scan Settings ..................37 Default Scan Settings ......................37 Add a Scan Setting Profile....................43 Delete a Scan Setting Profile ....................44 About ScanHandle Settings.....................44 About the Optional Digital Scan Button ................44 Enable and Configure the Digital Scan Button ............44 Scan Barcodes..........................45 About Scanning Configuration Barcodes..............45 Use the Scan Demo App ......................46...
- Page 6 Start the Settings App ......................57 About the Structure of the Settings App ..............57 About Network Communications ..................68 Connect to a Wi-Fi Network ....................68 Honeywell Wi-Fi Settings....................69 How to Connect to Virtual Private Networks ..............70 About Wireless Security......................71 About Certificates .........................71 About Bluetooth Communications..................73...
- Page 7 Optional microSD Card Method ..................81 About the Honeywell Upgrader ....................81 Install OTA Updates ......................81 Restart (Reboot) the Computer ....................83 About an Enterprise Data Reset .....................83 Before You Begin........................83 Enterprise Data Reset the Computer................84 About a Full Factory Reset......................84 Before You Begin........................84 Full Factory Reset the Computer..................85...
- Page 8 viii EDA52 User Guide...
-
Page 9: Customer Support
Support to search our knowledge base for a solution or to log into the Technical Support portal. Product Service and Repair Honeywell International Inc. provides service for all of its products through service centers throughout the world. Go to sps.honeywell.com... - Page 10 EDA52 User Guide...
-
Page 11: Chapter 1 - About The Computer Features
About the Mobile Computer ScanPal EDA52 mobile computers deliver real-time connectivity, advanced data capture, and future-proof investment protection. All EDA52 models come equipped for fast Wi-Fi connectivity with a WLAN 802.11 a/b/g/n/ac radio and Bluetooth (v5.1) technology that includes Bluetooth Low Energy (BLE) support. -
Page 12: Eda52 Model Overview
• 4GB DDR4 RAM, 64 GB flash memory • 6GB DDR4 RAM, 128 GB flash memory (Two-pin model only) Honeywell S0703-SR (Standard Range) high performance 2D imager USB Type C connector for communication/charging/headset (Two-pin and Health Care models only) High-tier rugged specifications with IP67sealing WLAN IEEE 802.11 a/b/g/n/ac radio;... -
Page 13: Mobile Computer Features
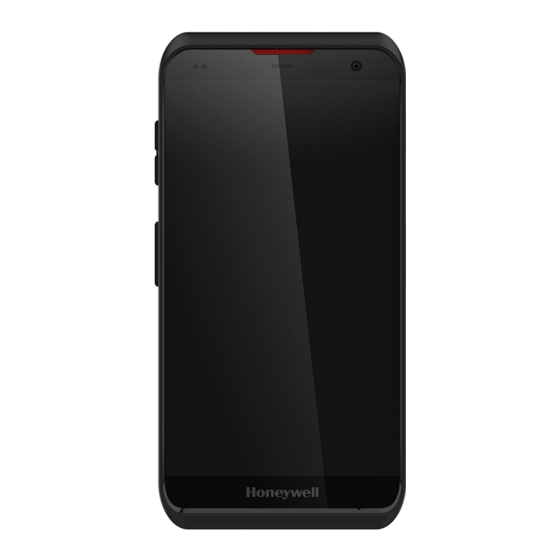
Mobile Computer Features Imager Window (LED/Laser Aperture) Battery Status/ Notification LED Front-facing Camera Scan Status LED Power Button Touch Panel Scan Button Microphone Note: Hand strap not shown. Nano-SIM* and/or MicroSD Card Slot EDA52 User Guide... -
Page 14: About The Battery
The computer uses a rechargeable Li-ion battery as its main power source. Several factors determine the life of the battery, such as display brightness, display timeout, input device, extreme temperature, and battery usage. Honeywell recommends that you keep the battery charged at all times to prevent data loss. -
Page 15: Battery Part Numbers
For a list of compatible accessories, see the EDA52 Accessory Guide, available for download from the product device pages at sps.honeywell.com. Contact your local sales representative for replacement battery ordering information. Caution: Improper battery replacement or incompatible device usage may result in risk of burns, fire, explosion, or other hazard. -
Page 16: Battery Replacement
Battery Replacement If your battery power is low, you need to either charge the battery in the computer or replace it with a charged battery. Replace the Battery Caution: Improper battery replacement or incompatible device usage may result in risk of burns, fire, explosion, or other hazard. Dispose of lithium-ion batteries according to local regulations. - Page 17 5. Lift the battery cover and remove it. 6. Use the tabs on the bottom of the battery to lift and remove it from the computer. EDA52 User Guide...
- Page 18 Install the Battery 1. Insert the charged battery into the computer. The top of the battery must go in first to connect the pins. See Battery Part Numbers on page 5. 2. Insert the battery cover into the computer. EDA52 User Guide...
-
Page 19: About The Battery Status
The battery is critically low. You need to replace the battery now or connect the computer to a charging accessory. The computer is connected to external power and the battery is charging. There is a battery error. Install another battery. If the problem persists, call Honeywell Technical Support. EDA52 User Guide... -
Page 20: About The Battery Status Led Setting
(blinking green) is not acceptable to your environment. You can choose one of three options: • Default Battery LED (optional Android OS configuration) • Honeywell Battery LED (factory default, out-of-box configuration) • No Battery LED Honeywell Battery LED Behavior (Factory Default/Out-of-Box Configuration) Connected to Power... -
Page 21: Check The Battery Level And Usage
To change the battery status LED behavior: 1. Swipe up from the bottom of the Home screen to access all apps. 2. Tap Settings > Honeywell Settings > Battery LED. 3. Choose one of the options: • Default Battery LED (optional Android OS configuration) •... -
Page 22: Battery Recommendations And Safety Precautions
Use of this battery in other devices could result in damage to the device or battery. • Avoid dropping the battery or computer. If you suspect that the battery or computer is damaged, send it to Honeywell service center for inspection. EDA52 User Guide... -
Page 23: Power On The Computer
Battery Part Numbers (see page 5) section of this guide. These batteries have been tested in accordance with applicable safety standards. Contact your Honeywell sales representative or distributor if this battery is no longer available. • Discarded batteries may create a safety hazard. Before disposal, cover the battery contacts with electrical insulating tape. -
Page 24: Unlock The Screen
Unlock the Screen The screen lock automatically activates every time the computer is turned On or when the computer wakes from Screen Timeout mode (sleep mode). • Swipe up from the bottom of screen to open. The level of security provided depends on the type of lock set (e.g., Face Unlock, Swipe, Pattern, PIN, or Password). -
Page 25: Set Up Face Unlock
The face unlock feature is initially available as trial version for evaluation. After the evaluation period expires, you need to purchase a license to use face unlock. Contact a Honeywell representative for licensing information. Face unlock allows you to unlock the computer in sleep mode by using facial recognition with the front camera. -
Page 26: Configure The Screen Backlight
Configure the Screen Backlight The display has an ambient light sensor that automatically adjusts the backlight intensity to conserve power and ensure the display is readable. You can also manually set the backlight intensity if you do not want to use the automated adaptive brightness feature. -
Page 27: About The Audio Features
About the Audio Features The EDA52 has multiple speakers, three microphones, and several software settings to configure sound volume or enable vibration feedback. Adjust Speaker Volume Use the Volume buttons on the left side of the computer to adjust the volume of ringtones, media, notifications, and alarms. -
Page 28: Audio Settings
Insert a microSD Card You can use a microSD card to increase file storage capacity or to install software. Honeywell recommends the use of Single Level Cell (SLC) industrial grade microSD or microSDHC memory cards with the computer for maximum performance and durability. -
Page 29: How To Transfer Files
5. Slide the card holder tray out of the slot. 6. Insert the microSD card into the card holder tray with the contacts facing down. Note: For WWAN models, the card holder tray has a microSD card slot and a nano-SIM card slot. -
Page 30: Configure Usb Connection And Transfer Files
Contact your local sales representative for ordering information. Accessory Description Single Charging Dock Charging cradle for charging ScanPal EDA52 (Compatible with (EDA50-HB-R) EDA51 scan handle when used with Backwards Adapter: EDA52- ADC). Does not include charging cable; cable and power adapter plugs must be ordered separately. - Page 31 EDA52-QBC-1, EDA52-QBC-2, EDA52-QBC-3, EDA52-QBC-5) Quad Bay Charging Base Quad bay charging base for ScanPal EDA52. Kit contains power (EDA52-CB-0, EDA52-CB-1, supply and power cord. (Compatible with EDA52 scan handle). EDA52-CB-2, EDA52-CB-3) Non-booted Net Base Non-booted Net base for Ethernet communications and (EDA52-NB-UVN-0, recharging up to four computers.
- Page 32 EDA52 User Guide...
-
Page 33: Chapter 2 - About The User Interface And Applications
ABOUT THE USER INTERFACE AND APPLICATIONS Use this chapter to learn about the user interface and how to interact with the screen. You can also use this chapter to learn about the Honeywell applications on the computer. About the User Interface The Android operating system provides a touch-friendly and easy-to-navigate user interface. -
Page 34: Navigation And Function Buttons
Home Screen Features Item Description Notifications panel / Status icons to the left tell you when an app has sent notifications, such Status bar as an arriving message. System icons to the right display the current wireless and network connection state and battery level. Search bar Search the Internet or the computer using Google™. -
Page 35: Remap A Button
1. Swipe up from the bottom of the Home screen to access all apps. 2. Tap Settings > Honeywell Settings > Keyremap. 3. Tap the plus sign (+). 4. Press the button you want to remap or select one of the virtual buttons. -
Page 36: Restore Default Button Action
To restore the button default action: 1. Swipe up from the bottom of the Home screen to access all apps. 2. Tap Settings > Honeywell Settings > Keyremap. 3. Tap the clean icon 4. Choose the remapped button(s) you want restored to the default setting. -
Page 37: View And Manage Notifications
View and Manage Notifications You can view recent events on the computer, manage system notifications, change a setting, or quickly respond to an app notification by opening the notifications panel. When a notification icon appears in the status bar at the top of the screen: 1. -
Page 38: Customize The Favorites Tray
To add widgets or customize the look of the Home screen: 1. Tap and hold an empty section of the Home screen. 2. Select either Wallpapers, Widgets, or Home Settings. Customize the Favorites Tray Modify the Favorites tray to contain the apps you use the most. 1. -
Page 39: Set The Time Zone
• Drag and drop Tap and hold an item, and then slide your stylus or finger across the screen until you reach the target position. Lift your finger or stylus off the screen to drop the item in place. • Swipe Quickly move your finger across the screen, without pausing when you first touch the screen. -
Page 40: About Honeywell Applications
Honeywell applications help you troubleshoot and connect your computer to other devices and networks. Some of the applications in this table are located in the Power Tools app. To learn more about Honeywell Power Tools, go to sps.honeywell.com to download the Power Tools User Guide. -
Page 41: Applications You Can Download To The Mobile Computer
Applications You Can Download to the Mobile Computer You can download Honeywell applications to extend the capabilities of the computer. You may need to purchase a license to run some applications. To learn more about the applications described in this section and other Honeywell software solutions, go to sps.honeywell.com. - Page 42 For more information about Enterprise Browser, visit sps.honeywell.com. About Terminal Emulators Honeywell offers several terminal emulator solutions that allow users to manage their mobile devices by providing reliable data transfer between the host mobile device and terminal. Terminal emulators can be used for remote management and configuration of devices, data collection and analysis, and session management.
-
Page 43: Unlock Developer Options
Unlock Developer Options Developer options only appear in the Settings app if you unlock the feature. If you are a developer working with the computer, you can easily unlock the additional settings to use for testing and debugging applications under development for the computer. - Page 44 EDA52 User Guide...
-
Page 45: Chapter 3 - Use The Imager
Use the imager as a camera to capture black and white images, such as signatures or pictures of damaged inventory. The imager camera feature requires the development of a custom application that uses the Honeywell Mobility SDK for Android. To download the Honeywell Mobility SDK for Android, Developer Information on page 77. -
Page 46: Change The Scanner Settings
You can find information on how to create custom applications for the computer in the Software Development Kit (SDK) available for download from the Technical Support Downloads Portal at honeywell.com/PSSsoftware-downloads. Once you create an account and enter the portal, navigate to Software > Software and Tools >... -
Page 47: Restore Default Scan Settings
Restore Default Scan Settings You can easily discard all changes you made to the Default profile and restore the default values. Note: When you choose the Restore all defaults option from a settings screen in a profile, all the settings in that profile return to their default values. 1. - Page 48 ‘//’ ACTION '$' extra-data Where: ACTION and extra-data are any string of characters. Launches an application listening for the intent. Intent action: “com.honeywell.scantointent.intent.action.” + ACTION Intent extra: “com.honeywell.scantointent.intent.extra.DATA” contains the remainder of the barcode data after the first ‘$’ character.
- Page 49 Tap the check box to toggle the feature On or Off. • Select Center Decode to adjust the feature parameters. Honeywell recommends leaving the window size settings at 50 (default) to define the “center” area for the barcode. Configurable parameters: •...
- Page 50 Setting Description Default Decode Filter Use these settings to modify or reject data strings. none • Decode filter script The Decode Filter Script is used to configure a filter for decode results during scanning. For example, a filter could be used to reject barcodes that don't begin with certain characters, remove leading characters (like "00") from the beginning of a barcode, or only scan barcodes that begin with certain characters.
- Page 51 Setting Description Default Region of Interest Set the ROI for decoding. Options include: Disabled • Disable ROI is disabled and the entire original image is sent to the decoder. • Standard Use the aimer position to weight activity. Activity calculated on the row and the column in the middle of each cell.
- Page 52 Setting Description Default Preferred Use this setting to establish which barcode has priority if more Disabled Symbology than one barcode appears on the same label. Settings • Tap the check box to toggle the feature On or Off. • Select Preferred Symbology Settings to adjust the feature parameters.
-
Page 53: Add A Scan Setting Profile
To create a scan setting profile for a custom app on the computer: 1. Swipe up from the bottom of the Home screen to access all apps. 2. Tap Settings > Honeywell Settings > Scanning > Internal Scanner. 3. Tap in the upper right corner of the app screen. -
Page 54: Delete A Scan Setting Profile
1. Swipe up from the bottom of the Home screen to access all apps. 2. Tap Settings > Honeywell Settings > Scanning > Internal Scanner. 3. Tap and hold the profile you want to delete, select Delete and then click OK. -
Page 55: Scan Barcodes
Before you start scanning barcodes, go into Settings > Honeywell Settings > Scanning > Internal Scanner and modify the scan profile to enable only the barcode symbologies that you need. By reducing the active symbology list, you can increase scan speed. -
Page 56: Use The Scan Demo App
To learn more About Provisioning Mode, see page 77. Use the Scan Demo App Use the Scan Demo app to read barcodes or to test your symbology decode settings. 1. Swipe up from the bottom of the Home screen to access all apps. 2. -
Page 57: Chapter 4 - Use The Phone
CHAPTER USE THE PHONE You can use the phone feature to make and receive phone calls as well as transmit data through wireless wide-area networks (WWANs). Note: Phone features are only supported on EDA52 WWAN models About the Phone Phone features on the computer include a speaker and two microphones for noise cancellation. -
Page 58: Provision Esim
Dual SIM Dual Standby Mode The nano-SIM and eSIM can be provisioned with either the same or different mobile carriers. When both SIMs are provisioned, the EDA52 operates in Dual SIM Dual Standby (DSDS) mode. In this mode, both SIMs can connect to the selected mobile network. -
Page 59: Make A Phone Call
3. Remove the battery from the computer. Refer to page 4. Slide the card holder tray out of the slot. 5. Place the nano-SIM card into the card holder tray with contacts facing down. 6. Slide the card holder tray back into the card holder slot. 7. -
Page 60: Answer The Phone
• Select a favorite on your speed dial list • Select a number from the recent calls list 3. Tap call 4. To end the call, tap Answer the Phone When you receive a phone call, the Incoming Call screen opens. If the caller’s telephone number is available, it appears on the screen. -
Page 61: Make An Emergency Phone Call
Make an Emergency Phone Call You can use the phone to make an emergency phone call even if the SIM card is missing from your phone. The phone shows no service but the call still goes through if you dial certain emergency numbers (e.g., 112, 911, 000, 08, 118, 119, and 999). - Page 62 EDA52 User Guide...
-
Page 63: Chapter 5 - Use The Camera
CHAPTER USE THE CAMERA Use this chapter to learn how to take pictures and record videos with the color camera(s). About the Color Camera The EDA52 mobile computer comes equipped with two cameras, a 13-megapixel color camera on the back of the computer and a 5-megapixel camera located on the front. -
Page 64: Record A Video
4. The camera automatically adjusts the focus but you can tap the screen to modify the focal point. By default, the camera senses the lighting in the environment and turns the flash On, if needed. 5. Tap or the Volume button to take a photo. •... -
Page 65: Change Camera Settings
Change Camera Settings You can change the camera settings for best results when taking pictures. The camera settings are adjustable from within the Camera app. 1. Open the Camera app 2. At the top of the screen, select any of the following to adjust the settings. The options vary depending on camera mode selected. - Page 66 EDA52 User Guide...
-
Page 67: Chapter 6 - Configure The Computer
CHAPTER CONFIGURE THE COMPUTER Use this chapter to learn about the available methods for configuring your mobile computer. You can also use this chapter to learn how to configure network communications and wireless security. How to Configure the Computer You can configure many parameters on the computer such as the barcode symbologies it decodes or the network settings. - Page 68 • Add a network Wi-Fi connection and view saved networks. • Tap Wi-Fi preferences to access advanced Wi-Fi options, view MAC and IP address information, access Honeywell Wi-Fi settings (see page 69), and import and export Wi-Fi configurations. Mobile network...
- Page 69 Connected devices In the Settings app, select Connected devices to view current, connected devices and to access the following settings. Setting Description Pair new device • Connect to a Bluetooth Device. • Lists Bluetooth enabled devices in range. • View and rename the computer. •...
- Page 70 Apps & Notification In the Settings app, select Apps & Notifications to access the following settings. Setting Description Apps info View a list of recently opened apps or select "See all . ." to view a list of installed apps on the computer and system services running. Notifications Set rules for notifications.
- Page 71 Display In the Settings app, select Display to access the following settings. Setting Description Brightness level Set the Brightness level manually if Adaptive brightness feature is turned Off. Dark theme Enable dark mode to switch app backgrounds to a black color. Night light Activate the Night light feature to adjust the screen tint to a light amber for easier viewing and reading in dim light or for the hours you use the device...
- Page 72 Setting Description Advanced Google location Enable or disable location history and manage or delete activity. A Google history account must be associated with the device to use this feature. Activity controls Choose what type of activities are saved in your Google account. A Google account must be associated with the device to use this feature.
- Page 73 Setting Description Smart Lock Define safe conditions or locations where your phone will stay unlocked (e.g. On-body, Trusted places, Trusted devices, Voice Match). Device admin apps Manage administrator privileges. Encryption & View encryption status and manage trusted credentials (e.g., view, install, credentials clear, and edit).
- Page 74 • Turn High contrast text On/Off. • Turn Shortcut from lock screen On/Off. Honeywell Settings In the Settings app, select Honeywell Settings to access the following settings. Setting Description Battery LED Configures the battery LED behavior. To learn more, see...
- Page 75 Setting Description Battery Optimizer View battery status and app usage information. Tap Optimize Battery to create and enable or disable a battery optimization profile that implements a group of settings to conserve power. Options include: • None When selected, no battery optimization profile is active. •...
- Page 76 Options include: Keep awake on motion, Wake on motion, Face down suspend. Staging Hub Use this agent and settings to connect the computer to the Honeywell Staging Agent Hub Foundation software platform; a centralized software platform IT integrators and administrators can use as a solution for managing, monitoring and deploying Honeywell devices in a connected workspace environment.
- Page 77 Setting Description Reset Option Select from the following reset options: • Reset Wi-Fi, Mobile & Bluetooth. Use to reset all network settings, including Wi-Fi, Mobile data and Bluetooth. • Reset app preferences. Use to reset app preference back to defaults. This includes apps you disabled, notification changes, default app actions set, background data restrictions for apps and permission restrictions.
-
Page 78: About Network Communications
Setting Description Build number Kernel number installed. * If your WWAN model supports a dual SIM card setup, both sim slot 1 and sim slot 2 will be listed. About Network Communications You can easily add the mobile computer to your wireless or wired network. Connect the EDA52 to your computer using: •... -
Page 79: Honeywell Wi-Fi Settings
3. Tap Wi-Fi preferences. The Configure Wi-Fi menu appears. 4. Tap Notify for public networks to toggle the setting On or Off. Honeywell Wi-Fi Settings To access Wi-Fi preference settings for advanced configuration of the wireless 802.11 radio in the mobile computer:... -
Page 80: How To Connect To Virtual Private Networks
> Network & internet. > Wi-Fi. 3. Tap Wi-Fi preferences. The Configure Wi-Fi menu appears. 4. Tap Advanced > Honeywell Wi-Fi Settings. 5. Tap a setting to enable or disable the option or to access additional parameters that configure the Wi-Fi radio. -
Page 81: About Wireless Security
• LEAP • Honeywell recommends WPA3 security with SAE (Personal) or 802.1x (Enterprise) key management. Before you set security, you need to enable the radio, set the date, and set the SSID on your computer. To use 802.1x security, you need to load a root certificate on your computer. - Page 82 Android also supports X.509 certificates saved in PKCS#12 key store files with a .p12 or .pfx extension. To install a valid key store file with another extension, you must change the extension to .p12 or .pfx to install it. When you install a certificate from a PKCS#12 key store, Android also installs any accompanying private key or certificate authority certificates.
-
Page 83: About Bluetooth Communications
5. Scroll to the bottom of the screen and tap Disable (for System certificates) or Remove (for User certificates). 6. Tap OK. Note: You can enable a disabled System certificate, but if you remove a User certificate, you must install it again to enable it. About Bluetooth Communications Your mobile computer is equipped to communicate with other devices using Bluetooth technology. -
Page 84: Rename The Computer And View File History
Snap-on Cup (USB) Accessory documentation is available for download from the EDA52 product pages at sps.honeywell.com. For a complete list of compatible accessories for your mobile computer and their part numbers see the EDA52 Accessory Guide available for download at sps.honeywell.com. -
Page 85: Usb Troubleshooting
USB Troubleshooting • If you have a problem with your workstation computer recognizing the USB device, try downloading and installing the Honeywell-aidc-usb-driver. The driver is part of the Honeywell_Mobility SDK_Android software.zip file. To learn where to get the software, see Developer Information on page 77. -
Page 86: Set Up And Connection
Set up and Connection 1. Pair the mobile computer with another Bluetooth enabled device. 2. Verify the other device is set to use a network connection using Bluetooth technology. 3. Swipe up from the bottom of the Home screen to access all apps. 4. -
Page 87: Developer Information
When Provisioning mode is turned Off (disabled): • Configuration barcodes do not scan and process. • \honeywell\autoinstall folders are inaccessible. Note: To learn more about network and security for Honeywell mobile computers with Android operating systems, go to sps.honeywell.com. EDA52 User Guide... -
Page 88: Enable Or Disable Provisioning Mode
Enable or Disable Provisioning Mode 1. Swipe up from the bottom of the Home screen to access all apps. 2. Tap Settings > Honeywell Settings > Provisioning mode. 3. Tap the button to toggle the provisioning On or Off. EDA52 User Guide... -
Page 89: Chapter 7 - Manage And Maintain The Computer
1. Go to honeywell.com/PSSsoftware-downloads. 2. Create a login account if you have not already created one. 3. Install the Honeywell Download Manager tool. See “Note” on the portal page. This tool is required for downloads. EDA52 User Guide... -
Page 90: About Transferring Files Via Usb Connection
1. Swipe up from the bottom of the Home screen to access all apps. 2. Tap Settings > Honeywell Settings > Provisioning mode. 3. Tap the toggle button to turn Provisioning mode On. 4. Save the Android application file (*.zip or *.apk) in one of the following folders on the EDA52 mobile computer: •... -
Page 91: Optional Microsd Card Method
9. Once installation is complete, turn Provisioning mode Off. About the Honeywell Upgrader Use the Honeywell Upgrader app (HUpgrader) to check for and install OTA updates, and view the current OTA version installed on the computer. Install OTA Updates... - Page 92 2. Tap HUpgrader to open the Honeywell Upgrader app. 3. Tap , and then tap Choose OTA from storage. 4. Select the storage location (i.e., Internal Storage) where you saved the file. 5. Tap the OTA update file. The computer examines the file, and then starts the installation.
-
Page 93: Restart (Reboot) The Computer
Restart (Reboot) the Computer You may need to reboot the computer to correct conditions where an application stops responding to the system. 1. Save your files and close any open applications. 2. Press and hold the Power button until the options screen appears. 3. -
Page 94: Enterprise Data Reset The Computer
Enterprise Data Reset the Computer 1. Swipe up from the bottom of the Home screen to access all apps. 2. Select Settings > System > Advanced > Reset options. 3. Tap Reset enterprise data. 4. Tap Erase all data. 5. If prompted, type your screen lock security pattern, PIN, or password and tap next ( 6. -
Page 95: Full Factory Reset The Computer
Full Factory Reset the Computer 1. Swipe up from the bottom of the Home screen to access all apps. 2. Select Settings > System > Advanced > Reset options. 3. Tap Erase all data (factory reset). 4. Tap Erase all data. 5. -
Page 96: Clean The Computer
Clean the Computer The computer housing, scanner window, camera window and touch screen may be cleaned with a soft cloth dampened with water or a mild detergent-water solution. If a mild detergent solution is used, wipe the computer with a clean cloth dampened only with water to remove any detergent residue. -
Page 97: Appendix A - Specifications
Read all guidelines before using your computer. Product documentation is available for download from sps.honeywell.com. Public certificates are available for download from honeywell.com/PSScompliance. -
Page 98: Physical And Environmental Specifications
View and download available product documentation. For example, Data Sheet, Accessory Guide, Quick Start Guide, User Guide, Regulatory Information, Battery Information. Imager Specifications The EDA52 is equipped with the following Honeywell high-performance imager: • S0703-SR (Standard Range) Imager Barcode Symbologies... -
Page 99: S0703-Sr (Standard Range) Imager
1D Symbologies 2D Symbologies Postal Codes Default Default Default Disabled Telepen Disabled Trioptic Disabled UPC/EAN Enabled UPC-A Enabled UPC-E Enabled Note: To learn about changing the symbology settings, see Change the Scanner Settings page 36. S0703-SR (Standard Range) Imager The depth of field measurements used the following parameters: •... -
Page 100: S0703-Sr (Standard Range) Imager Field Of View/Resolution
Focus Standard Range Symbology Near Distance Far Distance 6.7 mils PDF 417 96.01 3.78 9.29 15 mils QR 1.54 15.35 Typical Specs Focus Standard Range Symbology Near Distance Far Distance 5 mils Code 39 2.75 11.85 10 mils Code 39 1.57 20.35 20 mils Code 39... - Page 102 Honeywell 855 S. Mint St. Charlotte, NC 28202 sps.honeywell.com ™ EDA52-A-EN-UG-01 Rev D 5/23...