Healthrider 500 Sel Treadmill User Manual
Canadian english manual
Hide thumbs
Also See for 500 Sel Treadmill:
- User manual (31 pages) ,
- Manuel de l'utilisateur (31 pages)
Table of Contents
Model No. HCTL10910
Serial No.
Serial
Number
Decal
QUESTIONS?
As a manufacturer, we are com-
mitted to providing complete
customer satisfaction. If you
have questions, or if there are
missing parts, please call:
1-888-936-4266
Mon.–Fri. 8h00 until 18h30 EST
(excluding holidays).
CAUTION
Read all precautions and instruc-
tions in this manual before using
this equipment. Save this manual
for future reference.
USER'S MANUAL
Visit our website at
www.healthrider.com
Table of Contents

Related Manuals for Healthrider 500 Sel Treadmill


Summary of Contents for Healthrider 500 Sel Treadmill
- Page 1 1-888-936-4266 Mon.–Fri. 8h00 until 18h30 EST (excluding holidays). CAUTION Read all precautions and instruc- tions in this manual before using Visit our website at this equipment. Save this manual for future reference. www.healthrider.com...
-
Page 2: Table Of Contents
LIMITED WARRANTY ............. . .Back Cover Note: An EXPLODED DRAWING and a PART LIST are attached in the center of this manual. HealthRider is a registered trademark of ICON Health & Fitness, Inc. -
Page 3: Important Precautions
IMPORTANT PRECAUTIONS WARNING: To reduce the risk of burns, fire, electric shock, or injury to persons, read the following important precautions and information before operating the treadmill. 1. It is the responsibility of the owner to ensure 12. Failure to use a properly functioning surge that all users of this treadmill are adequately suppressor could result in damage to the con- informed of all warnings and precautions. - Page 4 22. When using iFIT.com CDs and videos, an 25. Inspect and properly tighten all parts of the electronic “chirping” sound will alert you treadmill regularly. when the speed and/or incline of the treadmill is about to change. Always listen for the 26.
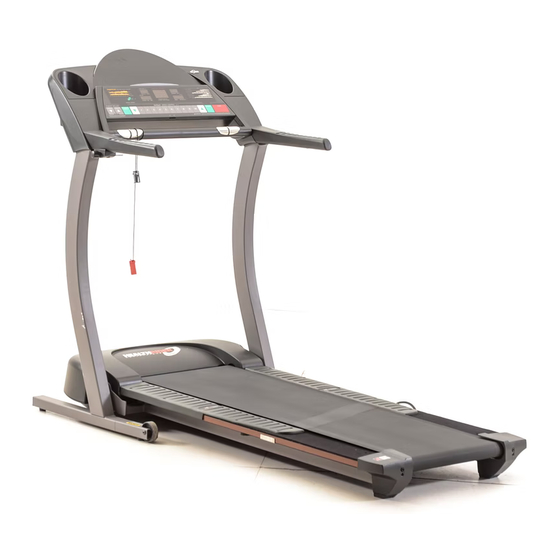
- Page 5 BEFORE YOU BEGIN Thank you for selecting the revolutionary HealthRider ® Monday through Friday 8h00 until 18h30 Eastern Time 500sel treadmill. From the advanced console to the (excluding holidays). To help us assist you, please cushioned walking platform, the 500sel treadmill is de-...
- Page 6 ASSEMBLY Assembly requires two people. Set the treadmill in a cleared area and remove all packing materials. Do not dispose of the packing materials until assembly is completed. Assembly requires your own Phillips screw- driver and rubber mallet Note: The underside of the treadmill walking belt is coated with high-performance lubricant. During shipping, a small amount of lubricant may be transferred to the top of the walking belt or the shipping carton.
- Page 7 3. Orient one of the Handgrip Extensions (34) so the bottom Post is open as shown and insert it as far as possible into the post on the left Upright (64). If necessary, tap the Handgrip Extension with a rubber mallet to fully insert it. Attach the Handgrip Extension with two Screws (33), one Open towards the front of the post, and the other towards the...
-
Page 8: Operation And Adjustment
OPERATION AND ADJUSTMENT THE PERFORMANT LUBE WALKING BELT plug. Plug the power cord into a surge suppressor, and plug the surge suppressor into an appropriate Your treadmill features a walking belt coated with outlet that is properly installed and grounded in PERFORMANT LUBE , a high-performance lubricant. - Page 9 CONSOLE DIAGRAM Manual/Program Indicators Display Program Display Display Program Profiles Note: If there is a thin sheet of plastic Clip on the face of the console, remove it. speed and incline of the treadmill to give you an effec- CAUTION: tive workout.
- Page 10 HOW TO TURN ON THE POWER Each time a button is pressed, the speed setting will change by 0.1 mph; if a button is held down, Plug in the power cord (see page 8). the speed setting will change in increments of 0.5 mph.
- Page 11 Time/Incline/Segment “E” (for English) or an “M” (for metric) will appear in Time display—When the display. Press the Speed button to change the manual mode or the the system of measurement. When the desired iFIT.com mode is se- system of measurement is selected, remove the lected, this display will key and then reinsert it.
- Page 12 speed setting for the HOW TO USE PERSONAL TRAINER PROGRAMS Current Segment first segment will be shown in the flashing Current Segment col- Insert the key fully into the console. umn of the program dis- play. (The incline set- See HOW TO TURN ON THE POWER on page tings are not shown in the program display.) The speed settings for the next five segments will...
- Page 13 To stop the program temporarily, press the Stop HOW TO USE HEART RATE PROGRAMS button. The Time/Incline/Segment Time display will begin to flash. To restart the program, press the Start button or the Speed button. To end the CAUTION: program, press the Stop button, remove the key, If you have heart prob- and then reinsert the key.
- Page 14 During heart rate pro- The speed and/or incline of the treadmill will then grams, the program change, if needed, to bring your heart rate closer to display will show a the target heart rate setting for the next segment. graphic that represents The program will continue in this way until no time your heart rate.
- Page 15 HOW TO CONNECT YOUR PORTABLE STEREO HOW TO CONNECT THE TREADMILL TO YOUR CD PLAYER, VCR, OR COMPUTER Note: If your stereo has an RCA-type AUDIO OUT jack, see instruction A below. If your stereo has a 3.5mm LINE OUT jack, see instruction B. If your To use iFIT.com CDs, the treadmill must be connected stereo has only a PHONES jack, see instruction C.
- Page 16 HOW TO CONNECT YOUR HOME STEREO HOW TO CONNECT YOUR COMPUTER Note: If your stereo has an unused LINE OUT jack, Note: If your computer has a 3.5mm LINE OUT jack, see instruction A below. If the LINE OUT jack is see instruction A.
- Page 17 HOW TO CONNECT YOUR VCR HOW TO USE IFIT.COM CD AND VIDEO PROGRAMS Note: If your VCR has an unused AUDIO OUT jack, see instruction A below. If the AUDIO OUT jack is being used, see instruction B. If you have a TV To use iFIT.com CDs or videocassettes, the treadmill with a built-in VCR, see instruction B.
- Page 18 If the speed or incline settings are too high or too • adjust the volume of your CD player or VCR. If low, you can manually override the settings at any the volume is too high or too low, the console time by pressing the Speed or Incline buttons on may not detect the program signals the console.
- Page 19 Return to the treadmill and stand on the foot HOW TO USE PROGRAMS DIRECTLY FROM OUR pads. Find the clip attached to the key and slide WEB SITE the clip onto the waistband of your clothes. When the on-screen countdown ends, the program Our Web site at www.iFIT.com allows you to access will begin and the walking belt will begin to move.
- Page 20 THE INFORMATION MODE/DEMO MODE OPTIONAL CHEST PULSE SENSOR The console features an information mode that keeps An optional chest pulse sensor adds even more fea- track of the total number of hours that the treadmill has tures to the console. The chest pulse sensor offers been operated and the total number of miles that the hands-free operation, and enables you to use the con- walking belt has moved.
-
Page 21: How To Fold And Move The Treadmill
HOW TO FOLD AND MOVE THE TREADMILL HOW TO FOLD THE TREADMILL FOR STORAGE Before folding the treadmill, adjust the incline to the lowest position. If this is not done, the treadmill may be permanently damaged. Next, unplug the power cord. CAUTION: You must be able to safely lift 20 kg (45 lbs.) to raise, lower, or move the treadmill. - Page 22 HOW TO LOWER THE TREADMILL FOR USE 1. Hold the upper end of the treadmill with your right hand as shown. Using your left hand, pull the latch knob to the left and hold it. Pivot the treadmill down until the frame is past the pin.
-
Page 23: Troubleshooting
TROUBLESHOOTING Most treadmill problems can be solved by following the steps below. Find the symptom that applies, and follow the steps listed. If further assistance is needed, please call our Customer Service Department toll- free at 1-888-936-4266, Monday through Friday, 8h00 until 18h30 eastern time (excluding holidays). PROBLEM: The power does not turn on SOLUTION: a. - Page 24 Locate the Reed Switch (18) and the Magnet (101) on the left side of the Pulley (78). Turn the Pulley until the Magnet is aligned with the Reed Switch. Make sure that the gap between the Magnet and the Reed Switch is about 3mm (1/8 in.).
-
Page 25: Conditioning Guidelines
CONDITIONING GUIDELINES begin to use stored fat calories for energy. If your goal WARNING: is to burn fat, adjust the speed and incline of the tread- Before beginning this mill until your heart rate is near the lowest number in or any exercise program, consult your physi- your training zone. - Page 26 SUGGESTED STRETCHES The correct form for several basic stretches is shown at the right. Move slowly as you stretch—never bounce. 1. Toe Touch Stretch Stand with your knees bent slightly and slowly bend forward from your hips. Allow your back and shoulders to relax as you reach down toward your toes as far as possible.
- Page 27 Monday through Friday 8h00 until 18h30 eastern time (excluding holidays). When ordering parts, please be pre- pared to give the following information: • The MODEL NUMBER of the product (HCTL10910) • The NAME of the product (HealthRider 500sel treadmill) ®...
- Page 28 LIMITED WARRANTY ICON OF CANADA, INC., (ICON), warrants this product to be free from defects in workmanship and material, under normal use and service conditions, for a period of 90 days from the date of purchase. This warranty ex- tends only to the original purchaser. ICON's obligation under this warranty is limited to replacing or repairing, at ICON's option, the product through one of its authorized service centers.
- Page 29 PART LIST—Model No. HCTL10910 R0803A To locate the parts listed below, refer to the EXPLODED DRAWING attached in the center of this manual. No. Qty. Description No. Qty. Description No. Qty. Description Motor Hood Console Pulse Wire Ground Wire Right Top Handgrip 86** 1 Optional iFIT.com Jam Nut 3/8”...
-
Page 30: Ordering Replacement Parts
REMOVE THIS EXPLODED DRAWING AND PART LIST FROM THE MANUAL Save this EXPLODED DRAWING and PART LIST for future reference. Note: Specifications are subject to change without notice. For information about ordering replacement parts, see the back cover of the User’s Manual. - Page 31 EXPLODED DRAWING—Model No. HCTL10910 R0803A...