Honeywell CIPer 30 Installation And Operation Manual
Hide thumbs
Also See for CIPer 30:
- Installation instructions manual (7 pages) ,
- Installation instructions manual (13 pages)

Related Manuals for Honeywell CIPer 30


Summary of Contents for Honeywell CIPer 30
- Page 1 CIPer Model 30 Controller INSTALLATION AND OPERATIONS GUIDE July 2021 ® U.S. Registered Trademark 31-00206 - 02 Copyright © 2021 Honeywell Inc. • All Rights Reserved...
- Page 2 Honeywell makes no representations or warranties with respect to this document. In no event shall Honeywell be liable for technical or editorial omissions or mistakes in this document, nor shall it be liable for any damages, direct or incidental, arising out of or related to the use of this document.
-
Page 3: Table Of Contents
CIPer MODEL 30 CONTROLLER - INSTALLATION AND OPERATIONS GUIDE Table of Contents About This Guide ..............................4 Other Related Documents ................................4 Abbreviations ..................................... 4 About CIPer Model 30 Controller Programming Tool ................5 Software Requirements ................................. 5 Supported Operating Systems ..................................5 Supported Web Browsers .................................... -
Page 4: About This Guide
MODEL 30 CONTROLLER - INSTALLATION AND OPERATIONS GUIDE About This Guide This document serves as an installation guide to install the Honeywell CIPer Model 30 controller. Released versions of the tool include a complete collection of technical information that is provided in both online help and PDF format. -
Page 5: About Ciper Model 30 Controller Programming Tool
In the UserService folder under Station > Config > Services in the Nav tree, the Default Web Profile must be Default Wb Web Profile. This is useful when you need to access and control the CIPer 30 controller remotely. The default value for Default Web Profile is HTML5 Hx Profile, which is not supported. -
Page 6: Installation
Follow the below steps to reinstall the licenses and certificates for CIPer 30 controller. If the license or certificate of CIPer 30 controller is removed or deleted accidently, connect to Niagara Central or request for license to WEBs License. - Page 7 This option is enabled when there is a local license database. • Import Honeywell IPC (Honeywell Webs 4.7) licenses from the licensing server: To import license from the licensing server in case there are no license present in the local files and databases.
- Page 8 (d) Click Ok. This completes licensing. Import Honeywell license from the licensing server (a) If you have access to licensing server, select Import Honeywell IPC (Honeywell Webs 4.7) licensing form the licensing server option, and click OK. (b) Select Import option from bottom of the certificate section.
- Page 9 CIPer MODEL 30 CONTROLLER - INSTALLATION AND OPERATIONS GUIDE (c) Click Next. (d) Click OK. This completes licensing from licensing server 31-00206 - 02...
-
Page 10: Import Certificate From The Local License Database
(a) Select the certificate file from the directory and click OK. Installer displays import status of license and certificates. Note: After you completed installation of license and certificates for CIPer 30 controller. Restart the workbench, this will apply all the updates. 31-00206 - 02... -
Page 11: Installing Ciper Model 30 Programming Tools
2. Upgrade using one of the following methods: You can install a single controller or multiple controllers. a) For single CIPer Model 30 Controller –use Distribution File Installer or Commissioning Service b) For multiple CIPer 30 Model Controllers –use Provisioning Service • Upgrade using Distribution File Installer •... -
Page 12: Install Webstation-N4.10.0.154
NOTE Factory Reset Image • The honeywell-IPC-factory.dist file can be used to reset the CIPer Model 30 Controller to factory settings. To install the honeywell-IPC-factory.dist file, use Distribution file installer. • The factory reset image should only be installed after the upgrade process has been verified successfully. - Page 13 CIPer MODEL 30 CONTROLLER - INSTALLATION AND OPERATIONS GUIDE • For upgrading only controller tool use honeywell-IPCtool-4.10.0.1.1.257.dist file for installation. • For upgrading controller baseboard firmware use honeywell-IPCBASE.dist- 1.1.1.146.dist file for installation. • For upgrading large expansion IO firmware, use honeywell-IPCIO-1.1.0.140.dist file for installation.
- Page 14 CIPer MODEL 30 CONTROLLER - INSTALLATION AND OPERATIONS GUIDE 2. Locate the folder containing (.dist) file from the C:/Honeywell/WEBStation-N4- 4.10.0.154/sw/4.10.0.154.6 directory, select the folder, and select OK. 3. Select the required .dist file and click Install, this action installs the (.dist) file.
-
Page 15: Procedure 2: Using Commissioning Wizard
4.10.0.154.6 NOTE Installing the honeywell-IPC-factory.dist file is not supported via commissioning. Steps To Perform Commissioning Wizard 1. Log in to the Platform of the CIPer Model 30 using the WEBStation-N4- N4.10.0.154 workbench. 2. Run the Platform Administration from platform view. - Page 16 CIPer MODEL 30 CONTROLLER - INSTALLATION AND OPERATIONS GUIDE 4. Uncheck all default checkboxes, except “Install/Upgrade core software from distribution files” (see below) and click Next. 5. Select the licensing options and click Next. 31-00206 - 02...
- Page 17 CIPer MODEL 30 CONTROLLER - INSTALLATION AND OPERATIONS GUIDE 6. Click Next. NOTE DO NOT click the Upgrade All Out of Date during the Install/Upgrade core modules step (refer below image). 7. The install/upgrade core software from the distribution file should look like the below image. If not, then go back and make sure the files from the zip folder were copied to the correct location and that the WEBs N4 4.9.0.198 workbench was restarted.
- Page 18 CIPer MODEL 30 CONTROLLER - INSTALLATION AND OPERATIONS GUIDE 8. Click Next and complete the commissioning wizard. Wait for several minutes to complete the controller upgrade. After the upgrade is complete you will be able to log in to the platform of the controller. 31-00206 - 02...
-
Page 19: Procedure 3: Using Niagara Provisioning Service
4.10.0.154.6 NOTE Installing the honeywell-IPC-factory.dist file is not possible by Provisioning Service. Niagara provisioning service allows you to upgrade multiple CIPer Model 30 controllers and Expansion IO For additional information on setting up provisioning service see the CIPer Model 30 Installation and... - Page 20 CIPer MODEL 30 CONTROLLER - INSTALLATION AND OPERATIONS GUIDE Steps To Perform Provisioning Service 1. Navigate to the ProvisioningNiagara palette, add a new NetworkJobPrototype to any place in the station under Config (NiagaraNetwork for example) and name the job prototype (example - CIPer30_1.1.4_Upgrade).
- Page 21 CIPer MODEL 30 CONTROLLER - INSTALLATION AND OPERATIONS GUIDE 4. Click Run Now. This upgrades CIPer Model 30 controller and Expansion IO to WEBs N4.10 version for all selected stations. 31-00206 - 02...
-
Page 22: Verify Upgrade
CIPer MODEL 30 CONTROLLER - INSTALLATION AND OPERATIONS GUIDE Verify Upgrade After the upgrade process of the CIPer Model 30 controller and Expansion IO, verify the versions of QNX/Baseboard Firmware/Software Tool. Log in to the Platform of the controller and then go to Platform Administration, and verify the updated versions installed. -
Page 23: To Verify Expansion Io Baseboard Firmware Version
CIPer MODEL 30 CONTROLLER - INSTALLATION AND OPERATIONS GUIDE To Verify Expansion IO Baseboard Firmware Version 1. Navigate to Station > Drivers > IPCNetwork and click on localDevice. 2. Drag the Large Expansion IO device from the ipcProgrammingTool palette and configure the model type as WEBO9056H and the address to what is configured on the DIP switches of the expansion IO module. - Page 24 CIPer MODEL 30 CONTROLLER - INSTALLATION AND OPERATIONS GUIDE 3. Drag the small Expansion IO device from the ipcProgrammingTool palette and configure the model type as WEBO3022H and the address to what is configured on the DIP switches of the expansion IO module.
-
Page 25: Launching Niagara N4
Launching Niagara N4 from application folder If you didn’t find Niagara application launcher on your desktop. 1. Navigate to the Niagara bin folder (Navigation path: C:\Honeywell\WEBStation-N4-4.7U1\bin, where U1 indicates latest version of the Niagara N4), locate wb.exe file, and run the wb.exe file as an administrator. -
Page 26: Launching Niagara N4 From Taskbar
CIPer MODEL 30 CONTROLLER - INSTALLATION AND OPERATIONS GUIDE Launching Niagara N4 from taskbar 1. Navigate to WEBStation-N4 4.7 app from taskbar app list. 2. Expand the WEBStation-N4 4.7 folder. 3. Run Install Platform Daemon and wait till the Install Platform Daemon window displays the successful installation of the platform daemon. -
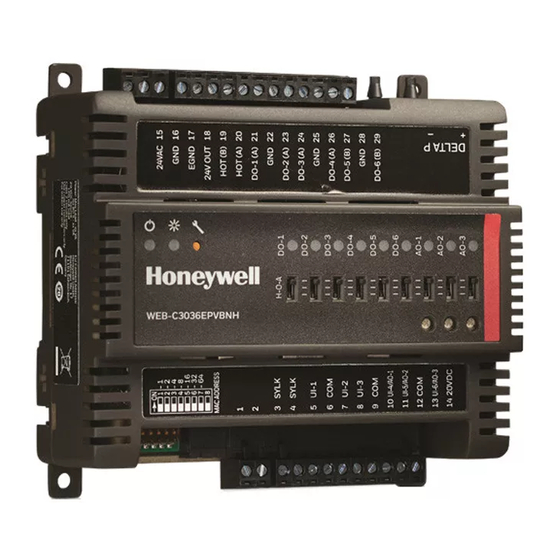
Page 27: Configuring Ciper Model 30 Controller With Webstation
CIPer MODEL 30 CONTROLLER - INSTALLATION AND OPERATIONS GUIDE Configuring CIPer Model 30 Controller with WEBStation Once you installed WEBStation-N4-4.x.x.xx on your system, you can start configuring the controller with the WEBStation. Connect all the required cables to the controller as shown in the figure. Cable connections: 1. - Page 28 CIPer MODEL 30 CONTROLLER - INSTALLATION AND OPERATIONS GUIDE Default credentials details: • Default IP address: 192.168.1.160 • Default username: honeywell • Default password: webs • Default station username: admin • Default station password: Honeywell1 • Passphrase: webs Note: The CIPer Model 30 controllers come within built DIP Switch feature, before configuring IP setting make sure all DIP switches are in off position.
-
Page 29: Configuring Platform And Station
CIPer MODEL 30 CONTROLLER - INSTALLATION AND OPERATIONS GUIDE Configuring Platform and Station When you configured CIPer Model 30 controller with WEBStation for the first time, you need to configure the platform and station with default credentials. After your first login, the controller requests you to change your default credentials. Configure platform 1. - Page 30 CIPer MODEL 30 CONTROLLER - INSTALLATION AND OPERATIONS GUIDE 5. Click Next to continue Change Platform Defaults Wizard. The Change Platform Defaults Wizard also lets you configure the system passphrase, creating a new platform account and remove the default platform account. 6.
- Page 31 CIPer MODEL 30 CONTROLLER - INSTALLATION AND OPERATIONS GUIDE 7. Enter a New Username, New Password and Confirm Password to create the new platform, and then click Next to continue. 8. Click Finish to complete the platform setup. This action launch Platform screen. 31-00206 - 02...
- Page 32 CIPer MODEL 30 CONTROLLER - INSTALLATION AND OPERATIONS GUIDE 9. Open the Application Director by double-clicking the Application Director option on the Platform screen. You can also launch Application Director from nav tree. 31-00206 - 02...
-
Page 33: Configure Station
CIPer MODEL 30 CONTROLLER - INSTALLATION AND OPERATIONS GUIDE Configure station 1. To run default station, click Start from the right side of Application Director window. Note: Auto-Start option has been disabled because of security reason. 2. Double-click the default station after successful starting the station. 3. - Page 34 CIPer MODEL 30 CONTROLLER - INSTALLATION AND OPERATIONS GUIDE 4. Enter the default station credentials in the Authentication window, and then click OK to continue. This action display Reset Password window. Default station username: admin Default station password: Honeywell1 5. Enter and confirm the password for the new station to be created and click OK to continue. 31-00206 - 02...
-
Page 35: Communication Mode
3. Connect to the platform with default IP address and the credentials. 4. To verify if the connection is successfully established, open the Run application and type ping < default ip address of the CIPer 30 controller >. 31-00206 - 02... -
Page 36: Serial Communication Setup
CIPer MODEL 30 CONTROLLER - INSTALLATION AND OPERATIONS GUIDE 5. Connect the platform and navigate to the TCP/IP Configuration option under Platform. 6. Double-click on TCP/IP Configuration. 7. Update the required fields, like default IP address. 8. Click Save to apply the changes. Serial Communication setup For serial communication, you can use software like Tera Term or PuTTY. -
Page 37: Reset To Factory Defaults
In case you forget the station credentials, you can reset to the factory defaults. Follow the below steps to reset CIPer 30 controller to default factory setting. Since this operation is performed in bootloader, the controller must be running in bootloader. - Page 38 CIPer MODEL 30 CONTROLLER - INSTALLATION AND OPERATIONS GUIDE After configuring CIPer 30 controller with serial console, power cycle the device. 2. When system displays Hit any key to stop autoboot, type passphrase enters, and press Enter key on the keyboard.
- Page 39 CIPer MODEL 30 CONTROLLER - INSTALLATION AND OPERATIONS GUIDE 3. Type Y and press Enter key on the keyboard, this action reset controller to default factory settings. Wait until the LED shows the device is working properly. Do not power off the controller during the reset process or the controller will be damaged permanently.
-
Page 40: Configuring Rstp
It is a network protocol which facilitates with a loop-free topology for Ethernet networks. You can configure the properties of RSTP using workbench. To know more about RSTP, see Rapid Spanning Tree Protocol (RSTP) section in the CIPer 30 System Engineering User Guide 31-00236. Configuring RSTP via Workbench 1. - Page 41 11. Right click on the RSTP workbench window, click Action > Apply RSTP settings. This action reboots the controller and effected changes will be effective. Honeywell Building Technologies Honeywell International Inc. ® U.S. Registered Trademark 1985 Douglas Drive North © 2020 Honeywell International Inc. Golden Valley, MN 55422 31-00206-02 | Rev 07-2021 customer.honeywell.com...