
Related Manuals for Electrolux EWF1141AESA


Summary of Contents for Electrolux EWF1141AESA
- Page 1 EWF1141AESA EWF1141AEWA EWF1142BESA EWF1142BEWA WASHING MACHINE USER MANUAL MÁY GIẶT TÀI LIỆU HƯỚNG DẪN SỬ DỤNG WI-FI CONNECTIVITY SETUP THIẾT LẬP KẾT NỐI WI-FI...
-
Page 2: Table Of Contents
Products must be used, installed and operated in accordance with this manual. You may not be able to claim on the Electrolux manufacturer’s warranty in the event that your product fault is due to failure to adhere to this manual. - Page 3 ENGLISH BEFORE FIRST USE ....................... 17 DAILY USE 5.1 Loading The Laundry ....................18 ..................18 5.2 Using Detergent And Additives ......................19 5.3 Options Setting ....................20 5.4 Starting A Cycle ( .................... 20 5.5 Interruption Of A Program ....................
-
Page 4: Safety Information
SAFETY INFORMATION 1.1 Conditions Of Use This appliance is intended to be used in household and similar applications such as: staff kitchen areas in shops, offices and other working ● environtment; farm houses; ● by clients in hotels, motels, and other residential type ●... -
Page 5: Child Safety
ENGLISH 1.2 Child Safety This washing machine is not intended for use by ● young children or infirm persons without supervision. Young children should be supervised to ensure that ● they do not play with the appliance. The packaging components (e.g. plastic film, ●... -
Page 6: Installation
● Under no circumstances should you For safety reasons do not use attempt to repair the machine double adaptors, extension yourself. Repairs carried out by cords and multi-plug adapters. inexperienced persons may cause injury or serious malfunctioning. Contact your local Service Centre. -
Page 7: Product Description
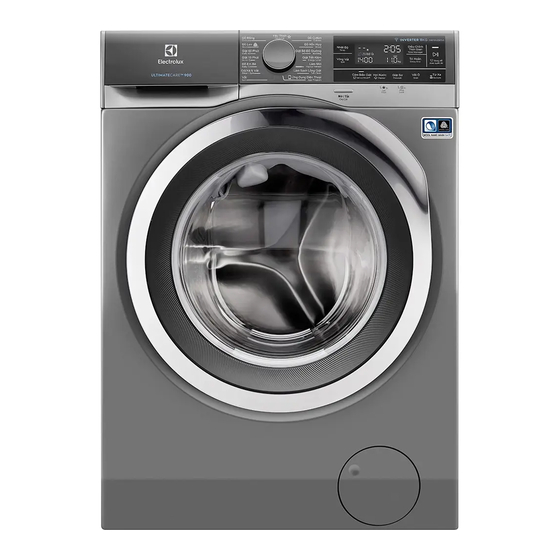
ENGLISH PRODUCT DESCRIPTION 2.1 Parts Worktop Detergent/Softener Control Panel Dispenser (see page 10) (see page 18) Cabinet Door Drain Pump Filter Front Panel (see page 26) Level Adjustment Feet (Front) Mains Cable Transit Bolts Transit Bolts & Hose Support Water Inlet Hose (see page 37) Water Drain Hose (see page 37) -
Page 8: Accessories
Detergent/Softener Dispenser Transit Bolt (when remove) (For more informations, see page 18, 25) Prewash Main Wash Softener Door (when open) (for more informations, see page 18) Transit bolts must be removed Drum Lifter before using the appliance. Stainless 2.2 Accessories... -
Page 9: Load Sensor (Only Model Ewf1141***)
ENGLISH 2.3 Load Sensor 2.4 Detergent Dosing Advice EWF1141*** EWF1141*** (Only Model (Only Model This machine has “Load Sensing Device” which shows how much load you put in the machine and maximum load recommended for selected wash program. The display shows these indicators when the door is open. -
Page 10: Control Panel
CONTROL PANEL 3.1 Control Panel Description Program Selector Knob Remote Touchpad Start/Pause and Add Clothes Touchpad On/Off Button Time Manager Touchpad Sensor Wash Touchpad Delay End Touchpad Vapour Touchpad Display Save Favourite Program Option Temperature Selection Touchpad Prewash Touchpad... -
Page 11: Program Chart
ENGLISH 3.2 Program Chart Program; Max. Max. Load Type of load and soil level Temperature Spin (Dry range Speed Clothes) Cottons; 1400 11 kg White and coloured cotton. (Adjust wash time according to soil level. See Time Manager table on Cold to 90°C page 14) Mixed;... - Page 12 Program; Max. Max. Load Type of load and soil level Temperature Spin (Dry range Speed Clothes) Wool 1200 2 kg Specially tested program for woollen garments bearing the “Pure new woollen, non-shrink, Cold to 40°C machine washable” label. 1200...
-
Page 13: Program Options Compatibility
ENGLISH 3.3 Program Options Compatibility Option Program Rinse Extra Time Delay Sensor Vapour Prewash Stain Spin Hold Silent Manager Wash Cottons Mixed Bedding ... - Page 14 Time Manager If you wish to modify or cancel Delay End option after starting the program, follow This option allows you to adjust the wash the steps below: time. Press this touchpad repeatedly to – set the washing machine to PAUSE by decrease or increase the wash time pressing “Start/Pause”...
- Page 15 ENGLISH Stain Touchpad 2) The 2 Conductivity sensor will check the amount of detergent residue after the first rinse and the machine will Press this touchpad to add the stain calculate the optimum number of phase to a program. The indicator of this rinses (Maximum of 2 additional option comes on.
-
Page 16: Settings
3.5 Settings ● To deactivate the function, press and hold “Prewash” touchpad about 2 seconds until the icon “ ” goes off. Save Favourite ( ) Program This function remains enabled Program settings that are frequently used even after the appliance is can be saved (e.g. -
Page 17: Start/Pause ( ) And Add Clothes ( ) Touchpad
ENGLISH 3.6 Start/Pause ( ) and Add Clothes ( Add Clothes ( ) Touchpad You can only add clothes when the icon “ ” shown on the This touchpad has 2 functions: display. Start/Pause ( To add clothes: Pressing the “Start/Pause” After you have selected the desired touchpad to pause the program. -
Page 18: Daily Use
DAILY USE 5.1 Loading The Laundry 5.2 Using Detergent And Additives Turn the water tap on. IMPORTANT: Please read Connect the main plug to the main “Detergents Type and Quantity of socket. Detergent”on page 23 before use. Press the On/Off button to turn on the Detergent Dispenser Drawer washing machine. -
Page 19: Options Setting
ENGLISH NOTE: When you use the NOTE liquid detergent The softener amount used must Do not use gelatinous or thick not exceed the “MAX” mark in the liquid detergents. drawer. Do not put more liquid than the If you use thick softeners it is maximum level. -
Page 20: Starting A Cycle ( )
5.4 Starting A Cycle ( 5.7 Changing The Options To start a program, press the Start/Pause It may be possible to change some of the touchpad. The corresponding pilot light options after a wash program has started. will stop flashing and a default program Press the touchpad Start/Pause. -
Page 21: At The End Of The Program
ENGLISH 5.9 At The End Of The To drain the water: Program Press the “Start/Pause ” touchpad. The appliance drains the water and − The appliance stops automatically. spins with the maximum spin speed − for selected program. The acoustic signal will operate. −... -
Page 22: Washing Hints
WASHING HINTS 6.1 Sorting The Laundry Wash bras, pantyhose and other delicates in a Follow the wash code symbols on each mesh laundry bag, garment label and the manufacturer’s which you can purchase washing instructions. Sort the laundry as from your supermarket. -
Page 23: Detergents Type And Quantity Of Detergent
ENGLISH Oil based paint: moisten with benzine Low sudsing detergents designed for stain remover, lay the garment on a soft front load washing machines are labelled cloth and dab the stain; treat several “Front Loading”, “high efficiency”, “HE”, times. such as Cold Power for Front Loaders or “Matic”. -
Page 24: International Wash Code Symbols
Not enough detergent causes: the washload to turn grey, greasy clothes. Too much detergent causes: oversudsing, reduced washing effect, inadequate rinsing. Use less detergent if: you are washing a small load, the laundry is lightly soiled, large amounts of foam during washing. -
Page 25: Care And Cleaning
ENGLISH CARE AND CLEANING To run a maintenance wash: WARNING! The drum should be empty of laundry. You must DISCONNECT the appliance from the electricity supply, before you can Select the “Tub Clean” program. carry out any cleaning or maintenance Press Start/Pause to start the program. -
Page 26: Cleaning The Drawer Recess
Flush it out under a tap to remove any WARNING! traces of accumulated powder. 1. Disconnect the mains plug from the mains socket. 2. Do not remove the filter while the appliance is operating. Do not clean the drain pump if the water in the appliance is hot. - Page 27 ENGLISH 3. When the container is full of water, 5. Remove fluff and objects from the put the drainage duct back again and pump (if there are any). empty the container. Do step 2, 3 again and again until no more water flows out from the drain pump.
-
Page 28: Cleaning The Water Inlet Filter
Put the filter back into the housing Clean the filter in the inlet hose with with exposed section facing up. a stiff brush. Make sure that you correctly tighten the filter to prevent leakages. Guide Remove the inlet hose behind the appliance. -
Page 29: Frost Precautions
ENGLISH 8.9 Frost Precautions If the appliance is installed in an area where the temperature can be less than 0 °C, remove the remaining water from the inlet hose and the drain pump. Emergency Drain Disconnect the main plug from the main socket. -
Page 30: Troubleshooting
TROUBLESHOOTING 9.1 Possible Failures Alarm Code: Certain problems are due to lack of The appliance does not fill with water simple maintenance or oversights, properly. which can be solved easily without The appliance does not drain the water. calling out an engineer. Before... - Page 31 ENGLISH Malfunction Possible cause Solution The drain hose is squashed or Check the drain hose kinked. (Error code: connection. The drain pump is clogged. Clean the drain filter. Machine (Error code: does not empty and/or The option “Rinse Hold” Press Start/Pause does not has been selected.
- Page 32 Malfunction Possible cause Solution The laundry is not evenly distributed in Pause the machine and the drum. redistribute laundry manually. Machine vibrates or There is very little laundry in the drum. Load more laundry. is noisy: Unstable floors eg. wooden floors.
-
Page 33: Emergency Door Opening
ENGLISH If you are unable to identify or solve the problem, contact our service centre. Before calling service centre, make a note of the model, serial number and purchase date of your machine: the Service Centre will require this information. 9.2 Emergency Door Opening In case of power failure or appliance failure, the appliance door remains... -
Page 34: Technical Data
TECHNICAL DATA Dimensions (Height / Width / Depth) 85 X 60 X 65.9 cm Power supply (Voltage / Frequency) 220-240 V~ / 50 Hz Total power absorbed 2100 W Water supply pressure (Maximum / Minimum) 0.8 MPa / 0.05 MPa Program Max. - Page 35 ENGLISH Remove the carton box. Remove the Put one of the polystyrene packaging polystyrene packaging materials. elements on the floor behind the appliance. Carefully put down the Remove the plastic bag which cover appliance with the rear side on it. the machine.
-
Page 36: Positioning
Remove the three transit bolts. 9. Pull out the plastic spacers. 11.2 Positioning It is important that your washing machine stands firm and leveled on the floor to ensure correct operation. The appliance must not be installed behind a lockable... -
Page 37: Water Inlet
ENGLISH 11.3 Water Inlet Loosen or tighten the feet to adjust the level. A correct adjustment of the Connect the water inlet hose to a tap appliance level prevents vibration, noise with 3/4” BSP thread. and the movement of the appliance when in operation. - Page 38 Fitting Hose Guide In a sink, drain pipe branch. This branch must be above the trap so that the bend is at least 60 cm above Pull apart to the ground. Hose bend insert hose. Guide hose Max. 90 cm pull hose Min.
-
Page 39: Electrical Connection
ENGLISH 11.5 Electrical Connection Should the appliance power supply cable need to be This machine is designed to operate on a replaced, this shall be carried 220-240 V, single-phase, 50 Hz supply. out by our Service Centre. “An incorrect power supply may void When the appliance is installed, the your warranty.”... - Page 40 Vì thế, bất cứ khi nào sử dụng sản phẩm của chúng tôi, bạn cũng có thể tin rằng bạn sẽ luôn có được kết quả tốt nhất qua mỗi lần sử dụng. Chào mừng bạn đến với Electrolux.
- Page 41 TIẾNG VIỆT TRƯỚC KHI SỬ DỤNG LẦN ĐẦU ................. 56 SỬ DỤNG HÀNG NGÀY 5.1 Bỏ Đồ Giặt Vào Máy ..................... 56 5.2 Sử Dụng Các Chất Giặt Tẩy ..................57 5.3 Cài Đặt Tùy Chọn ......................58 5.4 Bắt Đầu Chương Trình ( ..................
-
Page 42: Thông Tin Về An Toàn
THÔNG TIN VỀ AN TOÀN 1.1 Các Điều Kiện Sử Dụng Thiết bị này nhằm sử dụng trong các ứng dụng gia dụng và tương tự như: Khu vực nhà bếp của nhân viên trong các cửa hàng, ●... -
Page 43: An Toàn Cho Trẻ Em
TIẾNG VIỆT 1.2 An Toàn Cho Trẻ Em Máy giặt này được thiết kế không phải để trẻ em hoặc ● người khuyết tật sử dụng mà không có sự giám sát. Trẻ nhỏ phải được giám sát để đảm bảo chúng không ●... -
Page 44: Lắp Đặt
● ● Luôn rút phích cắm của thiết bị và tắt Bất kỳ công việc điện nào cần để lắp nguồn nước sau khi sử dụng, vệ sinh đặt thiết bị này cũng phải được tiến và bảo trì. -
Page 45: Mô Tả Sản Phẩm
TIẾNG VIỆT MÔ TẢ SẢN PHẨM 2.1 Các Bộ Phận Nắp Máy Ngăn Đựng Chất Giặt Tẩy / Chất Làm Bảng Điều Khiển Mềm Vải (Tham (Tham khảo trang 48) khảo trang 57) Cửa Vỏ Máy Bộ Lọc Bơm Xả Tấm Mặt Trước (Tham khảo trang 64) Điều Chỉnh Mức... -
Page 46: Phụ Kiện
Ngăn Đựng Chất Giặt Tẩy/Chất Làm Mềm Vải Bulông Vận Chuyển (Tham khảo trang 57, 63) Giặt Sơ Giặt Chính Chất Làm Mềm Vải Cửa Máy Giặt (Khi Mở) (Tham khảo trang 56) Thanh Đỡ CHÚ Ý! Phải tháo tất cả các Hình... -
Page 47: Load Sensor (Cảm Biến Trọng Lượng) (Chỉ Mô Hình Ewf1141*** )
TIẾNG VIỆT 2.3 Load Sensor (Cảm Biến 2.4 Thông Số Về Liều Lượng Trọng Lượng) Chất Giặt Tẩy (Chỉ mô hình EWF1141 (Chỉ mô hình EWF1141 Máy này có “Cảm Biến Trọng Lượng” cho biết trọng lượng đồ khô đã được cho vào trong máy và... -
Page 48: Bảng Điều Khiển
BẢNG ĐIỀU KHIỂN 3.1 Mô Tả Bảng Điều Khiển Núm Chọn Chương Trình Nút Cảm Ứng Điều Khiển Từ Xa Nút Mở/Tắt Bắt Đầu/Tạm Dừng, Thêm Quần Áo Nút Cảm Ứng Cảm Biến Giặt Phím Thời Gian Phím Chọn Chức Năng Hơi Nước Phím Chọn Chức Năng Trì... -
Page 49: Sơ Đồ Chương Trình
TIẾNG VIỆT 3.2 Sơ Đồ Chương Trình Tốc Độ Trọng Lượng Loại Quần Áo Cho Vào Và Độ Bẩn Của Chương Trình; Vắt Tối Quần Áo Tối Quần Áo Nhiệt Độ Đa Đa (Quần Áo Khô) Cottons 1400 11 kg Áp dụng cho đồ... - Page 50 Chương Tốc Độ Trọng Lượng Loại Quần Áo Cho Vào Và Độ Bẩn Trình; Vắt Tối Quần Áo Tối Đa Của Quần Áo Nhiệt Độ Đa (Quần Áo Khô) Daily 60 1400 5.5 kg Quần áo cotton màu, ví dụ như áo sơ mi, áo vòng/...
-
Page 51: Mức Tương Thức Giữa Chương Trình Giặt Và Các Chức Năng Tuỳ Chọn
TIẾNG VIỆT 3.3 Mức Tương Thức Giữa Chương Trình Giặt Và Các Chức Năng Tuỳ Chọn Tùy Chọn Chương Trình Rinse Extra Time Delay Sensor Vapour Prewash Stain Spin Hold Silent Manager Wash Cottons ... - Page 52 Phím Điều Chỉnh Thời Gian Sau khi chọn thời gian Delay End (Trì Hoãn Kết Thúc), nhấn bàn phím cảm ứng (Time Manager) Start/Pause để bắt đầu chương trình. Máy sau đó sẽ đếm ngược và cập nhật Lựa chọn này cho phép điều chỉnh thời thời gian trên màn hình mỗi giờ...
- Page 53 TIẾNG VIỆT ● Công nghệ cảm biến giặt SensorWash Cuối chu kỳ Vapour (Hơi Nước) quần bao gồm 2 cảm biến khác nhau: áo sẽ ấm hơn, mềm hơn và tách ra khỏi lồng giặt. Cảm biến Turbidity giúp đo lường độ Nếu chức năng Vapour (Hơi bẩn từ...
-
Page 54: Cài Đặt
Nút Cảm Ứng Điều Khiển Từ Xa 3. Để lưu chương trình yêu thích, nhấn và giữ phím “Hơi Nước ( )” trong 2 giây, và lắng nghe tiếng “BÍP, BÍP” và “Favourite” LED nhấp nháy. Tùy chọn này cho phép quý vị kết nối máy giặt với mạng Wi-Fi và... -
Page 55: Bắt Đầu/Tạm Dừng ( ), Thêm Quần Áo ( )
TIẾNG VIỆT Bật/Tắt âm báo Mở Máy và 3.6 Bắt Đầu/Tạm Dừng ( Giặt Xong Thêm Quần Áo ( Cài đặt này cho phép bạn bật hoặc tắt Phím này có 2 chức năng: âm báo khi mở máy và khi kết thúc Bắt Đầu/Tạm Dừng ( chương trình. -
Page 56: Trước Khi Sử Dụng Lần Đầu
TRƯỚC KHI SỬ DỤNG LẦN ĐẦU Trong lúc cài đặt hoặc trước khi lần 3. Chọn chu kỳ Đồ Cotton tại 90 °C, mà đầu sử dụng bạn có thể nhận thấy không có bất kỳ đồ giặt nào trong máy một số... -
Page 57: Sử Dụng Các Chất Giặt Tẩy
TIẾNG VIỆT Sử Dụng Chất Giặt Tẩy Khi sử dụng nước giặt tẩy: QUAN TRỌNG: Xin vui lòng đọc Không sử dụng bột giặt dạng gel hướng dẫn sử dụng chất giặt tẩy hoặc đặc. trong trang 61 trước khi sử dụng. Không cho dung dịch nước giặt tẩy Ngăn đựng chất giặt tẩy. -
Page 58: Cài Đặt Tùy Chọn
Lượng được sử dụng không được Sau xấp xỉ 15 phút kể từ lúc bắt đầu vượt dấu “MAX” (tối đa) trong ngăn. chương trình: Nếu sử dụng nước xả vải ở dạng đặc, Thiết bị sẽ tự động điều chỉnh thời gian bạn nên pha loãng với nước. -
Page 59: Mở Cửa
TIẾNG VIỆT 5.8 Mở Cửa CHÚ Ý Trong khi chương trình hoặc chức năng Khi gần kết thúc chương trình, thời gian còn Trì hoãn đang hoạt động thì cửa thiết bị lại có thể đột nhiên giảm từ 7 phút xuống đến đóng và... -
Page 60: Chế Độ Tạm Dừng Hoạt Động
5.11 Chế Độ Tạm Dừng Hoạt Động Sau 5 phút kể từ khi máy đã hoàn tất chương trình giặt. Chế độ TẠM DỪNG HOẠT ĐỘNG sẽ tự Nhấn nút “On/Off” để khởi động lại động làm cho máy ngừng hoạt động để... -
Page 61: Loại Bỏ Vết Bẩn
TIẾNG VIỆT 6.6 Loại Chất Giặt Tẩy Và 6.5 Loại Bỏ Vết Bẩn Lượng Chất Giặt Tẩy Các vết bẩn cứng đầu không thể loại bỏ chỉ bằng nước và bột giặt. Do vậy nên xử Cần sử dụng bột giặt có ít bọt xà phòng lý... -
Page 62: Các Biểu Tượng Mã Giặt Quốc Tế
Bạn có thể thử sử dụng lượng chất giặt Quá nhiều chất giặt tẩy gây ra: tẩy theo đúng hướng dẫn của nhà sản nhiều bọt, xuất sản phẩm sau đó so sánh kết quả giảm hiệu quả giặt, giặt theo danh sách bên dưới và... -
Page 63: Bảo Trì Và Vệ Sinh
TIẾNG VIỆT BẢO TRÌ VÀ VỆ SINH 8.5 Vệ Sinh Ngăn Đựng Chất CẢNH BÁO! Bạn phải NGẮT thiết bị khỏi nguồn điện, trước khi bạn có thể Giặt Tẩy thực hiện bất kỳ công việc vệ sinh hoặc bảo trì nào. Ngăn đựng chất giặt tẩy cần được vệ... -
Page 64: Vệ Sinh Hốc Ngăn
8.6 Vệ Sinh Hốc Ngăn Để vệ sinh bơm xả: 1. Mở cửa bơm xả. Sau khi đã tháo ngăn ra, sử dụng bàn chải nhỏ để vệ sinh hốc, đảm bảo rằng tất cả cặn lắng bột giặt được loại bỏ khỏi phần trên và... - Page 65 TIẾNG VIỆT 3. Khi khay đựng chứa đầy nước, đặt lại 5. Loại bỏ bụi xơ và các vật từ bơm ống xả và đổ nước trong khay đựng. (nếu có). Thực hiện lại các bước 2, 3 cho đến khi không còn thêm nước chảy ra từ...
-
Page 66: Vệ Sinh Bộ Lọc Nạp Nước
Đặt bộ lọc lại vào trong vỏ sao cho Vệ sinh bộ lọc trong ống nạp nước phần hở ra ngửa lên. bằng bàn chải cứng. Đảm bảo rằng quý vị vặn chặt bộ lọc đúng cách để ngăn rò rỉ. -
Page 67: Các Biện Pháp Phòng Ngừa Đóng Băng
TIẾNG VIỆT 8.9 Các Biện Pháp Phòng Ngừa Đóng Băng Nếu thiết bị được lắp đặt ở khu vực có nhiệt độ có thể xuống dưới 0 °C, tháo bỏ nước còn lại khỏi ống dẫn nước vào và bơm thoát nước. Thoát Nước Khẩn Cấp Rút phích điện chính ra khỏi ổ... -
Page 68: Khắc Phục Sự Cố
KHẮC PHỤC SỰ CỐ 9.1 Nguyên Nhân Có Thể Có Mã Báo Động Một số vấn đề là do thiếu bảo trì đơn giản hoặc Máy không được đổ đầy nước. sơ suất mà có thể được giải quyết dễ dàng mà... - Page 69 TIẾNG VIỆT Hỏng hóc Nguyên nhân có thể có Giải pháp Ống xả bị đè hoặc bị xoắn lại. Kiểm tra đầu nối ống xả. (Mã lỗi: Bơm xả bị tắc nghẽn. Vệ sinh bộ lọc tách nước. Máy không (Mã...
- Page 70 Hỏng hóc Nguyên nhân có thể có Giải pháp Sử dụng quá nhiều bột giặt. Giảm khối lượng bột giặt hoặc sử dụng bột giặt khác. (tham khảo trang 61 “Loại Thời gian chu chất giặt tẩy và Lượng chất giặt tẩy”).
-
Page 71: Mở Cửa Khẩn Cấp
TIẾNG VIỆT CHÚ Ý Nếu bạn không thể xác định hoặc giải quyết được vấn đề, hãy liên hệ với trung tâm dịch vụ của chúng tôi. Trước khi gọi điện, hãy ghi lại model, số sê-ri và ngày mua máy: Trung Tâm Dịch Vụ sẽ yêu cầu thông tin này. -
Page 72: Dữ Liệu Kỹ Thuật
DỮ LIỆU KỸ THUẬT Các Kích Thước 85 X 60 X 65.9 cm H (Chiều Cao) / W (Chiều Rộng) / D (Chiều Sâu) Nguồn điện (Điện áp / Tần suất) 220-240 V~ / 50 Hz Tổng điện hấp thụ... -
Page 73: Lắp Đặt
TIẾNG VIỆT LẮP ĐẶT 11.1 Mở Gói Thiết Bị THẬN TRỌNG : Phải tháo tất cả các Mở cửa. Gỡ các miếng xốp khỏi bulông vận chuyển và vỏ trước khi gioăng cửa và tất cả các vật ra khỏi sử... - Page 74 5. Tháo miếng lót bằng xốp phía dưới. 10. Đặt các nắp nhựa vào lỗ. Bạn có thể tìm thấy các nắp này trong túi tài liệu hướng dẫn sử dụng. 6. Kéo thiết bị lên vị trí thẳng đứng.
-
Page 75: Định Vị
TIẾNG VIỆT 11.2 Định Vị Khi máy giặt được đặt bằng phẳng, hãy cố gắng lắc từ góc này qua góc kia. Nếu Điều quan trọng là máy giặt của bạn cần máy lắc, hãy điều chỉnh lại các chân cho đứng vững chắc và... -
Page 76: Xả Nước
Ống nạp không được kéo dài. Nếu ống quá ngắn và bạn không muốn di chuyển vòi nước, bạn sẽ phải mua ống mới dài hơn, được thiết kế riêng cho mục đích sử dụng này. 35° 45° 11.4 Xả Nước Có... -
Page 77: Nối Điện
TIẾNG VIỆT 11.5 Nối Điện Trực tiếp vào ống thoát nước, ở độ cao không thấp hơn 60 cm và không cao Máy này được thiết kế để hoạt động trên quá 90 cm. nguồn một pha 220-240 V, 50 Hz. “Nguồn điện không thích hợp có... -
Page 78: Các Vấn Đề Về Môi Trường
CÁC VẤN ĐỀ VỀ MÔI TRƯỜNG 12.1 Vật Liệu Đóng Gói 12.3 Gợi Ý về Hệ Sinh Thái Để tiết kiệm nước, năng lượng và để Vật liệu có đánh dấu biểu tượng giúp bảo vệ môi trường, chúng tôi có... -
Page 79: Wi-Fi Connectivity Setup
* Yêu cầu tối thiểu: iPhone6/iOS 9.3/Android 5.1 trở lên. * Minimum requirements: iPhone6/iOS 9.3/Android 5.1 Bạn cần cài đặt Ứng dụng Electrolux Life, tạo tài khoản and above. You will need to install the Electrolux Life App, Electrolux, chấp nhận Điều khoản và điều kiện cũng như... - Page 80 TIẾNG VIỆT Tap on “Appliances” at the bottom of Nhấn vào tab “Thiết bị” ở cuối màn the home screen. hình chính trong Ứng dụng Electrolux life. Tap on “Add Appliance” and follow the prompts on screen. Nhấn vào “THÊM THIẾT BỊ” và làm theo hướng dẫn trên màn hình.
- Page 81 (Cài đặt) trên điện thoại và chọn be prompted go to “SETTINGS” mạng Wi-Fi nhà mình rồi quay on your phone and select your lại Ứng dụng Electrolux Life. Home Wi-Fi, then return to the Nếu kết nối đã được thiết lập, biểu Electrolux Life App.
- Page 82 English TIẾNG VIỆT To switch the wireless connection off, Để tắt kết nối không dây, Press and hold Remote touch button Hãy nhấn và giữ nút Remote - Từ xa for 3 seconds until the first acoustic trong 3 giây tới khi tín hiệu âm thanh đầu signal: appears on the display.
- Page 84 www.electrolux.vn...