Emerson Avocent ACS 6000 User Manual
Advanced console server
Hide thumbs
Also See for Avocent ACS 6000:
- Command reference manual (65 pages) ,
- Quick installation manual (2 pages)
Table of Contents
Quick Links
Table of Contents

Related Manuals for Emerson Avocent ACS 6000


Summary of Contents for Emerson Avocent ACS 6000
- Page 1 Avocent® ACS 6000 Advanced Console Server Installer/User Guide...
- Page 2 Emerson, Emerson Network Power and the Emerson Network Power logo are trademarks or service marks of Emerson Electric Co. Avocent, the Avocent logo and Cyclades are trademarks or service marks of Avocent Corporation or its affiliates in the U.S. and other countries.
-
Page 3: Table Of Contents
TABLE OF CONTENTS Introduction Features and Benefits Access options Web manager IPv4 and IPv6 support Flexible users and groups Security Authentication VPN based on IPSec with NAT traversal Packet filtering SNMP Data logging, notifications, alarms and data buffering Power management Auto discovery FIPS module Configuration Example... - Page 4 ii ..Avocent® ACS 6000 Advanced Console Server Information Usage Network Settings Devices IPv4 and IPv6 static routes Hosts Firewall IPSec(VPN) SNMP Configuration Ports Serial ports Auxiliary ports CAS Profile Dial-in Profile Dial-out Profile Pluggable Devices Device configuration Authentication Appliance authentication Authentication servers Users Accounts and User Groups Local accounts...
- Page 5 ..Recovering a Console Server's Password Port Information for Communication with the DSView Software Accessing a Console Server with a DSView Software Installation via Dial-up Installing DSView software with an OOB back door Configuring dial-up for a console server Internal Modem AT+MS modulation selection Set telephone extension option AT S registers...
-
Page 7: Introduction
Introduction The Avocent® ACS 6000 advanced console server is a 1U appliance that serves as a single point for access and administration of connected devices, such as target device consoles, modems and power devices. Console servers support secure remote data center management and out-of-band management of IT assets from any location worldwide. -
Page 8: Web Manager
2 ..Avocent® ACS 6000 Advanced Console Server • Target device connection. An authorized user can make a Telnet, SSH v1, SSH v2 or Raw connection to a target device. For Telnet or SSH to be used for target device connections, the Telnet or SSH service must be configured in the Security Profile that is in effect. -
Page 9: Flexible Users And Groups
Introduction..Flexible users and groups An account can be defined for each user on the console server or on an authentication server. The admin and root users have accounts by default, and either can add and configure other user accounts. Access to ports can be optionally restricted based on authorizations an administrator can assign to custom user groups. -
Page 10: Snmp
4 ..Avocent® ACS 6000 Advanced Console Server SNMP If SNMP is enabled in the selected security profile, an administrator can configure the Simple Network Management Protocol (SNMP) agent on the console server to answer requests sent by an SNMP management application. The console server SNMP agent supports SNMP v1/v2 and v3, MIB-II and Enterprise MIB. - Page 11 Introduction..Typical ACS 6000 Advanced Console Server Configuration Typical ACS 6000 Advanced Console Server Configuration Descriptions Number Description Number Description ACS 6000 advanced console server Phone line Remote dial-in Target devices client Local Area PDU (one or more) Network (LAN) Serial port connection LAN firewall Remote...
- Page 12 Introduction..
-
Page 13: Installation
Installation Getting Started Before installing your ACS 6000 console server, refer to the following list to ensure you have all items that shipped with it , as well as other items necessary for proper installation. Supplied with the console server •... -
Page 14: Connecting The Hardware
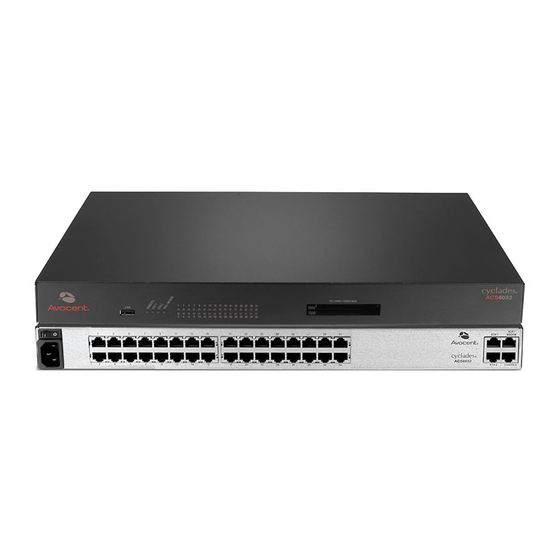
8 ..Avocent® ACS 6000 Advanced Console Server 1. Install the brackets at the front or back edges of the console server with the screws provided with the mounting kit. 2. Mount the console server in a secure position. Bracket Connections for Front Mount Configuration Connecting the Hardware Console server connectors The following figure shows the connectors on the front of the ACS 6000 console server. - Page 15 Installation..LEDs on the Console Server Front Label Description • Blue Blinks - During unit boot PWR/CPU • Solid - During operation • Off - Power is off • Amber - Link at 10BaseT speed • Yellow - Link at 100BaseT speed ETH 0/ETH 1 •...
-
Page 16: Connecting Device Consoles Or Modems To Serial Ports
10 ..Avocent® ACS 6000 Advanced Console Server Connecting device consoles or modems to serial ports Use CAT 5 or greater cables and DB-9 or DB-25 console adaptors as needed to connect target device consoles or modems to the serial ports on the console server. ®... -
Page 17: Turning On The Console Server
Installation..3. To connect modems, use straight-through CAT 5 or greater cables, with an appropriate connector or adaptor (USB, DB-9 or DB-25) for the modem. NOTE: To comply with EMC requirements, use shielded cables for all port connections. WARNING: Do not turn on the power on the connected devices until after the console server is turned on. To daisy chain PDUs to a console server: This procedure assumes that you have one PDU connected to a serial port on a console server. -
Page 18: Dc Power
12 ..Avocent® ACS 6000 Advanced Console Server DC power DC power is connected to DC-powered console servers by way of three wires: Return (RTN), Ground (GND) and -48 VDC. WARNING: It is critical that the power source supports the DC power requirements of your console server. Make sure that your power source is the correct type and that your DC power cables are in good condition before proceeding. -
Page 19: Configuring A Console Server
Installation..10. Turn on the power switches of the connected devices. Configuring a Console Server A console server may be configured at the appliance level through the command line interface accessed through the CONSOLE or Ethernet port. All terminal commands are accessed through a terminal or PC running terminal emulation software. - Page 20 14 ..Avocent® ACS 6000 Advanced Console Server # telnet [ hostname | IP_address] login: username:[portname | device_name] -or- # telnet [ hostname | IP_address] TCP_Port_Alias login: username -or- # telnet IP_Port_Alias login: username To close a Telnet session: Enter the Telnet hotkey defined for the client. The default is Ctrl ] + q to quit, or enter the text session hotkey for the CLI prompt and then enter quit .
- Page 21 Installation..At the beginning of a line, enter the hotkey defined for the SSH client followed by a period. The default is ~ . Or, enter the text session hotkey for the CLI prompt and then enter quit .
- Page 22 Installation..
-
Page 23: Accessing The Console Server Via The Web Manager
Accessing the Console Server via the Web Manager Once you’ve connected your ACS 6000 console server to a network, you can access the console server with its web manager. The web manager provides direct access to the console server via a graphical user interface instead of a command-based interface. -
Page 24: Wizard Mode
18 ..Avocent® ACS 6000 Advanced Console Server Web Manager Screen Areas Number Description Top option bar. The name of the appliance and of the logged in user appear on the left side. Refresh, Print, Logout and Help buttons appear on the right. Tab bar. - Page 25 Accessing the Console Server via the Web Manager..2. Select the desired Security Profile. If using a Custom Security Profile, click the checkboxes and enter values as needed to configure the services, SSH and HTTP and HTTPS options to conform with your site security policy. 3.
-
Page 26: Expert Mode
20 ..Avocent® ACS 6000 Advanced Console Server -or- Click Add to add a user. Enter the new username and password in the appropriate fields. 3. (Optional) To force the user to change the default password, select the User must change password at next logi n checkbox. -
Page 27: System Tools
Accessing the Console Server via the Web Manager..Button Purpose Disconnect To disconnect from the Java applet Select the left icon to reconnect to the server or device; or select the right icon to end the session and disconnect from the Java applet System Tools Click System Tools to display icons which can be clicked to reboot or shut down the console server, upgrade the console server’s firmware, save or restore its configuration or open a terminal session... -
Page 28: System
22 ..Avocent® ACS 6000 Advanced Console Server System Click System to display information about the console server and allow an administrator to configure the console server’s system parameters. The following tabs are listed under System in the side navigation bar. Security Security Profile A Security Profile determines which network services are enabled on the console server. - Page 29 Accessing the Console Server via the Web Manager..4. Under the Serial Devices heading, select whether port access is controlled by user group authorization or configure port access settings to apply to all users. 5. Under Bootp Configuration retrieval, enable or disable the service. 6.
- Page 30 24 ..Avocent® ACS 6000 Advanced Console Server integrity of the FIPS Object Module. Once the reboot is complete, the console server will accept SSH and HTTPS connections using only FIPS-approved ciphers. When FIPS is enabled the following restrictions apply: For SSH sessions: Protocol version 1 will be disabled.
- Page 31 Accessing the Console Server via the Web Manager..2. Check the radio button next to Download Certificate from FTP Server to download the file from the FTP server. 3. Enter all information about the FTP server: FTP site (IP address), Username, Password, File Directory and File Name -or- Check the radio button next to Download Certificate from My Computer to download the file...
-
Page 32: Date And Time
26 ..Avocent® ACS 6000 Advanced Console Server 2. Uncheck the box next to Enable Live Configuration. The saved configuration will be retrieved and applied on the next reboot. -or- Ensure the box next to Enable Live Configuration is checked. The saved configuration will be retrieved and applied on the next IP renewal. -
Page 33: Help And Language
Accessing the Console Server via the Web Manager..4. Enter the GMT Offset. 5. Select Enable daylight savings time if needed. 6. Select or enter the required values for daylight savings time settings and click Save . Help and Language Click System - Help And Language and use the drop-down menu to select the console server’s language. -
Page 34: Boot Configuration
28 ..Avocent® ACS 6000 Advanced Console Server Boot Configuration Boot configuration defines the location from which the console server loads the operating system. The console server can boot from its internal firmware or from the network. By default, the console server boots from Flash memory. -
Page 35: Usage
Accessing the Console Server via the Web Manager..Usage Click System - Usage to view memory and Flash usage. Network Click Network to view and configure the network options for Hostname, DNS, IPv6, Bonding, IPv4 and IPv6 static routes, Hosts, Firewall, IPSec (VPN) and SNMP. Settings Click Network - Settings to make changes to the configured network settings: Hostname, DNS, Bonding, IPv4 Multiple Routing Table. -
Page 36: Ipv4 And Ipv6 Static Routes
30 ..Avocent® ACS 6000 Advanced Console Server NOTE: The MAC Address for the device will be displayed after this option. IPv4 and IPv6 static routes To add static routes: 1. Select Network - IPv4 Static Routes or IPv6 Static Routes. Any existing static routes are listed with their Destination IP/Mask, Gateway, Interface and Metric values shown. -
Page 37: Firewall
Accessing the Console Server via the Web Manager..Firewall Administrators can configure the console server to act as a firewall. By default, three built-in chains accept all INPUT, FORWARD and OUTPUT packets. Select the Add , Delete or Change Policy buttons to add a user chain, delete user-added chains and to change the built-in chains policy. - Page 38 32 ..Avocent® ACS 6000 Advanced Console Server Firewall Configuration - TCP and UDP Options Fields Field/Menu Definition Option Source Port - or - Destination A single IP address or a range of IP addresses. Port [TCP only] SYN (synchronize), ACK (acknowledge), FIN (finish), RST (reset), URG (urgent) TCP Flags and PSH (push).
-
Page 39: Ipsec(Vpn)
Accessing the Console Server via the Web Manager..1. Select Network - Firewall . 2. Select either IPv4 Filter Table or IPv6 Filter Table as needed. 3. From the chain list, click the name of the chain you want to add a rule to. 4. -
Page 40: Snmp Configuration
An administrator can configure SNMP, which is needed if notifications are to be sent to an SNMP management application. NOTE: The Avocent ACS 6000 Enterprise MIB text file is available in the appliance at: /usr/local/mibs/ACS6000-MIB.asn. The Avocent ACS 6000 Enterprise TRAP MIB text file is available in the appliance at: /usr/local/mibs/ACS6000-TRAP-MIB.asn. -
Page 41: Ports
Accessing the Console Server via the Web Manager..a. Enter the SysContact information (email address of the console server’s administrator, for example, [email protected] ). b. Enter the SysLocation information (physical location of the console server, for example, Cyclades_ACS6000 ), then click Save to go back to the SNMP screen. 3. - Page 42 36 ..Avocent® ACS 6000 Advanced Console Server 1. Select Ports - Serial Ports . 2. Click the checkbox for each port you want to enable or disable. 3. Click the Enabled or Disabled button. To configure or edit one or more serial ports with the CAS Profile: 1.
- Page 43 Accessing the Console Server via the Web Manager..l. Use the drop-down menus to enable or disable log in/out multisession notification and informational message notification. 5. Click Next or click the Data Buffering link and use the drop-down menus to enable and configure data buffering.
-
Page 44
38 ..Avocent® ACS 6000 Advanced Console Server Parameter Description Defines the flow control as none, hardware, software, RxON software or TxON software. Flow Control Default: None. Name associated with the serial port (as an alias). Default:
-p- . - Page 45 Accessing the Console Server via the Web Manager..Parameter Description Transmission The interval the port waits to send data to a remote client in milliseconds. Default: 20. Interval Break An administrator can configure the control key as the break sequence, entering ^ before the Sequence letter.
- Page 46 40 ..Avocent® ACS 6000 Advanced Console Server Parameter Description Local IPv4/IPv6 Configures the local IPv4/IPv6 address for this PPP connection. Address Remote IPv4/IPv6 Configures the remote IPv4/IPv6 address for this PPP connection. Address Uses the radio button to select: none, PAP, CHAP or EAP. None - no authentication.
- Page 47 Accessing the Console Server via the Web Manager..Parameter Description Defines the speed as 300, 1200, 2400, 4800, 9600, 19200, 38400, 57600 or Speed 115200. Default: 9600. Parity Defines the parity as either Even, Odd or None. Default: None. Defines the data bits as either 5, 6, 7 or 8. Default: 8. Data Bits Stop Bits Defines the stop bits as either 1 or 2.
-
Page 48: Auxiliary Ports
42 ..Avocent® ACS 6000 Advanced Console Server Auxiliary ports On the Auxiliary Ports screen, you can enable the auxiliary port and configure it based on the type of connected device. To configure or edit auxiliary port with connected PDU: 1. Select Ports - Auxiliary Ports . 2. - Page 49 Accessing the Console Server via the Web Manager..target name will be reset to the configured target name or to the corresponding unique default target name. NOTE: The configured target name will be used only after the auto discovery process fails. NOTE: The auto discovery process starts when there is variation in the DCD signal from OFF to ON (disconnect/connect the target's cable, turn off/on the target) and when the configuration of the serial port goes from disabled to enabled and there is a target connected in the port.
- Page 50 44 ..Avocent® ACS 6000 Advanced Console Server b. To add a string, click Add , enter a new string in the New Probe String or New Match String field and click Save . c. To delete a string, select the checkbox for the string and click Delete . 4.
-
Page 51: Dial-In Profile
Accessing the Console Server via the Web Manager..- or - In the right side of the Pool Members field, select the ports to be removed from the pool and click Remove . 5. Click Save . NOTE: A serial port can only belong to one pool at a time, but a user can create an empty pool and add ports to it later. - Page 52 46 ..Avocent® ACS 6000 Advanced Console Server b. To allow any connection, select Enable . 5. When the PAP authentication protocol is configured for the port, select the authentication type from the PPP/PAP Authentication menu. 6. Click Save . To configure callback users and phone numbers for ports with the Dial-in Profile: 1.
-
Page 53: Dial-Out Profile
Accessing the Console Server via the Web Manager..7. Copy the certificates and keys to the /etc/ppp/cert file. They must be named server.crt (the ACS 6000 console server certificate), ca.crt (the Certificate Authority’s certificate) and server.key (the ACS 6000 console server asymmetric key). Dial-out Profile To configure the Dial-out Profile for a serial port with a connected modem: ... -
Page 54: Pluggable Devices
48 ..Avocent® ACS 6000 Advanced Console Server 3. Click Set Socket Client and use the drop-down menus to configure the physical settings. 4. Configure the Socket Client Settings (remote server address, TCP port and event trigger) and click Save . Socket Client Parameters Parameter Description... -
Page 55: Device Configuration
Accessing the Console Server via the Web Manager..If supported by the console server, insert a PC card into a PCMCIA slot. 4. The Pluggable Devices table displays all detected pluggable devices. NOTE: To disable pluggable device detection, click Disable Pluggable Device Detection . To eject or delete a pluggable device: 1. -
Page 56: Appliance Authentication
50 ..Avocent® ACS 6000 Advanced Console Server Local authentication can be tried first, followed by remote, if the local authentication fails (Local/Remote_Method). -or- Remote authentication may be tried first, followed by local (Remote_Method/Local). -or- Local authentication may be tried only if a remote authentication server is down (Remote_Method_ Down_Local). -
Page 57: Authentication Servers
Accessing the Console Server via the Web Manager..4. Select Enable single sign-on to enable single sign-on authentication, and select the desired authentication server from the Authentication Type drop-down menu. 5. Click Save . Authentication servers When using an authentication server, you must configure its IP address and in most cases other parameters before it can be used. - Page 58 52 ..Avocent® ACS 6000 Advanced Console Server 8. If you select the Enable User-Level attribute to specify the authorization group checkbox, enter the authorization group name for up to 15 User-Levels. 9. Click Save . To configure an LDAP(S)|AD authentication server: 1.
-
Page 59: Users Accounts And User Groups
Accessing the Console Server via the Web Manager..Users Accounts and User Groups Access to ports can be optionally restricted, based on authorizations that an administrator can assign to custom user groups. Groups can also be authorized to manage power while connected to devices. -
Page 60: User Groups
54 ..Avocent® ACS 6000 Advanced Console Server • Min Days: Enter the minimum number of days allowed between password changes. Password changes attempted sooner will be rejected. If not specified, -1 is the default which disables the restriction. • Max Days: Enter the maximum number of days a password is valid. After this period, a password change will be forced. - Page 61 Accessing the Console Server via the Web Manager..admin group Members of the admin group have full administrative privileges that cannot be changed, the same access and configuration authorizations as the default admin user. Administrators can configure ports, add users and manage power devices connected to the console server. NOTE: The only configuration allowed for the admin group is adding or deleting members.
-
Page 62: User Group
56 ..Avocent® ACS 6000 Advanced Console Server NOTE: The Appliance Access Rights screen for the admin and appliance-admin user groups is read-only and cannot be changed. Unchecking any box and clicking Save will result in an error message. The console server will maintain all rights selected. - Page 63 Accessing the Console Server via the Web Manager..2. Click the user group name. 3. Click Add . The Members Assignment screen is displayed showing a list of available users in the left box and an empty box on the right. 4.
-
Page 64
58 ..Avocent® ACS 6000 Advanced Console Server ts_menu Options Command Description Displays TCP port Displays local IPv4 assigned to the serial port Displays local IPv6 assigned to the serial port -u
Username to be used in the target session -e <[^]char>... - Page 65 Accessing the Console Server via the Web Manager..5. Move PDU devices from the Available PDU box on the left to the box on the right by double- clicking on the PDU name, or by selecting the PDU and clicking the Add button. You can remove any PDUs from the box on the right by double-clicking on the PDU name or by selecting the PDU and clicking the Remove button.
-
Page 66
60 ..Avocent® ACS 6000 Advanced Console Server 1. On the server, add raccess service to the user configuration. 2. Define which group(s) the user belongs to in the raccess service following this syntax: group_name =
[, -
Page 67: Dsview Software Access Rights
Accessing the Console Server via the Web Manager..FramedFilterID = group_name=admin; During the authentication phase, the console server will receive the attribute FramedFilterID from the RADIUS server. The user regina belongs to authorization group RADIUS_1 and RADIUS_2. and the user special belongs to authorization group admin. To configure group an LDAP authentication server: On the LDAP server, edit the info attribute for the user and add the following syntax. -
Page 68: Event Destinations
62 ..Avocent® ACS 6000 Advanced Console Server Event Destinations The console server will generate notifications for a variety of events. You can configure the console server to direct or store event notifications to various destinations for immediate use or for analysis later. -
Page 69: Data Buffering
Accessing the Console Server via the Web Manager..1. Click Events and Logs – Trap Forward. 2. Click Add. 3. Enter the IP address of the remote server and the UDP port. 4. Enter the OID to filter traps to send to this server (optional). To edit SNMP trap server configuration: 1. -
Page 70: Sensors
The following types of power devices can be connected to any serial port or to the AUX/Modem port (if an internal modem is not installed): • Avocent Power Management Power Distribution Unit (PM PDU). • Emerson Network Power MPH2 rack Power Distribution Units (PDUs) as well as MPX and MPH rack PDUs with RPC2 cards installed. -
Page 71: Pdus
Accessing the Console Server via the Web Manager..• Cyclades PM Intelligent Power Distribution Units (IPDUs) - With Cyclades PM IPDUs, up to 128 outlets can be daisy-chained and managed from a single serial port. • Avocent SPC power control devices. •... - Page 72 66 ..Avocent® ACS 6000 Advanced Console Server NOTE: You can upgrade the firmware for multiple PDUs at the same time for Avocent PM PDUs only. To view a PDU’s information and manage outlets: 1. Select Power Management - PDUs . 2.
-
Page 73: Login
Accessing the Console Server via the Web Manager..Login An administrator can change the login password for a supported PDU type. This password is used by the console server to communicate with the PDU. (Only one password is supported for all PDUs of the same type.) To change a PDU password: 1. -
Page 74: Network Pdus
• Avocent Power Management Power Distribution Unit (PM PDU). • Emerson Network Power MPH2 rack Power Distribution Units (PDUs) as well as MPX and MPH rack PDUs with RPC2 cards installed. • Server Technology Sentry™ family of Switched Cabinet Power Distribution Units (CDUs) and switched CDU Expansion Module (CW/CX) power devices. -
Page 75: Monitoring
Accessing the Console Server via the Web Manager..NOTE: If you start another session with the console server while viewing this screen, it will not be visible until you click Refresh at the top of the web manager window. To kill an active session: 1. -
Page 76: Web Manager Overview For Regular Users
70 ..Avocent® ACS 6000 Advanced Console Server Web Manager Overview for Regular Users The following figure shows features of the web manager for a regular user. Web Manager Regular User Screen Web Manager Regular Users Screen Functional Areas Number Description Top option bar. -
Page 77: Appendices
Appendices Technical Specifications Technical Specifications for the ACS 6000 Console Server Hardware Category Value General Information PPC440EPx @ 533 MHz (PowerPC with Security Acceleration Engine) Memory 256 MB DDR-2 / 128 MB NAND Flash (embedded ICs on motherboard) 2 Ethernet 10/100/1000BT on RJ-45 1 RS232 Console on RJ-45 1 AUX RS232 on RJ-45 or Interfaces internal MODEM V.92 on RJ-45 (RJ11 compatible) RS232 Serial Ports on RJ-45 1 USB 2.0 Host on Type A connector 2 PC Card / CardBus with ejector (dual Type II or single Type III) -
Page 78: Recovering A Console Server's Password
72 ..Avocent® ACS 6000 Advanced Console Server Recovering a Console Server's Password To recover the console server's root password: 1. Connect directly to the console server’s CONSOLE port. 2. Turn the console server off, then on again. 3. Press the Spacebar to access the uboot prompt. 4. -
Page 79: Port Information For Communication With The Dsview Software
Appendices..Port Information for Communication with the DSView Software The following ports on an ACS 6000 advanced console server can accept connections from the DSView management software: • TCP port 3502 (https) • TCP port 3871 (adsap2) • UDP port 3211 (aidp) •... -
Page 80: Accessing A Console Server With A Dsview Software Installation Via Dial-Up
74 ..Avocent® ACS 6000 Advanced Console Server Accessing a Console Server with a DSView Software Installation via Dial-up When a DSView software user establishes a serial session, the following events occur: • The user selects a serial port to access. •... - Page 81 Appendices..1. In a Units view window containing appliances, select the ACS 6000 console server you want to configure. For dial-in with callback, you must first select DSView Server - Properties - DSView Modem Sessions under the System tab and enter the the phone number assigned to the DSView server in the Analog Phone Number field.
- Page 82 76 ..Avocent® ACS 6000 Advanced Console Server 15. Log in to the console server’s CLI and access the Linux shell. Edit the /etc/ppp/chap-secrets and add a line in the format, where the first column should have the PPP user and the third column should have the PPP password as is shown in the following example: pppuser * "ppppassword"...
-
Page 83: Internal Modem
Appendices..Internal Modem Some models of the ACS 6000 console server come equipped with an internal modem. This modem is used to originate and answer phone calls and establish communication with other modems to transmit data. Controlling the modem’s functions is done by using the “AT” commands. These commands are used to instruct the modem to perform functions such as dialing or answering calls and are normally automatically issued by communication software. - Page 84 78 ..Avocent® ACS 6000 Advanced Console Server Command Description ATDA-D Dial the DTMF digits A, B, C and D. ATDP Select pulse dialing; effects current and subsequent dialing. ATDT Select tone dialing; effects current and subsequent dialing. ATD! Flash: go on-hook by time defined by S29. Wait for dial tone detection before dialing a number.
- Page 85 Appendices..Command Description detected, NO CARRIER will be reported instead of NO DIALTONE. Disables monitoring of busy tones. Sends only OK, CONNECT, RING, NO CARRIER, ERROR, NO DIALTONE and CONNECT XXXX. If busy tone detection is enforced and busy tone is ATX2 detected, NO CARRIER, will be reported instead of BUSY.
-
Page 86: At+Ms Modulation Selection
80 ..Avocent® ACS 6000 Advanced Console Server Command Description Line signal quality. Reports line signal quality (DAA-dependent). Returns higher order byte of the AT%Q EQM value. Based on EQM value, retrain or fallback/fall-forward may be iniated if enabled with AT%E1 or AT%E2 commands. AT+MS Select/force modulation. -
Page 87: Set Telephone Extension Option
..Set telephone extension option This command enables/disables “line-in-use” and “extension pickup” options. Set Telephone Extension Options -STE=n Value Extension Pickup Line-In-Use 0 (default) Disabled Disabled Disabled Enabled Enabled Disabled Enabled Enabled If the line is in use and the modem receives an ATDT command to dial out, the modem will not go off hook and will display the “LINE-IN-USE”... -
Page 88: Basic Modem Result Codes
82 ..Avocent® ACS 6000 Advanced Console Server Basic modem result codes There are basic codes the modem will issue in response to processing an AT command. Result codes may be displayed either in word (V1) or numeric (V0) format by using the Vn command. The Qn command controls if result codes are issued (Q0) or not issued (Q1). -
Page 89: Sleep Mode Operation
..Sleep mode operation The modem can be set to enter the low power sleep mode by setting ATS24=n . In this case, “n” is time, in seconds, that the modem will operate in normal mode with no detected telephone line or DTE line activity before entering low power sleep mode. -
Page 90: Using Caller Id
84 ..Avocent® ACS 6000 Advanced Console Server To view which countries are available in the modems firmware, enter AT+GCI=?. The modem will display all of the possible two digit country codes available. Country Codes List Country Code Country Code Country Code Australia Hong Kong... - Page 91 ..Command Parameter Description +VCID+ Enable caller ID with unformatted presentation to the DTE. +VRID= Displays the formatted caller ID of the last received call. +VRID+ Displays the unformatted caller ID of the last received call.
-
Page 92: Technical Support
86 ..Avocent® ACS 6000 Advanced Console Server Technical Support Our Technical Support staff is ready to assist you with any installation or operational issues you encounter with your Avocent product. If an issue should develop, follow the steps below for the fastest possible service. - Page 93 Emerson Network Power provides innovative data center infrastructure management solutions that bridge the gap between IT and facility management and deliver efficiency and uncompromised availability regardless of capacity demands. Our solutions are supported globally by local Emerson Network Power service technicians. Learn more www.EmersonNetworkPower.com...