
Related Manuals for Jack K4-D Series


Summary of Contents for Jack K4-D Series
- Page 1 K4-D系列使用说明 K4-D series’ use manual...
- Page 2 一、规格 First. specification 机种名称 小头式高速绷缝机 type High Speed Computerized Cylinder-bed Interlock Machine 型式 model name 缝迹形式 ISO 标准:406/407/602/605 Stitch type ISO standard:406/407/602/605 用途 针织、编织产品的包边缝、包缠缝 Knitting, knitting products of the wrap seam 、wrapping 缝纫速度 最高转速 The maximum speed:5500RPM Sewing speed 出厂转速 Factory speed:4000RPM 针幅...
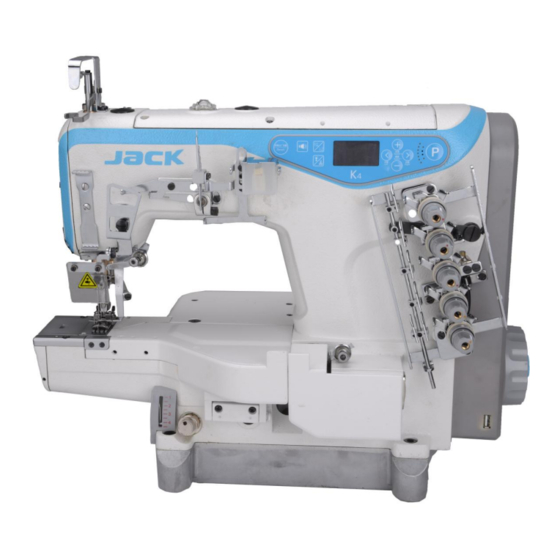
- Page 3 二、各部分的名称 Second, the name of each part Operatio n panel Silicone oil reservoir Thread (Upper) guide Needle bar guard PLUG sight window Presser foot adjustment screw Thread tension Thread take-up guard Finger guard Eye guard Stitch adjustment Indication plate knob 图...
- Page 4 简介:K4机器电控与机械一体,可以在机器上调节电控相关参数,实现了人性化的 人机交换模式,操作便利! Introduction:K4 , which control box is integrated into machine head, parameters can be adjusted on machine directly, achieved interpersonal exchange, easy and convenient to operate! 三、安装方法 Third, the installation method 1、台板尺寸及其安装方法 1, table size and installation method 图 3-1 2、链条的安装...
- Page 5 Chain 1 链条 1 hook 挂钩 链条 2 Chain 2 图 3-2 脚踏板链条如上图所示安装 Pedal chain installed as shown above 四、关于加油、注油 Fourth, on the Lubrication, oiling 注意:为了防止机器突然启动造成人身事故,请关掉电源,确认电机确实停止转动 后再进行操作! Note: In order to prevent personal accident caused by the sudden start of the machine, please turn off the power, make sure the motor does stop turning and then operate! 1、出厂加油...
- Page 6 1, the factory refueling recommended to use the oil 22#. When filling, open the plug marked with OIL and add the oil between the upper and lower engraved lines. Turn on the sewing machine after refueling to see if there is any oil spilled in the oil window.
- Page 7 注意:为了防止机器突然启动造成人身事故,请关掉电源,确认电机确实停止转动 后再进行操作! Note: In order to prevent personal accident caused by the sudden start of the machine, please turn off the power, make sure the motor does stop turning and then operate! 2、出厂注油 机器出厂首次使用或较长时间没有使用缝纫机时, 请一定向针杆滴 2-3 滴机油, 滴在针杆扎头与针杆的连接处,确保针杆机构润滑。 2, factory oiling When the machine is used for the first time in the factory or when the sewing machine is not used for a long time, be sure to drop 2-3 drops of oil to the needle bar and drop it at the junction of the bar head and needle bar...
- Page 8 图 Figure4-2 五、缝纫机的使用方法 Fifth、the use of sewing machines 注意:为了防止机器突然启动造成人身事故,请关掉电源,确认电机确实停止转动 后再进行操作! Note: In order to prevent personal accident caused by the sudden start of the machine, please turn off the power, make sure the motor does stop turning and then operate! 1、机针的安装方法...
- Page 9 注意:为了防止机器突然启动造成人身事故,请关掉电源,确认电机确实停止转动 后再进行操作! Note: In order to prevent personal accident caused by the sudden start of the machine, please turn off the power, make sure the motor does stop turning and then operate! 2、穿线方法 2, threading method ①、标准穿线法:①, standard threading method: 图...
- Page 10 figure5-3 当机针线伸缩量较小时:When the needle thread stretching in a smaller amount figure5-4 注意:为了防止机器突然启动造成人身事故,请关掉电源,确认电机确实停止转动 后再进行操作! Note: In order to prevent personal accident caused by the sudden start of the machine, please turn off the power, make sure the motor does stop turning and then operate! 3、针距调节...
- Page 11 rotating the stitch length adjusting knob. Clockwise Rotation, needle length becomes larger, counterclockwise rotation, stitch length becomes smaller. 图 5-5 Figure 5-5 注意:为了防止机器突然启动造成人身事故,请关掉电源,确认电机确实停止转动 后再进行操作! Note:In order to prevent the machine from personal accident suddenly, please turn off the power supply, confirm the motor really stop running again then operate ! 4、差动的调节...
- Page 12 图 5-6 Figure 5-6 注意:为了防止机器突然启动造成人身事故,请关掉电源,确认电机确实停止转动 后再进行操作! Note:In order to prevent the machine from personal accident suddenly, please turn off the power supply, confirm the motor really stop running again then operate ! 5、压脚压力调节 Adjust presser foot pressure 请把压脚压力在缝迹稳定范围内尽量调弱 调节压脚压力时,拧松压脚调节螺母,并将压脚调节螺杆顺时针或逆时针旋转,顺 时针旋转则压脚压力变大,逆时针旋转,则压脚压力变小。 It should be as light as possible, yet be sufficient to obtain the proper stitch formation.
- Page 13 rotation, when clockwise, the pressure of presser foot is Heavy, when counterclockwise, the pressure of presser foot is Light. 图 5-7 Figure 5-7 注意:为了防止机器突然启动造成人身事故,请关掉电源,确认电机确实停止转动 后再进行操作! Note:In order to prevent the machine from personal accident suddenly, please turn off the power supply, confirm the motor really stop running again then operate ! 6、线张力调节...
- Page 14 图 5-8 Figure 5-8 注意:为了防止机器突然启动造成人身事故,请关掉电源,确认电机确实停止转动 后再进行操作! Note:In order to prevent the machine from personal accident suddenly, please turn off the power supply, confirm the motor really stop running again then operate ! 7、滤油器的检查和更换 Inspect and replace oil filter 过滤器有灰尘在上面,不能正常使用,每使用 6 个月后请进行检查或更换。 注:如果油按规定的油量加入,油窗喷出的油量异常、过弱、有气泡等现象时,请...
- Page 15 Note: if the oil in accordance with the provisions, oil window spewing oil abnormal, too weak, the phenomenon such as bubbles, please timely replace or clean oil filter. 图 5-9 Figure 5-9...
- Page 16 六、电控操作 Six Electric control box operation 1、K4-D 电控操作 K4-D Electric control box operation Instructions of K4 Interlock sewing machine panel operation 本控制器使用双位数码管显示实现参数调整。 在 P 主界面, 第一个数码管显示 “P” , 第二个数码管显示当前设定的停针位置,上、下停针如图所示(图 1). In P interface, the first digit display “P”, the second digit display shows the current needle position, picture 1 shows the upper and lower needle position.
- Page 17 In the P interface, long ▼ button for 3 seconds, parameter will restore factory Settings.(J4, J5, except for the monitoring data of J6) 4.操作参数说明表 Parameter description...
- Page 18 默认 序 范围 参数说明 值 参数定义 parameter 号 range Description Defau 在 P 界面,长按 和 组合键 3s,可进入技术员界面,并显示 F The panel shows “P”, press for 3 seconds, inter engineers interface, and it shows “F” 0:灭 off 机头灯亮度调节 0 - 3 1~3:亮度 1~3 level LED light adjustment 以...
- Page 19 real voltage. 显示历史输入最低电压和最高电压 Display 历史电压 Historical the historical lowest input voltage and Voltage highest input voltage. 历史错误代码 Historical 显示最新的 5 个错误代码 Display historical Error error code(only show the latest 5 ). 累计运行时间 显示的数×100=实际时间(Hour) the Cumulative Running showing number multiples by 10 equal Time to the real time(hour).
- Page 20 Parameter 若重启或者恢复出厂设置后也不能解决,建议联系经销商 save 解决。Restart machine after several minutes or reset abnormal machine(press 3s ); If the problem unsolved, please contact dealers. 电机霍尔信 请检查电机编码器插头连接是否可靠,编码器信号线是否 号异常 Hall 有断线,插针是否退出或者变形。Please check if the 10 of the core line connect well or not, please check if the motor with connect line of hall is well or not.
- Page 21 立即切断电源,并检查供电电压是否过高,如果是,请调 系统过电压 整供电电压到额定电压后再开机工作(额定电压:220V)。 System Immediately switch off the power, and check over-volta whether the supply voltage is too high, if yes, please adjust the rated voltage, then start to work(rated voltage:220v). 请检查供电电压是否正常; 请等待电源重新开启/复位 (请 系统欠电压 仔细检查电源板各项机能)。Mean the voltage System abnormal, please check if the voltage is normal or under-volt not;...
- Page 22 七、缝纫机调整 Sewing machine adjustment 注意:为了防止机器突然启动造成人身事故,请关掉电源,确认电机确实停止转动 后再进行操作 Attention:In order to prevent the sudden start of the machine which causing a personal accident, please turn off the power, make sure the motor does stop rotating before operating! 1、冷却器导线器的调整 松开紧定螺钉,把各导线杆高度调整为图示的尺寸,然后拧紧紧定螺钉(图7-1), 针对不同布料时可通过调节A、B、C的高度来调节挑线量,导线杆的高度增加挑线 量减小,导线杆的高度降低挑线量增加(图1)。 1、Cooler wire guide adjustment.
- Page 23 Figure 7-1 2、松开紧定螺钉,左右移动针线操作器,如图 2 所示,把针线操作器边缘到摆动 挑线杆轴的中心调整至 80mm,然后拧紧紧定螺钉,针对不同布料时可通过调节针 线操作器边缘到摆动挑线杆轴的中心的距离来调节挑线量,针线操作器边缘到摆动 挑线杆轴的中心的距离加大,挑线量减小,针线操作器边缘到摆动挑线杆轴的中心 的距离减小,挑线量加大(图 8-2)。 2、 Release set screw, shuffling the needle thread operator, showed by figure 8-2,change the distance between margin of needle thread operator and center of shuffing release pole rod to 80mm, then tight the set screw. For various type of fabric, we can adjust the thread taking up length by change this distance.
- Page 24 Figure8-2 3、分布导线器的调整 分布导线器①在最高点时,松开紧定螺钉③,分布导线器的导线线道里侧上端调整 成与分布导线器的长槽下端一致,然后拧紧紧定螺钉③(图 8-3)。 3、Adjustment of spreader thread take up ① at the top point, release set screw③, make the top of inner guide line fix to the bottom of guider slot, then tight the set screw ③(Figure 8-3)。...
- Page 25 Figure 8-3 4、打线凸轮及打线凸轮导线器的调整 ①、打线凸轮位置调整 当机针处于最高点时(图 8-4),调整打线凸轮,使之恰好开始打线。 1、Adjustment of thread cam and thread cam guider ①、Hit thread cam adjustment When needle at the top(Figure 8-4),adjust hit thread cam,make it at the position that just start hit thread.
- Page 26 图8-4 图5...
- Page 27 ②、打线凸轮打线量调整 当需要调节底线打线量时,松开紧定螺钉,调节分线片位置,分线片往上移动打线 量减小,分线片往下运动,打线量增加。(图6) ②、Adjusting thread guides of CAM When adjusting the base thread distance, first loose screw and adjust dividing thread plate position. If dividing thread plate moving up ,the thread distance get less, while vice versa. screw Dividing thread plate Dividing thread plate 图6(Picture 6) 5、机针高度调整...
- Page 28 5、Adjusting needle height Firstly, adjusting the gap between the needle and the needle plate to ensure the gap is equal. And then adjusting needle height ,when the needle run to the highest point,the height of needle plate to left needle pinpoint is H( Picture 7),and H parameter as follows: 标...
- Page 29 needle Needle plate 图7(picture 7) 6、弯针的调整方法 6、Looper adjusting methold ①、弯针与机针引量的调节 当机针在最低点时,弯针在最右点,弯针针尖到右针中心点距离为弯针与机针的引 量A(图8),详细参数见下表: ①、Adjusting the distance of looper to needle When needle in the lowest point, and looper in the right end point, the distance between looper pinpoint to right needle middle point is called Leading distance A (Picture 8)between looper to needle,the detailed parameter see as follows: 标准...
- Page 30 型号 Model 弯针与机针引量A 弯针与机针引量A Leading distance A between Leading distance A between looper to needle looper to needle K4-01GB×356 3.5-3.8 3.0-3.2 K4-01GB×364 3.1-3.4 2.6-2.8 K4-02BB×356 3.5-3.8 3.0-3.2 K4-01BB×364 3.1-3.4 2.6-2.8 K4-35AC×356 3.1-3.3 3.0-3.2 K4-35AC×364 2.7-2.9 2.6-2.8 Lowest Right end point point screw 图8(Picture 8)
- Page 31 looper and needle to be 0-0.05 mm(Picture 9), and looper continue to moving towards left, when is arrive the middle of left needle, the distance of looper and left needle is 0.05-0.1mm(picture 9) . 图9 Picure 9 7、后护针的调节 针杆在最低点时,调整后护针,使护针在右针孔上方1/3处, 弯针先端最右位置开 始到右针中心时>右针和弯针的先端前后间隙为0-0.05mm(图10)...
- Page 32 on 1/3 of the right needle hole 图10 picture 10 8、摆动挑线杆的同步和线环的关系 8、The relationship between swing timing bar and thread loop 提要:如果由于线环过大或过小等找出机器跳针、断线时,可以通过调节摆动挑线 杆来调整线环的大小。 Tips:you can adjust swing timing bar to adjust the size of thread loop, if thread loop large small that leads needle-skipping,thread-broken problems.
- Page 33 if forward movement, the thread loop get smaller, otherwise if backward movement, the thread loop get larger. srew over thread 图11 (Picture 11) 9、送布牙高度的调整 9、Adjusting feed teeth height 调整送布牙高度,牙齿来到最高点时,松开螺钉2,将主送布牙高度调整刀 1.2mm, 然后拧紧螺钉2, 同理松开螺钉1, 将差动送布牙的高度调整到1.2mm, 然后拧紧螺钉1。 Adjusting feed teeth height,when feed teeth get the maxmium point,loose srew2,and adjusting...
- Page 34 hight to 1.2mm,and after that tighten srew1. Needle plate Screw 1 Screw 2 图12 picture12 10、喂针的安装位置 10、Installation position of spreader 喂针高度是针板上平面到喂针下面的距离为H,调整喂针高度,松开螺钉1,上 下移动喂针(图13),使其高度为为H,H的具体取值如下表: Spreader height H is the distance between needle plate to needle ,adjusting Spreader height, and loosing screw 1, then move Spreader up or down(picture 13) to adjusting the height is H, the specific references as follows: 标准...
- Page 35 型号 喂针高度H 喂针高度H model Spreader height H Spreader height H K4-01GB×356 K4-01GB×364 K4-02BB×356 K4-02BB×364 K4-35AC×356 K4-35AC×364 Screw 2 Screw Feedd needle Needle plate 图13(Picture 13) 喂针从右往左运动,松开螺钉1,调整喂针针尖与左针间隙调整喂0.5mm,喂针 继续向左运动到左极限, 松开螺钉2, 调整喂针与左针中心的间隙为4.5-5.0mm, 然后拧紧螺钉2。 Spreader moving from right towards to left, loose screw 1,adjusting the distance between Spreader pinpoint and left needle to be 0.5mm,and...
- Page 36 Spreader continue to move towards left to the end; and then loosing screw 2,adjusting the distance between Spreader and left needle middle to be 4.5-5.0mm, next is tighten srew2. Spreader pinpoint Spreader Spreader pinpoint pinpoint 图14(picture) 11、弯针向左运动通过各针的内侧,调整针和前护针和的间隙为0.3-0.5mm,对照 线的粗细,针线能顺利通过,前护针尽量靠近安装。调整前护针与前护针架为 0.5mm。 11. Looper moving towards left through the inside of all needles, adjusting the distance between needle and front guard needle to be 0.3-0.5mm.
- Page 37 Front guard needle looper Front guard needle protect device Front guard needle 图15 12、压脚高度调节 12. Adjusting presser height 调节压脚高度时,调整螺钉的高度,不让压脚和其他零件相接触,然后用螺母进 行固定。 When you are adjusting presser height, you should adjust the screw height to avoid presser touching other spare parts, and then fix it withnut screw 图16...