Table of Contents
Table of Contents

Related Manuals for Jack A Series


Summary of Contents for Jack A Series
- Page 1 A5 Computerized Lockstitch Machine 项目名称 | 日期 PROJECT NAME | date CONFIDENTIAL...
- Page 2 A series product Followed by A6, etc. 项目名称 | 日期 PROJECT NAME | date CONFIDENTIAL...
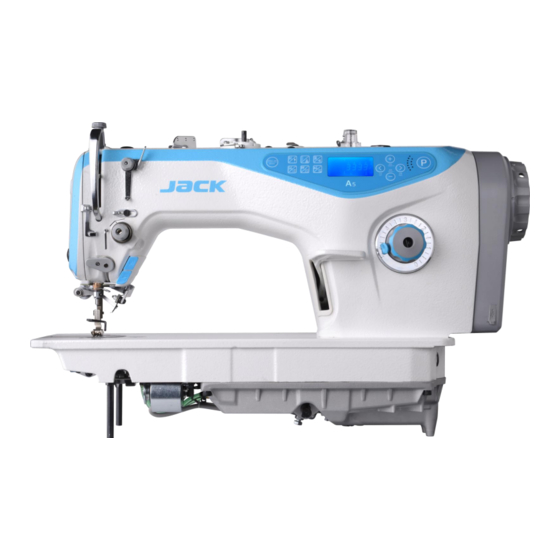
- Page 3 A5, Jack new generation semi-dry computerized lockstitch machine with shortest remaining thread. It’s updates from A4S-N and equipped with semi dry machine head, double knife movement and design of ending condense stitch, CONFIDENTIA 项目名称 | 日期 项目名称 | 日期...
- Page 4 product introduction sewing plate model hook type control box Powermax Computerized Stainless large hook lockstitch with auto- Qixing Steel normal trimmer normal hook Zobow Computerized lockstitch with 3 Machine head automatic functions High speed chinese Semi-oil Air suction computerized hook lockstitch With oil device...
- Page 5 Introduction A5 series parameters Maximum Speed (rpm) 5000rpm Stitch length (mm) Presser foot height (mm) 9mm(standart)12mm(max) Needle type DBx1 #14 Space for work(mm) 262x128mm CONFIDENTIA 项目名称 | 日期 项目名称 | 日期 PROJECT NAME | date PROJECT NAME | date CONFIDENTIAL...
- Page 6 Introduction Compared to A4S new function Product Advertising advantages Double knives movement double knife movement and design of ending condense assure short stitch, realize 3mm short thread remaining. thread at the end. electronic thread Electronic thread tension release, more efficient tension release Auto Bobbin Automatic winding thread, Save time, high...
- Page 7 operating instructions-Factory Reset Reset with one button Operation steps: In the power on, press and hold for 5 seconds,to restore the factory default. When the screen shows , and the screen shows , then panel will display boot screen automatically, which means resets successfully.
- Page 8 operating instructions-before and after backstitch operating steps: In standby mode, press 、 key,Set the number of before and after backstitch number of number of after backstitch before backstitch 项目名称 | 日期 PROJECT NAME | date CONFIDENTIAL...
- Page 9 operating instructions-without Bird's Nest In the standby mode, press the button , the icon on the screen lights up, indicating that the bird nest function is open. 项目名称 | 日期 PROJECT NAME | date CONFIDENTIAL...
- Page 10 Adjust the needle place Long press ,when in screen shows , can adjust 项目名称 | 日期 PROJECT NAME | date CONFIDENTIAL...
- Page 11 free seaming and scissors setting Free seam/shearing Free swing:press The screen turn on switch means free sewing model Tmring turn ;long press ,when it turn of in the screen, it means tmring turn off 项目名称 日期 项目名称 | 日期 PROJECT NAME | date PROJECT NAME | date CONFIDENTIAL...
- Page 12 W sewing stype C means the sticth quantity press AB means the sticth quantity at beging and end means it in W sewing adjust W缝:press ,when shows And adjust the The stitcth quantity not more than 15 CONFIDENTIA 项目名称 | 日期 项目名称...
- Page 13 Multistage stitch long press ,screen Long press shows press to adjust The sect quantity, not more than 24。 The quantity stitch of each sect Needle stitch quantity。 CONFIDENTIA 项目名称 | 日期 项目名称 | 日期 PROJECT NAME | date PROJECT NAME | date CONFIDENTIAL...
- Page 14 The sensern of auto-press lifter Long press to turn on and off Long press ,if shows , means it is turn on Long press , if shows , means it is turn off CONFIDENTIA 项目名称 | 日期 项目名称 | 日期 PROJECT NAME | date PROJECT NAME | date CONFIDENTIAL...
- Page 15 Auto-press lifter Switch of press lifter Long press , means mid-stitch auto-press lifter turn on Long press , means mid-stitch auto-press lifter turn off : Press Means after triming the press turn on press Means after triming the press turn CONFIDENTIA 项目名称...
- Page 16 Speed Press to up the speed Press to down the speed CONFIDENTIA 项目名称 | 日期 项目名称 | 日期 PROJECT NAME | date PROJECT NAME | date CONFIDENTIAL...
- Page 17 cursor remove Left shift select: parameter settings, parameter values need to increase the key, the standby interface cursor left shift key. Right move select: parameter setting, the parameter value needs to reduce the key, the right cursor right move button at the standby interface. CONFIDENTIA 项目名称...
- Page 18 Stop pin setting Press ,than press , When it shows, The change wheel makes the point on the handwheel and the engraving on the casingAlignment (handwheel is slightly lower), then press P button, then pressP keys align the pins and press P to save them The points on the handwheel on the housing CONFIDENTIA...
- Page 19 Operation Instruction –technical parameter 1、 In standby mode, the long press P key enters the parameter mode; 2、 presse to change parameter 3、The parameter interface flickers when the parameter value is modified.At this time, press the P key, save the modified parameter, and then briefly press the P key to exit the parameter interface and return the standby page.
- Page 20 Operation Instruction –technical parameter P 1 7 0~99 Automatic induction presser foot sensor setting (between the maximum and minimum value of the 02C parameter display) P 1 8 1~120 Stitch balance for start back tacking No.1(Pull in compensation) P 1 9 1~120 Stitch balance for start back tacking compensation release...
- Page 21 Operation Instruction –technical parameter P 3 3 1~100 Thread clamp solenoid off time per cycle (ms) P 3 7 1~100 Thread clamp solenoid on time per cycle (ms), (the clamp strength) P 4 5 1~100 Back stitch electromagnet per cycle opening time (ms) P 4 6 1~100 Back stitch electromagnet per cycle closing time (ms)
- Page 22 Operation Instruction –technical parameter P 6 2 0/1/2/3 Special mode: 0: normal Mode 1: simply sewing mode 2: motor initial angle measurement 3: Calculate the transmission ratio mode 4: automatic test modle 1 (It has needle stop position of automatic test, running 5s , stopping P 6 6 ;0: close;...
- Page 23 Operation Instruction –technical parameter Oil detection funcation selection 0:open 1:close P+power button detection Waiting time when stitch off 229 200 0~2500 the machine(0.25S/1) 项目名称 | 日期 PROJECT NAME | date CONFIDENTIAL...
- Page 24 Operation Instruction –technical parameter Switch 0~ 0A 800 Close needle sewing speed 9999 machine long press P Stitch number setting of Short 1 0~10 close needle sewing,0 thread default close 0~ 13F 800 Close needle sewing speed 9999 P+power Stitch number setting of button 20B 1 0~10 close needle sewing,0...
- Page 25 Operation Instruction –technical parameter 310 5~720 Switch on Under bird’s nest mode electronic thread machine and clamp compensating parameter (not tacking long press P 27 0~360 sewing slow compensating parameter) 100~ Slow start sewing speed 0~ bird’s nest mode on 1000 9999 With cutting machine、A4、A4S up and down...
- Page 26 Operation Instruction –technical parameter thread slack electromagnet timing selection: 0:[LS] After set angle then make thread slack movement , until upper needle position delay again [T2] to the setting time 1:[LS] After set angle then make thread slack movement ,until [LE] set angle.
- Page 27 Operation Instruction - monitoring parameter (P+ presser foot lifter key) Para Parameter Para Parameter description description meter numb stitch counter 0 2 6 The machine drive ratio Counter for 0 2 7 The total used time(hours) of sewing pieces motor The head of 0 2 8 The sampling voltage of...
- Page 28 Troubleshooting error Code solution code meaning Hardware Err-01 1, turn off the power, restart 2, check the voltage is normal overcurrent Software Err-02 low pressure 176V high pressure 264V 3, turn the hand wheel overcurrent to see whether the mechanical parts stuck 4, check the motor System undervoltage Err-03 plug 5, restore the factory, test the motor angle 6,replace...
- Page 29 Troubleshooting Brake circuit 1, check the electrical control box in the cement resistance plug is Err-09 failure off 2, check the cement resistance is burst 3, replace the cement resistance 4, replace the control box HMI communication 1, check the control panel and the electric control box connection Err-10 failure is off, loose, broken 2, restore the factory 3, replace the panel 4,...
- Page 30 Troubleshooting Err-14 DSP read and write EEPROM failure 1, restore factory settings Err-15 Motor overspeed 2, test the motor angle protection 3, replace the control box Err-16 Motor reversal Err-17 HMI read and write EEPROM fault Err-18 Motor overload Motor stall According to E08 to investigation, and E08 solution the same.
- Page 31 specific spare parts list of A5 description structure serial number quantity A5-0928 短 线头电磁铁 支架 Bracket 14112002 A5-0930 复位扭簧 Spring 14127001 A5-0927 倒送料 连杆轴位螺钉 Screw 141S20001 A5-0926 短 线头连杆 Link 14105001 A5-0937 辅助连杆 Link 14105002 Short thread A5-0938 轴位螺钉 SM11/64"x40 Screw 141S20003 A5-0914 轴位螺钉...
- Page 32 specific spare parts list of A5 description serial number quantity structure A5-0615剪 线凸轮 曲柄 轴 Shaft 14104002 A5-0611刀架 压板 Pressing plate 14112005 A5-0612活 动 刀Movable knife 14119001 A5-0613 辅助动 刀Movable knife 14119002 A5-0616剪 线轴套 Bushing 14103003 A5-0618剪 线 曲柄Crank 14104001 Double A5-0621剪...
- Page 33 specific spare parts list of A5 description serial number quantity structure A5-0329-00 松 线电磁铁组件 Tension release solenoid asm. 1413000900 A5-0331 松 线顶板 Tension release plate 14101017 A5-0332 松 线顶板连接销 Pin 14126002 Auto thread tension A5-0347 松 线顶板复位 簧 Spring 14127002 A5-0305 压脚扳手凸轮...
- Page 34 specific spare parts list of A5 serial number description quantity structure A5-0303 针杆 曲柄 Crank 14104004 A5-0414 滑 块导轨 Guide 14109001 A5-0201 挑 线组件 Thread take-up asm. 1413800100 A5-0407 针杆下衬套 Bushing 14103010 A5-0350 压杆下衬套 Bushing 14103012 Non-oil A5-0403 针杆上衬套(铜 ) Bushing 14103005 A5-0210 上...
- Page 35 specific spare parts list of A5 descriptio structure serial number description A5-0145 橡皮塞(四孔) Rubber seal 14122001 A5-0649-00 剪 线电磁铁组件 trimmer solenoid asm. 1413003400 A5-0839 过线 勾 Thread gudie 14112007 A5-0102 面板 垫 14122002 Panel pad A5-0104 面板 Face plate 14101001 A5-1615 一体机...