
Related Manuals for Jack W4 Series


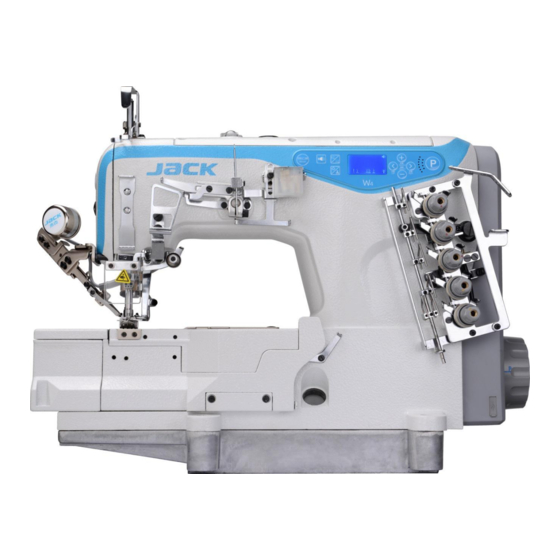
Summary of Contents for Jack W4 Series
- Page 1 W4 系列使用说明 (W4 series User Guide)...
- Page 2 一、 规格(Specification) 机种名称(machine 平台式高速绷缝机(High speed flatbed interlock machine) description) 型式(machine Model) W4 缝迹形式(stitch type) ISO 标准:406/407/602/605(ISO standard:406/407/602/605) 用途(use) 针织、编织产品的包边缝、包缠缝(Knit, knit product package edge seam, wrapped around the seam) 缝纫速度(sewing speed) 最高转速(Max speed):5500RPM 出厂转速(Factory set speed):4000RPM 针幅(needle width) 3 根针(needle):5.6mm、6.4mm 2 根针(needle):2.8mm、3.2mm、5.6mm、6.4mm 差动送布比(differential 0.65-1.3 feed ratio)...
- Page 3 二、各部分的名称 图2-1(Figure 2-1) 压脚护罩:Presser foot guard,挑线防护罩:thread take-up guard,玻璃 护罩:glass guard,压脚调节螺杆:Foot adjusting screw,针杆护罩:Pin guard, 油窗: oil window, 加油窗口: Refueling window, 操作面板: operation panel, 过线:line cross,夹线器:yarn trapper W4机器电控与机械一体,可以在机器上调节电控相关参数,实现了人性化的 人机交换模式,操作便利!( W4 machine electric control and mechanical integration, can adjust the electric control related parameters on the machine, realized humanized man-machine exchange mode, the operation is convenient!)...
- Page 4 三、安装方法(Installation method) 1、台板尺寸及其安装方法(Platform size and installation method) 图 3-1 2、链条的安装(Installation of the chain) 挂钩 链条 挂钩:hook up,链条 Chain 图 3-2(Figure 3-2)...
- Page 5 脚踏板链条如上图所示安装 (The pedal chain is installed as shown in the figure above) 四、关于加油、注油(About refueling and filling) 注意:为了防止机器突然启动造成人身事故,请关掉电源,确认电机确实停止转动 后再进行操作!(Note: In order to prevent personal accident caused by the sudden start of the machine, please turn off the power, make sure the motor does stop running and then operate!)...
- Page 6 注意:为了防止机器突然启动造成人身事故,请关掉电源,确认电机确实停止转动 后再进行操作!(Note: In order to prevent personal accident caused by the sudden start of the machine, please turn off the power, make sure the motor does stop running and then operate!) 2、出厂注油(Adding oil) 机器出厂首次使用或较长时间没有使用缝纫机时, 请一定向针杆滴 2-3 滴机油, 滴在针杆扎头与针杆的连接处,确保针杆机构润滑。 (When the machine is used for the first time or when the sewing machine is not used for a long time, be sure to drop 2-3 drops of oil to the needle bar and drop it at the junction of the bar head and needle bar to ensure the needle bar mechanism is...
- Page 7 五、缝纫机的使用方法(Methods to use sewing machine) 注意:为了防止机器突然启动造成人身事故,请关掉电源,确认电机确实停止转动 后再进行操作!(Note: In order to prevent personal accident caused by the sudden start of the machine, please turn off the power, make sure the motor does stop running and then operate!) 1、机针的安装方法(Needle installation method) 安装机针时,机针头部需要完全插入针古里,且机针凹槽部位向里侧。(When installing the needle, the needle head needs to be completely inserted into the needle, and the needle groove is to the inside.)...
- Page 8 2、穿线方法(Threading method) ①、标准穿线法(Standard threading method): 图 5-2 当机针线伸缩量较大时(When the expansion and contraction quantity of the needle thread is big:): 图 5-3(Figure 5-3) 当机针线伸缩量较大时(When the expansion and contraction quantity of the needle thread is big:): 图 5-4(Figure 5-4)...
- Page 9 注意:为了防止机器突然启动造成人身事故,请关掉电源,确认电机确实停止转动 后再进行操作!(Note: In order to prevent personal accident caused by the sudden start of the machine, please turn off the power, make sure the motor does stop running and then operate!) 3、针距调节(Stitch length adjustment) 机器针距可以在 1.5mm-4.5mm 范围内任意调整(实际缝料线迹长度,随布 料的种类和厚度有所不同),缝纫机针距的调节是通过旋转针距调节旋钮调节的, 顺时针旋转,针距变大,逆时针旋转,针距变小。 (Machine stitch length can be adjusted within the range of 1.5mm-4.5mm (actual sewing stitch length, depending on the type and thickness of the cloth).
- Page 10 注意:为了防止机器突然启动造成人身事故,请关掉电源,确认电机确实停止转动 后再进行操作!(Warning: In order to avoid any accident, before operating please make sure power is off and motor is stopped. ) 4、差动的调节(differential ratio adjustment) 差动调节范围在 0.65-1.3 内,松开调节螺钉,上下扳动,往上是顺差动,往下是逆 差动。(differential ratio adjustment range from 0.65-1.3, release the adjust screw, move up or down to adjust. ) 图...
- Page 11 5、压脚压力调节(Presser foot pressure adjustment ) 请把压脚压力在缝迹稳定范围内尽量调弱 调节压脚压力时,拧松压脚调节螺母,并将压脚调节螺杆顺时针或逆时针旋转,顺 时针旋转则压脚压力变大,逆时针旋转,则压脚压力变小。(Please keep the presser foot pressure as light as possible within the stable stitching. When adjust the presser foot pressure, loosen the presser foot adjusting nut and adjust the presser foot adjusting screw clockwise or anticlockwise, If clockwise, presser foot pressure becomes bigger, if anticlockwise, presser foot pressure becomes smaller)...
- Page 12 图 5-8(Figure 5-8) 注意:为了防止机器突然启动造成人身事故,请关掉电源,确认电机确实停止转动 后再进行操作!(Warning: In order to avoid any accident, before operating please make sure power is off and motor is stopped.) ) 7、滤油器的检查和更换(oil filter inspection and replacement) 过滤器有灰尘在上面,不能正常使用,每使用 6 个月后请进行检查或更换。 注:如果油按规定的油量加入,油窗喷出的油量异常、过弱、有气泡等现象时,请 及时更换或清扫过滤器(Oil filter, can't work smoothly with dust on it. Please check or replace every 6 months.
- Page 13 六、电控操作 1、W4-D 电控操作 Instructions of W4-D Interlock sewing machine panel operation 本控制器使用双位数码管显示实现参数调整。在 P 主界面,第一个数码管显示“P” ,第二个数码管显示当前设 定的停针位置,上、下停针如图所示(图 1). In P interface, the first tube display “P”, the second tube display shows the current needle position, picture 1 shows the upper and lower needle position. 图...
- Page 14 显 示 最 新 的 5 个 错 误 代 码 Display historical error 历史错误代码 Historical Error code(only show the latest 5 ). Cumulative 显示的数×100= 实际时间(Hour) the showing 累 计 运 行 时 间 Running Time number multiples by 10 equal to the real time(hour). 5.错误码说明表...
- Page 15 under-voltage restart again or recover to the factory reset. 请检查刹车电阻插头是否松动或脱落;请检查供电电压是否 正 常; 请尝 试恢 复 出厂 设置 或 将电 源重 启; Please check 刹车电阻保护 Brake resistor whether the plug of brake resistor is loose or drop off;Please protection check whether the supply voltage is normal;Please try to restore factory defaults or restart.
- Page 16 第 1 章 产品安装(The product installation) 1.1 产品规格(Product specification) 品型号(Model) AHE59 电源电压(Supply AC 220±20% V voltage) 电源频率( Supply 50Hz/60Hz 最大输出功率(Maximum 550W frequency) output) 1.2 接口插头的连接( Connection of interface plug) 将脚踏板及机头的各连接插头安插到控制器后面对应的插座上,各插座名称如图 1-2 所示。连接好,请检 查插头是否插牢。 (Connect the pedal and the nose of the plug placed behind the controller corresponding to the socket, the name of the socket as shown in figure 1-2.After connection,please check whether the plug is stuck or not.)...
- Page 17 :所有电源线、信号线、接地线等接线时不要被其它物体压到或过度扭曲,以确保使用安全! Do not press or over-distort all the power cables, signal cables, grounding cables, etc. to ensure safe ( operation! ) Operation panel instruction 第 2 章 操作面板使用说明( ) operation panel display instruction. 2.1 操作面板的显示说明( ) 根据系统工作状态,操作面板的液晶屏模块将显示当前的缝纫模式、各种参数,以及抬压脚、停针位、剪 Depends on the working status of system, the LCD screen of operation panel 线、慢速起缝等液晶字符。...
- Page 18 2.2 操作面板各按键功能说明 功能描述 Function Description 序 外观 名称 Name Appa 号 rance 参数进入 在开机状态下,长按 键进入参数模式。修改参数后按一下 键储存,再按 键退 及返回键 出参数模式。In state of power on,press and hold button to enter parameter model。 Parameter Press button to save, and press again to exit。 Enter and Exit 抬压脚键...
- Page 19 第 3 章 系统参数设置说明(Chapter 3 System parameter description) 3.1 参数模式(parameter mode) 键进入参数模式; (under standby mode,press button to enter parameter mode; ) 1、 待机状态下,按 button and button to adjust the parameter。 ) 2、 按 键和 键修改相对应的参数。 (press 3、 当参数值有修改时,参数界面闪烁。此时,短按 键,保存修改后的参数,再长按 键退出参数界面,返回 待机页面。...
- Page 20 扫线、吹风选择功能(2 为扫线;8 为吹风) 0~25 P 4 3 Sweep or Air(2 is sweep;8 is air) 剪线电磁铁每周期开通时间 ms P 4 5 0~100 trimmer magnet open time in a period ms 剪线电磁铁每周期关闭时间 ms 0~100 P 4 6 trimmer magnet close time in a period ms 剪线速度...
- Page 21 计针数模式(0:不计针数;1:递增加满自动复位;2:递减至零自动复 位;3:递增加满,报错停机,手动复位;4:递减至零,报错停机,手动 复位;5:递增加满,报错不停机,剪线后停机,手动复位;6:递减至零, 报错不停机,剪线后停机,手动复位) Stitch count mode(0:no count;1:increase and reset on maximum point;2: P A 8 decrease and reset on Zero;3:Increase and report error on maximum point, manual reset; 4: decrease and report error on Zero, manual reset; 5: increase and report error on maximum point without sewing stop.
- Page 22 Adjust the machine head until it stops warning Rockover switch warning 关闭系统电源,30 秒后重新接通电源,控制器若仍不能正常工作,请更 换控制器并通知厂方。 休眠 Turn off the machine, and turn on it after 30 second,if the control 5LEEP sleep box still not work,please replace the control box and inform service center.。...
- Page 23 检查控制面板与控制器的连线是否脱落、松动、断裂,将其恢复正常后重启 系统。若仍不能正常工作,请更换控制器并通知厂方。Check the connection HMI 通讯故障 of control panel and controller, whether loose or fall off,make it right and then E r r - 1 0 HMI communication error restart it. If still not work, please replace the control box, and inform service center 检查机头同步信号装置与控制器的连线是否松动,将其恢复正常后重启系...
- Page 24 footboard sensitivity adjustment) 第 4 章 脚踏板灵敏度调整(Chapter 4 脚踏板动作由初始位置①(136 号参数)开始,缓慢向前踩至②(137 号参数)开始低速缝纫,继续前踩至 ③(138 号参数)开始 加速,再深踩至④(139 号参数)达到最高速度。②③段之间维持起缝速度,③④段之间为无级调速过程; 1、 当脚踏板由初始位置①(136 号参数)开始,缓慢后踩至⑤(135 号参数)时抬压脚自动抬起; 2、 当脚踏板由初始位置①(136 号参数)开始,缓慢后踩至⑥(134 号参数)时自动完成剪线动作。 3、各参数数值设置需保证(134 号参数)<(135 号参数)<(136 号参数)<(137 号参数)<(138 号参数)< (139 号参数) 4、可通过监控模式下 025 号参数实时监测,不同位置下的踏板采样数值作为各参数的参考值。 调整对应参数,抬压脚和前踩或后踩的动作位置也随之改变。如前踩很大距离机器还没有运转,可适当减小 137 参数(不能小于回中 位置参数 136) ,即可提高前踩的灵敏度;若机器过于灵敏,轻触踏板机器就开始运行,可适当加大 137 参数; 若不容易补针,稍微前踩,...
- Page 25 七、缝纫机调整(Sewing Machine Adjustment) 注意:为了防止机器突然启动造成人身事故,请关掉电源,确认电机确实停止转动 后再进行操作! Attention: In order to prevent the machine from causing personal accident suddenly, please turn off the power supply,confirm the motor really stop running again then operate ! 1、冷却器导线器的调整(cooler thread guide adjustment) 松开紧定螺钉,把各导线杆高度调整为图示的尺寸,然后拧紧紧定螺钉(图7-1), 针对不同布料时可通过调节A、B、C的高度来调节挑线量,导线杆的高度增加挑线 量减小,导线杆的高度降低挑线量增加(图1)。 Adjust the release pole hight to the number below, then tighten the set crew (Figure7-1) , Accounting to different fabric, we can change thread taking up length by adjusting pole height of A、B、C,Thread taking up quantity increases when pole height decreases and thread taking up quantity decreases when pole height increase.s(Figure 1)。...
- Page 26 图 7-1( ) Figure 7-1 挑线量减少:Reduction of selection,挑线量增加:increase of selection 紧定螺钉:Set screw 2、松开紧定螺钉,左右移动针线操作器,如图 2 所示,把针线操作器边缘到 摆动挑线杆轴的中心调整至 80mm,然后拧紧紧定螺钉,针对不同布料时可通过调 节针线操作器边缘到摆动挑线杆轴的中心的距离来调节挑线量,针线操作器边缘到 摆动挑线杆轴的中心的距离加大,挑线量减小,针线操作器边缘到摆动挑线杆轴的 中心的距离减小,挑线量加大(图 8-2)。 Release set screw, moving around the needle thread operator, showed by figure 2, change the distance between margin of needle thread operator and center of shuffing release pole rod to 80mm, then tighten the set screw.
- Page 27 挑线量减少:Reduction of selection,挑线量增加:increase of selection,紧定螺钉:Set screw 图 8-2( ) Figure 8-2 3、分布导线器的调整(Adjustment of distributing thread guider) 分布导线器①在最高点时,松开紧定螺钉③,分布导线器的导线线道里侧上端调整 成与分布导线器的长槽下端一致,然后拧紧紧定螺钉③(图 8-3)。 When distributing thread guider ①at the top point,release set screw③,make the top of inner guide line fix to the bottom of guider slot, then tight the set screw ③ (Figure 8-3) 。 分布导线器:Distributing conductor,紧定螺钉:Set screw,针线操作器:Needle thread operator 图...
- Page 28 4、 打线凸轮及打线凸轮导线器的调整 (Adjustment of hit thread cam and the hit thread cam guider) ①、打线凸轮位置调整(Hit thread cam adjustment ) 当左针针尖下降大约位于弯针后面 1/2 的位置时(图 8-4),打线凸轮最高点 B 与 打线架平行。此时弯针线必须脱离凸轮最高位置,调整打线凸轮,使之恰好开始打 线。When the left needle goes down at the position, which is about 1/2 of the height of curved needle.(Figure 8-4), the highest point B of hit thread cam is parallel to the thread rack, put the looper thread out of the highest position of cam and adjust hit thread cam until just start hit thread.
- Page 29 ②、打线凸轮打线量调整(Adjusting the line distance of CAM) 当需要调节底线打线量时,松开紧定螺钉,调节分线片位置,分线片往上移动打线 量减小,分线片往下运动,打线量增加。 (图6)When adjusting the base thread distance, first loose crew and adjust dividing thread plate position. If dividing thread plate moves up ,the thread distance get less, while vice versa.(Figure 6) 图6(Figure 6) 紧定螺钉:Set screw,打线量减少:Line drop,打线量增加:Line up,分线片:Line piece...
- Page 30 5、机针高度调整(Needle height adjustment) 首先调整机针与针板的间隙,保证机针与针板的间隙均等,调整机针高度,机针运 行到最高点,针板到左针针尖的高度为H(图7),H参数如下表: Adjust the gap between needle and needle plate, make sure the gap is equal; then adjust the needle height, when the needle is in the highest position, the distance” H” between needle plate and the left needle is like sheet(Figure 7) the following 标准(...
- Page 31 针板:The needle plate,机针:needle 图7 (Figure 7) 6、弯针的调整方法(The Looper Adjustment) ①、弯针与机针引量的调节 当机针在最低点时,弯针在最右点,弯针针尖到右针中心点距离为弯针与机针的引 量A(图8),详细参数见下表: ① The adjustment of looper and needle citation amount adjustment When the needle is in the bottom position, the looper is in the rightmost position, the distance from the looper tip to the right needle central point is the citation amount “A”(Figure 8) of looper and needle 标准(...
- Page 32 W4-01GB×364 2.8-3.1 2.6-2.8 W4-02BB×356 3.2-3.5 3-3.2 W4-01BB×364 2.8-3.1 2.6-2.8 W4-05CB×356 3.2-3.5 3-3.2 W4-05CB×364 2.8-3.1 2.6-2.8 最低点:The lowest point,最右点: The most right point 图8( ) Figure8 弯针与机针间隙的调整(The adjustment between looper and needle gap) 弯针从最右端运行到中针中心后,把弯针与机针间隙调整为0-0.05mm(图9),弯 针继续向左运动, 当弯针运行到左针中心是, 弯针与左针间隙为0.05-0.1mm (图9) 。 Looper moves to the middle needle central position from rightmost positon, make the gap between looper and needle gap as 0-0.05mm(Figure9), the looper moves ahead to the left, when the looper moves to the left needle central...
- Page 33 弯针尖与左机针的位置:当机针上升 弯针向左运动到左机针中心线时, 在左机针的针孔上1-1.5mm。左机针与弯针的间隙应为0.05mm。 The position of looper and needle: when the needle moves up, the looper moves left to the left needle central position, and 1-1.15mm above the needle hole. Meanwhile, the gap of left needle and looper is 0.05mm 图9(...
- Page 34 7、后护针的调节(Rear guard needle adjustment) 弯针到机针的中心线时, 弯针与机针的间隙0.05mm。 机针与后护针的间隙为0 When the looper moves to the central line of needle, the gap between looper and needle is 0.05mm. The gap between rear guard needle and needle is 0. 图10( ) Figure10 8、 摆动挑线杆的同步和线环的关系 (The relationship between swing timing bar and thread loop)...
- Page 35 Making use of over-thread bar to make the adjustment Loose set, adjusting over-thread bar, moving the bar forward or backward, to adjust the loop smaller or larger. 过线球连杆: Bobbin connecting rod,紧定螺钉: Set screw,前: Front ,后: back 图11 (Figure11) 9、送布牙高度的调整(Adjustment of the feed dog height) 调整送布牙高度,...
- Page 36 the screw 2, adjust the main feed dog to 1.2 mm, then tighten the screw 2, in the same way, loosen screw 1, adjust the height of the differential feed dog to 1.2 mm, then tighten the screw 1. 针板平面:The needle plate plane,螺钉 1:screw 1,螺钉 2 :screw 2 图12(...
- Page 37 标准 standard 标准行程(30.8mm) 高行程(33.4mm) 机型( ) model Standard trip High trip 型号 喂针高度H 喂针高度H type Feeding needle height H Feeding needle height H W4-01GB×356 W4-01GB×364 W4-02BB×356 W4-02BB×364 W4-05CB×356 W4-05CB×364 标准 standard,机型 model,型号 type,标准行程 Standard trip,高行程 High trip,喂针高度 H Feeding needle height H,螺钉 1 Screw 1,螺钉 2 Srew 2,针板平面...
- Page 38 4.5-5.0mm,然后拧紧螺钉2。 Feed needle move from right to left , loosen the screw 1, adjust the gap between feed needle and left needle adjustment feed 0.5mm, feed needle continue to move to the left limit to the left, loosen the screw 2, adjust the feed needle and the center of the left needle The gap is 4.5-5.0mm, then tighten the screw 2.
- Page 39 前护针:To protect the needle before,弯针:Curved needle 图15 (Figure 15) 12、压脚高度调节(presser foot height adjustment) 调节压脚高度时,调整螺丝的高度,不让压脚和其他零件相接触,然后用螺母进 行固定。When adjusting the height of the presser foot, adjust the height of the screw so that the presser foot does not come in contact with other parts, and then use a nut to fix it.
- Page 40 螺母 1 与调节螺母 2 来调节剪线电磁铁行程,通过调节电磁铁行程满足上述调节要 求, 剪线电磁铁标准行程为 20mm (图 3)。 When adjusting the cutter, make the needle of the sewing machine be in the upper stop point and turn off the electric control to perform manual debugging. The hand-pushing cutter electromagnet moves to the left (Fig. 1) Move the knife to the left (head position) to the left,, fixed knife under the plane and the needle on the plane gap 0-0.1mm (Figure 2), adjust The lower cutter left and right position can loosen the set screw 2, adjust the lower cutter position by adjusting the left...
- Page 41 动刀:The knife,弯针:Curved needle 图 2( ) Figure2 调节螺母1:Adjusting nut1,调节螺母2:Adjusting nut2,紧定螺钉2:Set screw2,曲柄2:The crank2, 刀盘驱动连杆:Knife drive connecting rod 图3( ) Figure3...
- Page 42 图 4( ) Figure4 2、下切刀前后位置的调整(under the knife position adjustment) 当下切刀组件由初始位置向左运动,动刀刀尖运动到弯针处,约在弯针宽度中 心,前后 1/2 位置(图 5) ,调整时可通过松开紧定螺钉 1 与 2,使动刀前后移动, 调整刀正确位置(图 6) 。The current cutter assembly moves from the initial position to the left, the moving knife tip moves to the bending needle, about the center of the bending needle width, the front and back 1/2 position (Fig.
- Page 43 弯针中心处:Needle center 图 5( ) Figure5 紧定螺钉 1:Set screw1,紧定螺钉 2:Set screw2 图 6( ) Figure6...
- Page 44 3、下切刀组件相对位置调整(adjust the relative) 注意:下切刀组件安装前须先检查下切刀组件相对位置是否正确,是否有卡点。 当动刀运动到最右时,也就是下切刀组件初始状态时,动刀与定刀前端的啮合 距离为 0.5mm(图 7) 移动定刀调整动刀与定刀的相对位置,动刀与定刀啮合距 离 0.5-1mm,动刀与定刀平行(图 7、图 8) 。 Note: The lower cutter assembly before installation must first check the relative position of the lower cutter assembly is correct, whether there is a card point. When the movable knife to the right, that is, under the initial state of the cutter assembly, the movable knife and fixed knife front end of the engagement distance of 0.5mm (Figure 7) to move fixed knife to adjust the relative position of fixed knife and...
- Page 45 图 8( Figure8 夹线片:Thread clamp piece 图 10( Figure10...
- Page 46 夹线片:Thread clamp piece,压力片:Pressure piece 图 11( Figure11 4、夹线片及压力片的调整(clip and pressure film adjustment ) 当下弯针线被下切刀组件切断后,动刀与夹线片需将底线(下弯针线)稳定夹 住,调节夹线片与动刀之间的夹紧力,可由紧定螺钉旋转来调整,顺时针方向则夹 紧力越大,反之则夹紧力越小(图 12) 。After the current looper thread is cut off by the lower cutter assembly, the movable knife and the clip line need to clamp the bobbin thread (the lower looper thread) stably, and the clamping force between the clip thread piece and the movable knife can be adjusted by rotating the fastening screw, Clockwise clamping force is greater, otherwise the clamping force is smaller (Figure 12).
- Page 47 紧定螺钉:Set screw 图 12 (Figure 12) 注意: 1、下切刀组件完成调试后,需再次手动推动下切刀组件的定刀剪线,确认相对位 置准确,下切刀组件推出及复位均无卡点后方可重启电控,然后进行剪线。 2、当下切刀组件需要进行调整时,需确认针杆处于最高点,下弯针处于最右点, 然后方可手动推动下切刀组件确认相关位置。 Note: 1. After the lower cutter assembly is finished debugging, it is necessary to manually push the cutter cutter of the lower cutter assembly again to confirm the relative position is accurate. The lower cutter assembly is released and reset without card point before restarting the electric control and then cutting the wire.
- Page 48 confirm the needle bar at the highest point, the lower looper at the far right point, and then can only manually push the lower cutter assembly to confirm the relevant position. 二、上切刀组调整(adjust the cutter group) 注意:安装调整上切刀组前,必须先确认针杆处于最高点,且喂针与机针位置处于 标准状态。Note: Before installing and adjusting the cutter group, you must first confirm that the needle bar is at the highest point and the position of the needle and the needle are in the standard state.
- Page 49 定刀:Constant knife,动刀:The moving nife,紧定螺钉:Set screw,动刀架:Moving head 图13( ) Figure13 2、上切刀组弹簧夹紧力的调整(on the cutter group spring clamping force adjustment) 上饰线切线后,被夹紧弹簧夹持,调节夹紧弹簧夹紧力,松开紧定螺母转动紧定螺 钉,可以调节夹紧弹簧的夹紧力,拧紧紧定螺钉夹紧弹簧夹紧力加大,拧松紧定螺 钉夹紧弹簧的夹紧力减小,调整完成后,拧紧紧定螺母(图14) 注意:请在能夹紧上饰线的范围内,尽量把夹持力调整到稍小范围! Trim the upper thread trimmed by the clamping spring to adjust the clamping force of the clamping spring and release the clamping nut to rotate the clamping screw to adjust the clamping force of the clamping spring and tighten the clamping screw.
- Page 50 adjustment is completed, tighten the set nut (Figure 14) Note: Please be able to clamp the upper decorative line range, try to adjust the clamping force to a lesser extent! 压力片:Pressure piece,紧定螺钉:Set screw,紧定螺母: Set screw nut,夹紧弹簧:The clamping spring 图14( ) Figure14 3 、...
- Page 51 本齐平 (图17),松开紧定螺钉1,上下移动挡板,可以调节动刀行程,同时松开 紧定螺钉2,将整个上切刀上下移动,调节上切刀组的行程,调节标准。动刀运行 到最低时,动刀尖与压脚间距为2-3mm。(图16) When the movable knife moves downward and moves to the lowest point, the moving knife needs to be positioned between the needle and the needle. The distance between the movable knife tip and the presser foot should be 2-3mm.
- Page 52 动刀:moving blade, 机针:machine needle, 喂针:feed needle. 图15( ) Figure 15...
- Page 53 紧定螺钉1:Set Screw 1, 紧定螺钉2:set screw 2,紧定螺钉3: Set screw3,紧定螺钉4: Set Screw , 4. 挡板:Baffle, 安装板:mounting plate. 图16( ) Figure 16...
- Page 54 动刀: The knife,勾尖对齐: hook align at tip,机针: Machine Needle,喂针: Feed the needle 图17( ) Figure 17 三、拨线器的调整(the adjustment of thread dial) 1、拨线器高度调整 当拨线片往下运动到最低点时,拨线片底面与左机针(长针)针尖齐平(图18). 可以通过松开紧定螺钉1来调节拨线器上下位置,从而调节拨线器的高度(图19)。 2、拨线器前后位置调整 当拨线器通过压脚时,拨线片与压脚的间隙为1mm(图18),可通过松开紧定螺 钉2来调节拨线器的前后位置,从而调节拨线器与压脚的间隙。 3、拨线器左右位置调节...
- Page 55 当拨线片运行到最左端的时候,拨线片的勾尖与左针之间的距离为3.5mm(图20), 可通过松开紧定螺钉3来调节拨线器的左右位置。 1、Adjust the Height of thread dial When move thread dial to the lowest position. The bottom of Thread dial is aligned with the needle tip.( ) We can release the set screw 1 to Figure 18 adjust the position and height of thread dial.( )...
- Page 56 拨线片:Thread dial, 针尖与动刀底面齐平:the bottom of Thread dial is aligned with the needle tip 图18( ) Figure 18 紧定螺钉1:Set screw 1, 紧定螺钉2:Set Screw 2, 紧定螺钉3:Set Screw 3 图19( ) Figure 19...
- Page 57 图20 ( ) Figure 20 四、安全开关的调整(The adjustment of Safety Switch) 调节安全开关与电磁阀间隙,安全开关与电磁阀间隙为0.5mm,可通过松开紧定螺 钉上下调节安全开关与电磁阀的间隙,知道安全开关灯亮为止,然后拧紧紧定螺钉 (图21) Adjust the distance between safety switch and solenoid value to 0.5MM. we can release the set screws to adjust the distance, until the light of safety switch on, then we can tighten up the set screw. (Picture21)...
- Page 58 紧定螺钉:Set Screws,安全开关:Safety Switch,电磁阀:Solenoid Value. 图21( ) Figure21...