Panasonic CZ-RWS3 Operating Instructions Manual
Infrared remote controller
Hide thumbs
Also See for CZ-RWS3:
- Quick reference (17 pages) ,
- Installation instructions manual (9 pages)
Table of Contents
Infrared Remote Controller
Receiver
• Use this unit with the receiver that is separately sold.
English
Before operating the unit, read these operating instructions thoroughly and keep them for future
reference.
Panasonic Corporation
1006 Kadoma, Kadoma City, Osaka, Japan
Infrared Remote Controller
Installation Instructions Separately Attached.
OPERATION
TIMER
STANDBY
Operating Instructions
CZ-RWS3
Model No.
Table of Contents

Related Manuals for Panasonic CZ-RWS3


Summary of Contents for Panasonic CZ-RWS3
- Page 1 Operating Instructions Infrared Remote Controller CZ-RWS3 Model No. Infrared Remote Controller Installation Instructions Separately Attached. Receiver OPERATION TIMER STANDBY • Use this unit with the receiver that is separately sold. English Before operating the unit, read these operating instructions thoroughly and keep them for future reference.
-
Page 2: Safety Precautions
Safety Precautions WARNING CAUTION This symbol refers to a hazard This symbol refers to a hazard or unsafe practice which can or unsafe practice which can result in severe personal injury result in personal injury or or death. product or property damage. Matters to be observed Prohibited matters WARNING... - Page 3 CAUTION This appliance is intended to be used by expert or trained users in shops, in light industry and on farms, or for commercial use by lay persons. This appliance is not intended for use by persons (including children) with reduced physical, sensory or mental capabilities, or lack of experience and knowledge, unless they have been given supervision or instruction concerning use of the appliance by a person responsible...
-
Page 4: Operating Precautions
Operating Precautions ● Do not locate in the following types of places. • Where there is moisture, oil, or vibration/In direct sunlight/Near heat sources/ Where condensation forms (These can cause malfunctions.) • Where there is rapid start fluorescent lighting or inverter lights near the receiver (This can cause incorrect operation.) ● Do not clean with benzene or thinners or wipe with chemical cloths. (This can cause discolouration or malfunction.) • When the unit is very dirty, dampen a cloth in water or warm water, wring thoroughly, and wipe. - Page 5 Information for Users on Collection and Disposal of Old Equipment and Used Batteries These symbols on the products, packaging, and/or accompanying documents mean that used electrical and electronic products and batteries should not be mixed with general household waste. For proper treatment, recovery and recycling of old products and used batteries, please take them to applicable collection points, in accordance with your national legislation and the Directives 2002/96/EC and 2006/66/EC.
-
Page 6: Table Of Contents
Contents Safety Precautions ................2 Operating Precautions ................4 Supported Functions ................7 Names and Operations................8 Installing Batteries ................12 Setting the Current Time..............14 Using the Remote Controller ...............14 Paring Addresses ................16 Operation .....................18 Lock Individual Flap ................20 nanoe™ X Setting ................21 ECONAVI Setting ................22 Ventilation Setting ................23 Energy Saving Setting .................23 Temperature Automatic Return ............24... -
Page 7: Supported Functions
Supported Functions Available functions vary depending on the model of the indoor unit and the combination of the optional equipment. Also functions may vary even between indoor units of the same type if their capacities or manufactured years are different. See the operating instructions of the indoor unit for the settable functions. -
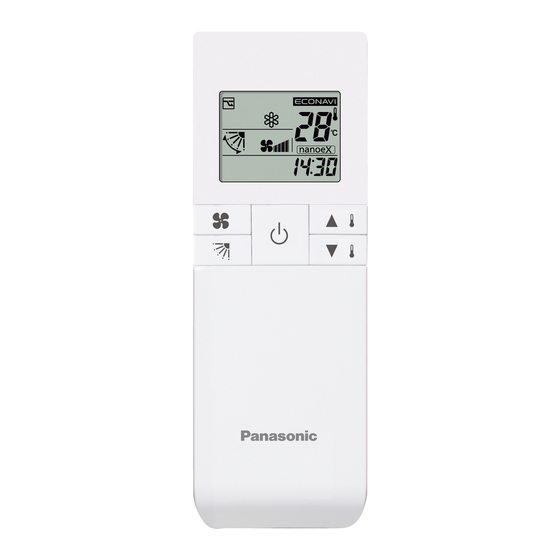
Page 8: Names And Operations
Names and Operations REMOTE CONTROLLER (EN) - Page 9 1 remote controller can control a group of up to 8 indoor units. (See page 28) 1. Operation Display 11. Temperature setting buttons Displays the operation status. raises the temperature (The figure shows all the setting 1 °C at a time. statuses.) lowers the temperature setting 1 °C at a time.
- Page 10 Names and Operations (Cont.) Receiver CZ-RWRU3 CZ-RWSU2N CZ-RWRD3 CZ-RWRU3W CZ-RWSD2 CZ-RWSU3 CZ-RWRC3 CZ-RWRL3 CZ-RWSC3 CZ-RWSL2N Display Operation Panel CZ-RWRT3 Build-in receiver on indoor unit CZ-RWST3N (Wall mounted type / 4-Way Cassette 60 × 60 type) OPERATION TIMER STANDBY (EN)
- Page 11 1. Receiver Screen display Receives the signal sent from the remote controller. 13 14 15 2. Emergency operation button See page 12. Indicator lamps When an error occurs, one of the lamps flashes. When an indicator lamp is flashing, refer to “Troubleshooting”. 3. OPERATION lamp Lights up when the unit is operating.
-
Page 12: Installing Batteries
Names and Operations (Cont.) Emergency operation Use [Emergency Operation] in the following situations when there is an urgent need. • When the remote controller’s batteries have failed. • When the remote controller is broken. • When the remote controller is lost. 1. - Page 13 2. Insert two LR03 size batteries. • Put the batteries in with the polarity [+/–] as shown in the figure. 3. Gently insert one end of an unfolded paper clip (or a similar object that can fit) into the RC reset hole and press the RC reset button inside the hole.
-
Page 14: Setting The Current Time
Setting the Current Time 1. Press for 2 seconds or longer. • The time display flashes. (The colon lights up.) 2. Press to set the hour, then press 2, 3 3. Press to set the minutes, then press Note 2, 3 • If the buttons are not pressed for a certain duration while setting the time, the displayed time is set. - Page 15 Wall Mount Use ■ Mounting the holder 1. Fasten the remote control holder with Screws (supplied) screws. Remote control holder 2. Slide the remote controller down into the holder. • Press from the location you wish to mount the remote controller and make sure the signal is received properly.
-
Page 16: Paring Addresses
Paring Addresses When more than 1 indoor units are installed in the same room with a compatible remote controller, addresses can be set up to avoid crosstalk. You can control up to 6 indoor units individually by the supported remote controller by pairing the address on the remote controller and the number on the address switch on the receiver. - Page 17 2. Press to select the address of the receiver you want to control, and press • Every time you press , it cycles from “ALL (All the addresses) → 1 → 2 → 3 → 4 → 5 → 6”. • If it corresponds to the receiver’s address setting, the buzzer sounds. Note •...
-
Page 18: Operation
Operation Hold the remote controller with your hand and point its transmitter at the receiver. Power: Turn on the circuit breaker beforehand, referring to the operating instructions for the unit. 1. Press 2. Press to select the operation mode. • Every time you press , it cycles from “Auto → Heat... - Page 19 4. Press to set the temperature. MAX (°C) MIN (°C) Auto Heat / Cool • Temperature settings cannot be made in Fan mode. • The temperature range that can be set varies depending on the model. • The maximum temperature varies depending on the system and operating condition.
-
Page 20: Lock Individual Flap
Lock Individual Flap (Supported models: 4-way ceiling cassette type) You can set the flap for each air outlet individually according to the room condition. • Even if the flap setting is changed with (P.19), the flap directions set here are not changed. Flap Indoor unit 1. Press at the same time for 4 seconds or longer. • “ ” starts blinking and the setting screen is displayed. 2. -
Page 21: Nanoe™ X Setting
4. Press to select the flap direction, then press • Every time you press , it cycles from “ (Unlock) ↔ (Swing) ↔ ↔ ↔ ↔ ↔ ”. 5. Press • You can return to Step 2 to continue setting if you press instead of Note •... -
Page 22: Econavi Setting
ECONAVI Setting (ECONAVI can be set using the separately sold ECONAVI panel or by connecting the holder on the wall.) 1. Press during operation. ECONAVI • You can toggle between ON and OFF each time you press ECONAVI • “ ” is displayed when this setting is ON. -
Page 23: Ventilation Setting
Ventilation Setting (When connected to an aftermarket fan) button is disabled as the factory setting. Enable the button if you have connected the ventilation fan. (See page 30) 1. Press • You can toggle between ON and OFF each time you press •... -
Page 24: Temperature Automatic Return
Temperature Automatic Return You can restore the changed temperature to the originally set temperature automatically after a specified time elapses. • Set the time and temperature for each operation mode. Operation mode Temperature 1. Press at the same time for 4 seconds or longer. • “ ” starts blinking and the setting screen is displayed. - Page 25 Changing the setting Perform Step 1 to 5 (P. 24) as you did when setting. Cancelling the setting 1. Press at the same time for 4 seconds or longer. 2. Press to select the operation mode, then press 4 seconds or longer. •...
-
Page 26: Timer Operation
Timer Operation • When setting the timer, make sure the current time on the remote controller is accurate. • The timer’s clock can only be set when the display of the remote controller is ON. • After setting the timer, put the remote controller for in a place where its signal will reach the receiver of the indoor unit. - Page 27 Combining ON and OFF Timers 1. The ON and OFF timers can be set respectively. Checking the timer setting 1. Press • The scheduled time is displayed for 4 seconds. • When the timer is not set or after replacing batteries, it displays “...
-
Page 28: Operating Multiple In/Outdoor Units Simultaneously (Group Control)
Operating Multiple In/Outdoor Units Simultaneously (Group control) Group control works well for providing air Outdoor unit conditioning to 1 large room with more than 1 air conditioning units. • 1 remote controller can operate up to 8 indoor Receiver Indoor unit units. - Page 29 < How to Operate > • While holding down the buttons below, the remote controller’s display changes every time is pressed. • Whatever is being displayed when you release is set. Remote Controller Setting Item Operation Button Setting Content Display Heat Pump (with Auto) Remote controller...
-
Page 30: Button Control
Button Control You can enable or disable the following buttons for some indoor units. nanoe™ X, ECONAVI, Ventilation, Energy saving 1. Press the button for desired setting for 4 seconds or longer. • You can toggle between enable and disable each time you press the button for 4 seconds or longer. -
Page 31: Troubleshooting
Troubleshooting Before requesting service, please check the following. Problem Cause Solution The unit doesn’t work The power to the indoor unit is not Make sure the power to the indoor unit is ON. even when pressed on the remote Are the remote controller’s Change the batteries. -
Page 32: Specifications
100 g (Batteries and remote controller holder are not Weight included) Temperature/ 0 ˚C to 40 ˚C / 20% to 80% (No condensation) Humidity range *Indoor use only. Power source Two LR03 size batteries Clock Accuracy ±90 seconds per month (at 25 °C) Panasonic Corporation http://www.panasonic.com © Panasonic Corporation 2018 - 2019...