Table of Contents
Quick Links
Table of Contents

Related Manuals for Alienware Area-51


Summary of Contents for Alienware Area-51
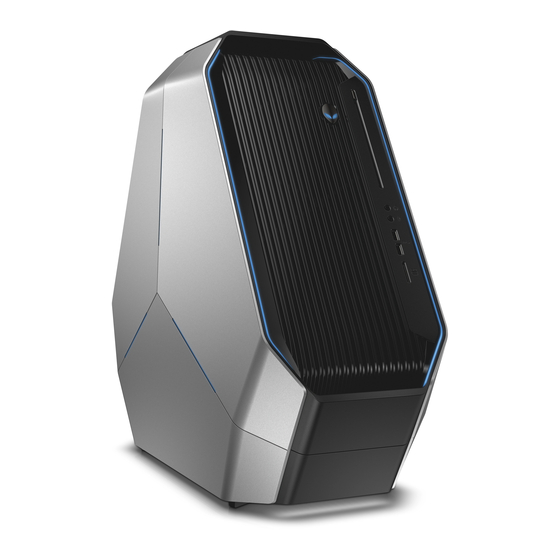
- Page 1 Alienware Area-51 Service Manual Regulatory Model: D03X Regulatory Type: D03X001...
- Page 2 Notes, Cautions, and Warnings NOTE: A NOTE indicates important information that helps you make better use of your computer. CAUTION: A CAUTION indicates either potential damage to hardware or loss of data and tells you how to avoid the problem. NOTE: A WARNING indicates a potential for property damage, personal injury, or death.
-
Page 3: Table Of Contents
Contents 1 Before Working Inside Your Computer....................8 Before You Begin ................................8 Safety Instructions.................................8 Recommended Tools................................9 2 After Working Inside Your Computer....................10 3 Technical Overview..........................11 Inside View of Your Computer............................11 Right View..................................11 Left View..................................12 System-Board Components..............................13 I/O Board Components.............................. - Page 4 12 Replacing the Battery Case.......................25 Procedure................................... 25 Post-requisites..................................25 13 Removing the Hard Drive........................26 Prerequisites..................................26 Procedure................................... 26 14 Replacing the Hard Drive........................28 Procedure................................... 28 Post-requisites..................................28 15 Removing the Optical Drive......................29 Prerequisites..................................29 Procedure................................... 29 16 Replacing the Optical Drive......................31 Procedure....................................
- Page 5 Prerequisites..................................41 Procedure....................................41 24 Replacing the Drive-Bay Heat-Sensor..................... 43 Procedure................................... 43 Post-requisites..................................43 25 Removing the Memory Module(s)....................44 Prerequisites..................................44 Procedure................................... 44 26 Replacing the Memory Module(s)....................45 Procedure................................... 45 Post-requisites..................................45 27 Removing the Graphics Card......................46 Prerequisites..................................46 Procedure................................... 46 28 Replacing the Graphics Card......................
- Page 6 35 Removing the Front-bezel Heat-sensor...................59 Prerequisites..................................59 Procedure................................... 59 36 Replacing the Front-bezel Heat-sensor...................60 Procedure................................... 60 Post-requisites..................................60 37 Removing the Memory Fan....................... 61 Prerequisites..................................61 Procedure....................................61 38 Replacing the Memory Fan.......................62 Procedure................................... 62 Post-requisites..................................62 39 Removing the Processor Cooling-Assembly..................63 Prerequisites..................................63 Procedure...................................
- Page 7 Procedure....................................73 Post-requisites..................................73 47 Removing the Wireless Card......................74 Prerequisites..................................74 Procedure................................... 74 48 Replacing the Wireless Card......................75 Procedure................................... 75 Post-requisites..................................75 49 Removing the Logo Board........................ 76 Prerequisites..................................76 Procedure................................... 76 50 Replacing the Logo Board........................ 78 Procedure....................................78 Post-requisites..................................78 51 Removing the System Board......................79 Prerequisites..................................
-
Page 8: Before Working Inside Your Computer
Before Working Inside Your Computer CAUTION: To avoid damaging the components and cards, handle them by their edges and avoid touching pins and contacts. NOTE: The images in this document may differ from your computer depending on the configuration you ordered. Before You Begin 1. -
Page 9: Recommended Tools
Recommended Tools The procedures in this document may require the following tools: • Philips screwdriver • Flat-head screwdriver • Plastic scribe... -
Page 10: After Working Inside Your Computer
After Working Inside Your Computer CAUTION: Leaving stray or loose screws inside your computer may severely damage your computer. 1. Replace all screws and make sure that no stray screws remain inside your computer. 2. Connect any external devices, peripherals, and cables you removed before working on your computer. 3. -
Page 11: Technical Overview
Technical Overview NOTE: Before working inside your computer, read the safety information that shipped with your computer and follow the steps in Before Working Inside Your Computer. After working inside your computer, follow the instructions in After Working Inside Your Computer. -
Page 12: Left View
Left View 1. optical drive (ODD) 2. I/O board (IO BRD) 3. drive-bay heat-sensor 4. 2.5 inch drive bracket (HDD4/HDD5) 5. AlienFX side-panel connector 6. rear I/O accessibility lighting batteries 7. 3.5 inch drive bracket (HDD1) 8. 3.5 inch drive bracket (HDD2) 9. -
Page 13: System-Board Components
System-Board Components 1. processor liquid cooling-assembly fan (LCM_FAN1) 2. audio connector (AUDIO101) 3. PCI-Express x16 slot (SLOT1) 4. low pin count debug header (LPC1) 5. password reset jumper (PASSWORD1) 6. PCI-Express x1 slot (SLOT2) 7. PCI-Express x16 slot (SLOT3) 8. M.2 connector (wireless card) 9. -
Page 14: I/O Board Components
I/O Board Components NOTE: The location of the connectors may vary based on the selections you made at the time of purchase. 1. rear I/O accessibility lighting battery connector (VBAT1) 2. rear I/O accessibility lighting connector (PORCH_LIGHT1) 3. left theater-lighting connector (POGO_IN_L1) 4. -
Page 15: Lifting The Computer
Lifting the Computer Procedure 1. With both hands, hold the handle on top of the computer. 2. Lift the computer. a. handle b. computer... -
Page 16: Removing The Stability Foot
Removing the Stability Foot NOTE: Before working inside your computer, read the safety information that shipped with your computer and follow the steps in Before Working Inside Your Computer. After working inside your computer, follow the instructions in After Working Inside Your Computer. -
Page 18: Replacing The Stability Foot
Replacing the Stability Foot NOTE: Before working inside your computer, read the safety information that shipped with your computer and follow the steps in Before Working Inside Your Computer. After working inside your computer, follow the instructions in After Working Inside Your Computer. -
Page 19: Removing The Side Panels
Removing the Side Panels NOTE: Before working inside your computer, read the safety information that shipped with your computer and follow the steps in Before Working Inside Your Computer. After working inside your computer, follow the instructions in After Working Inside Your Computer. -
Page 20: Replacing The Side Panels
Replacing the Side Panels NOTE: Before working inside your computer, read the safety information that shipped with your computer and follow the steps in Before Working Inside Your Computer. After working inside your computer, follow the instructions in After Working Inside Your Computer. -
Page 21: Removing The Battery
Removing the Battery NOTE: Before working inside your computer, read the safety information that shipped with your computer and follow the steps in Before Working Inside Your Computer. After working inside your computer, follow the instructions in After Working Inside Your Computer. -
Page 22: Replacing The Battery
Replacing the Battery NOTE: Before working inside your computer, read the safety information that shipped with your computer and follow the steps in Before Working Inside Your Computer. After working inside your computer, follow the instructions in After Working Inside Your Computer. -
Page 23: Removing The Battery Case
Removing the Battery Case NOTE: Before working inside your computer, read the safety information that shipped with your computer and follow the steps in Before Working Inside Your Computer. After working inside your computer, follow the instructions in After Working Inside Your Computer. - Page 24 1. battery-case cable 2. battery-case connector 3. battery-case 4. screws (2)
-
Page 25: Replacing The Battery Case
Replacing the Battery Case NOTE: Before working inside your computer, read the safety information that shipped with your computer and follow the steps in Before Working Inside Your Computer. After working inside your computer, follow the instructions in After Working Inside Your Computer. -
Page 26: Removing The Hard Drive
Removing the Hard Drive NOTE: Before working inside your computer, read the safety information that shipped with your computer and follow the steps in Before Working Inside Your Computer. After working inside your computer, follow the instructions in After Working Inside Your Computer. - Page 27 a. screws (4) b. hard drive c. hard-drive bracket...
-
Page 28: Replacing The Hard Drive
Replacing the Hard Drive NOTE: Before working inside your computer, read the safety information that shipped with your computer and follow the steps in Before Working Inside Your Computer. After working inside your computer, follow the instructions in After Working Inside Your Computer. -
Page 29: Removing The Optical Drive
Removing the Optical Drive NOTE: Before working inside your computer, read the safety information that shipped with your computer and follow the steps in Before Working Inside Your Computer. After working inside your computer, follow the instructions in After Working Inside Your Computer. - Page 30 a. screws (2) b. optical drive c. optical-drive bracket...
-
Page 31: Replacing The Optical Drive
Replacing the Optical Drive NOTE: Before working inside your computer, read the safety information that shipped with your computer and follow the steps in Before Working Inside Your Computer. After working inside your computer, follow the instructions in After Working Inside Your Computer. -
Page 32: Removing The Right Alienfx Side-Panel Connector
Removing the Right AlienFX Side-Panel Connector NOTE: Before working inside your computer, read the safety information that shipped with your computer and follow the steps in Before Working Inside Your Computer. After working inside your computer, follow the instructions in After Working Inside Your Computer. - Page 33 a. screws (2) b. right AlienFX side-panel connector...
-
Page 34: Replacing The Right Alienfx Side-Panel Connector
Replacing the Right AlienFX Side-Panel Connector NOTE: Before working inside your computer, read the safety information that shipped with your computer and follow the steps in Before Working Inside Your Computer. After working inside your computer, follow the instructions in After Working Inside Your Computer. -
Page 35: Removing The Left Alienfx Side-Panel Connector
Removing the Left AlienFX Side-Panel Connector NOTE: Before working inside your computer, read the safety information that shipped with your computer and follow the steps in Before Working Inside Your Computer. After working inside your computer, follow the instructions in After Working Inside Your Computer. - Page 36 a. screw b. left AlienFX side-panel connector assembly 7. Remove the screws that secure the AlienFX side-panel connector to the bracket and set it aside in a secure location. a. screw b. left AlienFX side-panel connector...
-
Page 37: Replacing The Left Alienfx Side-Panel Connector
Replacing the Left AlienFX Side-Panel Connector NOTE: Before working inside your computer, read the safety information that shipped with your computer and follow the steps in Before Working Inside Your Computer. After working inside your computer, follow the instructions in After Working Inside Your Computer. -
Page 38: Removing The I/O Board
Removing the I/O Board NOTE: Before working inside your computer, read the safety information that shipped with your computer and follow the steps in Before Working Inside Your Computer. After working inside your computer, follow the instructions in After Working Inside Your Computer. - Page 39 a. I/O board b. screws (2)
-
Page 40: Replacing The I/O Board
Replacing the I/O Board NOTE: Before working inside your computer, read the safety information that shipped with your computer and follow the steps in Before Working Inside Your Computer. After working inside your computer, follow the instructions in After Working Inside Your Computer. -
Page 41: Removing The Drive-Bay Heat-Sensor
Removing the Drive-Bay Heat-Sensor NOTE: Before working inside your computer, read the safety information that shipped with your computer and follow the steps in Before Working Inside Your Computer. After working inside your computer, follow the instructions in After Working Inside Your Computer. - Page 42 a. release tab b. securing clip c. drive-bay heat-sensor cable...
-
Page 43: Replacing The Drive-Bay Heat-Sensor
Replacing the Drive-Bay Heat-Sensor NOTE: Before working inside your computer, read the safety information that shipped with your computer and follow the steps in Before Working Inside Your Computer. After working inside your computer, follow the instructions in After Working Inside Your Computer. -
Page 44: Removing The Memory Module(S)
Removing the Memory Module(s) NOTE: Before working inside your computer, read the safety information that shipped with your computer and follow the steps in Before Working Inside Your Computer. After working inside your computer, follow the instructions in After Working Inside Your Computer. -
Page 45: Replacing The Memory Module(S)
Replacing the Memory Module(s) NOTE: Before working inside your computer, read the safety information that shipped with your computer and follow the steps in Before Working Inside Your Computer. After working inside your computer, follow the instructions in After Working Inside Your Computer. -
Page 46: Removing The Graphics Card
Removing the Graphics Card NOTE: Before working inside your computer, read the safety information that shipped with your computer and follow the steps in Before Working Inside Your Computer. After working inside your computer, follow the instructions in After Working Inside Your Computer. - Page 47 a. graphics card b. releasing clips...
-
Page 48: Replacing The Graphics Card
Replacing the Graphics Card NOTE: Before working inside your computer, read the safety information that shipped with your computer and follow the steps in Before Working Inside Your Computer. After working inside your computer, follow the instructions in After Working Inside Your Computer. -
Page 49: Removing The Multiple Graphics Cards
Removing the Multiple Graphics Cards NOTE: Before working inside your computer, read the safety information that shipped with your computer and follow the steps in Before Working Inside Your Computer. After working inside your computer, follow the instructions in After Working Inside Your Computer. - Page 50 a. screw cover b. screws (2) c. power cables (2) 7. Press and hold the securing tab on the card connector, grasp the card by its top corners, and then ease the card out of the card connector. a. graphics card b.
-
Page 51: Replacing The Multiple Graphics Cards
Replacing the Multiple Graphics Cards NOTE: Before working inside your computer, read the safety information that shipped with your computer and follow the steps in Before Working Inside Your Computer. After working inside your computer, follow the instructions in After Working Inside Your Computer. -
Page 52: Removing The Full-Length Graphics Cards
Removing the Full-length Graphics Cards NOTE: Before working inside your computer, read the safety information that shipped with your computer and follow the steps in Before Working Inside Your Computer. After working inside your computer, follow the instructions in After Working Inside Your Computer. - Page 53 a. screw cover b. screws (2) c. power cables (2) 8. Press and hold the securing tab on the card connector, grasp the card by its top corners, and then ease the card out of the card connector. a. graphics card b.
-
Page 54: Replacing The Full-Length Graphics Cards
Replacing the Full-length Graphics Cards NOTE: Before working inside your computer, read the safety information that shipped with your computer and follow the steps in Before Working Inside Your Computer. After working inside your computer, follow the instructions in After Working Inside Your Computer. -
Page 55: Removing The Pci Fan
Removing the PCI Fan NOTE: Before working inside your computer, read the safety information that shipped with your computer and follow the steps in Before Working Inside Your Computer. After working inside your computer, follow the instructions in After Working Inside Your Computer. - Page 56 a. PCI fan b. screws (2) 4. Disconnect the PCI-fan cable and front-bezel heat-sensor cable from the connector on the system board. 5. Pry out the PCI fan from the tabs securing it to the chassis. 1. tabs 2. PCI fan 3.
- Page 57 a. screws (4) b. fan shroud...
-
Page 58: Replacing The Pci Fan
Replacing the PCI Fan NOTE: Before working inside your computer, read the safety information that shipped with your computer and follow the steps in Before Working Inside Your Computer. After working inside your computer, follow the instructions in After Working Inside Your Computer. -
Page 59: Removing The Front-Bezel Heat-Sensor
Removing the Front-bezel Heat-sensor NOTE: Before working inside your computer, read the safety information that shipped with your computer and follow the steps in Before Working Inside Your Computer. After working inside your computer, follow the instructions in After Working Inside Your Computer. -
Page 60: Replacing The Front-Bezel Heat-Sensor
Replacing the Front-bezel Heat-sensor NOTE: Before working inside your computer, read the safety information that shipped with your computer and follow the steps in Before Working Inside Your Computer. After working inside your computer, follow the instructions in After Working Inside Your Computer. -
Page 61: Removing The Memory Fan
Removing the Memory Fan NOTE: Before working inside your computer, read the safety information that shipped with your computer and follow the steps in Before Working Inside Your Computer. After working inside your computer, follow the instructions in After Working Inside Your Computer. -
Page 62: Replacing The Memory Fan
Replacing the Memory Fan NOTE: Before working inside your computer, read the safety information that shipped with your computer and follow the steps in Before Working Inside Your Computer. After working inside your computer, follow the instructions in After Working Inside Your Computer. -
Page 63: Removing The Processor Cooling-Assembly
Removing the Processor Cooling-Assembly NOTE: Before working inside your computer, read the safety information that shipped with your computer and follow the steps in Before Working Inside Your Computer. After working inside your computer, follow the instructions in After Working Inside Your Computer. - Page 64 5. processor liquid-cooling assembly fan cable 6. Slide and lift the processor liquid-cooling assembly out of the chassis. a. processor liquid-cooling assembly b. processor liquid-cooling assembly pump...
-
Page 65: Replacing The Processor Cooling Assembly
Replacing the Processor Cooling Assembly NOTE: Before working inside your computer, read the safety information that shipped with your computer and follow the steps in Before Working Inside Your Computer. After working inside your computer, follow the instructions in After Working Inside Your Computer. -
Page 66: Removing The Processor
Removing the Processor NOTE: Before working inside your computer, read the safety information that shipped with your computer and follow the steps in Before Working Inside Your Computer. After working inside your computer, follow the instructions in After Working Inside Your Computer. -
Page 67: Replacing The Processor
Replacing the Processor NOTE: Before working inside your computer, read the safety information that shipped with your computer and follow the steps in Before Working Inside Your Computer. After working inside your computer, follow the instructions in After Working Inside Your Computer. -
Page 68: Post-Requisites
Post-requisites 1. Replace the processor liquid-cooling assembly fan. 2. Replace both the left and right side-panels. See “Replacing the Side Panels”. 3. Replace the stability foot. -
Page 69: Removing The Power-Supply Unit
Removing the Power-Supply Unit NOTE: Before working inside your computer, read the safety information that shipped with your computer and follow the steps in Before Working Inside Your Computer. After working inside your computer, follow the instructions in After Working Inside Your Computer. - Page 70 a. power supply b. power-supply cover 5. Slide the power-supply unit out through the back of the chassis and remove it from the computer. a. chassis b. power-supply unit...
-
Page 71: Replacing The Power-Supply Unit
Replacing the Power-Supply Unit NOTE: Before working inside your computer, read the safety information that shipped with your computer and follow the steps in Before Working Inside Your Computer. After working inside your computer, follow the instructions in After Working Inside Your Computer. -
Page 72: Removing The Coin-Cell Battery
Removing the Coin-Cell Battery NOTE: Before working inside your computer, read the safety information that shipped with your computer and follow the steps in Before Working Inside Your Computer. After working inside your computer, follow the instructions in After Working Inside Your Computer. -
Page 73: Replacing The Coin-Cell Battery
Replacing the Coin-Cell Battery NOTE: Before working inside your computer, read the safety information that shipped with your computer and follow the steps in Before Working Inside Your Computer. After working inside your computer, follow the instructions in After Working Inside Your Computer. -
Page 74: Removing The Wireless Card
Removing the Wireless Card NOTE: Before working inside your computer, read the safety information that shipped with your computer and follow the steps in Before Working Inside Your Computer. After working inside your computer, follow the instructions in After Working Inside Your Computer. -
Page 75: Replacing The Wireless Card
Replacing the Wireless Card NOTE: Before working inside your computer, read the safety information that shipped with your computer and follow the steps in Before Working Inside Your Computer. After working inside your computer, follow the instructions in After Working Inside Your Computer. -
Page 76: Removing The Logo Board
Removing the Logo Board NOTE: Before working inside your computer, read the safety information that shipped with your computer and follow the steps in Before Working Inside Your Computer. After working inside your computer, follow the instructions in After Working Inside Your Computer. - Page 77 a. screws (6) b. logo board bracket c. logo board...
-
Page 78: Replacing The Logo Board
Replacing the Logo Board NOTE: Before working inside your computer, read the safety information that shipped with your computer and follow the steps in Before Working Inside Your Computer. After working inside your computer, follow the instructions in After Working Inside Your Computer. -
Page 79: Removing The System Board
Removing the System Board NOTE: Before working inside your computer, read the safety information that shipped with your computer and follow the steps in Before Working Inside Your Computer. After working inside your computer, follow the instructions in After Working Inside Your Computer. - Page 80 a. screws (9) b. system board...
-
Page 81: Replacing The System Board
Replacing the System Board NOTE: Before working inside your computer, read the safety information that shipped with your computer and follow the steps in Before Working Inside Your Computer. After working inside your computer, follow the instructions in After Working Inside Your Computer. -
Page 82: System Setup
Build Date Displays the BIOS release date. Product Information Product Name Displays the product name. Default: Alienware Area-51 R2. Set Service Tag Allows you to enter the service tag of your computer. Asset Tag Displays the asset tag of your computer. - Page 83 Main CPU Information Processor Type Displays the processor type Processor ID Displays the processor identification code. CPU Speed Displays the CPU speed. Cache L2 Displays the processor L2 cache size. Cache L3 Displays the processor L3 cache size. Device Information SATA Port1 Displays the SATA 1 drive installed in the computer.
- Page 84 Advanced Power Management Setup AC Recovery Sets what action the computer takes when power is restored. Default: Last State. Deep Sleep Control Allows you to define the controls when Deep Sleep is enabled. Default: Enabled in S5 Only. Chipset Spread Spectrum Enabling this option could reduce the EMI.
- Page 85 Chipset tFAW Displays the Four Activate Window (editable in Manual Mode). tWCL Displays the Write CAS Latency (editable in Manual Mode). tCKE Displays the Minimum CKE High and Low Pulse Width (editable in Manual Mode). CPU Power Management Configuration Allows you to access the CPU Power Management Configuration submenu.
- Page 86 Chipset CPU Ring Voltage Offset Mode Allows you to change the CPU Ring Voltage Offset Mode. Default: Auto. CPU Ring Voltage Offset Allows you to change the CPU Ring Voltage Offset. Default: Auto. CPU SA Voltage Mode Allows you to change the CPU System Agent Voltage Mode.
-
Page 87: Clearing Forgotten Passwords
Boot 5th Boot Allows you to enable or disable the 5th boot device. Default: Network. Hard Disk Drive BBS Priorities Sets the hard drive boot priority. The items displayed are dynamically updated according to the hard drives detected. USB Storage Drive BBS Priorities Sets the USB storage drive boot priority. -
Page 88: Flashing The Bios
3. Remove the both the left and right side-panels. See “Removing the Side Panels”. 4. Locate the CMOS jumper (CLEAR_CMOS1) on the system board. See “System-Board Components”. 5. Remove the jumper plug from pins 2 and 3 and fix it on pins 1 and 2. 6.