Table of Contents
Quick Links
ALIENWARE ALX DESKTOP MANUAL
The contents herein are subject to change without notice. ©1996-2006 Alienware
Corporation. All rights reserved.
Reproduction of this manual in any manner without the prior written
permission of Alienware Corporation is strictly prohibited.
Trademarks used in this manual: Alienware, Alienlce, the AlienHead logo, and
AlienAutopsy are trademarks or registered trademarks of Alienware Corporation.
Microsoft and Windows are registered trade-marks of Microsoft Corporation. Other
trademarks and trade names may be used in this manual to refer to either the entities
claiming the marks and names or their products. Alienware Corporation disclaims any
proprietary interest in trademarks and trade names other than its own.
Rev 3.0
APRIL 2007
Table of Contents
Troubleshooting

Related Manuals for Alienware Aurora ALX


Summary of Contents for Alienware Aurora ALX
- Page 1 Microsoft and Windows are registered trade-marks of Microsoft Corporation. Other trademarks and trade names may be used in this manual to refer to either the entities claiming the marks and names or their products. Alienware Corporation disclaims any proprietary interest in trademarks and trade names other than its own.
-
Page 2: Table Of Contents
Alienware ALX Desktop Manual CONTENTS Introduction, 5 Chapter 1 System Preparation and Setup, 7 When your Computer First Arrives, 8 Location and Positioning of Your Computer, 8 Getting to Know Your Computer, 9 Front I/O Ports and Features, 10 Rear Ports and Features, 11... - Page 3 Things to Check before Troubleshooting, 50 Software Diagnostics Tools, 51 Backup and general Maintenance, 51 AlienAutopsy, 51 Answers to Common Problems, 52 CD-ROM, DVD-ROM, CD-RW, DVD±RW or Blu-Ray Drive, 52 System, 53 Hard Drive, 53 Internet, 54 Keyboard, 55 Memory, 56 Alienware ALX Desktop Manual...
- Page 4 Alienware ALX Desktop Manual Monitor, 56 Mouse, 57 Power, 57 Printer, 58 Speakers, 58 Expansion Cards, 59 Game Controllers, 59 Appendix A Microsoft Critical Updates, 61 Appendix B General And Electrical Safety Precautions, 6 Appendix C Terms And Conditions Agreement, 65 Appendix D Limited Product Warranty;...
-
Page 5: Introduction
We invite you to share your experience with your new computer with us, so please do not hesitate to either e-mail or call Alienware with any questions or concerns. The entire staff shares your enthusiasm for new technology and we hope that you enjoy using your new computer as much as Alienware enjoyed building it for you. -
Page 7: Chapter 1: System Preparation And Setup
Alienware ALX Desktop Manual CHAPTER 1: SYSTEM PREPARATION AND SETUP... -
Page 8: When Your Computer First Arrives
Alienware ALX Desktop Manual CHAPTER 1: SYSTEM PREPARATION AND SETUP When Your Computer First Arrives Before setting up your computer or components, please inspect all items for any physical damage that may have occurred during shipment. Report any damaged items to customer service within 5 days of receiving the shipment. Shipping damage reported after the fi rst 5 days of receiving the shipment will not be honored. -
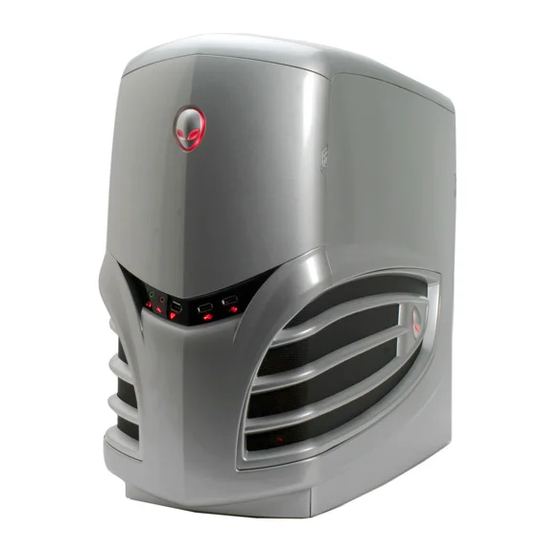
Page 9: Getting To Know Your Computer
Press the power button once to turn on your computer. The button will illuminate, indicating the system is powered on. The light will flutter when there is hard disk activity to indicate that your computer’s hard drive is busy. Alienware ALX Desktop Manual Power button, Power indicator, and Hard Disk Activity Indicator... -
Page 10: Front I/O Ports And Features
Alienware ALX Desktop Manual Front I/O Ports and Features Audio Line Out (Headphone) Audio Line In (Microphone) FireWire port (IEEE1394) USB 2.0 port USB 2.0 port FireWire (IEEE194) Connect high-speed FireWire (also known as IEEE1394) devices such as digital camcorders and external hard disk drives. -
Page 11: Rear Ports And Features
Alienware ALX Desktop Manual Rear Ports and Features Ventilation - Do not block Power supply switch I - On / O - Off Left and right panel release latches Power socket Ventilation - Do not block Rear I/O ports DVI display port 2... - Page 12 I/O ports, refer to the technical reference provided on your system’s Windows Desktop. Your system’s technical reference is also available for download from your My Hive® Personal Support Area on the Alienware website. Visit: http://support.alienware.com/ DVI Display Port 1 Connect your primary monitor to this port.
-
Page 13: Accessing System Drives
Alienware ALX Desktop Manual DVI Display Port (Optional) If your computer is configured with two graphics cards and you would like to use more than two monitors, connect your third monitor to this port. For detailed information on connecting monitors to your computer, see Connecting Monitors in this chapter. -
Page 14: Connecting Monitors
Alienware ALX Desktop Manual Connecting Monitors In addition to CRT and LCD displays, your system also supports the use of multiple monitors. It can also be output to a TV with an available S-Video input. To connect multiple monitors, a DVI-to-VGA adapter may be necessary. For more information on multiple monitors, see Connecting Multiple Monitors in this chapter. -
Page 15: Connecting An Analog Monitor
To connect multiple monitors to you computer, follow the steps for Connecting a Digital Monitor or Connecting an Analog Monitor above. A DVI-to-VGA adapter may be necessary, depending on the type of displays you wish to connect. Alienware ALX Desktop Manual DVI Connector VGA to DVI... -
Page 16: Connecting A Tv
Alienware ALX Desktop Manual Connecting a TV A TV with an available S-Video input can be connected using an S-Video cable. These cables can be purchased at home electronics retailers. For more information about your TV’s available video inputs, refer to the television’s manual. -
Page 17: Connecting To An Nvidia Sli Graphics Configuration
DVI or S-Video connections become inactive. An SLI graphics configuration can support up to four displays when SLI is not enabled. The illustration below shows possible display connections: Alienware ALX Desktop Manual DVI to VGA Adapter S-Video Port 1... -
Page 18: Enabling Multiple Monitors With Nvidia Based Graphics
Alienware ALX Desktop Manual Enabling Multiple Monitors with NVIDIA Based Graphics Use the nView Display Settings control panel to enable multiple monitors. Disable SLI in the NVIDIA Display control panel before enabling multiple displays. Accessing nView Display Settings from the Windows Control Panel From the Windows®... -
Page 19: Connecting To An Ati Crossfire Graphics Configuration
Alienware ALX Desktop Manual Connecting to an ATI CrossFire™ Graphics Configuration CrossFire-enabled graphics provides hardware support for one DVI-I monitor or one VGA monitor using a DVI-to-VGA adapter. The following shows how to connect your display to a CrossFire graphics configuration:... -
Page 20: Configuring A Crossfire Graphics Configuration With Multiple Displays
Alienware ALX Desktop Manual Configuring a CrossFire Graphics Configuration with Multiple Displays Display support is only available through the CrossFire™ Interconnect cable when CrossFire™ is active. This arrangement ensures the highest possible performance. When CrossFire is active other display devices connected to the other DVI or VGA connections on the Master and Slave graphics cards are rendered inactive. -
Page 21: Enabling Multiple Monitors With Ati Based Graphics
Control Center, or you can define your own hot key sequence by using the Catalyst Control Center’s Hotkey Manager. Disable CrossFire in the Catalyst Control Center software before enabling multiple displays. Alienware ALX Desktop Manual ™ Control Center software to enable multiple ®... -
Page 22: Connecting Speakers
Alienware ALX Desktop Manual To Enable a Secondary Display Device Click the Wizard button and follow the instructions to enable Clone Mode. Note: A secondary display device can be a flat panel display, CRT monitor, TV, or VCR. To Enable a Secondary Display Device 1. -
Page 23: Sound Blaster X-Fi Series
Line Out 3 jack Line Out 2 jack Line Out 1 jack LINE IN DIGITAL_IO Alienware ALX Desktop Manual AD_LINK Connects to the External I/O Hub for transferring data. Connects to Front Center, Subwoofer and Side Left (only on 7.1 speaker systems) or Rear Center (only on 6.1 speaker systems) inputs on powered... -
Page 24: Connecting Keyboards And Mice
Alienware ALX Desktop Manual Connecting Keyboards and Mice Connecting a Keyboard 1. Locate the (purple) PS/2 port at the back of the computer. 2. Properly orient the keyboard’s PS/2 connector with this port and gently push until the connector is fully inserted. Do not force the connector into the port. -
Page 25: Connecting A Printer
It is common for some printers, scanners and other peripherals to prevent the computer from starting properly. When starting your system for the first time, Alienware recommends connecting only the peripherals that were included in your purchase. For further information, please refer to your printer’s documentation. -
Page 27: Chapter 2: Using Your System
Alienware ALX Desktop Manual CHAPTER 2: USING YOUR SYSTEM... -
Page 28: Connecting Usb Devices
Alienware ALX Desktop Manual CHAPTER 2: USING YOUR SYSTEM Connecting USB Devices Plug the USB device into an available USB port on your computer. Windows Vista will detect the device and attempt to install the appropriate driver automatically. In some cases, Windows may require a driver. -
Page 29: Optical Drives
A Blu-Ray drive can read CD-ROM, CD-R, CD-R/W, DVD, Reader / Writer DVD+R/W, DVD-R/W, DVD+R Dual Layer (DL), BD-ROM, BD-R, and BD-RE media. It can also record to CD-R, CD-R/W, DVD+R/W, DVD-R/W, DVD+R Dual Layer (DL), BD-R, and BD-RE media. Alienware ALX Desktop Manual... -
Page 30: Playing A Dvd
Alienware ALX Desktop Manual You can easily identify and distinguish the optical drives installed in your computer by looking for the below logos on the front of each drive. These logos are used to indicate each drive’s respective capabilities and media compatibility. -
Page 31: Writing A Cd Or Dvd
Follow the Nero Express Essentials on-screen instructions. Copying a CD or DVD: Click Start (Windows® Logo) > All Programs > Nero 7 Essentials > Nero StartSmart Essentials Click ‘Data’, then ‘Copy CD’ or ‘Copy DVD Follow the Nero Express Essentials on-screen instructions Alienware ALX Desktop Manual... -
Page 32: Using Digital Flash Media
Alienware ALX Desktop Manual Using Digital Flash Media (Optional Media Reader / Writer) Insert a supported media card into the correct media slot in the digital flash media reader / writer. Windows will read the media and present a window containing the media card’s contents. -
Page 33: Power Management
2. Click ‘Classic View’ from the task panel. 3. Double-click on the ‘Power Options’ icon. 4. Select a power plan from the options show. To customize specific settings, click ‘Change plan settings’ beneath the selected power plan. Alienware ALX Desktop Manual... -
Page 35: Chapter Installing Additional Or Replacement Components, 5
Alienware ALX Desktop Manual CHAPTER 3: INSTALLING ADDITIONAL OR REPLACEMENT COMPONENTS... -
Page 36: Removing The Side Panel
Alienware ALX Desktop Manual CHAPTER 3: INSTALLING ADDITIONAL OR REPLACEMENT COMPONENTS This chapter provides information about installing, uninstalling, and replacing system components. Refer to the technical reference provided on your system’s Windows Desktop for more information about your system’s expansion slots, recommended memory confi gurations, and further technical information. -
Page 37: Installing Expansion Cards
PCI-E x16 slot with the other. Once the video card is free from the retention mechanism, continue to gently pull the card from the PCI-E x16 slot in order to remove it. Alienware ALX Desktop Manual... - Page 38 Alienware ALX Desktop Manual PCI Express x16 card PCI Express x16 card slot Installing a PCI Express x16 video card in a single card configuration Installing PCI Express x16 video cards in a dual card configuration Graphics Card Bridge Power Connectors (2)
-
Page 39: Installing A Pci Or Pci Express Expansion Card
New Hardware Found dialog. Using the CD provided with the video card, install its drivers by running the driver installation setup. Refer to the video card’s documentation for further details, or contact Alienware Technical Support. Installing a PCI or PCI Express Expansion Card If you are replacing an existing PCI card with on of a similar type –... - Page 40 New Hardware Found dialog. Using the CD provided with the PCI card, install its drivers by running the driver installation setup. Refer to the card’s documentation for further details, or contact Alienware Technical Support. PCI card PCI Express x16...
-
Page 41: Installing Additional Or Replacement Drives
9. Connect the drive’s SATA data cable. 10. Reconnect the power cord, monitor, keyboard and mouse. 11. Turn on the computer and ensure the drive is installed and working properly before connecting any other devices. SATA Power Cable: Alienware ALX Desktop Manual SATA Data Cable:... -
Page 42: Cd-Rw, Dvd/Cd-Rw, Or Dvd±R/W Drives
Refer to the technical reference provided on your system’s Windows Desktop for more information about your system’s memory compatibility and recommended memory configurations. Your system’s technical reference is also available for download from your My Hive® Personal Support Area on the Alienware website. Visit: http://support.alienware.com/ ATA Data Cable:... -
Page 43: Removing A Memory Module
6. Click Start (Windows® Logo) > Control Panel > System and Maintenence. 7. Click ‘View amount of RAM and processor speed’ located in the ‘System’ section. 8. The amount of memory installed is displayed under the ‘System’ heading. Alienware ALX Desktop Manual... -
Page 45: Chapter 4: System Recovery
Alienware ALX Desktop Manual CHAPTER 4: SYSTEM RECOVERY... -
Page 46: Alienrespawn 1.0
CHAPTER 4: SYSTEM RECOVERY AlienRespawn 1.0 Based on a unique image of your personal system hard drive created by Alienware technicians, AlienRespawn enables a quick and convenient restoration of your system to the condition in which it was shipped. The AlienRespawn kit includes the Boot CD featuring AlienRespawn software and the personalized Image DVD individually created from your hard drive. -
Page 47: Alienrespawn 2.0
AlienRespawn Image DVD in a secure location and restart your system. 10. Your system will now restart into its original factory configuration. An Alienware Support CD is also included with your system to provide drivers and utilities for your installed hardware. For updated drivers and utilities, please visit www.alienware.com. -
Page 48: Recovery Disc
Step 2: Insert the Alienware Recovery Disc into your computer’s optical drive. Step 3: When your system reads the Alienware Recovery Disc it will give you the message “Press any key to boot from CD”. Press any key to continue Step 4: Once the recovery is completed, remove the Alienware Recovery Disc from your CD-ROM drive. -
Page 49: Chapter 5: Troubleshooting
Alienware ALX Desktop Manual CHAPTER 5: TROUBLESHOOTING... -
Page 50: Things To Check Before Troubleshooting
• If an error message appears on the screen, please write down the exact error message prior to calling Alienware Technical Support to aid in diagnosing and resolving your issue. • If an error occurs in a specific program, refer to the program’s documentation. -
Page 51: Software Diagnostics Tools
• Write down your passwords and keep them safe (away from your computer). This is especially important if you choose to password-protect your system’s BIOS and operating system. • Document vital settings such as network, dialup, mail, and internet settings. Alienware ALX Desktop Manual... -
Page 52: Answers To Common Problems
Alienware ALX Desktop Manual Answers to Common Problems CD-ROM, DVD-ROM, CD-RW, DVD±RW or Blu-Ray Drive The computer does not recognize the disc or drive: • Check to see if the disc is properly inserted into the drive with the label facing up. -
Page 53: System
• Check that the cables are properly connected to the hard drive and the motherboard or controller. • If the computer has been subjected to physical shock or static electricity, the operating computer may need to be reinstalled. Alienware ALX Desktop Manual... -
Page 54: Internet
Alienware ALX Desktop Manual Error: “Non-system disk or disk error”: • Eject the disk from the diskette drive and then press ENTER. • The hard drive is not recognized. • Check that the IDE or SATA controllers are properly enabled in the BIOS setup utility. -
Page 55: Keyboard
Once the keyboard has dried, connect it to the computer. If the keyboard does not work, it needs to be replaced. Keyboards damaged due to spills are not covered under warranty. Alienware ALX Desktop Manual... -
Page 56: Memory
• Computers using a dual-channel memory configuration require that memory modules be installed in pairs. If you require assistance, please contact Alienware Technical Support. Monitor There is no display on the screen: • Check that the monitor cables are properly connected to the monitor, the computer and the UPS, power strip or wall outlet. -
Page 57: Mouse
• Check that all devices on the computer are properly connected to your computer and that the computer is properly connected to the surge protector or UPS. Alienware ALX Desktop Manual... -
Page 58: Printer
Alienware ALX Desktop Manual Printer The printer will not turn on: • Check that the power cord is properly connected to a wall outlet. • Check that the wall outlet is working properly by testing it with another device such as a radio or lamp that you know works. If the wall outlet is not working, please contact an electrician or power company for further assistance. -
Page 59: Expansion Cards
The computer does not recognize the game controller: • Check that the cable connecting the game controller to the computer is not damaged and that it is properly connected. • Reinstall the device driver for the game controller. Alienware ALX Desktop Manual... - Page 60 Alienware ALX Desktop Manual...
-
Page 61: Appendix A Microsoft Critical Updates
Critical Updates. Alienware also highly recommends visiting the Microsoft Windows Update website immediately after recovering a system from any Alienware Recovery or Respawn CD to view a list of and install the most recently released Critical Updates. Doing so will ensure... -
Page 63: Appendix B General And Electrical Safety Precautions
• Do not step or place any objects on the power cord. • Do not spill anything on or into the computer. • To avoid electrical shock, always unplug all power, modem, and any other cables from the wall outlets before handling the computer. Alienware ALX Desktop Manual... -
Page 64: Replacement Components Or Accessories
• The computer was dropped or the case was damaged. • Normal operation of the computer does not occur when the operating instructions are followed. Replacement Components or Accessories It is only advised to use replacement parts or accessories recommended by Alienware... -
Page 65: Appendix C Terms And Conditions Agreement
Alienware ALX Desktop Manual APPENDIX C: TERMS AND CONDITIONS AGREEMENT Please visit http://www.alienware.com/terms/ to view the terms and conditions agreement. We recommend that you print a copy and file it with your invoice for future reference. -
Page 67: Appendix D Limited Product Warranty; Disclaimer Of Warranties; And Limitation Of Liability
Alienware for exchange. In most cases, Alienware will make all shipping arrangements for the return for repair of your system and/or components and you will be issued a... -
Page 68: Systems Returned To Alienware For Repair
If the Technical Support representative determines that your system must come back to Alienware for repair, you will be issued an RMA number. Be sure to follow all of the return instructions completely as all systems arriving at Alienware without a valid RMA number will be refused and returned to sender. -
Page 69: Replacing A Defective Component
If a Technical Support representative determines that a component is defective, you will be issued an RMA number. All components arriving at Alienware without a valid RMA number will be refused and returned to sender. The two options for returning... -
Page 70: Keep In Mind
3. Package weight 4. Your return address Contact Alienware to schedule a pickup. You will have up to five business days to ship the defective component(s) back to Alienware. No refunds will be issued if the defective component(s) are not shipped within 5 days of receiving the replacement component(s). -
Page 71: Day Money Back Guarantee
Alienware ALX Desktop Manual 0-day Money Back Guarantee In addition to the standard warranty, Alienware offers a 30-day money back guarantee on every system. If you are not satisfied with your system, you may return it within 30 days for a refund. The refund will only be issued for the amount of the sale and will not include shipping costs. -
Page 72: Appendix E Contacting Alienware
Customer Service Please visit our web site for current operational hours. Have your Alienware account number available on your first visit to set up a support account. Go to www.alienware. com and visit our Support Area. Customer service representatives are also available by telephone. Please have your account number on hand when calling. -
Page 73: Technical Support
Solutions. You are able to search by key words, categories or both. It is likely that you will find the information needed here. This area is open and does not require warranty coverage. Go to www.alienware.com and visit our support area. Technical support representatives are also available by telephone. Telephone support is available for computer systems under warranty. -
Page 74: Appendix F Important Information
Alienware ALX Desktop Manual APPENDIX F: IMPORTANT INFORMATION • PLEASE BACKUP ANY DATA YOU HAVE BEFORE INITIATING A SYSTEM RECOVERY OR SENDING YOUR SYSTEM IN FOR REPAIR OR UPGRADES. • PLEASE RETAIN ALL BOXES THAT WERE ORIGINALLY SHIPPED TO YOU IN CASE YOU NEED TO RETURN ANY MERCHANDISE.