
Related Manuals for Philips EasyKey 3000 Series


Summary of Contents for Philips EasyKey 3000 Series
- Page 1 Easy Key 3000 series Smart Video Door Lock DDL303-VP-5HW User manual Register your produc t and get support at ww w.philips.com/support...
-
Page 3: Table Of Contents
Contents 6. Other features 1. Important Information One-click mute Safety Restore to default settings Caution Doorbell Disposal of used products and batteries Display 2. Installation 7. Indicators Packing list Door lock status indicator Exploded views Mute indicator Pre-install instruction System lock-up indicator Installation steps 3. -
Page 4: Important Information
◆ Do not hang objects on the handle, in case it ◆ You can have your locks reclaimed at Philips might affect the normal use of the lock. authorized service centers. You will receive corresponding compensation if your products ◆... -
Page 5: Installation
2 Installation Packing list This packing list is for reference only. Please refer to the actual packing items. ① Outside ② Inside ③ Drilling ④ Mortise escutcheon with escutcheon with template silicon pad silicon pad Easy Key Easy Key User Warranty EasyKey Manual Card 合格证... -
Page 6: Exploded Views
Exploded views 1. Screen*1 6. Rear sealing plate 11. Outside 2. Li-ion battery*1 component*1 escutcheon*1 3. Inside escutcheon 7. Mortise*1 12. Lock cylinder*1 screw*6 8. Mortise’s anchor 13. Lock cylinder’s 4. Inside escutcheon*1 screw*4 anchor screw*1 5. Anchor screw*3 9. M6 screw tube*3 14. -
Page 7: Pre-Install Instruction
Pre-install instruction Step 1 | Door opening direction This product is suitable for doors with four opening directions: left-out pull, right- out pull, left-in push and right-in push. Left-open Right-open Left-in push Right-in push Left-out pull Right-out pull Step 2 | Changing the latch bolt’s direction You can change the direction of the latch bolt to adapt to doors of different opening directions. -
Page 8: Installation Steps
① Follow the direction of the ② Follow the direction of the arrow to arrow to rotate the direction rotate the latch bolt to 180 degrees. adjustment bar. ③ Follow the direction of the ④ Follow the direction of the arrow to Graph 2 arrow to push the latch bolt in. - Page 9 Put the lock cylinder into the mortise, and then tighten the lock cylinder’s anchor screw. Attention 1. Please cut the bar of the lock cylinder to a proper Lock cylinder length. 2. Cutting requirements: After the lock cylinder is inserted into the mortise, leave the bar with an extruded length of 15-30mm that is higher than the door surface and cut the rest part.
- Page 10 Attach the fixing plate to the inner Insert the cut lock-out bolt bar into surface of the door, fix it with 3 M6 the buckle of the inside escutcheon, anchor screws, and tighten them. then connect the escutcheon cable and video cable accordingly. Escutcheon cable Video cable...
-
Page 11: Get To Know The Product
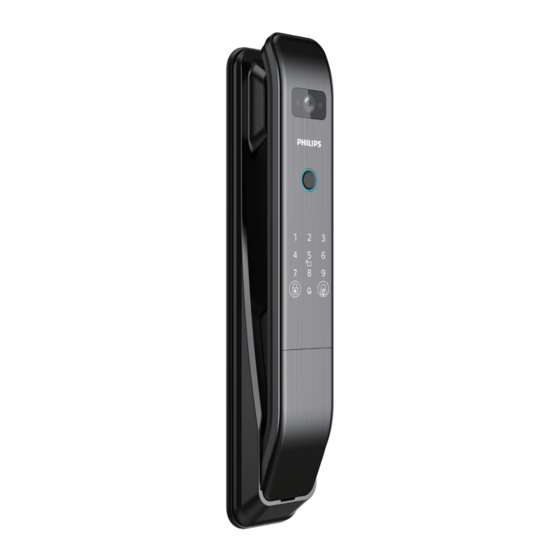
3 Get to know the product This packing list is for reference only. Please refer to the actual packing items. Outside escutcheon Camera ① Card reader ② Fingerprint sensor ③ Keypad ④ Micro USB port ⑤ Mechanical key hole ⑥ Inside escutcheon Screen ①... -
Page 12: Settings
4 Settings Pre-setup instructions There are 2 operating modes for the product: general mode and dual verification mode. ◆ General mode Unlock by any enrolled verification method. Unlock by any two of the verification methods among PIN code, Dual verification mode key tag and fingerprint. -
Page 13: Master Mode
Master mode Add a PIN code: enter the master PIN code and confirm with [#] key, re-enter the master PIN code and re-confirm with [#], and the voice will prompt that the addition is successful. Add a fingerprint: place the finger on the fingerprint sensor, follow the voice prompts to lift and re-place the finger on the fingerprint sensor until the voice prompts... -
Page 14: User Settings
User settings Add a user Press [2] to enter user settings, re-press [2] to delete a user, then delete the user codes of the PIN code, fingerprint or key tag that need to be deleted, and confirm with [#] Long press the [#] key to enter the master key, and the voice will prompt that the mode. - Page 15 Delayed locking settings Voice settings Long press the [#] key to enter the master Long press the [#] key to enter the master mode. mode. Press [3] to enter system settings, re-press Press [3] to enter system settings, then press [5] to enter delayed locking settings, for [3] to enter voice settings, then follow the longer delayed locking time, please press...
-
Page 16: Network Settings
Network settings Code query Long press the [#] key to enter the master Long press the [#] key to enter the master mode. mode. Press [4] to enter network settings, for hot- spot connection, please press [1], for auto Press [5] to enter information query, for connection, please press [2]. - Page 17 Motor settings Reversal period settings The motor settings only for installation technicians, please operate it carefully. Torque settings Under the initial state, wake up the keypad and press "888#" can enter the motor setting mode. Press [3] to enter reversal period settings, then press [2] to add the When the door lock is in the initial state, reversal period, or press [8] to reduce the...
- Page 18 5 Get to use the product Unlock from outside / inside Unlock from outside PIN code Fingerprint Key tag Push/pull to unlock Fingerprint sensor Keypad Card reader Push/pull Push/pull to unlock to unlock ① Touch to wake up the ① Place the enrolled finger ①...
- Page 19 Lock from outside/inside Auto-locking When the door is closed, the lock will be locked automatically. Attention The auto-locking period is related to the delayed locking period, please follow your own usage habit to set the locking period. Manually locking When the auto-locking of the door lock fails occasionally and cannot be automatically locked.
- Page 20 Handle locking Hold and rotate the handle can unlock the door from inside. Indoor deadlock When the door lock is locked, press down and rotate the rotary knob to the left or the right side’s lock scale (as shown on the left graphic) could enable indoor deadlock.
-
Page 21: Other Features
6 Other features One-click mute function: Users can enable one-click mute to disable the voice prompts, which applies to the scenario that you don’t want your family to be disturbed. How to use: (1)Switch to mute mode: when the system is waken up, long press the mute button for 2s to enter mute mode, and the indicator will be in white. -
Page 22: Doorbell
Doorbell function: The indoor speaker emits a ding-dong sound to remind the host that a visitor is arrived. How to use: Press the doorbell from outside, the indoor speaker will emits a ding-dong sound. Simultaneously, the camera of the door lock will capture the visitor's photo, and send the captured content to the bond WeChat Mini Program. -
Page 23: Indicators
7 Indicator annotation Door lock status indicator Blue: indicating that fingerprinting could be processed; Green: Indicator indicating that verification is succeeded, and unlocking is allowed; Red: indicating that verification failed or alert is triggered. Mute indicator Note: White:whether the mute mode is on or off, the indicator is in white. -
Page 24: Troubleshooting
8 Troubleshooting Alert types & methods Anti-dismantling alert Triggering: when the outside escutcheon is being pried open and the outside escutcheon is not closely fit with the door. Alert mode: continuous repeated alert. Off: the alert will turn off automatically, turn off after any successful unlock verification from outside or a successful unlock from inside. -
Page 25: How To Replace Batteries
How to replace batteries The working power of the door lock is a 4200mA/h lithium battery. The battery cabinet is located at the upper end of the inside escutcheon. You can slide the battery cover upwards and remove the cover to replace the battery. Slide up to open the Battery cover buckle battery cover... - Page 26 Philips and the Philips Shield Emblem are registered trademarks of Koninklijke Philips N.V. and are used under license. This product has been manufactured by and is sold under the responsibility of Shenzhen Conex Intelligent Technology Co., Ltd. and Shenzhen Conex...