Table of Contents
Quick Links
Notes for operators and responsible maintenance personnel
★ Please read through this Instruction Manual carefully prior to use.
★ Keep this Instruction Manual together with the system with care to
make it available anytime.
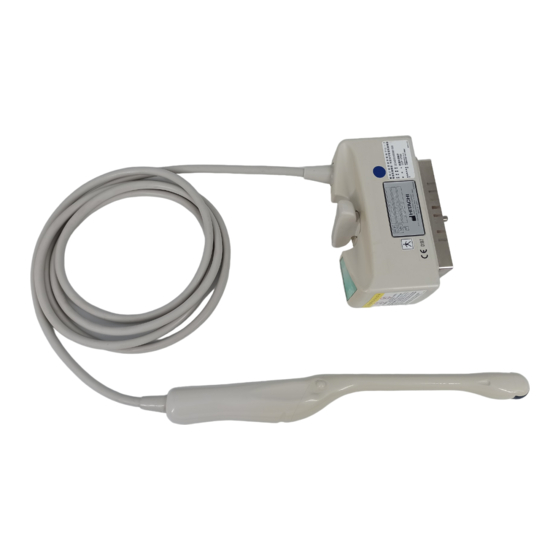
Transvaginal Probe
EUP‐V73W
INSTRUCTION MANUAL
Tokyo, Japan
© Hitachi, Ltd. 2013, 2017. All rights reserved.
Q1E‐EP1430‐5
0123
Table of Contents

Related Manuals for Hitachi EUP-V73W


Summary of Contents for Hitachi EUP-V73W
- Page 1 Transvaginal Probe EUP‐V73W INSTRUCTION MANUAL Notes for operators and responsible maintenance personnel ★ Please read through this Instruction Manual carefully prior to use. ★ Keep this Instruction Manual together with the system with care to make it available anytime. Tokyo, Japan Q1E‐EP1430‐5 © Hitachi, Ltd. 2013, 2017. All rights reserved. 0123 ...
- Page 2 Hitachi, Ltd. Manufacturer: 2‐16‐1, Higashi‐Ueno, Taito‐ku, Tokyo, 110‐0015, Japan +81‐3‐6284‐3668 http://www.hitachi.com/businesses/healthcare/index.html European Representative: Hitachi Medical Systems GmbH Otto‐von‐Guericke‐Ring 3 D‐65205 Wiesbaden, Germany EU Importer: Hitachi Medical Systems Europe Holding AG Address: Sumpfstrasse 13 CH‐6300 Zug, Switzerland Local Distributor: (1) Q1E‐EP1430 ...
- Page 3 About this manual This instruction manual contains safety precautions, the inspection, the operation procedure and the reprocessing procedure of EUP‐V73W. Please read this manual thoroughly to ensure the safety operation. If you have any questions concerning the operation of the probe, please contact a service support. The following conventions are used throughout the manual to denote information of special emphasis. WARNING: “Warning” indicates the presence of a hazard which may result in severe personal ...
- Page 4 Graphical Symbols for Use in Labeling of Hitachi Ultrasound Probes Some graphical symbols that are used in labeling of Hitachi Ultrasound Probes are compliant with EN980:2008 standard. Refer to the following table about the meanings of them. Explanation of Symbol Symbol Descriptive Content Hitachi,Ltd Manufacturer Company 2‐16‐1, Higashi‐Ueno,taito‐ku, Name and Address Tokyo,110‐0015,Japan Authorized Hitachi Medical Systems GmbH Representative in The Otto‐von‐Guericke‐Ring 3 D‐65205 Wiesbaden, European Community Germany Store the probe in a cool, dustproof and dark, Keep away from dry environment to avoid high temperature, Sunlight humidity and direct sunlight. Contains or presence of Contains or presence of natural rubber latex ...
- Page 5 Definition of symbol The following symbol is also used for HITACHI Ultrasound Probes. Location Symbol Definition Probe This instrument complies with Directive 93/42/EEC relating to connector Medical Device and Directive 2011/65/EU relating to RoHS Probe IPX7 mark IPX7 connector See section 1.6. Probe Type BF APPLIED PART connector Probe General warning sign connector Probe Warning; dangerous voltage connector Probe Caution; Biohazard connector Follow the instruction manual to operate this instrument. If not Probe avoided, may result in injury, property damage, or the connector equipment trouble. Probe STERRAD sterilization compatibility mark connector ...
-
Page 6: Table Of Contents
CONTENTS Page Introduction ∙∙∙∙∙∙∙∙∙∙∙∙∙∙∙∙∙∙∙∙∙∙∙∙∙∙∙∙∙∙∙∙∙∙∙∙∙∙∙∙∙∙∙∙∙∙∙∙∙∙∙∙∙∙∙∙∙∙∙∙∙∙∙∙∙∙∙∙∙∙∙∙∙∙∙∙∙∙∙∙∙∙∙∙∙∙∙∙∙∙∙∙∙∙∙∙∙∙∙∙∙∙∙∙∙∙∙∙∙∙∙∙∙∙∙∙∙∙∙∙∙∙∙∙∙∙ 1 Features ∙ ∙∙∙∙∙∙∙∙∙∙∙∙∙∙∙∙∙∙∙∙∙∙∙∙∙∙∙∙∙∙∙∙∙∙∙∙∙∙∙∙∙∙∙∙∙∙∙∙∙∙∙∙∙∙∙∙∙∙∙∙∙∙∙∙∙∙∙∙∙∙∙∙∙∙∙∙∙∙∙∙∙∙∙∙∙∙∙∙∙∙∙∙∙∙∙∙∙∙∙∙∙∙∙∙∙∙∙∙∙∙∙∙∙∙∙∙∙∙∙∙∙∙∙∙∙ 1 Principles of operation ∙∙∙∙∙∙∙∙∙∙∙∙∙∙∙∙∙∙∙∙∙∙∙∙∙∙∙∙∙∙∙∙∙∙∙∙∙∙∙∙∙∙∙∙∙∙∙∙∙∙∙∙∙∙∙∙∙∙∙∙∙∙∙∙∙∙∙∙∙∙∙∙∙∙∙∙∙∙∙∙∙∙∙∙∙∙∙∙∙∙∙∙∙∙∙∙∙∙∙∙ 1 Intended Use ∙ ∙∙∙∙∙∙∙∙∙∙∙∙∙∙∙∙∙∙∙∙∙∙∙∙∙∙∙∙∙∙∙∙∙∙∙∙∙∙∙∙∙∙∙∙∙∙∙∙∙∙∙∙∙∙∙∙∙∙∙∙∙∙∙∙∙∙∙∙∙∙∙∙∙∙∙∙∙∙∙∙∙∙∙∙∙∙∙∙∙∙∙∙∙∙∙∙∙∙∙∙∙∙∙∙∙∙∙∙∙∙∙∙∙∙∙∙ 1 Components ∙ ∙∙∙∙∙∙∙∙∙∙∙∙∙∙∙∙∙∙∙∙∙∙∙∙∙∙∙∙∙∙∙∙∙∙∙∙∙∙∙∙∙∙∙∙∙∙∙∙∙∙∙∙∙∙∙∙∙∙∙∙∙∙∙∙∙∙∙∙∙∙∙∙∙∙∙∙∙∙∙∙∙∙∙∙∙∙∙∙∙∙∙∙∙∙∙∙∙∙∙∙∙∙∙∙∙∙∙∙∙∙∙∙∙∙∙∙∙ 2 Accessories (Option) ∙ ∙∙∙∙∙∙∙∙∙∙∙∙∙∙∙∙∙∙∙∙∙∙∙∙∙∙∙∙∙∙∙∙∙∙∙∙∙∙∙∙∙∙∙∙∙∙∙∙∙∙∙∙∙∙∙∙∙∙∙∙∙∙∙∙∙∙∙∙∙∙∙∙∙∙∙∙∙∙∙∙∙∙∙∙∙∙∙∙∙∙∙∙∙∙∙∙∙∙∙∙∙∙∙ 2 External view ∙∙∙∙∙∙∙∙∙∙∙∙∙∙∙∙∙∙∙∙∙∙∙∙∙∙∙∙∙∙∙∙∙∙∙∙∙∙∙∙∙∙∙∙∙∙∙∙∙∙∙∙∙∙∙∙∙∙∙∙∙∙∙∙∙∙∙∙∙∙∙∙∙∙∙∙∙∙∙∙∙∙∙∙∙∙∙∙∙∙∙∙∙∙∙∙∙∙∙∙∙∙∙∙∙∙∙∙∙∙∙∙∙∙∙∙ 3 Inspection before Use ∙∙∙∙∙∙∙∙∙∙∙∙∙∙∙∙∙∙∙∙∙∙∙∙∙∙∙∙∙∙∙∙∙∙∙∙∙∙∙∙∙∙∙∙∙∙∙∙∙∙∙∙∙∙∙∙∙∙∙∙∙∙∙∙∙∙∙∙∙∙∙∙∙∙∙∙∙∙∙∙∙∙∙∙∙∙∙∙∙∙∙∙∙∙∙∙∙∙∙∙∙∙∙∙∙∙∙∙∙∙ 4 Inspection for Appropriate Connection ∙ ∙∙∙∙∙∙∙∙∙∙∙∙∙∙∙∙∙∙∙∙∙∙∙∙∙∙∙∙∙∙∙∙∙∙∙∙∙∙∙∙∙∙∙∙∙∙∙∙∙∙∙∙∙∙∙∙∙∙∙∙∙∙∙∙∙∙∙∙∙∙∙ 4 Inspection for Material Surface ∙∙∙∙∙∙∙∙∙∙∙∙∙∙∙∙∙∙∙∙∙∙∙∙∙∙∙∙∙∙∙∙∙∙∙∙∙∙∙∙∙∙∙∙∙∙∙∙∙∙∙∙∙∙∙∙∙∙∙∙∙∙∙∙∙∙∙∙∙∙∙∙∙∙∙∙∙∙∙∙∙∙∙∙∙∙ 4 Operation Procedure ∙∙∙∙∙∙∙∙∙∙∙∙∙∙∙∙∙∙∙∙∙∙∙∙∙∙∙∙∙∙∙∙∙∙∙∙∙∙∙∙∙∙∙∙∙∙∙∙∙∙∙∙∙∙∙∙∙∙∙∙∙∙∙∙∙∙∙∙∙∙∙∙∙∙∙∙∙∙∙∙∙∙∙∙∙∙∙∙∙∙∙∙∙∙∙∙∙∙∙∙∙∙∙∙∙∙∙∙∙∙∙ 5 Connection and Settings ∙∙∙∙∙∙∙∙∙∙∙∙∙∙∙∙∙∙∙∙∙∙∙∙∙∙∙∙∙∙∙∙∙∙∙∙∙∙∙∙∙∙∙∙∙∙∙∙∙∙∙∙∙∙∙∙∙∙∙∙∙∙∙∙∙∙∙∙∙∙∙∙∙∙∙∙∙∙∙∙∙∙∙∙∙∙∙∙∙∙∙∙∙∙∙∙∙ 5 How to attach the Sterile Puncture Adapter (EZU‐PA7V) ∙∙∙∙∙∙∙∙∙∙∙∙∙∙∙∙∙∙∙∙∙∙∙∙∙∙∙∙∙∙∙∙∙∙∙∙∙∙∙∙ 7 Display of Needle Guide Line ∙ ∙∙∙∙∙∙∙∙∙∙∙∙∙∙∙∙∙∙∙∙∙∙∙∙∙∙∙∙∙∙∙∙∙∙∙∙∙∙∙∙∙∙∙∙∙∙∙∙∙∙∙∙∙∙∙∙∙∙∙∙∙∙∙∙∙∙∙∙∙∙∙∙∙∙∙∙∙∙∙∙∙∙∙∙∙∙∙ 8 Option of EUP‐V73W ∙∙∙∙∙∙∙∙∙∙∙∙∙∙∙∙∙∙∙∙∙∙∙∙∙∙∙∙∙∙∙∙∙∙∙∙∙∙∙∙∙∙∙∙∙∙∙∙∙∙∙∙∙∙∙∙∙∙∙∙∙∙∙∙∙∙∙∙∙∙∙∙∙∙∙∙∙∙∙∙∙∙∙∙∙∙∙∙∙∙∙∙∙∙∙∙∙∙∙∙∙∙∙∙∙∙∙∙ 10 Magnetic sensor EZU‐RV2S ∙∙∙∙∙∙∙∙∙∙∙∙∙∙∙∙∙∙∙∙∙∙∙∙∙∙∙∙∙∙∙∙∙∙∙∙∙∙∙∙∙∙∙∙∙∙∙∙∙∙∙∙∙∙∙∙∙∙∙∙∙∙∙∙∙∙∙∙∙∙∙∙∙∙∙∙∙∙∙∙∙∙∙∙∙∙∙∙∙ 10 Magnetic sensor EZU‐RV3S ∙∙∙∙∙∙∙∙∙∙∙∙∙∙∙∙∙∙∙∙∙∙∙∙∙∙∙∙∙∙∙∙∙∙∙∙∙∙∙∙∙∙∙∙∙∙∙∙∙∙∙∙∙∙∙∙∙∙∙∙∙∙∙∙∙∙∙∙∙∙∙∙∙∙∙∙∙∙∙∙∙∙∙∙∙∙∙∙∙ 13 Reprocessing Procedure ∙ ∙∙∙∙∙∙∙∙∙∙∙∙∙∙∙∙∙∙∙∙∙∙∙∙∙∙∙∙∙∙∙∙∙∙∙∙∙∙∙∙∙∙∙∙∙∙∙∙∙∙∙∙∙∙∙∙∙∙∙∙∙∙∙∙∙∙∙∙∙∙∙∙∙∙∙∙∙∙∙∙∙∙∙∙∙∙∙∙∙∙∙∙∙∙∙∙∙∙∙∙∙∙∙ 16 Point of use (Pre‐cleaning) ∙ ∙∙∙∙∙∙∙∙∙∙∙∙∙∙∙∙∙∙∙∙∙∙∙∙∙∙∙∙∙∙∙∙∙∙∙∙∙∙∙∙∙∙∙∙∙∙∙∙∙∙∙∙∙∙∙∙∙∙∙∙∙∙∙∙∙∙∙∙∙∙∙∙∙∙∙∙∙∙∙∙∙∙∙∙∙∙∙∙∙∙∙ 18 Containment and transportation ∙∙∙∙∙∙∙∙∙∙∙∙∙∙∙∙∙∙∙∙∙∙∙∙∙∙∙∙∙∙∙∙∙∙∙∙∙∙∙∙∙∙∙∙∙∙∙∙∙∙∙∙∙∙∙∙∙∙∙∙∙∙∙∙∙∙∙∙∙∙∙∙∙∙∙∙∙∙∙∙∙ 18 Manual Cleaning and disinfection ∙∙∙∙∙∙∙∙∙∙∙∙∙∙∙∙∙∙∙∙∙∙∙∙∙∙∙∙∙∙∙∙∙∙∙∙∙∙∙∙∙∙∙∙∙∙∙∙∙∙∙∙∙∙∙∙∙∙∙∙∙∙∙∙∙∙∙∙∙∙∙∙∙∙∙∙∙∙ 18 Drying ∙∙∙∙∙∙∙∙∙∙∙∙∙∙∙∙∙∙∙∙∙∙∙∙∙∙∙∙∙∙∙∙∙∙∙∙∙∙∙∙∙∙∙∙∙∙∙∙∙∙∙∙∙∙∙∙∙∙∙∙∙∙∙∙∙∙∙∙∙∙∙∙∙∙∙∙∙∙∙∙∙∙∙∙∙∙∙∙∙∙∙∙∙∙∙∙∙∙∙∙∙∙∙∙∙∙∙∙∙∙∙∙∙∙∙∙∙∙∙∙∙∙∙∙∙∙ 21... -
Page 7: Introduction
3) The transducer is also used to receive reflected ultrasonic waves. The transducer vibrates mechanically due to the received ultrasonic waves and converts mechanical vibrations into electric energy. Electric signals are converted to shades of brightness by brightness modulation to obtain an image. Intended Use The Transvaginal Probe EUP‐V73W is designed for observation and diagnosis of the following regions mainly by connecting with the HITACHI ultrasound diagnostic scanner. General OB/GYN organs Biopsy (with a Sterile Puncture Adapter) Transrectal ... -
Page 8: Components
19G. Biopsy application requires special care. 24 pieces of Sterile Puncture Adapter EZU‐PA7V are packaged in one set as follows: Component Model Qty Sterile Puncture Adapter EZU‐PA7V 24 pcs NOTE: If you need Sterile Puncture Adapters, please contact your local HITACHI distributor. CAUTION Only a well‐trained physician should perform a biopsy. ... -
Page 9: External View
1.5.4 Spacer for EZU‐RV2S Spacer for EZU‐RV2S is the spacer needed to fix the EZU‐RV2S to the Magnetic Sensor Attachment. CAUTION The Magnetic Sensor Attachment and the Spacer for EZU‐RV2S are not sterilized when delivered from the factory. Prior to use, be sure to clean, disinfect and if necessary sterilize them. External view ... -
Page 10: Inspection Before Use
Inspection before Use Prior to use, the probe and accessories must be carefully inspected for appropriate use. If you find any damage, do not use them and contact a service support immediately. Inspection for Appropriate Connection 1) Confirm that the ultrasound diagnostic scanner is correctly operating. Please refer to the instruction manual of the scanner for the operation. 2) Confirm that any unauthorized device/instrument such as an unauthorized biopsy attachment is not attached or connected to the probe. 3) Confirm that the Sterile Puncture Adapter and settings of the scanner are appropriate for the probe. Attach the Sterile Puncture Adapter to the probe according to “3. Operation Procedure”. Display the “Needle guide line” on the monitor. (Refer to the ... -
Page 11: Operation Procedure
Operation Procedure Connection and Settings 1) Confirm that the probe, the Magnetic Sensor Attachment and the Spacer for EZU‐RV2S are cleaned, disinfected and if necessary sterilized. The Magnetic Sensor Attachment and the Spacer for EZU‐RV2S are needed for Real‐time Virtual Sonography (RVS). Regarding the option for RVS, please refer to “4.Option of EUP‐V73W”. ... - Page 12 5) Put a probe cover on the probe and draw the probe cover until the end of the probe shaft. If air bubbles remain in jelly, remove air bubbles by pushing jelly with finger. (See Fig. 4) Probe cover Air bubble Sterilized acoustic jelly Fig. 4 Removal of bubbles in jelly WARNING Special attention should be paid for a probe cover made out of latex. Latex may cause allergic reactions such as itching, rubor, urticaria, swelling, fever, anhelation, ...
-
Page 13: How To Attach The Sterile Puncture Adapter (Ezu-Pa7V)
9) Store the probe, the Magnetic Sensor Attachment and the Spacer for EZU‐RV2S under the conditions written in “6. Maintenance and Safety Inspection” and “8.Specification”. CAUTION Do not use the probe if the image and the frequency do not match the probe. An incorrect acoustic output can result in burns or other injuries to the patient. Scan for the minimum length of time necessary for the diagnosis and at the lowest possible output. There is the possibility that the patient’s tissues could be affected. For ... -
Page 14: Display Of Needle Guide Line
Display of Needle Guide Line The needle guideline in dot marks can be displayed on the monitor for biopsy. Regarding the needle guideline, refer to the operation manual of the ultrasound diagnostic scanner. NOTE: The needle guide line is intended to provide a visual guide to the direction of the puncture needle pathway. Be sure to check the actual needle position on the ultrasound image when performing the puncture operation. CAUTION The needle guide line can be displayed for this probe, but if the image is displayed at some angle (see the figures below), the image displayed may not be appropriate for biopsy. Confirm that the image displayed is appropriate prior to biopsy. ... - Page 15 WARNING 1) Special attention should be paid for a probe cover made of latex. Latex may cause allergic reactions such as itching, rubor, urticaria, swelling, fever, anhelation, wheezing, depression of blood pressure, and shock. For the patients suspected of latex allergy, do not use the latex‐containing medical devices. ...
-
Page 16: Option Of Eup-V73W
Option of EUP‐V73W RVS (Real‐time Virtual Sonography) is available by using EUP‐V73W with options. The options needed for RVS are the Magnetic Sensor Attachment and the magnetic sensor. The magnetic sensors available are EZU‐RV2S and EZU‐RV3S shown in Fig.7 and Fig.12 respectively. Magnetic sensor EZU‐RV2S EZU‐RV2S as shown in Fig. 7 is the magnetic sensor for EUP‐V73W. Magnetic sensor (black) Projected part Fig. 7 EZU‐RV2S ... - Page 17 4.1.1 How to attach EZU‐RV2S The procedure of attaching the magnetic sensor EZU‐RV2S is as follow. 1) Confirm that the magnetic sensor attachment and the Spacer for EZU‐RV2S are cleaned, disinfected and sterilized. 2) Attach the Spacer for EZU‐RV2S to the magnetic sensor as shown in the top of Fig.8. 3) Insert the magnetic sensor into the Magnetic Sensor Attachment in the correct direction as shown in the bottom of Fig. 8. Spacer for EZU‐RV2S Projected part Magnetic sensor (EZU‐RV2S: Black) Spacer Projected part Magnetic sensor ...
- Page 18 4) Attach the Magnetic Sensor Attachment to the probe as shown in Fig. 9. Fig. 9 How to attach the Magnetic sensor attachment CAUTION Do not put your fingers between the Magnetic Sensor Attachment and the Probe when attaching the Magnetic Sensor Attachment to the probe. ‐12‐ Q1E‐EP1430 ...
- Page 19 4.1.2 How to release EZU‐RV2S The procedure of releasing the magnetic sensor EZU‐RV2S is as follow. 1) Detach the Magnetic Sensor Attachment from the probe as shown Fig. 10. Fig. 10 How to release the Magnetic sensor attachment from the probe 2) Detach the magnetic sensor and the Spacer for EZU‐RV2S from the Magnetic Sensor Attachment as shown Fig. 11. Fig. 11 How to release magnetic sensor from the Magnetic Sensor Attachment CAUTION Clean, disinfect and sterilize the Magnetic Sensor Attachment and the Spacer for EZU‐RV2S prior to the first use as they are not sterilized when delivered. ...
-
Page 20: Magnetic Sensor Ezu-Rv3S
4.2.1 How to attach EZU‐RV3S The procedure of attaching the magnetic sensor EZU‐RV3S is as follow. 1) Confirm that the Magnetic Sensor Attachment is cleaned, disinfected and sterilized. 2) Insert Magnetic sensor into the Magnetic sensor attachment in the correct direction as shown in Fig. 13. Direction mark of EZU‐RV3S Magnetic sensor (EZU‐RV3S) Magnetic sensor attachment Fig. 13 How to attach the Magnetic sensor CAUTION Never attach the Magnetic Sensor Attachment to the probe in the wrong direction, otherwise it may result in false diagnosis. 3) Attach the Magnetic Sensor Attachment to the probe as shown in Fig. 14. Fig. 14 How to attach the Magnetic Sensor Attachment ... - Page 21 4.2.2 How to release EZU‐RV3S The procedure of releasing the magnetic sensor EZU‐RV3S is as follow. 1) Detach the Magnetic sensor attachment from the probe as shown Fig. 15. Fig. 15 How to release the Magnetic Sensor Attachment from the probe 2) Detach the magnetic sensor from the Magnetic Sensor Attachment as shown Fig. 16. Fig. 16 How to release magnetic sensor from the Magnetic Sensor Attachment CAUTION Clean, disinfect and sterilize the Magnetic Sensor Attachment prior to the first use as it is not sterilized when delivered. ‐15‐ Q1E‐EP1430 ...
-
Page 22: Reprocessing Procedure
Reprocessing Procedure The probe and accessory must be reprocessed after each use. Refer to the reprocessing instruction in this chapter. ‐ The probe is delivered unsterile. Prior to the first use, reprocess the probe. WARNINGS ‐ Temperature should not exceed 60°C during reprocessing. ‐ Probe connector is not water resistant. The probe is not completely submersible. The immersible part is Limitations on shown in Fig.1. The un‐immersible part should be disinfected by wipe reprocessing disinfection. The probe should be packed in a sterile pouch or container to transport Transportation from Central Sterile Supply Department (CSSD) to an operating room. before using Be careful not to damage the sterile pouch or container during transportation. Levels of reprocessing requirements: Depending on the application of the product and with regard to risk evaluation, the user has to classify the medical device according to the current Medical Device Directive for processing of medical devices as uncritical, semi‐critical or critical. Supporting information concerning this topic is listed in the table below. The user is responsible for correct classification of the medical device. Classification Definition Processing Cleaning Application part only contacts intact and uncritical uninjured skin Disinfection Cleaning Application part contacts mucosa ... -
Page 23: Point Of Use (Pre-Cleaning)
The flowchart of the reprocessing process of this probe is as follows. Point of use (Pre‐cleaning) Containment and transportation Manual cleaning and disinfection Manual Cleaning Rinsing after manual cleaning Manual Disinfection Rinsing after manual disinfection Drying Packing Sterilization ‐17‐ Q1E‐EP1430 ... -
Page 24: Manual Cleaning And Disinfection
Point of use Point of use (Pre‐cleaning) (Pre‐cleaning) Pre‐cleaning should be done immediately after each use. The procedure is as follows: A) EUP‐V73W probe 1) Remove the protective cover. 2) Clean the probe of all patient’s blood or fluid with running tap water until the surface of the probe looks visually clean. 3) Wipe the whole surface of the probe with gauze pad and remove superficial visible impurities. B) Attachment 1) Remove the Attachment and the magnetic sensor from the probe. 2) Immerse the Attachment in sufficient amount of high quality tap water. Scrub it using soft cloth to remove all visible soil from its surface. ... - Page 25 Manual Cleaning: Prepare the detergent solution in a tank with cold water (please follow the instructions of the detergent manufacturer regarding application, dilution and contact time). A) EUP‐V73W probe 1) The temperature of the detergent solution should be between 15‐30 °C, concentration is 1.6%. Please note the minimum contact time of the detergent in the manufacturer’s instruction. If a differing detergent is used, please also note the approved material compatibility for the medical device. 2) Immerse the immersible part of the probe without connector into the diluted detergent ...
- Page 26 Manual disinfection: A) EUP‐V73W probe 1) Prepare the disinfectant solution in a tank with cold Water, Detergent water (please follow the instructions of the disinfectant or Disinfectant manufacturer regarding application, concentration, microbiological efficiency, service life and contact time). 2) Confirm the concentration of the disinfectant before ® immersing the probe. Although Cidex ...
-
Page 27: Drying
Drying Drying 1) Wipe the probe with a single‐use, fluff‐free wipe or towel to remove moisture from the surface of the probe. 2) Dry the probe naturally in an ambient temperature between 15‐30°C for a minimum of 4 hours. Alternatively the equipment can be dried using a drying heater at a temperature of less than 55 °C. Inspection Inspect the equipment for any damage such as crack, scratch or deformation. Do not use it if any damage is found. Packaging Packaging Pack the probe in a sterile barrier such as Polypropylene fleece or ®... -
Page 28: Sterilization
Sterilization Sterilization The probe and accessory can be sterilized using either ethylen oxide gas (EtO) sterilization or plasma sterilization (see table in the next page). Follow the manufacturerʹs instructions of the sterilizer regarding usage, temperature and sterilization‐time. The sterilization method and operating conditions are as follows Sterilization Method Condition Plasma Sterilization: Short Cycle ® STERRAD 50, 100S or 200 (*) Plasma Sterilization: Standard cycle ® Sterrad NX or 100NX (*) Gas Type: 10% EO/ 90% HCFC Temperature: 50‐55°C Exposure Time: More than 120 minutes ETO Sterilization Pressurization: 162‐200kPa Depressurization: 13‐8kPa Relative humidity: 40‐90% Aeration is minimum 12 hours ® * STERRAD systems are manufactured by ʺJohnson & Johnsonʺ ... - Page 29 The packaging procedure is as follows. 1) Put the probe into TYVEK pouch. Probe Attachment TYVEK Pouch Fig.18 Packaging in the pouch 2) Seal the TYVEK Pouch using a heat sealer. TYVEK Pouch Ensure that the seal is complete. Sealed Probe Attachment Fig.19 Sealing 3) Put the sealed pouch into a tray or plastic mesh wire for sterilization. Tray for sterilization ...
-
Page 30: Storage
Storage Store the equipment in a cool, dustproof and dark space to avoid high temperature, humidity and direct sunlight. Limitations for the time for sterilized equipment belong to package. ‐24‐ Q1E‐EP1430 ... -
Page 31: Maintenance And Safety Inspection
Maintenance and Safety Inspection Daily Inspection 1) Visually inspect the surface of the probe head, housing, cable and connector for any crack, scratch or denaturalization. If you find any damage, do not use the probe and contact a service support immediately. 2) Visually inspect the surface of the Magnetic Sensor Attachment and the Spacer for EZU‐RV2S for any crack, deformation or denaturalization. If you find any damage, do not use them and contact a service support immediately. ... -
Page 32: Safety Precautions
3) Never use the Sterile Puncture Adapter if the adapter is deformed, cracked or damaged. 4) Do not use a probe cover made out of latex for latex sensitive patients. The latex probe cover may cause allergic reactions such as itching, rubor, urticaria, swelling, fever, anhelation, wheezing, depression of blood pressure, and shock. 5) The ultrasound jelly which is an accessory of Hitachi ultrasound scanner is not sterile jelly, so never use it for EUP‐V73W. 6) Do not disassemble, modify, or repair the probe. Electric shock or other unforeseen accidents could result. 7) Wear medical gloves during examination. Conducting examinations with the bare ... - Page 33 CAUTION 1) When the probe is used for surgical or minimal‐invasive procedures, keep electrocautery away from the probe. When defibrillator is used, take the probe out of the body. 2) Keep the acoustic power low and minimize the ultrasound exposure time for the examination of early pregnancy. 3) Do not expose the connector to water or other liquids. The connector is not waterproof. ...
-
Page 34: Specifications
Specifications Probe Type: EUP‐V73W Transvaginal probe Acoustic working frequency: 6.5MHz Technology: Convex Array Probe Dimensions: See Fig. 21 Weight: Approx.1kg (Including cable and connector) Probe materials: Bio‐compatible allergy free components Acoustic output: According to IEC 60601‐2‐37 (See Main Unit manual.) Applicable system: Depending on production and upgrade status. For detailed information contact a service support. Classification: MDD classification IIa. Cleaning: Applicable detergents are listed in the suppliers list Disinfection: Applicable disinfectants are listed in the suppliers list Sterilization: ETO gas sterilization or Plasma sterilization Operating conditions: Ambient temperature: +10 – +40°C Contact surface temperature Max. 42°C (Temperature of examinee): ... -
Page 35: Sterile Puncture Adapter Ezu-Pa7V
Sterile Puncture Adapter EZU‐PA7V Type: EZU‐PA7V External view: See Fig. 22 Acceptable needle gauge: 16G to 19G Materials: Bio‐compatible allergy free components Classification: MDD classification Is Package: 24 Sterile Puncture Adapters for single use Sterilization method: Sterilized with gamma irradiation Operating conditions: Temperature: ‐10 – +40°C Storage conditions: Temperature: ‐10 – +40°C ‐29‐ Q1E‐EP1430 ... -
Page 36: Suppliers List
Suppliers List The products listed below are seriously tested and approved for use with the transvaginal probe EUP‐V73W. Product name manufacturer purpose Cidezyme® Johnson & Johnson Enzymatic detergent STERANIOS 2% ANIOS Disinfectant ANIOXYDE1000 ANIOS Disinfectant CIDEX Johnson & Johnson Disinfectant CIDEX® plusTM 28 Johnson & Johnson Disinfectant CIDEX® OPA Johnson & Johnson Disinfectant HYAMINE SOLUTION RICCA CHEMICAL COMPANY Disinfectant STERIHYDE® Maruishi Pharmaceutical Disinfectant/sterilize WAVICIDE‐01 Medical Chemical Corp Disinfectant/sterilize Please contact your local distributor for a current version of the ʺDisinfectant/Sterilization Method Compatibility for Ultrasound Probe and Accessory List” Disposal of the probe Recycle or dispose equipment properly in compliance with your organizational rules and ... - Page 37 Unit: mm Fig. 21 External view of Probe EUP‐V73W ‐31‐ Q1E‐EP1430 ...
- Page 38 Fig. 22 External view of the probe EUP‐V73W with Sterile Puncture Adapter (EZU‐PA7V) ‐32‐ Q1E‐EP1430 ...
- Page 39 Fig. 23 External view of the probe EUP‐V73W with the Magnetic Sensor Attachment (Option) ‐33‐ Q1E‐EP1430 ...