ABB ACS800 Cabinet Installation And Operating Instruction
Drive modules
Hide thumbs
Also See for ACS800:
- Firmware manual (340 pages) ,
- Hardware manual (210 pages) ,
- User manual (72 pages)

Related Manuals for ABB ACS800


Summary of Contents for ABB ACS800
- Page 1 ACS800 Cabinet Installation ACS800-04 and ACS800-04M Drive Modules (45 to 560 kW) ACS800-U4 Drive Modules (60 to 600 HP)
-
Page 2: Acs800 Single Drive Manuals
ACS800 Single Drive Manuals HARDWARE MANUALS (appropriate manual is included in the delivery) ACS800-01/U1 Hardware Manual 0.55 to 160 kW (0.75 to 200 HP) 3AFE64382101 (English) ACS800-01/U1/04 Marine Supplement 0.55 to 160 kW (0.75 to 200 HP) 3AFE64291275 (English) ACS800-11/U11 Hardware Manual 5.5 to 110 kW (7.5 to 125 HP) 3AFE68367883 (English) ACS800-31/U31 Hardware Manual 5.5 to110 kW (7.5 to 125 HP) - Page 3 ACS800-04 and ACS800-04M Drive Modules 45 to 560 kW ACS800-U4 Drive Modules 60 to 600 HP Cabinet Installation 3AFE68360323 Rev B EN EFFECTIVE: 14.2.2008 © 2008 ABB Oy. All Rights Reserved.
-
Page 5: Table Of Contents
Providing feedback on ABB Drives manuals ........ - Page 6 Control Panel Holder RPMP-21 (+J413) ......... . 38 Mechanical installation of pre-assembled units (ACS800-04/U4) What this chapter contains .
- Page 7 Frame size R7 units with bottom exit (+H352) ........49 Delivery check .
- Page 8 Assembling procedure for units with busbars on the short side (+H360) ....104 Working order ............. 104 Swapping the pedestal output busbars to the left-hand side .
- Page 9 Dimensional drawings (USA) ........... . 138 Frame size R7 without pedestal (inches) .
- Page 10 Table of contents...
-
Page 11: About This Manual
National Electrical Code and local codes are marked with (US). Safety WARNING! Follow the safety instructions given in ACS800-04/04M/U4 Hardware Manual [3AFE64671006 (English)] when installing, operating and servicing the drive. If ignored, physical injury or death may follow, or damage may occur to the drive, the motor or driven equipment. -
Page 12: Categorization According To The Frame Size
For installation instructions of optional equipment, see their manuals. For example installations in Rittal TS 8 cabinet, refer to ACS800-04/U4 Rittal TS 8 Cabinet Installation [3AFE68372330 (English)]. Categorization according to the frame size The instructions, technical data and dimensional drawings which concern only certain frame sizes are marked with the symbol of the frame size R7 or R8. -
Page 13: Installation, Commissioning And Operating Flowchart
Only intact units may be started up. If the converter has been non- operational for more than one year, the converter DC link capacitors need to be reformed. Ask ABB for instructions. Assemble and install the drive module into the Mechanical installation of pre- cabinet. -
Page 14: Product And Service Inquiries
Address any inquiries about the product to your local ABB representative, quoting the type code and serial number of the unit in question. A listing of ABB sales, support and service contacts can be found by navigating to www.abb.com/drives and selecting Drives –... -
Page 15: The Acs800-04/U4 And Acs800-04M
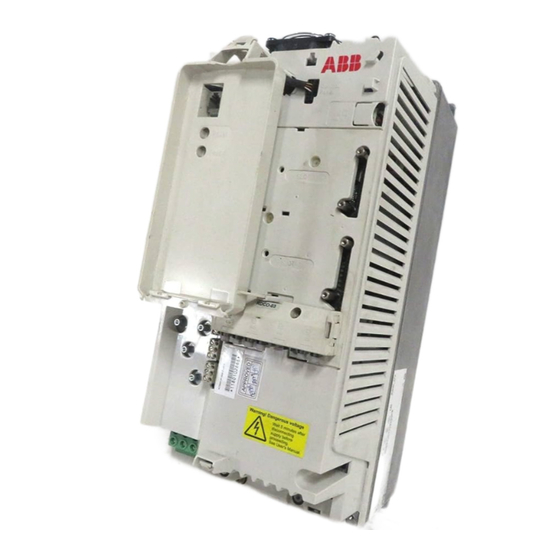
This chapter describes the construction and operating principle of the drive in short. The ACS800-04/U4 The ACS800-04/U4 is an IP 00 drive module for controlling AC motors. It is to be installed into a cabinet by the customer with base or wall fastening. The input cable terminals are located at the top of the unit whereas the motor cable terminals are located at the left- or right-hand side of the unit. -
Page 16: The Acs800-04M
The ACS800-04M The ACS800-04M is delivered as non-pre-assembled kits, which provide more alternatives in assembling the units than the basic ACS800-04. Example configurations Frame size R7 Motor and brake busbars on the Output busbars on the short Motor and brake busbars on the... -
Page 17: Type Designation Label
The type designation label is located on the front cover and the serial number label inside the unit. Example labels are shown below. The ACS800-04/U4 and ACS800-04M... -
Page 18: Type Code
Type code The type code contains information on the specifications and configuration of the drive. The first digits from left express the basic configuration (e.g. ACS800-04- 0170-5). The optional selections are given thereafter, separated by plus signs (e.g. +E202). The main selections are described below. Not all selections are available for all types. - Page 19 Type code for ACS800-04M non-pre-assembled units (delivered as kits) Selection Alternatives Product series ACS800 product series Type Drive module. When no options are selected: 6-pulse diode input bridge, IP 00, top entry, RDCU drive control unit, Standard Control Program, boards without coating, one set of manuals.
-
Page 20: Main Circuit And Control Interfaces
Optional module 2: RTAC, RAIO, RRIA External control via or RDIO analogue/digital inputs and outputs DDCS communication option module: RDCO-01, RDCO-02 or RDCO-03 Drive Capacitor bank Rectifier Inverter AC supply Motor output Brake chopper (optional) R- UDC+ UDC- The ACS800-04/U4 and ACS800-04M... -
Page 21: Connections Of The Drive Control Unit (Rdcu) In Frame Sizes R7 And R8
AC voltage to DC voltage capacitor bank energy storage which stabilizes the intermediate circuit DC voltage six-pulse IGBT inverter converts the DC voltage to AC voltage and vice versa. The motor operation is controlled by switching the IGBTs. The ACS800-04/U4 and ACS800-04M... -
Page 22: Printed Circuit Boards
The motor control is based on the Direct Torque Control (DTC) method. Two phase currents and DC link voltage are measured and used for the control. The third phase current is measured for earth fault protection. The ACS800-04/U4 and ACS800-04M... -
Page 23: Planning The Cabinet Installation
Note: The installation must always be designed and made according to applicable local laws and regulations. ABB does not assume any liability whatsoever for any installation which breaches the local laws and/or other regulations. -
Page 24: Layout Examples, Door Closed
Layout examples, door closed IP 22 IP 54 1a Air inlet for the converter module 1b Air inlet for the other equipment 2a Air outlet for the converter module 2b Air outlet for the other equipment 2c Air outlet for the converter module and the other equipment, an extra exhaust fan Converter control panel (connected to the RMIO board in the RDCU unit inside the... -
Page 25: Layout Examples, Door Open
Layout examples, door open IP 54 IP 22 1 Supporting frame of the cabinet 2 Air baffles that separate the cool and hot areas (leak-proof lead-throughs) 3 Input power cable including the protective conductors to cabinet grounding (PE) 4 Disconnector and fuses 5 Contactor 6 Converter module 7 Motor cable including the grounding... -
Page 26: Grounding Of Mounting Structures
Grounding of mounting structures Make sure any cross-members or shelves on which components are mounted are properly grounded and the connecting surfaces left unpainted. The drive module will be grounded to the cabinet frame via its fastening screws. Busbar material and joints Tin-plated copper is recommended but aluminium can also be used. - Page 27 This entails the installation of additional cooling equipment, such as a hot air exhaust fan. Arrange the cooling air flow through the converter module so that the requirements given in chapter Technical data in ACS800-04/04M/U4 Hardware Manual [3AFE64671006 (English)] are met: • cooling air flow Note: The figures apply to continuous nominal load.
-
Page 28: Cabinet Cooling Data
Cabinet cooling data IP 22 cabinet with no extra fan The table below shows the data the IP 22 cabinet should meet to ensure efficient cooling of the converter module. No extra fan is used. The pressure drop over the cabinet is the additional counterpressure that the module fan is capable of overcoming while still maintaining the required air flow through the module. -
Page 29: Preventing The Recirculation Of Hot Air
Preventing the recirculation of hot air Converter cubicle from side Converter cubicle from above A - A Vertical air baffle Air flow out Converter module Horizontal air baffle Converter module Air flow in max. 40°C (104 °F) Outside the cabinet Prevent hot air circulation outside the cabinet by leading the outcoming hot air away from the area where the inlet air to the cabinet is taken. -
Page 30: Required Free Space Around The Drive Module For Cooling
Required free space around the drive module for cooling Free space at the top of the drive module Required free space at the top of the module for frame sizes R7 and R8 is shown below (views of frame size R7). Note: Air inlet gratings only at the lower part of the cabinet door are not recommended without an extra fan. -
Page 31: Free Space Around Units With Busbars On The Long Side (Bookshelf Mounting +H354)
Free space around units with busbars on the long side (bookshelf mounting +H354) The figure below shows the required free space in a unit with motor and brake busbars connected to the left-hand side and DC busbars to the right-hand side of the module (+H354+H356+H362+H363). -
Page 32: Free Space Around Units With Busbars On The Short Side (Flat Mounting +H360)
Free space around units with busbars on the short side (flat mounting +H360) The required free space at the air inlet side of the drive module: • 0 mm (0 in.) if cabinet gratings are located at the air Cables connected to the vertical inlet side of the drive module output busbar terminals require and are as high as the grating... -
Page 33: When The Drive Module Is Installed In Another Position Than Vertically
When the drive module is installed in another position than vertically • Fasten the drive module by the fastening points. • Lay support brackets below the module to carry the module weight. • Ensure that hot air flows freely out of the cabinet and does not build up pressure. •... -
Page 34: Drive Module Of Frame Size R7 On Its Back
Drive module of frame size R7 on its back Prevent dripping water from entering the drive module. Note: Air inlet into the drive module goes through the front gratings of the module. Do not cover them. Ensure that the cooling air will flow freely and Leave space above the module is clean. -
Page 35: Emc Requirements
Bare cable shield Cable ties Knitted wire mesh Lead-through plate Cable Cabinet bottom plate *) First environment EMC compliance is defined in chapter Technical data / CE marking in ACS800-04/ 04M/U4 Hardware Manual [64671006 (English)]. Planning the cabinet installation... -
Page 36: Grounding Of Cable Shields
Base plate Lead-through plate * required for motor cables in first environment installations. First environment EMC compliance is defined in chapter Technical data / CE marking in ACS800-04/04M/U4 Hardware Manual [64671006 (English)]. Installing the Drive Control Unit (RDCU) See RDCU Drive Control Unit Hardware Manual [3AFE64636324 (English)]. -
Page 37: Fastening Of The Control Panel (Cdp312R)
Fastening of the control panel (CDP312R) The control panel can be fastened directly to the cabinet door, or a mounting platform or control panel holder (+J413) can be used. Installing the control panel directly on the cabinet door Fasten the control panel from the back side with two screws of one of the following types: •... -
Page 38: Control Panel Holder Rpmp-21 (+J413)
Control Panel Holder RPMP-21 (+J413) Fasten the control panel holder to the cabinet frame or wall with three screws. Do not fasten the panel holder to the drive module. Planning the cabinet installation... -
Page 39: Mechanical Installation Of Pre-Assembled Units (Acs800-04/U4)
Do not tilt the drive. The centre of gravity of the unit is high. The unit will overturn from a tilt of about 6 degrees. An overturning unit can cause physical injury. Do not tilt! Views of frame size R7 Do not lift by the lower part of the frame. Mechanical installation of pre-assembled units (ACS800-04/U4) -
Page 40: Delivery Check
Check that there are no signs of damage. Before attempting installation and operation, check the information on the type designation label of the drive to verify that the unit is of the correct type. Mechanical installation of pre-assembled units (ACS800-04/U4) -
Page 41: Required Tools
• torque wrench with a 500 mm (20 in.) or 2 × 250 mm (2 × 10 in.) long extension • 19 mm (3/4 in.) socket for frame size R7: 13 mm (1/2 in.) magnetic-end socket for frame size R8: 17 mm (11/16 in.) magnetic-end socket. Mechanical installation of pre-assembled units (ACS800-04/U4) -
Page 42: Installation Procedure
The output cables can be also connected directly to the vertical output busbar holes with cable lugs. The PE conductors can be connected to the PE terminal screws. Busbars for output cables can be connected to the pedestal busbars. Mechanical installation of pre-assembled units (ACS800-04/U4) -
Page 43: View Of Output Busbar Connections Of Frame Size R7 (Dc And Brake Busbars Included)
M8: 15...22 Nm (3.7 lbf ft) M10: 30...44 Nm (22...32 lbf ft) Spring washer with mechanically sprayed zinc coating Plain washer with electroplated zinc coating and yellow chromate passivation M10x30 Tightened at the factory Mechanical installation of pre-assembled units (ACS800-04/U4) -
Page 44: View Of Output Busbar Connections Of Frame Size R8 (Dc And Brake Busbars Included)
Tightening torque M12x35 M10: 30...44 Nm (22...32 lbf ft) Tightened at the factory M12: 50...75 Nm (37...55 lbf ft) User connections of Prevention of Unexpected Start (+Q950) See pages and 97. Mechanical installation of pre-assembled units (ACS800-04/U4) -
Page 45: Mechanical Installation Of Non-Pre-Assembled Units (Acs800-04M)
Units with pedestal and busbars on the short side (+H360, flat mounting) on page 91. 3. Choose the applying instructions in section Assembling procedure for units with busbars on the short side (+H360) on page 104. Mechanical installation of non-pre-assembled units (ACS800-04M) -
Page 46: Required Tools And Tightening Torques
The centre of gravity of the unit is high. The unit will overturn from a tilt of about 6 degrees. An overturning unit can cause physical injury. Do not tilt! Mechanical installation of non-pre-assembled units (ACS800-04M) - Page 47 RDCU unit • residual voltage warning and output busbar stickers • hardware manual • appropriate firmware manuals and guides • delivery documents • optional module manuals. Top view Bottom view Undo the fastening screws. Mechanical installation of non-pre-assembled units (ACS800-04M)
- Page 48 Fasten the lifting hooks to the lifting lugs of the drive module. A hook can be fastened to the base bracket also. Use at least three fastening points because the module is turns over easily. Mechanical installation of non-pre-assembled units (ACS800-04M)
-
Page 49: Frame Size R7 Units With Bottom Exit (+H352)
Check that there are no signs of damage. Before attempting installation and operation, check the information on the type designation label of the drive to verify that the unit is of the correct type. ACS800-04M of frame size R7 with bottom exit Package Parts... - Page 50 ACS800-04M of frame size R7 with bottom exit Package Parts Assembling drawing / reference to instruction ProE code 64770306 D 68324963 Front L-plate Spacers for wall mounting R-busbar with fastening pin Bottom plate Mechanical installation of non-pre-assembled units (ACS800-04M)
- Page 51 ACS800-04M of frame size R7 with bottom exit Package Parts Assembling drawing / reference to instruction ProE code 64770306 D Optional selection +H352+B060: top entry busbar shroud and bottom exit shroud 68363977 68339545 Screws Mechanical installation of non-pre-assembled units (ACS800-04M)
- Page 52 ACS800-04M of frame size R7 with bottom exit Package Parts Assembling drawing / reference to instruction ProE code 64770306 D Example assembly+H352+B060: bottom exit with top entry busbar shroud and bottom exit shroud Top entry busbar shroud kit (+B060) Front...
-
Page 53: Assembling Procedure
A. Insert the two pins of the longer side of the L-plate to the counter holes in the side plate of the drive module. B. Slide the L-plate horizontally to match the three pins in its shorter side with the counter holes in the drive module. C. Fasten the L-plate with 5 screws. Mechanical installation of non-pre-assembled units (ACS800-04M) - Page 54 Tightening torque: 15...22 Nm (11...16 lbf ft). D. Fasten the bottom plate to the drive module with four M6 screws. Tightening torque: 6...9 Nm (3.7 lbf ft). R+/UDC+ UDC- 4. Fasten the front cover. Mechanical installation of non-pre-assembled units (ACS800-04M)
-
Page 55: Fastening The Spacer
Press the top cover on the sides inwards to enable its tabs Step drill lead-throughs to enter the slots in the shroud for the busbars. when it is placed in position (4). Mechanical installation of non-pre-assembled units (ACS800-04M) -
Page 56: Bottom Exit Shroud
Fasten the side plates to the drive module. Remove the protective film from all parts. Fasten the L-plate to the drive module. Step drill lead- throughs for the busbars. Fasten the bottom to the shroud Mechanical installation of non-pre-assembled units (ACS800-04M) -
Page 57: Units With Pedestal And Busbars On The Long Side (+H354, Bookshelf Mounting)
• Item packages of frame size R8 with busbars on the long side on page 64. Note: The complete assembling instructions are represented under Assembling procedure for units with busbars on the long side (+H354) on page 73. Mechanical installation of non-pre-assembled units (ACS800-04M) -
Page 58: Item Packages Of Frame Size R7 With Busbars On The Long Side
Item packages of frame size R7 with busbars on the long side ACS800-04M of frame size R7 with busbars on the long side Package Parts Assembling drawing / reference to instruction ProE code 64770306 D Basic unit (type code ACS800-0M4-xxxx-x+H354+H355) - Page 59 ACS800-04M of frame size R7 with busbars on the long side Package Parts Assembling drawing / reference to instruction ProE code 64770306 D 64754416 Base mounting from outside: Pedestal 64743309 PE terminals right left Front Wall mounting: Base mounting brackets...
- Page 60 ACS800-04M of frame size R7 with busbars on the long side Package Parts Assembling drawing / reference to instruction ProE code 64770306 D 64743180 Motor cable terminals Insulating supports Support brackets AC output busbars Front Optional selection +J413: Control Panel Holder RPMP-21...
- Page 61 ACS800-04M of frame size R7 with busbars on the long side Package Parts Assembling drawing / reference to instruction ProE code 64770306 D Optional selection +H354+H356+H362: DC/brake busbars 64769341 Front Pedestal busbars 64744747 Insulating supports Terminals Side busbars Front Mechanical installation of non-pre-assembled units (ACS800-04M)
- Page 62 ACS800-04M of frame size R7 with busbars on the long side Package Parts Assembling drawing / reference to instruction ProE code 64770306 D Optional selection +H354+H356+H362+H363: DC and brake busbars on opposite sides 64744895 DC busbars on the right side:...
- Page 63 ACS800-04M of frame size R7 with busbars on the long side Package Parts Assembling drawing / reference to instruction ProE code 64770306 D Example assembly (+H354+H355+H356+H362+H363 included) AC, brake and DC busbars on the left Front +H355 +H363 AC and brake busbars on the left and...
-
Page 64: Item Packages Of Frame Size R8 With Busbars On The Long Side
Item packages of frame size R8 with busbars on the long side ACS800-04M of frame size R8 with busbars on the long side Package Parts Assembling instruction ProE code 64772023 E Basic unit (type code ACS800-04M-xxxx-x+H354+H355) Refer to section Assembling procedure for units with... - Page 65 ACS800-04M of frame size R8 with busbars on the long side Package Parts Assembling instruction ProE code 64772023 E 64754424 Base mounting from outside: Pedestal 64744330 Front right left Wall mounting: PE terminals Wall mounting bracket Base mounting brackets Front...
- Page 66 ACS800-04M of frame size R8 with busbars on the long side Package Parts Assembling instruction ProE code 64772023 E Optional selection +H354+H356+H362: DC/brake busbars 64769359 Insulating supports and connecting busbars Pedestal DC busbars Front Pedestal when DC busbars installed Front...
- Page 67 ACS800-04M of frame size R8 with busbars on the long side Package Parts Assembling instruction ProE code 64772023 E Optional selection +H354+H356+H363: DC and brake busbars on opposite sides 64744798 DC output on the right side: Support brackets Terminal Output busbar...
- Page 68 ACS800-04M of frame size R8 with busbars on the long side Package Parts Assembling instruction ProE code 64772023 E Optional selection +J413: Control Panel Holder RPMP-21 68394961 Control panel holder Mechanical installation of non-pre-assembled units (ACS800-04M)
- Page 69 ACS800-04M of frame size R8 with busbars on the long side Package Parts Assembling instruction ProE code 64772023 E Example assembly (+H354+H355+H356+H362+H363 included): AC and brake or DC busbars on the left, brake or DC busbars on the right View when vertical busbars are not...
- Page 70 ACS800-04M of frame size R8 with busbars on the long side Package Parts Assembling instruction ProE code 64772023 E Optional selection +B060: shrouds for vertical busbars and input terminals 68341493 Top entry busbar shroud Fastening screws included Mechanical installation of non-pre-assembled units (ACS800-04M)
- Page 71 ACS800-04M of frame size R8 with busbars on the long side Package Parts Assembling instruction ProE code 64772023 E 68329639 Vertical busbar shrouds Alternative positions Fastening screws included Mechanical installation of non-pre-assembled units (ACS800-04M)
- Page 72 ACS800-04M of frame size R8 with busbars on the long side Package Parts Assembling instruction ProE code 64772023 E Example assembly (+H354+H355+H356+H362+B060+Q950 included): top entry busbar shroud, vertical busbar shroud and Prevention of Unexpected Start +B060 600 mm (23.62 in.)
-
Page 73: Assembling Procedure For Units With Busbars On The Long Side (+H354)
Connecting the DC busbars to the pedestal (+H356 and left side and +H363 only) on page UDC+ and UDC- 3. Go to step 2. busbars on the UDC+/R+ UDC- right side (+H356 and +H363 required) Mechanical installation of non-pre-assembled units (ACS800-04M) - Page 74 2. Go to step 4 (wall-mounted units) or 5 (base-mounted units). wall-mounted unit See Fastening the drive module to wall (wall-mounted units only, not for base-mounted units) on page 81. Wall mounting Mechanical installation of non-pre-assembled units (ACS800-04M)
- Page 75 See Top entry busbar shroud in section Fastening the top entry Fastening busbar and bottom exit shrouds (+B060) on page 55. shrouds Frame size R8 Fastening the shrouds in frame size R8 on page 90. Mechanical installation of non-pre-assembled units (ACS800-04M)
-
Page 76: Connecting The Dc Busbars To The Pedestal (+H356 And +H363 Only)
3. Connect the connecting busbars (d, e, f) to the insulating supports and to the R-, R+/UDC+ and UDC busbars as shown below. For +H363, see also Optional selection +H363 on page Photos of frame size R7 UDC- UDC+ DC busbars connected PE busbar Mechanical installation of non-pre-assembled units (ACS800-04M) -
Page 77: Photos Of Frame Size R8
Photos of frame size R8 UDC- UDC+ DC busbars connected Mechanical installation of non-pre-assembled units (ACS800-04M) -
Page 78: Busbars To The Left- Or Right-Hand Side Of The Module
Pedestal upside down (busbar ends at the left, PE terminal at the right) Plain washer with electroplated zinc coating and passivation 2 M10x30 (frame size R7) M12x35 (frame size R8) Spring washer with mechanically sprayed zinc coating Mechanical installation of non-pre-assembled units (ACS800-04M) -
Page 79: Optional Selection +H363
Connecting the DC busbars to the pedestal (+H356 and +H363 only) on page 1. Connect the UDC- busbar. 2. Connect the R+/UDC+ busbar. 3. Connect the R- busbar. UDC- UDC+ Pedestal upside down DC output connected to the right Mechanical installation of non-pre-assembled units (ACS800-04M) -
Page 80: Fastening The Pedestal To The Cabinet Base (Not For Wall-Mounted Units)
Tightening torque: 5 Nm (3.7 lbf ft) Fastening the pedestal through the holes inside the pedestal Fasten the pedestal to the base of the cabinet with four screws through the inside fastening points. M6, 5 Nm (3.7 lbf ft) Mechanical installation of non-pre-assembled units (ACS800-04M) -
Page 81: Fastening The Drive Module By Top To The Cabinet Frame
Requirements for protection The drive module must be protected against contact, dust and humidity (see chapter Technical data in ACS800-04/04M/U4 Hardware Manual [64671006 (English)]. Requirements for the wall The wall must be as close to vertical as possible, of non-flammable material and strong enough to carry the weight of the unit. -
Page 82: Procedure
The pins of the wall mounting bracket are fastened with Fastening the wall mounting bracket with screws from nuts from inside outside (alternative to pin fastening from inside) Mechanical installation of non-pre-assembled units (ACS800-04M) - Page 83 In bookshelf mounting, the spacer removes a 4 mm (0.16 in.) gap between the drive module top and the wall so that the module will hang in an upright position. • Fasten the module also by top front with a wall-fastened support bracket. Mechanical installation of non-pre-assembled units (ACS800-04M)
- Page 84 15 mm (0.6 in.) View from above Spacer viewed from front (frame size R7) Side view View from below Screw size: M10 for frame sizes R7 and R8 Fastening points of frame size R8 Bottom Mechanical installation of non-pre-assembled units (ACS800-04M)
- Page 85 Frame size R7 with spacer Frame size R8: no spacer View from above no spacer Spacer (frame size R7) Side view Screw size: M10 for frame sizes R7 and R8 Fastening points of frame size R7 Bottom Mechanical installation of non-pre-assembled units (ACS800-04M)
-
Page 86: Fastening The Output Busbars And Pe Terminal And Sliding The Module In
7. Slide the module onto the pedestal so that the inner support bracket enters inside the outer support bracket. 8. Fasten the outer support bracket to the drive module. 9. Fasten the stickers to the output busbars. Mechanical installation of non-pre-assembled units (ACS800-04M) -
Page 87: View Of Output Busbar Connections Of Frame Size R7 (Dc And Brake Busbars Included)
M10x25 screws. Tightening torque M8: 15...22 Nm (3.7 lbf ft) M10: 30...44 Nm (22...32 lbf ft) Spring washer with mechanically sprayed zinc coating Plain washer with electroplated zinc coating and passivation M10x30 Mechanical installation of non-pre-assembled units (ACS800-04M) -
Page 88: View Of Output Busbar Connections Of Frame Size R8 (Dc And Brake Busbars Included)
M10x20 M10x25 2 pcs Spring washer with mechanically sprayed zinc coating Plain washer with electroplated zinc coating and passivation Tightening torque M12x35 M10: 30...44 Nm (22...32 lbf ft) M12: 50...75 Nm (37...55 lbf ft) Mechanical installation of non-pre-assembled units (ACS800-04M) -
Page 89: Fastening The Drive Module To The Pedestal
Tightening torque: 5 Nm (3.7 lbf ft) Tightening torque: 30...44 Nm (22...32 lbf ft) • Match the three guide pins on the cover with the counter holes. Fasten the front cover to the module with screws. Mechanical installation of non-pre-assembled units (ACS800-04M) -
Page 90: Fastening The Shrouds In Frame Size R8
Fasten the shroud plates to Vertical busbar shroud fastened the drive module. each other and to the drive module. Note: When connecting the power cables, remove the front (and top and side) shroud by undoing the fastening screws. Mechanical installation of non-pre-assembled units (ACS800-04M) -
Page 91: Units With Pedestal And Busbars On The Short Side (+H360, Flat Mounting)
• Item packages of frame size R8 with busbars on the short side on page 98. Note: The complete assembling instructions are represented under Assembling procedure for units with busbars on the short side (+H360) on page 104. Mechanical installation of non-pre-assembled units (ACS800-04M) -
Page 92: Item Packages Of Frame Size R7 With Busbars On The Short Side
Item packages of frame size R7 with busbars on the short side ACS800-04M with busbars on the short side (frame size R7) Package Parts Assembling drawing / reference to instruction ProE code 64770306 D Basic unit (type code ACS800-04M-xxxx-x+H355+H360) Refer to section... - Page 93 ACS800-04M with busbars on the short side (frame size R7) Package Parts Assembling drawing / reference to instruction ProE code 64770306 D 64749404 Pedestal Base mounting if clamped from outside Front Spacers for wall mounitng 64745808 PE terminals Base mounting...
- Page 94 ACS800-04M with busbars on the short side (frame size R7) Package Parts Assembling drawing / reference to instruction ProE code 64770306 D 64744402 Insulating supports AC support brackets Motor cable terminals AC output busbars Front Optional selection +J413: Control Panel Holder RPMP-21...
- Page 95 ACS800-04M with busbars on the short side (frame size R7) Package Parts Assembling drawing / reference to instruction ProE code 64770306 D Optional selection +H360+H356+H362: DC/brake busbars 64769375 Front (view from above) Insulating supports Connecting busbars Insulating supports Front Connecting busbars...
- Page 96 ACS800-04M with busbars on the short side (frame size R7) Package Parts Assembling drawing / reference to instruction ProE code 64770306 D 64744763 Insulating supports DC support brackets Terminals Side busbars Front Mechanical installation of non-pre-assembled units (ACS800-04M)
- Page 97 ACS800-04M with busbars on the short side (frame size R7) Package Parts Assembling drawing / reference to instruction ProE code 64770306 D Example assembly +H360+H355+H356+H362: DC and brake busbars included 500 mm (19.68 in.) Terminal block for user connection of Prevention of Unexpected Start (+Q950 ).
-
Page 98: Item Packages Of Frame Size R8 With Busbars On The Short Side
Item packages of frame size R8 with busbars on the short side ACS800-04M with busbars on the short side (frame size R8) Package Parts Assembling drawing / reference to instruction ProE code 64772023 E Basic unit (type code ACS800-04M-xxxx-x+H355+H360) Refer to section... - Page 99 ACS800-04M with busbars on the short side (frame size R8) Package Parts Assembling drawing / reference to instruction ProE code 64772023 E 64749978 Pedestal Front Spacers for wall mounting Front Upper Wall mounting Lower 64745794 Insulating support PE terminal L-bracket (used when U2 output...
- Page 100 ACS800-04M with busbars on the short side (frame size R8) Package Parts Assembling drawing / reference to instruction ProE code 64772023 E 64749871 Adapter (viewed View from above from the side that will mate with the Front drive module) 64744453...
- Page 101 ACS800-04M with busbars on the short side (frame size R8) Package Parts Assembling drawing / reference to instruction ProE code 64772023 E Optional selection +H356+H362+H360: DC/brake busbars 64769456 Insulating View from above supports Front Connecting busbars Front Adapter when DC busbars...
- Page 102 ACS800-04M with busbars on the short side (frame size R8) Package Parts Assembling drawing / reference to instruction ProE code 64772023 E Insulating supports Front Connecting busbars Front Pedestal DC busbars Pedestal when DC busbars installed 64744771 M10x20 Insulating Terminals...
- Page 103 ACS800-04M with busbars on the short side (frame size R8) Package Parts Assembling drawing / reference to instruction ProE code 64772023 E Example assembly +H355+H356+H360+H362: DC/brake busbars included View when vertical busbars are not connected +H360 Front View with vertical busbars...
-
Page 104: Assembling Procedure For Units With Busbars On The Short Side (+H360)
Preparing the adapter AC busbars, R-, Preparing the adapter (+H360 +H356 only) R+/UDC+ and page 108. UDC- busbars on 2. Go to step 3. the right or left side (+H356 required) Mechanical installation of non-pre-assembled units (ACS800-04M) - Page 105 Fastening the drive module to wall (wall- mounted units only, not for base-mounted units) page 81. Wall mounting (not performed for base-mounted units) base-mounted Fastening the drive module by top to the cabinet unit frame on page Fastening by Mechanical installation of non-pre-assembled units (ACS800-04M)
-
Page 106: Swapping The Pedestal Output Busbars To The Left-Hand Side
• fasten the left-hand side PE terminal in frame size R7. In frame size R8, fasten the PE busbar as follows. Left Right Front (the profiled side) PE busbar Fastening of the PE busbar in frame size R8 Mechanical installation of non-pre-assembled units (ACS800-04M) -
Page 107: Connecting The Dc Busbars To The Pedestal (+H360 +H356 Only)
3. Connect the connecting busbars (d, e, f) to the insulating supports and to the R-, R+/UDC+ and UDC busbars as shown below. Frame size R7 DC busbars connected Frame size R8 See also chapter Assembly drawings. Mechanical installation of non-pre-assembled units (ACS800-04M) -
Page 108: Preparing The Adapter (+H360 +H356 Only)
1. Screw insulating supports (“a” above) onto the free pins (“b” above). 2. Connect the connecting busbars to the insulating supports as shown below. Connect busbar c to busbar d. Frame size R7 Frame size R8 See also chapter Assembly drawings. Mechanical installation of non-pre-assembled units (ACS800-04M) -
Page 109: Fastening The Adapter To The Drive Module
The DC busbars (+H356) are included in the installation examples below. 1. Fasten the screws. 2. Connect the busbars. Frame size R7 Frame size R8 Tightening torque Tightening torque M10: 30...44 Nm (22...32 lbf ft) M8: 15...22 Nm (3.7 lbf ft) Mechanical installation of non-pre-assembled units (ACS800-04M) -
Page 110: Fastening The Drive Module To The Pedestal Via The Adapter
3. Connect the busbars. 4. Frame size R7: Fasten the side plate of the pedestal. Frame size R8: Fasten the side plate to the adapter and the pedestal. Frame size R7 Frame size R8 Mechanical installation of non-pre-assembled units (ACS800-04M) -
Page 111: Connecting The Output Busbars On The Short Side Of The Module
7. Connect the cable lug terminals. Use a M8x20 screw when the terminal is placed on an insulating support and M10x25 screws elsewhere. 8. Connect the PE busbar. M8x16 without cable lug terminal, M8x20 with cable lug terminal Mechanical installation of non-pre-assembled units (ACS800-04M) - Page 112 M8: 15...22 Nm (3.7 lbf ft) M10: 30...44 Nm (22...32 lbf ft) 8 M8. Use the side plate fastening screw for fastening the PE terminal by side. Frame size R7 +H360: AC, DC and brake busbars connected (+H356 included) Mechanical installation of non-pre-assembled units (ACS800-04M)
-
Page 113: Procedure Frame Size R8
3. Slide the outer support bracket on the inner bracket. 4. Fasten the outer support bracket to the drive module. 5. Connect the AC busbars. 6. Connect the DC busbars (if ordered). 7. Connect the PE busbar. Mechanical installation of non-pre-assembled units (ACS800-04M) - Page 114 M12: 50...75 Nm (37...55 lbf ft) Spring washer with mechanically sprayed zinc coating Plain washer with electroplated zinc coating and passivation M12x35 Frame size R8 +H360: AC, DC and brake busbars connected (+H356 included) Mechanical installation of non-pre-assembled units (ACS800-04M)
-
Page 115: Checking The Installation
There is a sufficient number of supports, bolts and nuts for cables. Instrumentation, busbars and cabling Checks for instrumentation, busbars, cabling, clearances and creepage distances are listed below. For more information, refer to ACS800-04/04M/U4 Hardware Manual [3AFE64671006 (English)]: Planning the electrical installation. - Page 116 Step Check item Busbars The types (Al/Cu) and cross-sections of busbars are correct. Busbars are intact and joint surfaces are clean. There are no metal scraps on the busbars that could cause a short-circuit. The placement and mounting of busbars is correct. The electrical connection of busbars.
-
Page 117: Groundings And Protection
Step Check item Connection of cables to devices and terminal blocks. Check that • cables are connected to terminals tight enough by pulling the cable • cable termination on terminals chaining is done correctly • bare conductors are not too far outside the terminal causing an insufficient clearance or loss of shielding against contact. -
Page 118: Labels, Switches, Fuses And Doors
Labels, switches, fuses and doors Checks for labels, switches, fuses and doors are listed below. Step Check item Labels The name plates are correct. The name plates are located correctly. Check the name plates for • cabinet • main circuit fuses •... -
Page 119: Dimensional Drawings
Dimensional drawings Dimensional drawings... -
Page 120: Frame Size R7 Without Pedestal (Mm)
Frame size R7 without pedestal (mm) Center of gravity 64796003_3/7 E Dimensional drawings... -
Page 121: Frame Size R7 With Bottom Exit (Mm)
Frame size R7 with bottom exit (mm) Dimensional drawings... -
Page 122: Frame Size R7 With Bottom Exit And Top Entry And Bottom Exit Shrouds (Mm)
Frame size R7 with bottom exit and top entry and bottom exit shrouds (mm) Dimensional drawings... -
Page 123: Frame Size R7 With Busbars On The Left Side (Mm)
Frame size R7 with busbars on the left side (mm) Dimensional drawings... -
Page 124: Frame Size R7 With Dc Busbars On Both Sides (Mm)
Frame size R7 with DC busbars on both sides (mm) Dimensional drawings... -
Page 125: Frame Size R7 Pedestal Busbars On The Long Side (Mm)
Frame size R7 pedestal busbars on the long side (mm) Bilateral output busbar 64796003_4/7 E Dimensional drawings... -
Page 126: Frame Size R7 With Busbars On The Short Side (Mm)
Frame size R7 with busbars on the short side (mm) Dimensional drawings... -
Page 127: Frame Size R8 Without Pedestal (Mm)
Frame size R8 without pedestal (mm) Center of gravity 64801082_3/6 E Dimensional drawings... -
Page 128: Frame Size R8 With Busbars On The Left Side (Mm)
Frame size R8 with busbars on the left side (mm) Dimensional drawings... -
Page 129: Frame Size R8 With Top Entry And Vertical Busbar Shrouds (Mm)
Frame size R8 with top entry and vertical busbar shrouds (mm) 64801082_6/6 E Dimensional drawings... -
Page 130: Frame Size R8 With Busbars On Both Sides (Mm)
Frame size R8 with busbars on both sides (mm) Dimensional drawings... -
Page 131: Frame Size R8 Pedestal Busbars On The Long Side (Mm)
Frame size R8 pedestal busbars on the long side (mm) Bilateral output busbar 64801082_4/6 E Dimensional drawings... -
Page 132: Frame Size R8 With Busbars On The Short Side (Mm)
Frame size R8 with busbars on the short side (mm) Dimensional drawings... -
Page 133: Wall Mounting Spacers
Wall mounting spacers Frame size R7: long side against wall 68240808 B Frame size R7: short side against wall A - A 68240166 A Frame size R8: long side against wall 68238021 A Dimensional drawings... -
Page 134: Frame Size R7 Bottom Exit Kit (+H352)
Frame size R8: short side against wall 68377927 A Frame size R7 bottom exit kit (+H352) 64770306_16/20 E Dimensional drawings... -
Page 135: Frame Size R7 Top Entry Busbar Shroud And Bottom Exit Shroud (+B060)
Frame size R7 top entry busbar shroud and bottom exit shroud (+B060) 64770306_18/20 E 64770306_17/20 E Dimensional drawings... -
Page 136: Control Panel Holder Rpmp-21 (+J413)
Control Panel Holder RPMP-21 (+J413) 64770306_20/20 E Dimensional drawings... -
Page 137: Drive Control Unit (Rdcu-02)
Drive Control Unit (RDCU-02) Can be mounted on a DIN rail (EN 50022, 35 mm x 7.5 mm) 64675214-B Dimensional drawings... -
Page 138: Dimensional Drawings (Usa)
Dimensional drawings (USA) Dimensional drawings... -
Page 139: Frame Size R7 Without Pedestal (Inches)
Frame size R7 without pedestal (inches) Center of gravity 68439221_3/7 A (64796003.asm E) Dimensional drawings... -
Page 140: Frame Size R7 With Bottom Exit (Inches)
Frame size R7 with bottom exit (inches) Dimensional drawings... -
Page 141: Frame Size R7 With Bottom Exit And Top Entry And Bottom Exit Shrouds (Inches)
Frame size R7 with bottom exit and top entry and bottom exit shrouds (inches) Dimensional drawings... -
Page 142: Frame Size R7 With Busbars On The Left Side (Inches)
Frame size R7 with busbars on the left side (inches) Dimensional drawings... -
Page 143: Frame Size R7 With Busbars On Both Sides (Inches)
Frame size R7 with busbars on both sides (inches) Dimensional drawings... -
Page 144: Frame Size R7 Pedestal Busbars On The Long Side (Inches)
Frame size R7 pedestal busbars on the long side (inches) Bilateral output busbar 68439221_4/7 A (64796003.asm E) Dimensional drawings... -
Page 145: Frame Size R7 With Busbars On The Short Side (Inches)
Frame size R7 with busbars on the short side (inches) Dimensional drawings... -
Page 146: Frame Size R8 Without Pedestal (Inches)
Frame size R8 without pedestal (inches) Center of gravity 68440513_3/6 A (64801082.asm E) Dimensional drawings... -
Page 147: Frame Size R8 With Busbars On The Left Side (Inches)
Frame size R8 with busbars on the left side (inches) Dimensional drawings... -
Page 148: Frame Size R8 With Top Entry And Vertical Busbar Shrouds (Inches)
Frame size R8 with top entry and vertical busbar shrouds (inches) 68440513_6/6 A (64801082.asm E) Dimensional drawings... -
Page 149: Frame Size R8 With Busbars On Both Sides (Inches)
Frame size R8 with busbars on both sides (inches) Dimensional drawings... -
Page 150: Frame Size R8 Pedestal Busbars On The Long Side (Inches)
Frame size R8 pedestal busbars on the long side (inches) Bilateral output busbar 68440513_4/6 A (64801082.asm E) Dimensional drawings... -
Page 151: Frame Size R8 With Busbars On The Short Side (Inches)
Frame size R8 with busbars on the short side (inches) Dimensional drawings... - Page 152 Dimensional drawings...
-
Page 153: Circuit Diagrams
Circuit diagrams What this chapter contains This chapter shows an example circuit diagram for employing the Prevention of Unexpected Start function (+Q950). Circuit diagrams... - Page 154 Circuit diagrams...
-
Page 155: Assembly Drawings
Assembly drawings What this chapter contains This chapter shows a few step-by-step assembly drawings. Assembly drawings... -
Page 156: Adding Udc+/R+, Udc- And R- Busbars To The Pedestal (Frame Size R7, +H356+H360)
Adding UDC+/R+, UDC- and R- busbars to the pedestal (frame size R7, +H356+H360) Assembly drawings... -
Page 157: Adding Udc+/R+, Udc- And R- Busbars To The Adapter (Frame Size R7, +H356+H360)
Adding UDC+/R+, UDC- and R- busbars to the adapter (frame size R7, +H356+H360) Assembly drawings... -
Page 158: Adding Udc+/R+, Udc- And R- Busbars To The Pedestal (Frame Size R8, +H356+H360)
Adding UDC+/R+, UDC- and R- busbars to the pedestal (frame size R8, +H356+H360) Assembly drawings... -
Page 159: Adding Udc+/R+, Udc- And R- Busbars To The Adapter (Frame Size R8, +H356+H360)
Adding UDC+/R+, UDC- and R- busbars to the adapter (frame size R8, +H356+H360) Assembly drawings... - Page 160 Assembly drawings...
- Page 162 ABB Oy ABB Inc. ABB Beijing Drive Systems Co. Ltd. AC Drives Automation Technologies No. 1, Block D, A-10 Jiuxianqiao Beilu P.O. Box 184 Drives & Motors Chaoyang District FI-00381 HELSINKI 16250 West Glendale Drive Beijing, P.R. China, 100015 FINLAND...