Table of Contents
Table of Contents

Related Manuals for Haier HWD120-B1558


Summary of Contents for Haier HWD120-B1558
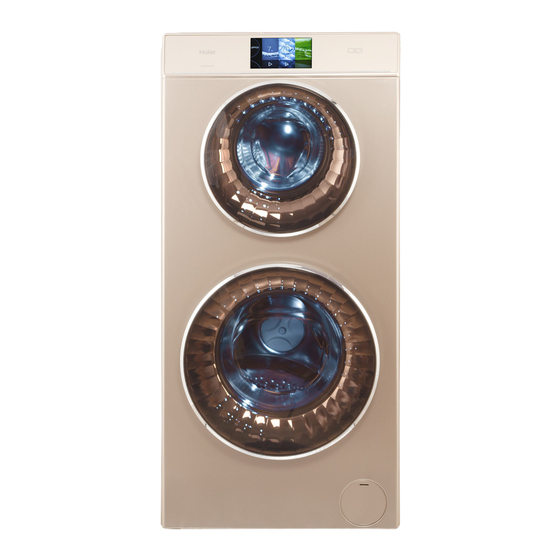
- Page 1 User manual User manual Washer-dryer Washing machine HWD120-B1558...
- Page 2 Thanks Thank you for purchasing a Haier Product. Please read these instructions carefully before using this appliance. The instructions con- tain important information which will help you get the best out of the appliance and ensure safe and proper installation, use and maintenance.
-
Page 3: Table Of Contents
Thanks 1- Safety information.................... 4 2- Product description ..................9 3- Control panel ....................11 4- Consumption ....................15 5- Programmes ....................18 6- Eco-friendly washing ..................19 7- Daily use ......................20 8- Care and cleaning ................... 29 9- Troubleshooting .....................32 10- Installation .................... -
Page 4: 1- Safety Information
1- Safety information WARNING! Make sure there is no transport damage. Make sure all transportation bolts and packaging screws are re- moved. Remove all packaging and keep out of children´s reach. Handle the appliance always with at least two persons because it is heavy. - Page 5 1- Safety information WARNING! Daily use Do not wash any garments treated with solvents in the appliance without having dried them previously in the air. Do not remove or insert the plug in the presence of flammable gas. Do not hot wash foam rubber or sponge-like materials. Do not wash any laundry which is polluted with flour.
- Page 6 1- Safety information WARNING! Daily use Do not dry following items in the appliance: Items which are unwashed. Items which have been contaminated with inflammable sub- stances such as cooking oil, acetone, alcohol, benzine, petrol, kerosene, spot removers, turpentine, waxes, wax removers ter with an extra amount of detergent and then be dried in the open air before drying in the appliance.
- Page 7 1- Safety information WARNING! Maintenance / cleaning Make sure children are supervised if they carry out cleaning and maintenance. Disconnect the appliance from the electrical supply before under- taking any routine maintenance. Keep the lower part of the porthole clean and open door and de- tergent drawer if appliance is not in use to prevent odours.
- Page 8 1- Safety information WARNING! Installation Make sure not to damage the electric cable and the plug. If dam- aged, have it replaced by an electrician. For the power supply, use a separate earthed socket which is ea- syly accessible after installation. The appliance must be earthed. no leakage.
-
Page 9: 2- Product Description
2- Product description 2.1 Intended use This appliance is intended for washing machine-washable and dryable laundry only. Always follow the instructions given on the label of each garment label. The appliance is designed exclusively for domestic use inside the house. It is not intended for commercial or indus- trial use. - Page 10 2- Product description 2.2.2 Back (Fig. 2.2.2) 2.2.2 1 Power cord plug 7 Water inlet connection point 2 Power cord 8 Upper rear cover 3 Packaging screws (S1-S2) 9 Lower rear cover 4 Blanking plugs (7 in all) 10 Transportation bolts (T1-T5) 5 Water outlet connector 11 Adjustable feet (4 in all) 6 Filter B...
-
Page 11: 3- Control Panel
3- Control panel This appliance is operated through a full touch screen display (Fig. 3.0). The touch screen clearly shows how to choose between upper and lower drums, programmes and settings. The user gets access to all functions with one slight touch. 1 Drum selector 3 Submenu 5 Quick-Start button... - Page 12 3- Control panel 3.3 Submenu Touch the symbols to get following information or further settings: Symbol Meaning Opens operation guide videos. Setting mode for child lock function, sound, language, brightness, WIFI set- ting and remote control. 3.3.1 Operation guide 3.3.1 Touch on right edge of the display (Fig.
- Page 13 3- Control panel 3.6 Programme status indicators A Upper drum 1 Selected programme 5 Door is locked B Lower drum 2 Remaining operation time 6 Programme progress indicator 3 Washing process indicator 4 Start/Pause button 3.7 Special functions 3.7.1 Child Lock 3.7.1-1 This option blocks all panel elements against activa- tion.
- Page 14 3- Control panel 3.7.2 Door lock 3.7.2 For safety reasons the appliance door is normally · · locked during the washing circles. The door lock signal is shown on the screen; when both drums are operat- ing, both signals are shown (Fig. 3.7.2). To unlock the door during the washing circles touch the pause signal on the screen and open the door after the signal fades out.
-
Page 15: 4- Consumption
4- Consumption Parameter Programme 12 kg Standard Temperature in °C 60 °C Drum Upper Lower Lower Max. load Washing in kg Drying Washing, spinning and drying 8.14 Energy in kWh Only for washing and spinning 0.95 Washing, spinning and drying Water in L Only for washing and spinning... - Page 16 5- Programmes Following programmes are available for the upper and lower drum: Drum Both drums are working simultaneously. Don´t forget to load both drums! Do n ot overdose de tergent to avoid too much foam. Fabric care Fibre type / descrip- Presorted laundry symbol Programme...
- Page 17 5- Programmes Max. load Presetting Available temperature Due to multiple distribution, inlet waiting, spin in kg in °C waiting and drainage waiting, the displayed time does not match with the actual runtime. (P: Presetting; •: available) Programme runtime „Wash“ „Rinse“ „Speed“...
-
Page 18: 5- Programmes
5- Programmes Following functions are available for the programms: Drum Max. load Available functions in kg • : available list Programme • • • • Allergy Care • • • • • Hygiene U+L 4+8 12 kg Standard • • •... -
Page 19: 6- Eco-Friendly Washing
6- Eco-friendly washing Environmentally responsible use Washing To achieve the best use of energy, water, detergent and time you should use the recommended maximum load size. Do not overload (hand width clearance above laundry). For slightly soiled laundry, select the Quick Wash programme. Apply exact dosages of each washing agent. -
Page 20: 7- Daily Use
7- Daily use 7.0 Quick Guide Put the electrical plug into the socket. Open the water tap. Switch the appliance on by touching the power on symbol for 3 seconds. Prepare the laundry. Select the washing drum according to the laundry. Load the laundry and close the door. - Page 21 7- Daily use 7.1 Power supply Connect the appliance to a power supply (220 V to 240 V~/50 Hz) (Fig. 7.1.). Please refer also to section · · INSTALLATION. 7.2 Water connection Before connecting check the cleanliness and clar- ity of the water inlet. Turn on the tap (Fig.
- Page 22 7- Daily use Note: Special hints for drying Sort clothes according to fabric (cotton, synthetics, etc.), desired dry level and equal residual moisture. Follow the instructions on the laundry label and dry only machine- dryable garments Spin the laundry with the maximum spin speed before drying. Do not exceed the max.
- Page 23 7- Daily use 7.5 Selecting a drum 7.5-1 7.5-2 1. Touch in the area of the drum selector on the left Cotton side of the screen to switch between the drums (Fig. 7.5-1). Choose the drum according to de- sired programme and weight of laundry: hours juice special stains...
- Page 24 7- Daily use 7.8.1 Choose the best detergent Kind of detergent Programme Universal Colour Delicate Special Softener Upper drum Baby Care Underwear Silk Casual Allergy Care Color Wear Kids´ Wear Quick Wash Towels 12 kg Standard Lower drum Cotton Synthetic Wool Jeans Sports Wear...
- Page 25 7- Daily use Note: Detergent Put the detergent into the correct compartment depending on the selected drum. Do not overdose detergent or softener. Do not use more than 1 measuring cup (about 40 ml). Please follow the instruction on the detergent package. Concentrated liquid detergent should be diluted before being added.
- Page 26 7- Daily use Note: Functions If there are no special requirements, the default settings are recommended. Not every function is available for each programme. It depends on the selected pro- gramme. Some additional functions cannot be selected at the same time. The functions “Wash”, “Rinse”, “Temp.”...
- Page 27 7- Daily use 7.10.2.1 7.10.2.1 Selecting a time delay – End time delay Use this function to start the programme with a delay. 1. Set a programme and select required functions. 2. Slide or touch within the option cube to set up time delay in steps of 1 hour from OFF-24h (Fig.
- Page 28 7-Daily use 7.11-1 7.11 Start wash programme Touch on the display to start programme.(Fig. 7.11-1: screen after choosing individual settings; Fig. 7.11-2: screen using default settings= quick-start). Appliance operates according to present settings. 7.11-2 7.11.1 7.11.1 Interrupt wash programme To interrupt a running programme, touch the pause symbol on the display (Fig.
-
Page 29: 8- Care And Cleaning
8- Care and cleaning Inspect and clean your appliance at regular intervals. WARNING! Before maintenance, deactivate the appliance and disconnect the mains plug from the mains socket. 8.1 Cleaning the machine Unplug the machine during cleaning and mainte- nance. Use a soft cloth with soap liquid to clean the ma- chine case (Fig. - Page 30 8- Care and cleaning 8.4 Long periods of disuse 8.4-1 8.4-2 If the appliance is left idle for a longer period: 1. Pull out the electrical plug (Fig. 8.4-1). 3. Open the doors to prevent formation of moisture and odours. Leave doors open while not in use. Before next usage carefully check the power cord, wa- ter inlet and drain hose.
- Page 31 8- Care and cleaning 7. After complete drainage, close the drainhose and 8.5-5 (pos. 5 in Fig. 8.5-5). and remove it. 9. Remove contaminants and dirt (Fig. 8.5-6). 8.5-7 8.5-6 (Fig. 8.5-7). 8.5-9 8.5-8 12. Close service fl Note: Filter at the back (Fig.
-
Page 32: 9- Troubleshooting
9- Troubleshooting problem please check all shown possibilities and follow the instructions below before you contact an Aftersales service. See CUSTOMER SERVICE. WARNING! Before maintenance, deactivate the appliance and disconnect the mains plug from the mains socket. improper repairs can cause considerable consequential damages. A damaged power cable should only be replaced by the manufacturer, its service 9.1 Information codes Some displayed messages only refer to the washing... - Page 33 9- Troubleshooting Cause Solution code Motor fault. Abnormal drying temperature de- tected sales service. Water level sensor fault. Power PCB communication fault. Motor PCB communication fault. Drying communication abnormality pliance and contact Aftersales service. Display PCB communication fault. Drive PCB fault with the same identity code.
- Page 34 9- Troubleshooting 9-3 Troubleshooting without display code Problem Cause Solution Appliance fails to • Programme is not yet started. • Check programme and start it. operate. • Door is not properly closed. • Close the door properly. • Appliance has not been switched on •...
- Page 35 9- Troubleshooting Problem Cause Solution Strange sound • Appliance has no solid position. • Ensure solid ground and a lev- elled position. • Foreign matters like coins or zip- • Ensure pockets are emptied of pers hit the drum. keys, coins etc. Parts of control •...
- Page 36 9- Troubleshooting 9.4 In case of power failure /door opening in emergency The current programme and its setting will be saved. When power supply is restored operation will be re- sumed. To cancel it, touch „Start/Pause button“ and then „power button“ for about 3 sec. If a power failure cuts an operating wash programme door opening is mechanically blocked.
-
Page 37: 10- Installation
10- Installation 10.1 Preparation 10.1 Take the appliance out of the packaging. Remove all packaging material including the poly- styrene base (A) with part (B) (Fig. 10.1) and the of childrens reach. While opening the package, wa- ter drops may be seen on plastic bag and porthole. This normal phenomenon results from water tests in the factory. - Page 38 10- Installation 10.3 Adjusting the feet 10.3 Adjust all feet to achieve a complete level position with enclosed spanner. This will minimize vibrations and thus noise during use. It will also reduce wear and tear. We recommend to use a spirit level for adjustment. Floor should be as stable and flat as possible.
- Page 39 10- Installation CAUTION! The drain hose should not be submerged in water and should be securely xed and leak-free. If the drain hose is placed on the ground or if the pipe is at a height of less than 80 cm, the appliance will continuously drain while being lled (self-siphoning). Drain hose is not to be extended.
-
Page 40: 11- Technical Data
11- Technical data Trade mark Haier HWD120-B1558U Energy consumption for washing, spinning and drying using the 8.14 standard cotton programmes in kWh/complete operating cycle Energy consumption for washing and spinning using the standard 0.95 cotton washing programme in kWh/washing cycle Washing performance class Water remaining after spin for standard 60 °C cotton washing cycle... - Page 41 11- Technical data 11.2 Additional technical data Dimension (HxWxD in mm) 1280x600x600 Voltage / current 220-240 V/50 Hz/10 A Max. power (W) 2100 Water pressure (MPa) 0.03 - 1.0 Net weight (kg)
-
Page 42: 12- Customer Service
12- Customer service We recommend our Haier Customer Service and the use of original spare parts. your local dealer or and FAQs and where you can activate the service claim. To contact our Service, ensure that you have the following data available. - Page 44 0020507767V...