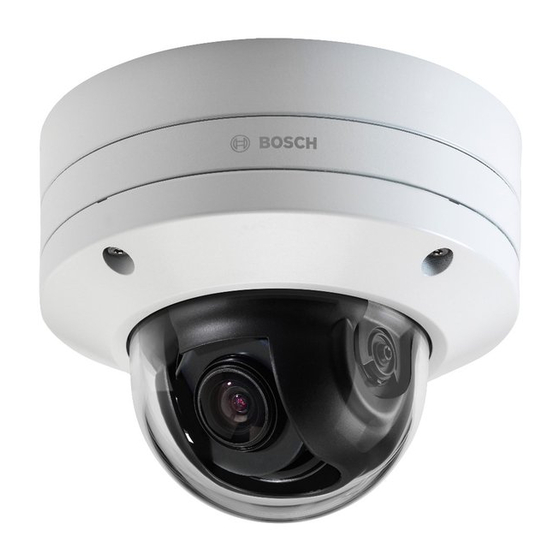
Bosch FLEXIDOME IP starlight 8000i Installation Manual
Hide thumbs
Also See for FLEXIDOME IP starlight 8000i:
- Installation manual (52 pages) ,
- User manual (68 pages) ,
- Installation manual (44 pages)
Table of Contents
Table of Contents

Related Manuals for Bosch FLEXIDOME IP starlight 8000i


Summary of Contents for Bosch FLEXIDOME IP starlight 8000i
- Page 1 FLEXIDOME IP starlight 8000i Installation Manual...
-
Page 3: Table Of Contents
FLEXIDOME IP starlight 8000i Table of contents | en Table of contents Safety About this manual Legal information Safety precautions Important safety instructions Power connection in applications Important notices System overview Product description Intended use Remote commissioning Using the camera... - Page 4 | Table of contents FLEXIDOME IP starlight 8000i Decommissioning Transfer Disposal Technical data 10.1 Dimensions 10.2 Specifications 2018.11 | 01 | Installation Manual Bosch Security Systems...
-
Page 5: Safety
Legal information Copyright This manual is the intellectual property of Bosch Security Systems, and is protected by copyright. All rights reserved. Trademarks All hardware and software product names used in this document are likely to be registered trademarks and must be treated accordingly. -
Page 6: Power Connection In Applications
Electrical Code (NEC)), Canadian Electrical Code, Part I (also called CE Code or CSA C22.1), and all applicable local codes. Bosch Security Systems accepts no liability for any damages or losses caused by incorrect or improper installation. All-pole power switch - Incorporate an all-pole power switch, with a contact separation of at least 3 mm, into the electrical installation of the building. - Page 7 FLEXIDOME IP starlight 8000i Safety | en UL MAKES NO REPRESENTATIONS, WARRANTIES, OR CERTIFICATIONS WHATSOEVER REGARDING THE PERFORMANCE OR RELIABILITY OF ANY SECURITY OR SIGNALING-RELATED FUNCTIONS OF THIS PRODUCT. Notice! This is a class B product. In a domestic environment, this product may cause radio interference, in which case the user may be required to take adequate measures.
- Page 8 Simplified EC DoC (European Union) Hereby, Bosch declares that the radio equipment type FLEXIDOME IP starlight 8000i is in compliance with Directive 2014/53/EU. The full text of the EU declaration of conformity is available at the following internet address: www.boschsecurity.com / (Product Catalog) /...
- Page 9 Manufactured year and month: http://www.boschsecurity.com/datecodes/ NBTC (Thailand) This telecommunication equipment conforms to NBTC technical standard or requirement. More information For more information please contact the nearest Bosch Security Systems location or visit www.boschsecurity.com Bosch Security Systems Installation Manual 2018.11 | 01 |...
-
Page 10: System Overview
With the FLEXIDOME IP starlight 8000i camera’s remote commissioning functionality there’s no need to go up and down ladders. Using a PC or a mobile device with the Bosch Project Assistant app, you can pan, tilt, roll and zoom (PTRZ) and point the camera to the required field of view with a single click - without ever having to touch the camera or lens. -
Page 11: Applcation Variants
It offers a user-friendly interface for easy live viewing of multiple cameras, playback, forensic search and export. IP Helper The IP Helper tool is a free PC application that makes it easy to detect Bosch cameras and devices on your network. Video security app The Bosch video security mobile app has been developed to enable Anywhere access to HD surveillance images allowing you to view live images from any location. -
Page 12: Unpacking
This equipment should be unpacked and handled with care. If an item appears to have been damaged in shipment, notify the shipper immediately. Verify that all parts are included. If any items are missing, notify your Bosch Security Systems Sales or Customer Service Representative. - Page 13 FLEXIDOME IP starlight 8000i Unpacking | en Quantity Component – 2-pole terminal for 12 VDC/24 VAC connection Desiccant sachet: for additional moisture protection in very humid environments Note: do not open the sachet before its content has to be used. Premature exposure to air will...
-
Page 14: Hardware Installation
| Hardware Installation FLEXIDOME IP starlight 8000i Hardware Installation Caution! Do not attempt to move the camera lens manually. Do not remove the bubble. The lens system is motorized for easy commissioning. Moving these parts manually will break the gears and damage the camera. In order to move or focus the camera lens, always use the commissioning apps mentioned in this manual. -
Page 15: Installing The Surface Mounting Plate
FLEXIDOME IP starlight 8000i Hardware Installation | en Slide one card into one slot. Press the card firmly until it latches into place in the slot. To remove the card, press it into the slot until it unlatches again. To install a second card, repeat from step 3 with the remaining free slot. - Page 16 | Hardware Installation FLEXIDOME IP starlight 8000i Figure 4.1: Prepared for different applications 1 4“ Square junction box 2 Ceiling/wall mount and Pendant interface plate (NDA-8000-PIP) 3 Pole mount 4 Double gang box (NDA-U-PMAL/NDA-U-PMAS) 5 Single Gang box and universal slot, Note: Only options 1,2 and 3 must be 45 mm to 85 mm...
-
Page 17: Preparing For In-Ceiling Or On-Surface Cable Routing
FLEXIDOME IP starlight 8000i Hardware Installation | en For on-ceiling cable routing, the cable conduit must be oriented towards the cable duct. (Preliminary picture) Steps Use the mounting plate to mark the bore holes on the surface. Note: With in-ceiling cable routing, make sure to have the plate centered over the cable outlet. - Page 18 | Hardware Installation FLEXIDOME IP starlight 8000i Preparing for on-surface cable routing For on-surface cable routing, a cable conduit is available in the package. This conduit consists of five parts: The conduit plate gets fixed to the surface mounting plate. Choose from ¾” / M25 or ½” / –...
- Page 19 FLEXIDOME IP starlight 8000i Hardware Installation | en 1, 2 Tabs 3,4 Slide-in slots Pass the external cable through the center hole of the conduit plate. Use the hooks on the surface mounting plate to secure the cable and to form a service loop.
-
Page 20: Wiring
| Hardware Installation FLEXIDOME IP starlight 8000i The installation of the cable conduit is finished. Preparing the camera top for on-surface cable routing There is a lid on the camera top which has to be removed in order to have the required space for the cable duct. -
Page 21: Grounding
FLEXIDOME IP starlight 8000i Hardware Installation | en Pin assignment Connection 12 V out ALARM OUT ALARM OUT ALARM IN 1 ALARM IN 2 AUDIO OUT AUDIO IN Tab. 4.1: Pin assignment for 10-pin terminal After fitting the terminal to an on-site wiring, the connection can easily be made. Plug the terminal into the 10-pin I/O on the camera base. -
Page 22: Network (And Poe Power)
| Hardware Installation FLEXIDOME IP starlight 8000i Unfasten the connector screw to lift it from the metal bracket underneath. Do not remove the connector screw completely. The gap between the washer and the bracket shall suit the diameter of the grounding wire. -
Page 23: 12V Output
FLEXIDOME IP starlight 8000i Hardware Installation | en Use a zero potential make-contact or switch as the actuator (with a bounce-free contact system). 4.3.6 12V output The 12 V output can be controlled by the Alarm Task editor and it can be enabled via the web interface. - Page 24 | Hardware Installation FLEXIDOME IP starlight 8000i 1 Network cable inlet 2 Sealed cable inlet with adjustable rubber grommet 3 Ventilation holes. Note: Never remove or break the sealing from these holes. Check safety chapter for further information. Insert the RJ45 plug into the RJ45 network connector.
-
Page 25: Handling Additional Cabling
FLEXIDOME IP starlight 8000i Hardware Installation | en Make sure that the grommet is pushed in to its full length: Place the camera base onto the surface mounting plate. Turn the camera base clockwise until you hear a ‘click’ sound. - Page 26 | Hardware Installation FLEXIDOME IP starlight 8000i Steps Open the sachet and take out the pill. From now you have 10 minutes to complete the whole installation. Remove the protective cover from the adhesive side of the pill. Affix the pill to the base, on the left side of the cable inlets. Be sure not to cover the ventilation hole.
- Page 27 FLEXIDOME IP starlight 8000i Hardware Installation | en Use the screwing tool to fasten all four bolts. Apply at least 2.5 Nm of torque, but no more than 4 Nm. Remove the protective cover from the bubble. The hardware installation is complete.
-
Page 28: Online Camera Commissioning
| Online Camera Commissioning FLEXIDOME IP starlight 8000i Online Camera Commissioning Once the hardware installation is completed, – the camera has to be integrated into your network and – the field of view needs to be set. The camera’s initial setup is done via the camera’s browser interface or, preferably, via the free-of-charge Bosch Project Assistant app. -
Page 29: Using The Project Assistant App
FLEXIDOME IP starlight 8000i Online Camera Commissioning | en Project Assistant The Project Assistant app allows you to cluster and preconfigure cameras in projects. Project defaults can be defined for network settings and passwords and are automatically used for added cameras. Both project defaults and dedicated camera configurations can be defined offline and pushed onto the cameras when connecting. - Page 30 | Online Camera Commissioning FLEXIDOME IP starlight 8000i Notice! Do not expose the image sensors to direct sunlight. 2018.11 | 01 | Installation Manual Bosch Security Systems...
-
Page 31: Connection Via The Web Browser
Identity and Password. Only after these have been configured can communication with the unit via the network occur. IP Helper tool Alternatively, use the IP Helper tool to detect Bosch devices on the network: Access the Bosch download store (http://downloadstore.boschsecurity.com/). Download and install IP Helper. -
Page 32: Troubleshooting
| Troubleshooting FLEXIDOME IP starlight 8000i Troubleshooting Resolving problems The following table is intended to help identify the causes of malfunctions and correct them where possible. Malfunction Possible causes Solution Unit does not operate. Power failure. Check power supply. -
Page 33: Testing The Network Connection
FLEXIDOME IP starlight 8000i Troubleshooting | en Incorrect firmware file. Enter the IP address of the unit followed by /main.htmin your Web browser and repeat the upload. Web browser contains Active proxy server in network. Create a rule in the local empty fields. -
Page 34: Maintenance
| Maintenance FLEXIDOME IP starlight 8000i Maintenance Cleaning It is generally sufficient to use a dry cloth for cleaning, but a moist lint-free cloth or leather shammy may also be used. Do not use liquid cleaners or aerosol cleaners. - Page 35 The unit should only be passed on together with this installation guide. Disposal Disposal - Your Bosch product was developed and manufactured with high-quality material and components that can be recycled and reused. This symbol means that electronic and electrical appliances, which have reached the end of their working life, must be collected and disposed of separately from household waste material.
- Page 36 | Technical data FLEXIDOME IP starlight 8000i Technical data 10.1 Dimensions Figure 10.1: FLEXIDOME IP 8000i dimensions 10.2 Specifications Mechanical Dimensions (D x H) 175 x 145 mm (6.9 x 5.7 in) Weight 2.2 kg (4.85 lbs) Mounting Surface mount Color White (RAL9010) Motorized PTR range Pan: -181.5º to +181.5º...
- Page 37 FLEXIDOME IP starlight 8000i Technical data | en Environmental -34 ºC to +74 ºC (-30 ºF to +165 ºF) according to NEMA TS 2-2003 (R2008), para 2.1.5.1 using fig. 2.1 test profile Storage temperature -30 ºC to +70 ºC (-22 ºF to +158 ºF) Operating humidity 5% to 93% RH non condensing...
- Page 38 | Technical data FLEXIDOME IP starlight 8000i Network Ethernet 10/100 Base-T, auto-sensing, half/full duplex Connectivity Auto-MDIX Interoperability ONVIF Profile S; ONVIF Profile G; ONVIF Profile T GB/T 28181 Camera installation Mirror image On / Off Rotate 0° / 90° upright / 180° / 270° upright...
- Page 39 FLEXIDOME IP starlight 8000i Technical data | en Local storage – Extend (maximum retention time) – Automatic Network Replenishment Industrial SD cards Extreme lifetime and health monitoring support that provides early service indication. SR-32VMA (32GB), SR-64VMA (64GB), SR-G1VMA (128GB) Data security...
- Page 40 | Technical data FLEXIDOME IP starlight 8000i Video resolution (H x V) 480p SD 854 x 480 SD 4:3 (cropped) 704 x 480 6 MP version Video resolution (H x V) 6.0 MP 3264 x 1840 5.3 MP 3072 x 1728 2.8 MP (4:3) 1920 x 1440...
- Page 42 Bosch Security Systems B.V. Torenallee 49 5617 BA Eindhoven Netherlands www.boschsecurity.com © Bosch Security Systems B.V., 2018...