Bosch FLEXIDOME IP indoor 8000i Installation Manual
Hide thumbs
Also See for FLEXIDOME IP indoor 8000i:
- Installation manual (44 pages) ,
- User manual (68 pages) ,
- Installation manual (56 pages)

Related Manuals for Bosch FLEXIDOME IP indoor 8000i


Summary of Contents for Bosch FLEXIDOME IP indoor 8000i
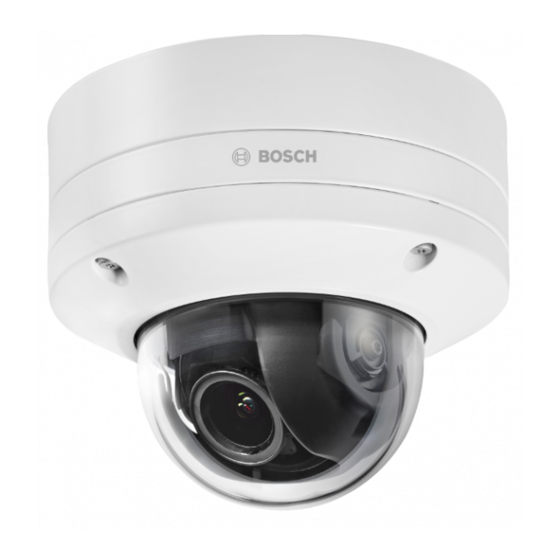
- Page 1 FLEXIDOME IP indoor 8000i NDV‑8502‑R | NDV‑8503‑R | NDV‑8504‑R | NDV‑8502‑RX | NDV‑8503‑RX Installation manual...
-
Page 3: Table Of Contents
FLEXIDOME IP indoor 8000i Table of contents | en Table of contents Safety Safety precautions Important safety instructions Notices Short information System overview Product description Intended use Preparing for installation Unpacking Contents Wiring In-box configuration SD card installation Hardware installation Installing the mounting plate 6.1.1... -
Page 4: Safety
| Safety FLEXIDOME IP indoor 8000i Safety Read, follow, and retain for future reference all of the following safety instructions. Follow all warnings before operating the device. Safety precautions Caution! Installation should only be performed by qualified service personnel in accordance with the National Electrical Code (NEC 800 CEC Section 60) or applicable local codes. - Page 5 – Security advisories, that is a list of identified vulnerabilities and proposed solutions: https://www.boschsecurity.com/xc/en/support/product-security/security-advisories.html Bosch assumes no liability whatsoever for any damage caused by operating its products with outdated software components. Old electrical and electronic equipment This product and/or battery must be disposed of separately from household waste.
-
Page 6: Short Information
Bosch Security Systems accepts no liability for damage resulting directly or indirectly from faults, incompleteness or discrepancies between this manual and the product described. Copyright This manual is the intellectual property of Bosch Security Systems and is protected by copyright. All rights reserved. Trademarks All hardware and software product names used in this document are likely to be registered trademarks and must be treated accordingly. -
Page 7: System Overview
The camera’s remote commissioning functionality makes sure installation and commissioning can be done in very little time. Using a PC or a mobile device with the Bosch Project Assistant app, you can pan, tilt, roll and zoom (PTRZ) and point the camera to the required field of view with a single click - without ever having to touch the camera or lens. -
Page 8: Intended Use
| System overview FLEXIDOME IP indoor 8000i LED overview A status LED can be seen in the camera bubble on the opposite side of the camera lens. Refer to the table below for the different status LED functions. Status LED... -
Page 9: Preparing For Installation
This equipment should be unpacked and handled with care. If an item appears to have been damaged in shipment, notify the shipper immediately. Verify that all parts are included. If any items are missing, notify your Bosch Security Systems sales or customer service representative. -
Page 10: Wiring
| Preparing for installation FLEXIDOME IP indoor 8000i Quantity Component Quick installation guide Safety information Identification label sticker Make sure that: – All parts are included and without damage. The necessary cable is ready for use (refer to Wiring, page 10 for more information): –... -
Page 11: In-Box Configuration
For more detail about the Project Assistant app, refer to Commissioning, page 32 . SD card installation Notice! Bosch recommends the use of industrial micro SD cards with health monitoring. Unscrew the thumb screw of the microSD card compartment. No tools are needed. Open the lid of the microSD card compartment. - Page 12 | In-box configuration FLEXIDOME IP indoor 8000i Notice! The camera supports dual microSD cards for increased maximum storage capacity or enhanced data protection. In case only one microSD card is used, install it into the microSD card slot 1.
-
Page 13: Hardware Installation
FLEXIDOME IP indoor 8000i Hardware installation | en Hardware installation Caution! Do not remove the bubble to move the camera lens manually. The lens system is motorized for easy commissioning. Moving these parts manually will break the gears and damage the camera. In order to move or focus the camera lens, always use the motorized PTRZ controls mentioned in this manual. -
Page 14: Installing The Mounting Plate Without Conduit
| Hardware installation FLEXIDOME IP indoor 8000i Additionally, the camera has various mounting options when combined with the available accessories. Refer to Mounting accessories, page 27 for the available accessories. Notice! The plugs and screws for surface mounting are not supplied with the camera. -
Page 15: Installing The Mounting Plate With Conduit
FLEXIDOME IP indoor 8000i Hardware installation | en Drill the 4 holes with the appropriate diameter drill to support your 5-6 mm (0.2 inch) screws and plugs. Install 4 plugs in the holes. Put the cable through the center hole of the mounting plate. - Page 16 | Hardware installation FLEXIDOME IP indoor 8000i Remove the conduit plate from the box. Mark the position of the hole on the surface. Drill the hole with the appropriate diameter drill. Install a plug in the hole. Select the applicable conduit plate adapter and install it on the conduit plate: –...
-
Page 17: Wiring The Camera Module
FLEXIDOME IP indoor 8000i Hardware installation | en 10. Drill the 4 holes with the appropriate diameter drill to support your 5-6 mm (0.2 inch) screws and plugs. 11. Install 4 plugs in the holes. 12. Attach the mounting plate to the surface with 4 screws. Tighten the screws between 4 and 7 Nm (3 and 5.2 lbfft). -
Page 18: Wiring The Camera Module
| Hardware installation FLEXIDOME IP indoor 8000i Wiring options Chose one of the two possible wiring option: – Wiring the camera module, page 18 – Wiring the camera module with the IP54 protection kit, page 18 6.2.1 Wiring the camera module... - Page 19 FLEXIDOME IP indoor 8000i Hardware installation | en Put the M20 rubber grommet on the edge of the RJ-45 punch-through aid. Since the grommet is directional, the punch-through tool and cable should be inserted from the side with the larger diameter.
- Page 20 | Hardware installation FLEXIDOME IP indoor 8000i Slide the IP54 cover onto the network cable. Remove the camera module from the box. 10. Connect the network cable to the RJ-45 connector of the camera module. 2021-08 | 01 | Bosch Security Systems B.V.
- Page 21 FLEXIDOME IP indoor 8000i Hardware installation | en 11. Push the IP54 cover onto the two ball studs in the camera module until it clicks into place. click click Bosch Security Systems B.V. 2021-08 | 01 | Installation manual...
- Page 22 | Hardware installation FLEXIDOME IP indoor 8000i 12. Tighten the three screws of the IP54 cover between 0.6 and 0.8 Nm (0.44 and 0.59 ft-lb). 13. Push the M20 rubber grommet down into the IP54 cover and ensure it’s fitted correctly all around to ensure a waterproof seal.
- Page 23 FLEXIDOME IP indoor 8000i Hardware installation | en 14. Check and make sure that the grommet sleeve faces outwards for a proper waterproof seal. If facing inwards, slightly pull back the network cable. Bosch Security Systems B.V. 2021-08 | 01 |...
-
Page 24: Installing The Camera Module
| Hardware installation FLEXIDOME IP indoor 8000i Installing the camera module If the installation of the mounting plate was done with the conduit, remove the door on the camera module. Keep the screw and lid. 2021-08 | 01 | Bosch Security Systems B.V. - Page 25 FLEXIDOME IP indoor 8000i Hardware installation | en Align the camera according to the conduit installation. – If the installation of the mounting plate was done without the conduit (A), align the silver triangle on the conduit door with the red circle on the mounting plate.
- Page 26 | Hardware installation FLEXIDOME IP indoor 8000i Tighten the 4 captive screws of the screw holes in the camera module between 1 and 1.5 Nm (0.74 and 1.1 ft-lb). Remove the protective cover from the bubble. 2021-08 | 01 | Bosch Security Systems B.V.
-
Page 27: Mounting Accessories
FLEXIDOME IP indoor 8000i Hardware installation | en Mounting accessories NDA-8001-IP RJ45 waterproofing kit. NDA-8000-CBL Clear replacement bubble. NDA-8000-TBL Tinted bubble. NDA-8000-IC In-ceiling mount kit. NDA-8000-PLEN Plenum-rated in-ceiling mount kit. Bosch Security Systems B.V. 2021-08 | 01 | Installation manual... - Page 28 | Hardware installation FLEXIDOME IP indoor 8000i NDA-8001-IC In-ceiling mount kit with microphone support. NDA-8001-PLEN Plenum-rated in-ceiling mount kit with microphone support. NDA-8000-SP Optional soft ceiling support for in-ceiling mount kit. NDA-8000-PIP Pendant interface plate for FLEXIDOME IP 8000i, indoor.
- Page 29 FLEXIDOME IP indoor 8000i Hardware installation | en NDA-U-PMTE Extension for universal pipe mount, 50 cm, white. NDA-U-PSMB Surface mount box (SMB) for wall mount or pipe mount. NDA-U-PA0 Surveillance cabinet, 24 VAC input. NDA-U-PA1 Surveillance cabinet, 100 - 120 VAC input.
-
Page 30: Removing The Camera
| Hardware installation FLEXIDOME IP indoor 8000i NDA-U-WMTG Universal wall mount, compatible with gang box installation for fixed dome cameras only, white. NDA-U-PMTG Universal pipe mount, compatible with gang box installation for fixed dome cameras only, white. VG4-SFPSCKT Ethernet media converter... - Page 31 FLEXIDOME IP indoor 8000i Hardware installation | en Disconnect the Ethernet cable and remove the camera. Bosch Security Systems B.V. 2021-08 | 01 | Installation manual...
-
Page 32: Commissioning
| Commissioning FLEXIDOME IP indoor 8000i Commissioning With the remote commissioning functionality, only a PC or a mobile device is needed to pan, tilt, roll, and zoom (PTRZ), and point the camera to the required field of view - without ever having to remove the camera from the box. -
Page 33: Connection Via The Web Browser
Connection via the web browser This device can be accessed via a web browser to configure, control, receive live images, and replay stored video. For best experience, use Microsoft Internet Explorer browser with the Bosch MPEG-ActiveX plugin. This enables these functions: –... - Page 34 | Connection via the web browser FLEXIDOME IP indoor 8000i The camera requires a strong password. Follow the prompts in the dialog box, which specifies what is required. The system measures the strength of the password that you enter.
-
Page 35: Troubleshooting
FLEXIDOME IP indoor 8000i Troubleshooting | en Troubleshooting Resolving problems The following table is intended to help identify the causes of malfunctions and correct them where possible. Malfunction Possible causes Solution Unit does not operate. Power failure. Make sure that the power supply is working properly. - Page 36 | Troubleshooting FLEXIDOME IP indoor 8000i Closing seals are damaged. Please contact your supplier or system integrator, or go directly to Bosch Security Systems customer service. Rubber grommet not placed Re-install rubber grommet. correctly on IP54 protection kit.. Cable diameter or shape is not...
-
Page 37: Testing The Network Connection
Customer service If a fault cannot be resolved, please contact your supplier or system integrator, or go directly to Bosch Security Systems customer service. The version numbers of the internal firmware can be viewed on a service page. Please note this information before contacting customer service. -
Page 38: Maintenance
| Maintenance FLEXIDOME IP indoor 8000i Maintenance There are different types of bubbles available to choose from. All bubbles require special care when handling and cleaning to avoid scratches. 10.1 Bubble handling The bubble may be packaged with a protective plastic sheet. It is recommended that the bubble remain stored this way until it is ready to install. -
Page 39: Camera Reset
FLEXIDOME IP indoor 8000i Maintenance | en For instructions on how to replace the bubble, refer to the respective Quick Installation Guide. 10.4 Camera reset To reset the camera to factory settings: If the camera is already mounted, remove the camera module from its mounting plate. - Page 40 | Maintenance FLEXIDOME IP indoor 8000i Release the reset button. Wait 60 seconds for the LED light to turn off and for the reset to be complete. Close the lid of the microSD card compartment. Tighten the thumb screw of the microSD card compartment by hand.
-
Page 41: Decommissioning
FLEXIDOME IP indoor 8000i Decommissioning | en Decommissioning 11.1 Transfer The device should only be passed on together with this Installation manual. 11.2 Disposal Old electrical and electronic equipment This product and/or battery must be disposed of separately from household waste. -
Page 42: Technical Data
| Technical data FLEXIDOME IP indoor 8000i Technical data 12.1 Dimensions Dimensions in mm (inch) 12.2 Specifications Power Input voltage PoE IEEE 802.3af / 802.3at Type 1, Class 3 Power Consumption PoE: 7 W / 11.5 W (typical / maximum) Sensor NDV-8502-R NDV-8503-R... - Page 43 FLEXIDOME IP indoor 8000i Technical data | en Sensitivity NDV-8502-R NDV-8503-R NDV-8504-R NDV-8502-RX NDV-8503-RX Low-light starlight starlight X technology Measured according to IEC 62676 Part 5 (1/25, F1.3) Color 0.0104 lx 0.0509 lx 0.054 lx 0.0061 lx 0.0078 lx Mono 0.0039 lx 0.0086 lx 0.0098 lx 0.0007 lx 0.0008 lx Dynamic range...
- Page 44 | Technical data FLEXIDOME IP indoor 8000i Video streaming NDV-8502-R NDV-8503-R NDV-8504-R NDV-8502-RX NDV-8503-RX 50 fps, 1920 x 25 fps, 3264 x 30 fps, 3840 x 30 fps, 30 fps, 1080 (2.1 MP) 1840 (6 MP) 2160 (8.3 MP) HDR X, HDR X, 60 fps, 1920 x 30 fps, 3264 x 1920 x 1080...
- Page 45 FLEXIDOME IP indoor 8000i Technical data | en Video resolution (H x V) NDV-8502-R NDV-8503-R NDV-8504-R NDV-8502-RX NDV-8503-RX x 432, 720 x 480, 720 x 480, SD 480p (4:3) VGA (4:3) VGA (4:3) 720 x 480, 640 x 480 640 x 480 VGA (4:3) 640 x 480 Camera installation Mirror image On / Off Rotate 0° / 90° upright / 180° / 270° upright...
- Page 46 | Technical data FLEXIDOME IP indoor 8000i Video content analysis NDV-8502-R NDV-8503-R NDV-8504-R NDV-8502-RX NDV-8503-RX Analysis type Intelligent Video Analytics, Camera Trainer Maximum IVA Wide: 5.01 m Wide: 4.72 m - 32.68 m Wide: 5.33 m - 37.34 m detection - 32.68 m (15.49 ft - 107.22 ft) (17.49 ft - 122.51 ft)
- Page 47 FLEXIDOME IP indoor 8000i Technical data | en Local storage Industrial SD cards Extreme lifetime and health monitoring support that provides early service indication. Input/output Ethernet Shielded RJ45 Surge protection Ethernet: 1 kV, 2 kA to ground (8/20 µs pulse) Fiber optics (sold separately)
- Page 48 | Technical data FLEXIDOME IP indoor 8000i Mechanical NDV-8502-R NDV-8503-R NDV-8504-R NDV-8502-RX NDV-8503-RX Weight 1988.45 g 2051.45 g (4.52 lbs) 2040.00 g (4.5 lbs) (4.38 lbs) Mounting Surface mount Color White (RAL9003) Motorized Pan: 0º to +361º; PTR range Tilt: -3º to +85º; Roll: -95º to +95º...
-
Page 49: Support And Training
Troubleshooting – Repair & Exchange – Product Security Bosch Building Technologies Academy Visit the Bosch Building Technologies Academy website and have access to training courses, video tutorials and documents: www.boschsecurity.com/xc/en/support/training/ Bosch Security Systems B.V. 2021-08 | 01 | Installation manual... - Page 50 | Support and training FLEXIDOME IP indoor 8000i 2021-08 | 01 | Bosch Security Systems B.V. Installation manual...
- Page 52 Bosch Security Systems B.V. Torenallee 49 5617 BA Eindhoven Netherlands www.boschsecurity.com © Bosch Security Systems B.V., 2021 202108051735...