Table of Contents
Quick Links
Table of Contents

Related Manuals for Hitachi KH530B


Summary of Contents for Hitachi KH530B
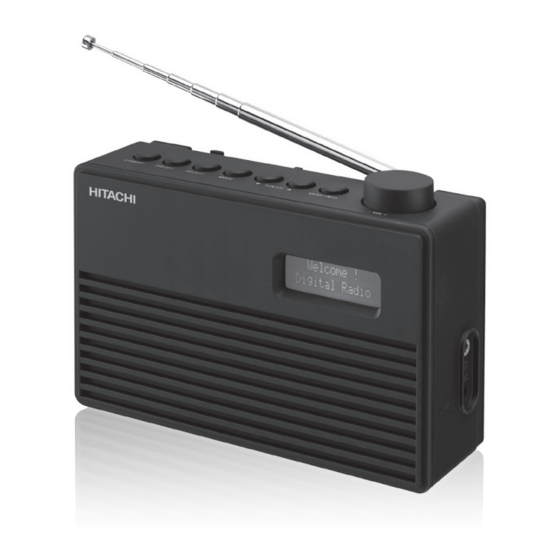
- Page 1 Instruction Manual KH530B PORTABLE DAB+/ FM RADIO...
-
Page 3: Table Of Contents
Contents Safety Warnings ..................7 Unpacking ....................9 Product Overview ..................10 Front View ........................10 Rear View ........................10 Top View ........................11 Side View ........................11 Power Source .................... 12 Mains Power ....................... 12 Battery Power ......................13 Battery Life (Approx. - Page 4 FM Operation .................... 22 Switching from DAB to FM Mode ............... 22 Auto Scan ........................22 Manual Scan ....................... 22 Scan Setting ....................... 22 Audio Setting ......................23 Presetting Stations ....................23 Recalling a Stored Station ..................23 FM Display Modes ....................24 Maintenance .....................
- Page 5 SOME DOS AND DON’TS ON THE SAFE USE OF EQUIPMENT This equipment has been designed and manufactured to meet international safety standards but, like any electrical equipment, care must be taken if you are to obtain the best results and safety is to be assured.
- Page 6 Used correctly, domestic batteries are a safe and dependable source of portable power. Problems can occur if they are misused or abused – resulting in leakage or, in extreme cases, re or explosion. Here are some simple guidelines to safe battery use designed to eliminate any such problems.
-
Page 7: Safety Warnings
Safety Warnings Moisture • Read all the instructions carefully before using the unit and keep them • To reduce the risk of fire, electric for future reference. shock or product damage, do not • Retain the manual. If you pass the expose this unit to rain, moisture, unit onto a third party make sure to dripping or splashing. - Page 8 Interference CAUTION • Do not place the unit on or near RISK OF ELECTRIC SHOCK DO NOT OPEN appliances which may cause electromagnetic interference. If The lightning flash with you do, it may adversely affect the arrowhead symbol, within an operating performance of the unit, equilateral triangle, is intended and cause a distorted picture or...
-
Page 9: Unpacking
Thank you for purchasing your new Hitachi Radio. We recommend that you spend some time reading this instruction manual in order that you fully understand all the operational features it offers. You will also find some hints and tips to help you resolve any issues. -
Page 10: Product Overview
Product Overview Front View 1. Display 2. Speaker Rear View 1. Aerial 2. Battery Compartment... -
Page 11: Top View
Top View 1. STANDBY Button TUN/CH Button 2. PRESET Button 6. MENU/INFO Button 3. SELECT Button 7. –VOL+ Button 4. MODE Button Side View DC 6V 2. DC 6V Socket Earphones Socket... -
Page 12: Power Source
Power Source Mains Power 1. Connecting the unit to any other power source may cause damage the unit. Unwind the mains adapter cable to its full length. Connect the end of the cable to the DC 6V Socket at the right side of the unit and then connect the mains adapter to the mains DC 6V... -
Page 13: Battery Power
Battery Power Insert 4 X 1.5V AA batteries (not included) correctly by following the polarity (+ or –) indications in the battery compartment. Battery Life (Approx. hours) When Using Alkaline (Size AA) Knowing when to Replace the Batteries • When the batteries become weak, the sound becomes weak and distorted. -
Page 14: Connections
Connections Using Earphones Turn down the volume before connecting earphones. Slowly raise the volume with the earphones on until you reach your desired level. DC 6V Long-term exposure to loud music may cause hearing damage. It is best to avoid extreme volume when using earphones, especially for extended periods of time. -
Page 15: Basic Operation
Basic Operation Powering ON/OFF After connecting the mains adapter to the unit and the mains socket, the unit will enter Standby mode. • Press the STANDBY button to switch on the unit. • Press the STANDBY button again to switch the unit back to Standby mode. -
Page 16: Factory Reset
TUN/CH 3. Press the buttons to select the option below: Set time/date TUN/CH Press buttons to adjust the time and date, then press SELECT to confirm. Auto update TUN/CH buttons to select Update Press from Any, DAB, FM or No Update then press SELECT to confirm. -
Page 17: Software Version
Software Version 1. Press and hold MENU/INFO and then press TUN/CH buttons to select. Press SELECT to confirm. TUN/CH buttons to select , then press SELECT 2. Press to confirm. 3. The software version will show on the display. 4. -
Page 18: Dab Operation
DAB Operation If the unit is connected to the mains power for the first time, the unit will show “Welcome! Digital Radio“ and then “00:00:00 Time is not set”. Press the STANDBY button to switch on the unit and perform auto scan. During the scan the display will show “Scanning…”... -
Page 19: Presetting Stations
Presetting Stations You can store up to 10 of your favourite DAB stations to the memory. This will enable you to access your favourite stations quickly and easily. 1. To store a preset, you must first be listening to the station that you would like to save. -
Page 20: Dab Display Modes
DAB Display Modes Every time you press MENU/INFO, the display will show the following display modes. Scrolling text This is a scrolling message giving real-time information, e.g. song titles, news headlines, etc. Signal Strength This show a slide bar to indicate the signal strength, the stronger the signal, the longer the bar will be from left to right. - Page 21 Date Scrolling text This display the current date provided automatically by the broadcaster. Signal Strength Programme Type Ensemble Frequency Signal Error Bitrate and codec Power Used Time Date...
-
Page 22: Fm Operation
FM Operation Switching from DAB to FM Mode To switch the unit from DAB to FM mode, press MODE once. Auto Scan TUN/CH and then press SELECT To search for an FM station, press to start the forward or reverse scanning. ”Scanning…” will show on the display. -
Page 23: Audio Setting
Audio Setting FM is able to search for Stereo or Mono stations. 1. Press and hold MENU/INFO and then press TUN/CH to select -
Page 24: Fm Display Modes
FM Display Modes Every time you press MENU/INFO, the display will show the following display modes. Radio Text Radio Text This is a scrolling message information about the current programme. Programme Type This describes the “Style” or Programme Type “genre” of programme that is being broadcast. -
Page 25: Maintenance
Maintenance Ensure to unplug the unit from the mains socket before cleaning. • To clean the unit, wipe the case with a slightly moist, lint-free cloth. • Do not use any cleaning fluids containing alcohol, ammonia or abrasives. • Do not spray an aerosol at or near the unit. Hints and Tips Problem Solution... -
Page 26: Specifications
Specifications Model KH530B Mains Adapter Input AC 100–240V ~50/60Hz, 0.3A Output DC 6V 0.5A Battery DC 1.5V x 4, AA size Speaker Output Power 1.0 W RMS Radio Frequency FM 87.5 – 108 MHz DAB 174 – 240 MHz Dimension... - Page 28 Importer: Elkjøp, Solheimsveien 6-8, PB 153, NO 1471 Lørenskog, Norge Norge: 815 32 000 Sverige: 0771 115 115 Danmark: 70 80 70 70 Suomi: 020321321 Manufacturer: Hitachi Europe Ltd., Whitebrook Park, Lower Cookham Road, Maidenhead, Berkshire SL6 8YA U.K. 227-6204AP-0A3...