Table of Contents
Table of Contents

Related Manuals for Hitachi KHI340E


Summary of Contents for Hitachi KHI340E
- Page 1 Instruction Manual KHI340E Internet FM Radio...
-
Page 3: Table Of Contents
Contents Safety Warnings ....................7 Unpacking ....................... 9 Product Overview ..................10 Front View........................10 Rear View ......................... 10 Remote Control .....................11 Remove the Insulating Strip from the Remote Control ......11 Battery Replacement for the Remote Control ..................12 Handling the Battery ....................12 Handling the Remote Control .................. - Page 4 Media Player Operation ................26 UPnP server ........................27 Playback via UPnP ......................28 Windows Shares ......................28 Playback ........................... 29 Stop ........................... 29 Previous and Next ......................29 Shuffle and Repeat Mode ..................29 FM Operation ....................30 Auto Scan ........................30 Manual Scan ........................
- Page 5 SOME DOS AND DON’TS ON THE SAFE USE OF EQUIPMENT This equipment has been designed and manufactured to meet international safety standards but, like any electrical equipment, care must be taken if you are to obtain the best results and safety is to be assured.
- Page 6 Used correctly, domestic batteries are a safe and dependable source of portable power. Problems can occur if they are misused or abused – resulting in leakage or, in extreme cases, re or explosion. Here are some simple guidelines to safe battery use designed to eliminate any such problems.
-
Page 7: Safety Warnings
Safety Warnings Naked Flames • Read all the instructions carefully before using the unit and keep • Never place any type of candle or them for future reference. naked flame on the top of or near the unit. • Retain the manual. If you pass the unit onto a third party make sure Moisture to include this manual. - Page 8 Mains Cable • Please dispose of batteries correctly by following the • Make sure the unit or the unit guidance in this manual. stand is not resting on top of the mains adapter cable, as the Supervision weight of the unit may damage • Children should be supervised to the cable and create a safety ensure that they do not play with...
-
Page 9: Unpacking
Thank you for purchasing your new HITACHI Internet FM Radio. We recommend that you spend some time reading this instruction manual in order that you fully understand all the operational features it offers. You will also find some hints and tips to help you resolve any issues. -
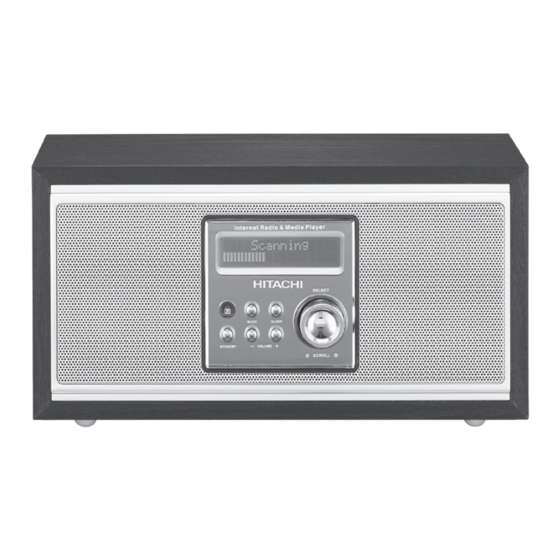
Page 10: Product Overview
Product Overview Front View Internet Radio & Media Player SELECT BACK SLEEP – STANDBY VOLUME SCROLL LCD Display SLEEP Button SCROLL Speakers Control (Rotate) BACK Button SELECT Button (Press) VOLUME +/– Buttons Remote Sensor STANDBY Button Rear View NETWORK AUX IN LINE OUT AC~100-240V FM ANT... -
Page 11: Remote Control
Remote Control STANDBY Button STANDBY BROWSE SLEEP Button SNOOZE Button SEEK SLEEP SNOOZE BACK Button (P2) Button BACK REPLY (P1) Button MODE (P4) Buttons SELECT P7 Button VOLUME +/– Buttons MODE 10. BROWSE Button 11. SEEK Buttons 12. REPLY Button 13. -
Page 12: Battery Replacement For The Remote Control
Battery Replacement for the Remote Control The remote control requires a CR2032, 3V Lithium battery. Slide and hold the battery release tab in the direction of the arrow. Pull out the battery holder and remove the old battery. Replace with a new one battery. Insert the battery holder back into the remote control. -
Page 13: Handling The Remote Control
Handling the Remote Control • Take care of your fingernails when you press and hold the battery release tab. • Do not drop or cause impact to the remote control. • Do not spill water or any liquid on the remote control. •... -
Page 14: Connections
Connections Mains Power • This unit was designed to operate with an AC 100-240V~50/60Hz power supply. • Connecting the unit to any other power source may cause damage to the unit. Unwind the mains cable to its full length. Connect the supplied power cable socket to the rear of the unit and then to the mains socket. -
Page 15: Connecting To Auxiliary Equipment
Connecting to Auxiliary Equipment Connect the AUX IN socket at the rear of the unit to the line output sockets on the auxiliary equipment using 3.5mm to RCA stereo audio cables (not included), as illustrated below. AUDIO OUT NETWORK AUX IN LINE OUT White AC~100-240V... -
Page 16: Connecting To The Internet
Connecting to the Internet Connecting to Your Home Network This radio can be connected to a local area network (LAN) via the LAN port at the rear of the unit. Wired network Connect the NETWORK socket on the unit to the corresponding port on your Router using a commercially available LAN or Ethernet cable (CAT5 or better with RJ45 connector). -
Page 17: Wireless Network
Wireless network Another connection option is to use an Access Point or a wireless router. In the example configuration for a wireless connection below, the unit would be able to access content from your PC. The network configuration and connection method may vary depending on the equipment in use and the network environment. - Page 18 Connecting to Computer This radio can be connected to PC via a wired or wireless modem/router. To playback music files from PC, make sure the unit and computer are in the same network. NETWORK AUX IN LINE OUT AC~100-240V FM ANT Modem/Router To the NETWORK Socket...
-
Page 19: Switching On Your Unit For The First Time
Switching on Your Unit for the First Time When you first connect the unit to the mains socket, the unit will be in STANDBY mode. Press the STANDBY button on the unit or the remote control to switch on the unit. For initial use, the unit will automatically enter the Network mode and start the auto scanning for Internet... -
Page 20: General Operation
Turn the SCROLL control on the unit or press the SCROLL buttons on the remote control to select “END”, and then press the SELECT button on the unit or the remote control to complete type in. If the WEP/WPA key input is correct, the display will show “Network Ok”. -
Page 21: Selecting Modes
Selecting Modes Press the SELECT button on the unit or the remote control to • display the menu. Turn the SCROLL control on the unit or press the SCROLL • buttons on the remote control repeatedly to select the mode as follows. -
Page 22: The Menu Structure
The Menu Structure Internet Radio Location Genre Search Media Player UPnP Servers Windows Shares Playback Mode Shuffle Repeat Queue Auxiliary Input Alarm Clock Set Alarms Disable all Sleep Timer Alarm 1 Alarm 2 Alarm 3 Alarm 4 Alarm 5 Settings Network Config Scan for networks Version... -
Page 23: Internet Radio Operation
Internet Radio Operation If the unit is connected to the mains power and then switched on from standby for the first time, the unit will automatically enter into the Internet Radio mode and perform network connection. During the scan the display will show “Initialising Network” and “Scanning” together with a slide bar that indicates the progress of the scan. -
Page 24: Genre
Genre Turn the SCROLL control on the unit or press the SCROLL buttons on the remote control to select, and then press the SELECT button on the unit or the remote control to confirm. Turn the SCROLL control on the unit or press the SCROLL buttons on the remote control to select the genre of your choice. -
Page 25: Storing Stations
Storing Stations You can store up to 8 of your favourite stations to the memory. This will enable you to access your favourite stations quickly and easily. To store a preset, you must first be listening to the station that you would like to save. -
Page 26: Media Player Operation
What is displayed will depend on the station you have chosen. The following steps are only a guide. When you choose, the display shows the names of the programmes. Turn the SCROLL control on the unit or press the SCROLL buttons on the remote control to choose the program you want, and then press the SELECT button on the unit or the remote control to confirm. -
Page 27: Upnp Server
Turn the SCROLL control on the unit or press the SCROLL buttons on the remote control to select Media Player mode, and then press the SELECT button on the unit or the remote control to confirm. UPnP server This unit can connect to a PC with Windows Media Player 11 or above, This allows you to access your media library on your PC. -
Page 28: Playback Via Upnp
Playback via UPnP Once the UPnP server is configured to share media files with the Internet radio, you can playback the files via UPnP. During UPnP Servers mode, turn the SCROLL control on the unit or press the SCROLL buttons on the remote control to select a desired media category that is available from the PC UPnP server. -
Page 29: Playback
Playback Select your desired media and then press the SELECT button on the unit or the remote control to start playback. During playback, press the button on the remote control to pause playback. Press the button again to resume normal playback. Stop Press the button to stop the playback. -
Page 30: Fm Operation
FM Operation Press the SELECT button on the unit or the remote control to display the menu. Turn the SCROLL control on the unit or press the SCROLL buttons on the remote control to select FM mode, and then press the SELECT button on the unit or the remote control. -
Page 31: Recalling A Stored Station
Recalling a Stored Station Once you have saved a station to one of the preset buttons, you can recall it by pressing the P1-P8 buttons on the remote control. The stored stations will be saved into the memory and turning off the power will not erase it. -
Page 32: Alarm Clock Setting
Alarm Clock Setting Press the SELECT button on the unit or the remote control to display the menu. Turn the SCROLL control on the unit or press the SCROLL buttons on the remote control to select Alarm Clock mode, and then press the SELECT button on the unit or the remote control. -
Page 33: To Cancel The Alarm
Turn the SCROLL control on the unit or press the SCROLL buttons on the remote control to choose which days the alarm is to be set for. • Once – the alarm will be active one time. • Every Day – the alarm will be active Everyday • Weekly –... -
Page 34: Settings The Sleep Timer
Turn the SCROLL control on the unit or press the SCROLL buttons on the remote control to select “Disable all” to disable all alarms settings and reset to default. To turn off individual alarm, turn the SCROLL control on the unit or press the SCROLL buttons on the remote control to select the desired alarm and then press the SELECT button on the... -
Page 35: Other Connections
Other Connections Auxiliary Input Before connecting to the mains socket, use the AUX IN cable (not included) to connect your audio device through the AUX IN socket at the rear of the unit. Connect the mains cable to the mains socket. The unit will enter Standby mode. -
Page 36: Settings
Settings Press the SELECT button on the unit or the remote control to display the menu. Turn the SCROLL control on the unit or press the SCROLL buttons on the remote control to select Settings mode, and press the SELECT button on the unit or the remote control to confirm. If you make a wrong selection, press the BACK button to go back to the previous selection at anytime. -
Page 37: Version
Version Turn the SCROLL control on the unit or press the SCROLL buttons on the remote control to select, and then press the SELECT button on the unit or the remote control to view the software version of this unit. Service Pack Serial Number Product Code... -
Page 38: Factory Reset
Factory Reset Turn the SCROLL control on the unit or press the SCROLL buttons on the remote control to select. Press the SELECT button on the unit or the remote control to confirm. Turn the SCROLL control on the unit or press the SCROLL buttons on the remote control to select YES, and then press the SELECT button on the unit or the remote control to start the system reset. -
Page 39: Backlight
Turn the SCROLL control on the unit or press the SCROLL buttons on the remote control to adjust the year digits, and then press the SELECT button on the unit or the remote control to confirm. The date and time settings are now complete. Backlight Turn the SCROLL control on the unit or press the SCROLL... -
Page 40: Maintenance
Maintenance Cleaning the Unit Ensure to unplug the unit from the mains socket before cleaning. • To clean the unit, wipe the case with a slightly moist, lint-free cloth. • Do not use any cleaning fluids containing alcohol, ammonia or abrasives. -
Page 41: Hints And Tips
Hints and Tips If a problem does occur, it may often be due to something very minor. The following table contains various tips. Menu Description No power. • Ensure the mains plug is properly connected. • Make sure that the unit is turned on. The remote control • Use the remote control near the unit. -
Page 42: Specifications
Specifications Model KHI340E Media file supported AAC, MP3, WAV and WMA Wi-Fi Connectivity 802.11b/g standards Terminals: Network Socket x 1 Earphones Socket x 1 LINE OUT Socket x 1 AUX IN Socket x 1 Frequency Range 87.5 – 108 MHz... - Page 44 Notes for battery disposal The batteries used with this product contain chemicals that are harmful to the environment. To preserve our environment, dispose of used batteries according to your local laws or regulations. Do not dispose of batteries with normal household waste. For more information, please contact the local authority or your retailer where you purchased the product.