Table of Contents
Table of Contents

Related Manuals for GE ImageQuant LAS 4000


Summary of Contents for GE ImageQuant LAS 4000
- Page 1 GE Healthcare Getting Started with ImageQuant™ LAS 4000 Original instructions...
-
Page 3: Table Of Contents
Installing Epi light sources ............................. Operation ................................Operation overview ................................Preparation .................................... 4.2.1 Starting the ImageQuant LAS 4000 and Control Software ................4.2.2 Preparing the ImageQuant LAS 4000 for exposure ................... 4.2.3 Placing the sample ................................Performing an exposure .............................. - Page 4 Problems with the exposed image ..........................Strange sounds or odors are perceived ........................Problems with ImageQuant LAS 4000 ........................Problems with ImageQuant LAS 4000 Control Software .................. Message “ImageQuant LAS 4000 hardware error occurred" ................ Error messages and countermeasures ........................
-
Page 5: Introduction
ImageQuant LAS 4000 User Manual. Prerequisites In order to operate the ImageQuant LAS 4000 in the way it is intended, the following prerequisites must be fulfilled: • You should have a general understanding of how a PC and Windows™ work. - Page 6 The ImageQuant LAS 4000 is a camera system that produces digital images of chemiluminescent, dyed or fluorescent gels and membranes. The ImageQuant LAS 4000 is intended for research use only, and shall not be used in any clinical procedures, or for diagnostic purposes.
-
Page 7: Regulatory Information
1 Introduction 1.2 Regulatory information 1.2 Regulatory information This section describes the directives and standards that are fulfilled by the ImageQuant LAS 4000. Manufacturing information The Declaration of Conformity includes the following information: Requirement Content Name and address of manufacturer GE Healthcare Bio-Sciences AB Björkgatan 30, SE-751 84 Uppsala, Sweden... -
Page 8: The Imagequant Las 4000
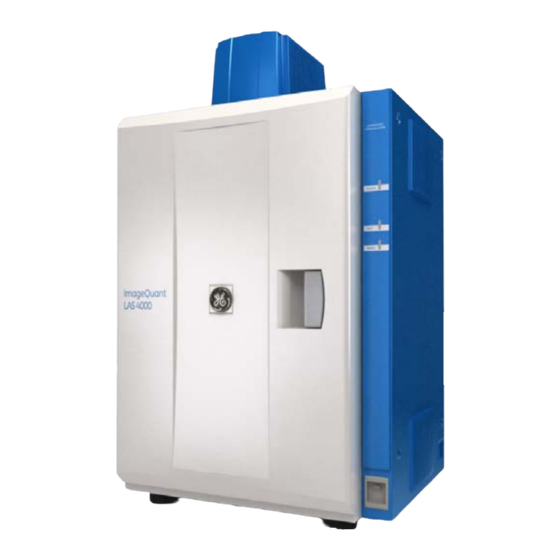
• connected to other CE marked GE Healthcare instruments, or • connected to other products recommended or described in the user documentation, and • used in the same state as it was delivered from GE Healthcare, except for alterations described in the user documentation. - Page 9 1 Introduction 1.3 The ImageQuant LAS 4000 • Image capture and analysis is simplified using the ImageQuant LAS 4000 Control Software in combination with GE Healthcare's analysis software, ImageQuant TL. ImageQuant LAS 4000 hardware components The following illustrations and table show the main hardware components of the ImageQuant LAS 4000.
-
Page 10: Imagequant Las 4000 Control Software
Power switch Turn the ImageQuant LAS 4000 on or off Computer The ImageQuant LAS 4000 is operated using a PC running Windows XP or VISTA. It is not designed for standalone operation. Note: The computer used should be certified according to IEC/UL 60950. - Page 11 The state of the CCD and exposure type Setting state, IDX Current settings of tray position and illumination inside the dark Method/Tray position Set the detection method and tray position Focusing Adjust the focus Start Start the exposure Getting Started with ImageQuant LAS 4000 28-9607-59 AB...
-
Page 12: Safety Instructions
2.1 Safety precautions Introduction The ImageQuant LAS 4000 is powered by mains voltage and is used to image samples that may be hazardous. Before installing, operating or maintaining the equipment, you must be aware of the hazards described in the user documentation. Follow the instructions provided to avoid personal injury or damage to the equipment. - Page 13 Do not damage the power supply cord by bending, twisting, heating or allowing them to become pinned under the equipment. Using damaged power cords could result in fire or electric shock. If the power supply cords are damaged, contact your local GE Healthcare representative for replacements. WARNING Do not place the equipment on unstable tables or on inclined surfaces, as the equipment could be dropped or fall, resulting in injury.
- Page 14 Place the instrument at least 20 cm away from walls or other equipment to ensure adequate cooling. CAUTION Do not open the door of the instrument too wide, and do not apply excessive force to it. Getting Started with ImageQuant LAS 4000 28-9607-59 AB...
- Page 15 CAUTION Do not place heavy objects on the equipment. These may fall and cause injury. CAUTION Only one ImageQuant LAS 4000 should be connected to a particular PC. Connecting more than one may result in malfunction. CAUTION Turn the power switch off before connecting or disconnecting cables, otherwise the equipment may malfunction.
- Page 16 The UV trans tray will deteriorate with repeated UV radiation. This is normal. Replace the UV trans tray when this deterioration becomes noticable in exposed images. NOTICE Do not disconnect the USB cable while the Control Software is running. Getting Started with ImageQuant LAS 4000 28-9607-59 AB...
- Page 17 2.1 Safety precautions Maintenance WARNING Do not remove the covers of the camera head or the ImageQuant LAS 4000. High temperature and high voltage parts could result in burns or electric shock. Contact your local GE Healthcare representative to request internal inspection, servicing, and repairs.
-
Page 18: Labels
The names of parts on the components are also shown. ImageQuant LAS 4000 serial number The ImageQuant LAS 4000 serial number is located on a label on the back of the instrument. 123456 Symbols used in safety labels... - Page 19 This symbol indicates that the product contains hazardous materials in excess of the limits established by the Chinese standard SJ/T11363-2006 Requirements for Concen- tration Limits for Certain Hazardous Substances in Electronics. Intelligent dark box (IDX) Camera cable Getting Started with ImageQuant LAS 4000 28-9607-59 AB...
- Page 20 2.2 Labels Camera head Lens mount Mechanical shutter Bottom Connector for IDX LAS High Sens. lens F0.85 43mm LAS High Sens. Lens Label (Back side) End cap Mount Lens control connector Lens cap Getting Started with ImageQuant LAS 4000 28-9607-59 AB...
- Page 21 The following diagram shows the UV Epi lights. Other Epi light pairs are labelled corresponding to their type. Guide pin Optical filter and LED Illumination Distinguishing labels for right and left Retaining screw hole Connector (1 position) Getting Started with ImageQuant LAS 4000 28-9607-59 AB...
- Page 22 2 Safety instructions 2.2 Labels White light table Diffusion board Power supply connector UV transilluminator Power supply connector Mercury-containing Products Label UV glass filter Getting Started with ImageQuant LAS 4000 28-9607-59 AB...
- Page 23 2 Safety instructions 2.2 Labels Cal plates Sample trays The Epi tray is shown here. The White trans tray and UV trans tray are labelled correspondingly. Getting Started with ImageQuant LAS 4000 28-9607-59 AB...
-
Page 24: Emergency Procedure
Recycling of hazardous substances The lamps in the ImageQuant LAS 4000 may contain mercury vapour. These must be disposed of in manner compliant with local regulations. Getting Started with ImageQuant LAS 4000 28-9607-59 AB... - Page 25 Waste of electrical and electronic equipment must not be disposed as unsorted municipal waste and must be collected separately. Please contact an authorized representative of the manufacturer for information concerning the decommissioning of the equipment. Getting Started with ImageQuant LAS 4000 28-9607-59 AB...
-
Page 26: Installation
Humidity 30% to 70%, non-condensing (Storage: 5% to 100%, non-condensing) 3.2 Transport The ImageQuant LAS 4000 weighs approximately 57 kg and requires at least two people to lift and move it. Before moving the instrument: 1 Turn off the instrument. -
Page 27: Installation Of The Software
3 Installation of ImageQuant LAS 4000 3.4.1.1 Installation of the USB Control Driver (Windows XP) Note: The computer and ImageQuant LAS 4000 must not be connected with a USB cable during the operation. 1 Open the control panel and select Printers and Other Hardware. - Page 28 7 Select Show All Devices and click the Next button. 8 Click the Have Disk button. 9 Insert the ImageQuant LAS 4000 CD and click the Browse button. 10 Select to install the driver from the ImageQuant LAS 4000 CD.
- Page 29 17 Click the Finish button to complete the driver installation. 3.4.1.2 Installation of the USB Function driver (Windows XP) 1 Connect the computer and the ImageQuant LAS 4000 with a USB cable and turn ON the power switch of ImageQuant LAS 4000.
-
Page 30: Installation (Windows Vista)
3 Installation of ImageQuant LAS 4000 Control Software 3.4.2.1 Installation of the USB Control Driver (Windows VISTA) Note: The computer and ImageQuant LAS 4000 must not be connected with a USB cable during the operation. Note: During software installations, you may be asked to confirm your actions in a dialog with the text Windows needs your permission to continue. - Page 31 5 Select Show All Devices and click the Next button. 6 Click the Have Disk button. 7 Insert the ImageQuant LAS 4000 Control Software CD and click the Browse button. 8 Select to install the driver from the ImageQuant LAS 4000 Control Software CD.
- Page 32 Windows needs your permission to continue. Enter an administrator password, if prompted, then click Continue to proceed with the installation. 1 Connect the computer and the ImageQuant LAS 4000 with a USB cable and turn ON the power switch of ImageQuant LAS 4000.
-
Page 33: Installation Of Hardware
3 In the ImageQuant LAS 4000 - InstallShield Wizard dialog, click the Next button. 4 Read the license text. If the license agreement is not acceptable please contact a GE Healthcare representative, see the back cover of this manual for contact information. -
Page 34: Attaching The Camera Head
2 Attach the two screws fixing the camera head. Two screws 3 Connect the camera cable and USB cable. USB cable Camera cable 4 Proceed to install the lens. See Section 3.5.3 Installing the lens, on page 35. Getting Started with ImageQuant LAS 4000 28-9607-59 AB... -
Page 35: Connecting The Camera Head To The Computer
3.5.2 Connecting the camera head to the computer 3.5.2 Connecting the camera head to the computer Connect the USB cable from the USB connector of the ImageQuant LAS 4000 camera head to one of the USB ports of the computer. - Page 36 Turn the knurling ring until it is securely fixed. Knurling ring Connector of the lens cable Note: Be sure to connect the lens cable. Otherwise, the high sensitivity lens cannot be recognized. This may also cause malfunction. Getting Started with ImageQuant LAS 4000 28-9607-59 AB...
-
Page 37: Attaching A Filter To The Filter Changer
ImageQuant LAS 4000 Control Software. Note: Before installing or changing filters in the filter changer, the ImageQuant LAS 4000 Control Software should be installed and running. For instructions on installing the software, refer to Section 3.4 Installation of the software, on page 27. - Page 38 1 Ensure that the camera head and PC are connected. Turn on the instrument and the PC, and start the ImageQuant LAS 4000 Control Software. 2 Close the instrument door 3 Select Filter Customization in the Option menu in the ImageQuant LAS 4000 Control Software main window. 4 Click the Filter down button.
-
Page 39: Installing A Transmitted Light Source
This section describes how to insert the UV transilluminator or the white light table into the IDX. 1 Push the transmitted light source along the guide at the bottom of the IDX. Getting Started with ImageQuant LAS 4000 28-9607-59 AB... -
Page 40: Installing Epi Light Sources
The tray should be at tray position 4 before installing Epi lights. If the tray is higher, then it should be lowered to tray position 4 using the ImageQuant LAS 4000 Control Software before attaching the lights, as described below. - Page 41 • The Epi lights are clearly labelled L for the left and R for the right sides. • Install the Epi lights in matching pairs only. If Epi lights with different wavelengths are used, the intended image will not be obtained. Getting Started with ImageQuant LAS 4000 28-9607-59 AB...
-
Page 42: Operation
4 Operation 4 Operation This chapter describes how to operate the ImageQuant LAS 4000 and how samples are to be placed in the instrument. The steps required to record an image are also described. 4.1 Operation overview The general flow of operation is as follows:... -
Page 43: Preparing The Imagequant Las 4000 For Exposure
Changing the lens Two lenses can be used with the ImageQuant LAS 4000, an F0.85 43mm LAS High Sens. lens, and an optional F1.8 24mm wide view lens. The wide view lens can image samples up to 250 x 250 mm in size. - Page 44 4 Operation 4.2 Preparation 4.2.2 Preparing the ImageQuant LAS 4000 for exposure Changing the light sources Both trans (transmitted) and epi (incident) light sources are available for exposure with the ImageQuant LAS 4000. Type Name Peak wavelength UV transilluminator 312 nm...
- Page 45 The tray should be at tray position 4 before installing Epi lights. If the tray is higher, then it should be lowered to tray position 4 using the ImageQuant LAS 4000 Control Software before attaching the lights, as described below.
- Page 46 4 Operation 4.2 Preparation 4.2.2 Preparing the ImageQuant LAS 4000 for exposure 5 Holding the latch with one hand, remove the Epi light by pulling it gently outwards. 6 Lift up and remove the Epi light. 7 Before installing the new Epi light, ensure that the latch is sprung open (upwards).
- Page 47 4 Operation 4.2 Preparation 4.2.2 Preparing the ImageQuant LAS 4000 for exposure 9 Push the Epi light while holding the latch open, and slide it inwards until a click sound is heard. 10 Lower the latch to lock the Epi light in place.
- Page 48 4.2 Preparation 4.2.2 Preparing the ImageQuant LAS 4000 for exposure Changing or installing a filter Optical filters can be inserted in the filter turrent and registered in the ImageQuant LAS 4000 Control Software as follows: 2, 5 1 Ensure that the camera head and PC are connected. Turn on the instrument and the PC, and start the ImageQuant LAS 4000 Control Software.
-
Page 49: Placing The Sample
4 Operation 4.2 Preparation 4.2.2 Preparing the ImageQuant LAS 4000 for exposure 6 Turn the filter changer so the desired position is easily accessible. If a filter is already in place at this position, unscrew it carefully and put it back in its cover. - Page 50 Gel sheet The gel sheet can be used repeatedly. After use, wash it with mild detergent, rinse Note: with water then dry well. A gel sheet can be reused about 20 times. Getting Started with ImageQuant LAS 4000 28-9607-59 AB...
- Page 51 Line up the sample using the appropriate dents. For NP tray • The NP tray is to be used at tray position 3. Note: The readable area will be slightly smaller using the F1.8 wide view lens. Getting Started with ImageQuant LAS 4000 28-9607-59 AB...
-
Page 52: Performing An Exposure
LAS 4000 User Manual. Images may also be obtained by repeated, incremental or programmed exposure of a sample. For detailed instructions on these types of exposure, refer to the ImageQuant LAS 4000 User Manual. 4.3.1 Workflow The workflow for exposing a sample and recording an image is as follows:... -
Page 53: Choose Method And Tray Position
Choose method and tray position Adjust the focus Set exposure sensitivity Expose Save the image 4.3.2 Choose method and tray position Step Action Click the Method/Tray position button. Result: The Method/Tray position dialog opens. Getting Started with ImageQuant LAS 4000 28-9607-59 AB... - Page 54 Fluorescence: DAPI Sample digitization using White Epi light Digitization: Epi-illumination Sample digitization using White light table Digitization: Trans-illumination Select Tray position according to the sample size or type. Click the OK button Getting Started with ImageQuant LAS 4000 28-9607-59 AB...
-
Page 55: Focus Adjustment
Check that the sample is correctly positioned and focus the image. Click the Return button. 4.3.4 Set exposure type and exposure time For a detailed description of the different exposure types, refer to the ImageQuant LAS 4000 User Manual. Step Action Select the Exposure Type from the drop-down list. -
Page 56: Set Exposure Sensitivity
1536 x 1024 High 768 x 512 1536 x 1024 Super 384 x 256 1536 x 1024 Ultra 192 x 128 1536 x 1024 High Binning 768 x 512 768 x 512 Getting Started with ImageQuant LAS 4000 28-9607-59 AB... -
Page 57: Exposure
Select Sensitivity/Resolution... in the Help menu. This displays a diagram that describes the relation between sensitivity and resolution. 4.3.6 Exposure Step Action Click the Start button to begin exposure. Note: The orange Busy LED lights on the ImageQuant LAS 4000 during exposure. Getting Started with ImageQuant LAS 4000 28-9607-59 AB... -
Page 58: Save The Image
Adjust the dynamic range by dragging the limits with the mouse. The gradation conversion curve can be toggled between Linear or Sigmoid. The gradation can be altered by dragging with the mouse. Getting Started with ImageQuant LAS 4000 28-9607-59 AB... -
Page 59: After Exposure
Click the Complete button. Result: The current display returns to the initial screen. 4.4 After exposure If the ImageQuant LAS 4000 will not be used for some time, it should be switched off as follows. Step Operation Select Quit from the File menu. - Page 60 Image- Quant LAS 4000 Control Software. This is useful if more samples will be exposed later in the day. Switch off the computer. Turn off the ImageQuant LAS 4000 power switch. Getting Started with ImageQuant LAS 4000 28-9607-59 AB...
-
Page 61: Maintenance
5.1 ImageQuant LAS 4000 Use a soft dry cloth to clean the exterior of the ImageQuant LAS 4000. For marks that are hard to remove, wipe with a soft cloth slightly dampened with a neutral detergent, then wipe with a new clean, dry cloth. -
Page 62: Lens, Filters, Np Tray And Epi Light Sources
Wear gloves while cleaning. There may be residues of hazardous chemicals. 5.5 Regular inspections Regularly inspect the ImageQuant LAS 4000 to ensure the following: • The power supply plug is firmly secured in the power outlet. • The power cable and supply plug do not become overheated. - Page 63 5 Maintenance 5.5 Regular inspections • The lights do not remain lit, and the tray rail or filter changer do not move when the IDX door is opened. Getting Started with ImageQuant LAS 4000 28-9607-59 AB...
-
Page 64: Troubleshooting
Take the following procedures if an error occurs: 1 Take note of the error code and error message on the monitor. 2 Turn off the power to ImageQuant LAS 4000 and the analysis PC, then turn them on again after about ten seconds. -
Page 65: Problems With The Exposed Image
Avoid direct sunlight sunlight Dew condensation in Quit the ImageQuant LAS 4000 Control the optical system Software and wait until the operation en- The image appears misty vironment meets the required specifica- tions Getting Started with ImageQuant LAS 4000 28-9607-59 AB... -
Page 66: Strange Sounds Or Odors Are Perceived
Healthcare representative ImageQuant LAS 4000 beeps on and The door is open Close the door. The subsequent processing off (four times, at intervals of three should start. minutes) and the Busy LED blinks Getting Started with ImageQuant LAS 4000 28-9607-59 AB... -
Page 67: Problems With Imagequant Las 4000
Lock the Epi lights in place. Foreign object is present Remove the foreign object in the door sensor Software is not in the Click the Focusing button in the soft- Focusing mode ware Getting Started with ImageQuant LAS 4000 28-9607-59 AB... -
Page 68: Problems With Imagequant Las 4000 Control Software
6.4 Problems with ImageQuant LAS 4000 Control Software If the error persists even after the following countermeasures have been taken, fill in the necessary items and the error code in the Service report fax sheet at the end of the User Manual. -
Page 69: Message "Imagequant Las 4000 Hardware Error Occurred
6 Troubleshooting 6.4 Problems with ImageQuant LAS 4000 Control Software Phenomenon Cause Countermeasure The exposure time is too Make the exposure time longer short The light source is not correct Install the correct light source After exposure, no image is displayed... - Page 70 6 Troubleshooting 6.5 Message “ImageQuant LAS 4000 hardware error occurred" SensKey SensCode Content Countermeasure B001 Lifting table error during Restart the ImageQuant LAS 4000 and Image- startup diagnosis Quant LAS 4000 Control Software B002 Filter changer error during startup diagnosis...
-
Page 71: Error Messages And Countermeasures
For a description of hardware errors, see Section 6.5 Message “ImageQuant LAS 4000 hardware error occurred" , on page 69. - Page 72 CCD to LAS 4000, reduce the air tem- cool perature around the instru- ment, and then restart Image- Quant LAS 4000 and Image- Quant LAS 4000 Control Soft- ware Getting Started with ImageQuant LAS 4000 28-9607-59 AB...
- Page 73 Automatic exposure is only available used when the sensitivity mode when using standard sensivity in the is High, Super or Ultra digitization method. Automatic exposure cannot be used at the sensitivity or resolution. Getting Started with ImageQuant LAS 4000 28-9607-59 AB...
- Page 74 Please run CCD calibration for the in the Option menu. Perform exposure time range from 1/100 sec calibration for both over 2 to 2 hours. hours and from 1/100 sec to 2 hours. Getting Started with ImageQuant LAS 4000 28-9607-59 AB...
- Page 75 The save and launch function failed. Failed to launch the exter- Choose an application to nal application. The desig- launch in Launch Application nated file cannot be found. in Preference in the Edit menu Getting Started with ImageQuant LAS 4000 28-9607-59 AB...
- Page 76 Check that the correct sample calibration for Cy3 tray position 4. age exposure failed tray and calibration plate are Please check that the correct tray in place and re-calibrate and calibration plate were used. Getting Started with ImageQuant LAS 4000 28-9607-59 AB...
- Page 77 Failed to open End-User Licence Agreement. Please note that a PDF reader (e.g. Adobe Reader) is needed. Failed to open the Getting Started guide. Please note that a PDF reader (e.g. Adobe reader) is needed. Getting Started with ImageQuant LAS 4000 28-9607-59 AB...
- Page 78 Edit menu - preference - Print Adjust Error message Meaning Countermeasure The range of % value is 90-110. The supplied value is not Enter a suitable value Please set a suitable value within the appropriate interval. Getting Started with ImageQuant LAS 4000 28-9607-59 AB...
-
Page 79: Reference Information
16 bit Focusing: 8 bit Exposure time 1/100 seconds to 2 hours (Images can be continuously exposed for up to 30 hours using ImageQuant LAS 4000 Control Software.) Lens High-sensitivity lens F0.85 43 mm Wide view lens F1.8 24 mm... - Page 80 : 224 x 161 x 252 mm (W/H/D) : 510 x 730 x 480 mm (W/H/D) Weight Camera head : 3.4 kg : 49 kg (not including the light source, lens, and tray) High-sensitivity lens : 4.5 kg Getting Started with ImageQuant LAS 4000 28-9607-59 AB...
- Page 81 : 50/60 Hz Rated input current : 3.0-1.5 A AC power cable Use the cable supplied with the instrument. Specifications of cables required for the use of ImageQuant LAS 4000 Voltage : 100-120 V Plug/connector : 125 V AC, 13 A Cable : SJT3 x 16AWG 60°C...
- Page 82 Floor oscillation conditions (1) Operating time Oscillation : 0.03G (5 to 60 Hz) Impact : 1G (2) Non-operating time Oscillation : 0.4G (5 to 60 Hz) Impact : 2G Getting Started with ImageQuant LAS 4000 28-9607-59 AB...
- Page 83 Rated pollution applied : Pollution Degree 2 Analysis unit interface USB 2.0 Do not connect the ImageQuant LAS 4000 USB connector to a computer not certified with UL60950-1 (UL listed) and IEC60950-1. Others Noise : 70 dB (A) or lower...
-
Page 84: Minimum Computer Requirements
Monitor resolution More than 1280 × 1024 pixels 7.3 Literature For further information on the ImageQuant LAS 4000 and the ImageQuant LAS 4000 Control Software, refer to the ImageQuant LAS 4000 User Manual. 7.4 Ordering information For ordering information visit www.gelifesciences.com/quantitative_imaging. - Page 86 First published Oct. 2009 Björkgatan 30 All goods and services are sold subject to the terms and conditions of sale of the company within GE 751 84 Uppsala Healthcare which supplies them. A copy of these terms and conditions is available on request. Contact your local GE Healthcare representative for the most current information.