Silvercrest RT2000 Operating And Safety Instructions Manual
Programmable radiator thermostat
Hide thumbs
Also See for RT2000:
- Operating manual (54 pages) ,
- Operating manual (54 pages) ,
- Operating manual (54 pages)
Table of Contents
Olympia Business Systems Vertriebs GmbH
Zum Kraftwerk 1
D-45527 Hattingen
www.olympia-vertrieb.de
Information Status
04/2014 - Ident.-No.: 042014-3
Gi
P
r
t
rogrammable
adiator
hermostat
rt2000
Operating and Safety Instructions
IAN 101034
Gi
Before starting to read the information, fold out the page containing
the illustrations and then familiarise yourself with all the functions pro-
vided by the device.
Gi
Operating and Safety Instructions
Gi
Table of Contents

Related Manuals for Silvercrest RT2000


Summary of Contents for Silvercrest RT2000
- Page 1 Olympia Business Systems Vertriebs GmbH Zum Kraftwerk 1 D-45527 Hattingen www.olympia-vertrieb.de rogrammable adiator hermostat rt2000 Information Status Operating and Safety Instructions 04/2014 - Ident.-No.: 042014-3 Operating and Safety Instructions IAN 101034...
-
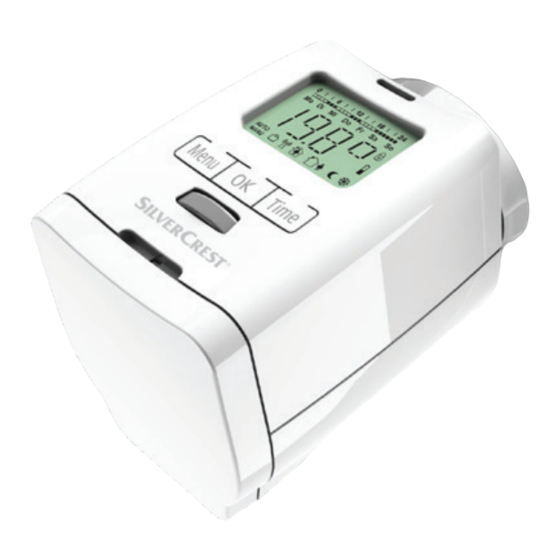
Page 2: Product View And Parts
– opens the main menu (starting from the standard Scope of Delivery MENU display); when a menu is open, the display moves one menu level back each time the button is pressed Programmable radiator thermostat, RT2000 button – confirm a setting Coupling ring button – timer function TIME... -
Page 3: Table Of Contents
Contents Introduction �������������������������������������������7 General Function Intended Use Operating and Display Elements Settings Technical Data Scope of Delivery Safety Instructions ������������������������������� 13 Safety Information on Batteries Inserting/Changing the Batteries ���������15 Setting the Date and Time �������������������16 Installation ������������������������������������������ 18 Disassembling the Old Thermostat Head Adapters for Danfoss Disassembly ���������������������������������������... - Page 4 Window Function Holiday Function Key Lock Heating Pause Standby (LC Display) Summertime/Wintertime Version Number Resetting the Factory Settings Frost Monitoring Function CalcificationProtectionFunction Optional Accessories ��������������������������� 36 USB Programming Flash Drive Troubleshooting and Maintenance �������37 Cleaning ���������������������������������������������� 38 Disposal ���������������������������������������������� 39 Guarantee �������������������������������������������...
-
Page 5: Introduction
General Function The programmable radiator thermostat RT2000, with its pre-programmed and indi- vidually adjustable heating and energy-sav- ing times, enables you to regulate the room temperatureaccordingtodefinedtimes.The device moves a valve which controls the... -
Page 6: Intended Use
Intended Use The programmable radiator thermostat RT2000, subsequently referred to as "de- vice", serves to regulate a common radiator valve. The device may only be operated indoors. Any use other than that described... -
Page 7: Operating And Display Elements
Operating and Display Elements Heating times USB port AUTO or MANU mode active button – opens the main menu MENU (starting from the standard display); when a menu is open, the display moves one menu level back each time the button is pressed button–confirmasetting button –... -
Page 8: Settings
Settings On pressing the button, a menu opens MENU inwhichtodefinesettings.Thevariousitems can be selected by means of the adjusting wheel. Press the button to select an option and use the adjusting wheel to mod- ify the corresponding parameters. Press the buttontoconfirmtheentry,pressthe button to move one level back in the se- MENU quence of menus. - Page 9 Adaptation to valve adjustment ADAP Holiday function URLA I nstallationfunction(onlyfitthe INST device on the coupling ring in this position) Adapt the temperature to local OFFS characteristics (or subjective per- ception of temperature) Standby mode STBY Summertime/Wintertime Version number VERS...
-
Page 10: Technical Data
Technical Data Model RT2000 Supply voltage 3 VDC Max. power consump- 100 mA tion Batteries 2 x AA mignon, 1.5 V Battery service life Approx. 1 year Display LC display Dimensions (mm) 58 x 71.5 x 90 Connection M30 x 1.5 Ambient temperature +5 to +55 °C... -
Page 11: Scope Of Delivery
Scope of Delivery Programmable radiator thermostat RT2000 Coupling ring Adapters (Danfoss RA, Danfoss RAV, Danfoss RAVL) Operating instructions Batteries (AA mignon), 1.5V Safety Instructions RISK OF FATAL AND PER- SONAL INJURY TO INFANTS AND CHILDREN! Never leave children unattended when the packaging material is nearby. -
Page 12: Safety Information On Batteries
Do not open the device; it does not contain any parts which can be serviced by the user. In the event of any faults, send the device to the Service Department. This device can be used by children from the age of 8 and persons with reduced physical, sensory or mental capabilities or lack of experience and knowl- edge when they are under supervision or... -
Page 13: Inserting/Changing The Batteries
not short circuit or open them. This could resultintheriskofoverheating,fireor bursting.Neverthrowbatteriesinafireor water. The batteries could explode. Leaking batteries could damage the device. Be particularly careful when handling damaged or leaking batteries and wear protective gloves. Switch thedeviceoffwhenitisnotinusetosave the batteries. Remove the batteries if the device will be out of use for a longer period. -
Page 14: Setting The Date And Time
Property damage! Risk of damage to the device through reverse poling when inserting the batteries. Pay attention the batteries are correctly aligned when inserted. Replace the battery compartment cover. □ The service life of new batteries is approx. □ 1 year. The battery icon appears when the batteries need to be changed. - Page 15 Confirmbypressing Use the adjusting wheel to set the day's □ date. Confirmbypressing Use the adjusting wheel to set the hour. □ Confirmbypressing Use the adjusting wheel to set the minute. □ Confirmbypressing appears in the display. Wait a moment while the device prepares itself for installa- tion.
-
Page 16: Installation
Installation Risk of burns through hot radiator valve! Contact could lead to hands being burned. Allow the radiator to cool down before complet- ing any assembly, disassembly or repair work on the device! Wear work gloves! Assembly of the programmable radiator thermostat is easy and can be completed without the need to drain any heating wa- ter or work on the heating system. -
Page 17: Disassembling The Old Thermostat Head
- Landis&Gyr (Duodyr) - Honeywell-Braukmann - Oventrop Type A, Oventrop AV6 - Schlösser - Comap D805 - Valf - Sanayii - Mertik Maxitrol - Watts -Wingenroth(Wiroflex)R.B.M - Tiemme - Jaga - Siemens - Idmar Using the applicable adapter contained with the material supplied, the programmable radiator thermostat can be installed on Dan- foss RA, Danfoss RAV and Danfoss RAVL... -
Page 18: Adapters For Danfoss
semble (see Fig. 1). Releasethefixationofthethermostathead (12) and remove the thermostat head (12). Adapters for Danfoss During assembly, be careful not to jamyourfingersbetweenthehalves of the adapter! One of the adapters contained in the mate- rial supplied is required in order to assemble the thermostat on Danfoss valves. - Page 19 the adapter (14) are aligned to the grooves (13) in the valve. Then slide the corresponding adapter on □ the valve until it latches into place. The RA and RAV adapters are produced to have a pretension in order to provide a bet- terfit.Ifnecessary,useascrewdriverduring assembly in order to open the corresponding adapter a little in the area of the screw.
-
Page 20: Disassembly
Disassembly Risk of burns through hot radiator valve! Contact could lead to hands being burned. Allow the radiator to cool down before complet- ing any assembly, disassembly or repair work on the device! Wear work gloves! Turn the adjusting wheel to the right until □... -
Page 21: Adaptation
Pull the device from the valve or adapter. □ If you have been using an adapter, unscrew it from the valve and store the adapter in a safe place� Adaptation The device adapts to the stroke of the valve body. To do this, the valve is opened and closed several times in order to programme the respective end point. -
Page 22: Operating Modes
Operating Modes MANU Mode When in MANU operating mode, the device regulates the temperature to the value set by hand (via the adjusting wheel). AUTO Mode When in AUTO operating mode, the device regulates the temperature between two tem- peratures according to the time programme set: Comfort temperature (factory setting: 21 °C) -
Page 23: Setting The Heating And Energy-Save Times
can be set per day. The following settings are preprogrammed at the factory: Comfort Temperature (Factory setting: 1st heating time at 7:00 a.m.) Energy-save temperature (Factory setting: 1st energy-save time at 10.00 p.m.) Setting the Heating and Energy-save Times Thedevicecanbeusedtodefine4heating and 4 energy-save times per day –... -
Page 24: Setting An Individual Programme
T 1–5 = Same programme from Monday to Friday T 1-6 = Same programme from Monday to Saturday T 1-7 = Same programme from Monday to Sunday If certain days are not programmed, the pre- programmed factory settings are activated. Setting an Individual Programme button. -
Page 25: Setting Comfort And Energy-Save Temperatures
Use the adjusting wheel to set the start of □ the 1st energy-save time (icon ).Confirm by pressing Youcannowdefinethe2nd,3rdand4th heating/energy-save times, if necessary. If you do not want to define any further heating/ energy-saving times, confirm the display pressing the button�... -
Page 26: Timer Function
menuoption.Confirmbypressing Use the adjusting wheel to set the comfort □ temperature.Confirmbypressing Use the adjusting wheel to set the ener- □ gy-savetemperature.Confirmbypressing Range : 8 °C, anti-freeze function ac- tive Range : Valve fully open Timer Function Open the Timer function by pressing the Timer button . -
Page 27: Offset
Offset The temperature determined by the device can deviate from the temperature perceived by the user. In such cases, the temperature determined by the device must be adjusted. Press the button. □ MENU Use the adjusting wheel to select the □... - Page 28 heating costs, the valve is fully closed for 10 minutes. The device then resumes normal op- eration. button. Press the □ MENU Use the adjusting wheel to select the □ menuoption.Confirmbypressing Use the adjusting wheel to set the sensi- □ tivity ( = high sensitivity, = medium...
-
Page 29: Holiday Function
Holiday Function Youcandefineafreelyselectabletemper- ature which should be active for the period you are absent. Following this period, the previous programme is reactivated. button. Press the □ MENU Use the adjusting wheel to select the □ menuoption.Confirmbypressing Use the adjusting wheel to select the end □... -
Page 30: Key Lock
Key Lock This function locks the functions assigned to the buttons. Press and hold the buttons □ simultaneously for approx. 2 seconds. The icon appears in the display. Deactivate the key lock function when you want to use the device again. Press and hold the buttons si- □... -
Page 31: Standby (Lc Display)
ature in the display to Calcification protection continues to be performed� The valve is closed and works without any timer programme� NOTE: When the heating pause has expired, switch back to AUTO mode. Standby (LC Display) Press the button. □ MENU Use the adjusting wheel to select the □... -
Page 32: Summertime/Wintertime
by pressing any button� This setting serves to save the service life of the batteries� Summertime/Wintertime Press the button. □ MENU Use the adjusting wheel to select the DST □ menuoption.Confirmbypressing Use the adjusting wheel to select the □ option. Confirmthesettingbypressingthe □... -
Page 33: Resetting The Factory Settings
Resetting the Factory Settings button. Press the □ MENU Use the adjusting wheel to select the □ menuoption.Confirmbypressing flashesinthedisplay,confirmbypress- □ ing the button. The settings are returned to their default factory values and the device is in the state it was when delivered�... -
Page 34: CalcificationProtectionFunction
Calcifi cation Protection Function This function is automatically active. The de- viceperformscalcifi cationprotectionpro- cess once a week (Fridays at midday) to pre- vent the radiator valves from calcifying. Optional Accessories USB Programming Flash Drive YoucanusetheconvenientUSBfl ashdrive to transfer your individual heating and ener- gy-save times to all the radiator thermostats installed in your house. -
Page 35: Troubleshooting And Maintenance
Troubleshooting and Maintenance Fault Cause Solution Battery Battery Change the bat- icon power is too teries. low. No adapta- Is the device tion is possi- correctly assem- ble. Device bled on the radi- is not as- ator? Assemble sembled on it according to the radiator the instructions. -
Page 36: Cleaning
No valve Is the valve movement. plunger freely moveable? Make valve plunger move- able, if neces- sary. Press any button to clear the error message from the display and readapt the device auto- matically. Cleaning Clean the device regularly using a dry, lint- free cloth. -
Page 37: Disposal
Disposal The packing is made of environmen- tally friendly materials which can be disposed of through the local recycling centres. Refer to your local authoritiesormunicipalofficesforinforma- tion on how to dispose of the device when no longer functional. Never throw old devices in house- hold waste in the interest of environ- mental protection but dispose of them according to the applicable local regula-... - Page 38 Defective or used batteries must be recycled according to Directive 2006 / 66 / EC. Re- turn batteries and / or the device via the re- cyclingservicesoffered. Environmental Damage Through Incorrect Disposal of Batteries! Batteries must not be disposed of in house- hold waste.
-
Page 39: Guarantee
Guarantee ATTENTION! IMPORTANT GUARANTEE DOCUMENT! KEEP IN A SAFE PLACE! Dear Customer, We are very pleased that you have decided to buy this high quality product. Should a technical problem arise with re- gard to the equipment, please observe the following points: –... - Page 40 Our expert personnel can frequently provide help over the phone. service�gb@gsl-servicenet�de service�ie@gsl-servicenet�de However, if the problem cannot be solved via telephone, please send the equipment to the following address in its original pack- aging: GSL mbH Am Weimarer Berg 6 99510 Apolda Germany Repairs under the terms of guarantee can...
-
Page 41: Manufacturer
Manufacturer Olympia Business Systems Vertriebs GmbH Zum Kraftwerk 1 45527 Hattingen www.olympia-vertrieb.de IAN 101034...