
Related Manuals for Hitachi AMS 2500


Summary of Contents for Hitachi AMS 2500
- Page 1 Hitachi AMS 2500 Getting Started Guide INKS Getting Started Guide MK-97DF8032EN-02 *043-100478-01* 043-100478-01...
- Page 2 Corporation (hereinafter referred to as “Hitachi Data Systems”). Hitachi Ltd. and Hitachi Data Systems reserve the right to make changes to this document at any time without notice and assume no responsibility for its use. Hitachi Ltd. and Hitachi Data Systems products and services can only be ordered under the terms and conditions of Hitachi Data Systems’...
- Page 3 The instructions in this guide are designed to get your storage system up and running quickly. If you prefer detailed instructions, please refer to the Hitachi AMS 2500 Storage System User’s Guide (MK-97DF8007) on the CD supplied with the storage system.
-
Page 4: Table Of Contents
Installation & Configuration Checklist The following checklist identifies the steps for getting your AMS 2500 storage system up and running. Please check each step as you complete it and record your settings on page Preparing for the Installation 1. Prepare the Site (page 2. -
Page 5: Preparing For The Installation
Preparing for Installation 1. Prepare the Site Planning the proper location and layout of the Hitachi AMS 2500 storage unit is essential for its successful operation. The site where you install the storage unit can affect its performance. For example, equipment placed too close together or in an inadequately ventilated area can cause over- temperature conditions. - Page 6 Open and remove the bag in which the base unit is enclosed. Repeat this step for any expansion units you may have ordered. Compare the items received to the packing list. If any items are missing or damaged, contact the shipper immediately. Hitachi AMS 2500 Getting Started Guide...
-
Page 7: Provide User-Supplied Items
A personal computer (PC) that will act as a management console (see Requirements for Array Management on page • The Hitachi Global 19-inch rack or an equivalent rack • Two AC outlets (100 V to 120/200 V to 240 V) •... - Page 8 Red Hat Enterprise Linux AS 4.0 (update 1) NOTE: Microsoft Windows XP and Windows Server 2003 R2 can also operate as a guest operating system of VMware ESX Server 3.1.x when Windows update KB922760 or newer is installed. Hitachi AMS 2500 Getting Started Guide...
-
Page 9: Identify Your Configuration
Installing the Storage Units 4. Install the Base and Expansion Units Base and expansion units ordered with the Hitachi Global 19-inch rack are delivered preinstalled in the rack. If you use a different rack, refer to and follow all safety precautions in the documentation for the rack. -
Page 10: Install Drives
(round dent) on the filler moves to the right. Installing a Drive Installing a Filler Figure 1-4: Installing a Drive or Drive Filler Hitachi AMS 2500 Getting Started Guide... -
Page 11: Attach Expansion Units (Optional)
To connect additional expansion units, follow the pattern in Figure 1- 7 on page Figure 1-5: Location of PATH#0 and PATH#1 Ports (Base Unit) Legend: PATH#0 port PATH#1 port Hitachi AMS 2500 Getting Started Guide... - Page 12 Path 0 and Path 1 ports on the rear of the base unit to the IN port on the rear of each expansion unit. ENC Module #0 ENC Module #1 Figure 1-7: Example of Connecting Expansion Units Hitachi AMS 2500 Getting Started Guide...
-
Page 13: Connect Cables To The Base Unit
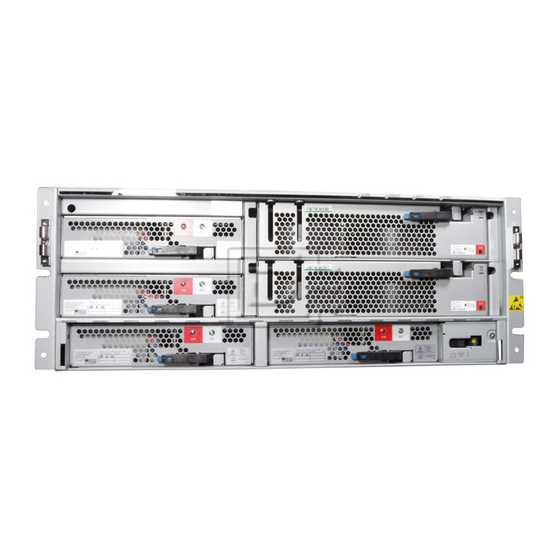
Figure 1-8: Rear View of the Hitachi AMS 2500 Base Unit Legend: Battery port (labeled BATTERY) Path 0, 1, 2, and 3 connectors for connecting to expansion unit Fibre channel ports ... -
Page 14: Power-Up The Base Unit
Battery unit Alarm LED (red). If this LED goes ON, refer to the User’s Guide. Warning LED (orange). If this LED goes ON, refer to the User’s Guide. Ready LED (green) Hitachi AMS 2500 Getting Started Guide... -
Page 15: Attach The Front Bezel
Figure 1-10: Attaching the Front Bezel Legend: Ball catches Hook on right side MAIN SW (power) switch Hook on left side Front bezel Hitachi AMS 2500 Getting Started Guide... -
Page 16: Configuring The Storage Units
3. Click the Java tab. The Java tab is displayed (see Figure 1-11). Figure 1-11: Java Tab 4. Click View in the Java Applet Runtime Settings section. The Java Runtime Settings dialog box appears. Hitachi AMS 2500 Getting Started Guide... -
Page 17: Install And Log In To Navigator
Navigator 2 software. c. Insert the Navigator 2 CD in the management console CD drive and follow the installation wizard. Hitachi AMS 2500 Getting Started Guide... -
Page 18: Add Arrays
Array List window to launch the Add Array wizard. b. When the introductory page appears, click Next. c. At the next page, enter the following default IP address for each base unit management port. Controller 0: type 192.168.0.16 Controller 1: type 192.168.0.17 Hitachi AMS 2500 Getting Started Guide... -
Page 19: Perform The Initial Setup
Account Authentication user ID and password for the controller (Account Authentication is a security protocol enabled by default on the AMS. For more information, refer to the Hitachi Storage Navigator Modular 2 Storage Features Reference Guide (MK-97DF8148). a. If the Arrays page is not displayed, click Arrays in the left pane. - Page 20 19). Then click Next and go to Configure Management Ports on page NOTE: This procedure assumes that your SMTP server is set up correctly to handle email. b. Otherwise, click Next and skip to Configure Management Ports on page Hitachi AMS 2500 Getting Started Guide...
- Page 21 Use the Set up Management Ports page to configure the base unit’s management ports manually or automatically (see Figure 1-17 on page 20 Table 1-2 on page 20). b. Click Next and go to Set Up Host Ports on page 21 Hitachi AMS 2500 Getting Started Guide...
- Page 22 (you will configure the management port settings for the other controller later). • Management console is connected via a switch or hub, you can enter settings for both controllers now. Hitachi AMS 2500 Getting Started Guide...
- Page 23 Select the drives you want to use as spares. If the drives exceed what can be shown in the Available Drives area, use the controls at the top of this area to display other pages of drives. Hitachi AMS 2500 Getting Started Guide...
- Page 24 If you select Set Manually, enter the date (in YYYY/DD/MM format) and time (in 24-hour format) in the fields provided. Figure 1-20: Set Up Date & Time Page Hitachi AMS 2500 Getting Started Guide...
- Page 25 Check the storage unit name (which you recorded in Table 1-4 on page 30). d. Click Edit Array. An Edit Array page similar to the one in Figure 1- 21 on page 24 appears. Hitachi AMS 2500 Getting Started Guide...
- Page 26 In the Common Array Tasks area, click Create Logical Unit. The Create & Map New Volume wizard starts. c. When the introductory page appears, click Next. The page in Figure 1-22 on page 25 appears. Hitachi AMS 2500 Getting Started Guide...
- Page 27 To use RAID groups that already exist: • Select Use an existing RAID group. • Select a RAID group from the drop-down list. e. Click Next. The page in Figure 1-23 appears. Figure 1-23: Create or Select Logical Units Page Hitachi AMS 2500 Getting Started Guide...
- Page 28 • In the Name field, enter a host group name from 1 to 32 characters. • Select a platform and/or middleware setting if appropriate for your configuration (refer to the Navigator 2 online help). Hitachi AMS 2500 Getting Started Guide...
-
Page 29: Configure The Other Controller
Click Next at the first page. g. When the Search Array page appears (see Figure 1-25 on page 28), enter the IP address for each controller, which you recorded in Table 1-4 on page 1-30. Hitachi AMS 2500 Getting Started Guide... -
Page 30: Completing Your Installation
Click Next and Finish to complete the wizard. The newly configured base unit appears in the Arrays area. Completing Your Installation 16. Register Your Storage Unit After you configure the storage unit, please register it on the Hitachi Data Systems Web portal at https://extranet.hds.com/http://aim.hds.com/ portal/dt. -
Page 31: Where To Go From Here
Hitachi AMS 2000 Family Host Installation Guide for Fibre Channel (MK- 08DF8189) You may also need to select the appropriate platform and middleware settings using Navigator 2. For more information, refer to the Hitachi AMS 2500 Storage System User’s Guide (MK-97DF8007). Perform Any Additional Configuration Activities... - Page 32 Use the following procedure: WARNING! Do not remove the power cords from the rear of the base unit without first setting the Hitachi switch to the OFF position. a. Stop all host I/O to the base and expansion units. b. Press the Power switch on the lower right side of the base unit front panel to the OFF position: c.
- Page 33 Controller 1 Configuration Automatic (Use DHCP) Manual (record your settings below) IP Address Subnet Mask Default Gateway LUN Settings RAID Group Free Space Capacity Stripe Size Format the Logical Unit Hitachi AMS 2500 Getting Started Guide...
-
Page 34: Troubleshooting
Support Portal: https://extranet.hds.com/http://aim.hds.com/portal/dt Compatibility Refer to the interoperability information at: www.hds.com/products/ interoperability Firmware (Microcode) Refer to the Navigator 2 online help and to the Hitachi Data Systems Support Portal: http://support.hds.com Troubleshooting Refer to the Hitachi Data Systems Support Portal: http://support.hds.com... - Page 35 Hitachi AMS 2500 Getting Started Guide...
- Page 36 Hitachi Data Systems Corporate Headquarters 750 Central Expressway Santa Clara, California 95050-2627 U.S.A. Phone: +1 408 970 1000 www.hds.com [email protected] Asia Pacific and Americas 750 Central Expressway Santa Clara, California 95050-2627 U.S.A. Phone: +1 408 970 1000 [email protected] Europe Headquarters...