Hitachi AMS 2100 Getting Started Manual
Hide thumbs
Also See for AMS 2100:
- Hardware manual (306 pages) ,
- User manual (210 pages) ,
- Service manual (192 pages)

Related Manuals for Hitachi AMS 2100


Summary of Contents for Hitachi AMS 2100
- Page 1 Hitachi AMS 2100/2300 Getting Started Guide INKS Getting Started Guide MK-98DF8152EN-17 *043-100423-01* 043-100423-01...
- Page 2 Hitachi, Ltd. and Hitachi Data Systems Corporation (hereinafter referred to as “Hitachi”). Hitachi, Ltd. and Hitachi Data Systems reserve the right to make changes to this document at any time without notice and assume no responsibility for its use. Hitachi, Ltd. and Hitachi Data Systems products and services can only be ordered under the terms and conditions of Hitachi Data Systems' applicable agreements.
- Page 3 If you prefer detailed instructions, please refer to the following: • AMS 2100/2300 Storage System Hardware Guide (MK- 97DF8010) on the CD supplied with the storage system. • Storage Navigator Modular User’s Guide (MK-97DF8008) on the CD supplied with the storage system.
-
Page 4: Table Of Contents
Installation & configuration checklist The following checklist identifies the steps for getting your AMS 2100 or 2300 storage system up and running. Please check each step as you complete it and record your settings on page Preparing for the installation 1. -
Page 5: Preparing For The Installation
7. Each base unit has a key for locking and unlocking the front bezel. Place the keys in a safe place. 8. Please keep all packing materials and cartons in case you need to transport or ship the base or expansion unit. Hitachi AMS 2100/2300 Getting Started Guide... -
Page 6: User-Supplied Items
Table 1-1 on page 1-5) • A host server that contains at least one Fibre Channel host bus adapter (HBA) (see Host server requirements on page • Optional: a Fibre Channel switch for switch configurations Hitachi AMS 2100/2300 Getting Started Guide... - Page 7 Microsoft Windows Server 2008 R2 (no Service Pack) Red Hat Enterprise Linux 4 (Update 1) – x86 only Red Hat Enterprise Linux 4 (Update 5) –x86 only Red Hat Enterprise Linux 5 (Update 3) – x86 only Hitachi AMS 2100/2300 Getting Started Guide...
- Page 8 Red Hat Enterprise Linux 4 (Update 1) Red Hat Enterprise Linux 4 (Update 5) Red Hat Enterprise Linux 5 (Update 3) Red Hat Enterprise Linux 5 (Update 4) Sun™ Solaris™ v8, v9, and v10 SuSE Linux Hitachi AMS 2100/2300 Getting Started Guide...
-
Page 9: Identify Your Configuration
Hitachi compatibility and interoperability matrix can be used as a reference when constructing configurations that are supported end to end by Hitachi AMS storage systems. To view the matrix, please visit: http://www.hds.com/products/interoperability/?_p=v. Hitachi AMS 2100/2300 Getting Started Guide... -
Page 10: Install The Base And Expansion Units
4. Install the base and expansion units 1. Select an appropriate location. Refer to the AMS 2100/2300 Storage System Hardware Guide (MK-97DF8010). 2. Base and expansion units ordered with the Hitachi Global 19-inch rack are delivered preinstalled in the rack. If you use a different rack, refer to and follow all safety precautions in the documentation for the rack. -
Page 11: Attach The Front Bezel
2. After the hooks are engaged, gently push the bezel against the base unit’s front panel until the bezel snaps into place. 3. Lock the bezel by inserting the key in the keyhole and turning counterclockwise. Hitachi AMS 2100/2300 Getting Started Guide... -
Page 12: Attach Expansion Units (Optional)
3. To connect additional expansion units, follow the pattern in Figure 1-6 on page Figure 1-4: Location of PATH#0 and PATH#1 Ports (Base Unit) Hitachi AMS 2100/2300 Getting Started Guide... - Page 13 4. To connect two expansion units, use a supplied ENC cable to connect the OUT port on the rear of one expansion unit to the IN port on the rear of the next expansion unit. Repeat this step for each additional expansion unit you want to add. Hitachi AMS 2100/2300 Getting Started Guide...
- Page 14 ENC Unit #1 ENC Unit #0 ENC Unit #1 ENC Unit #0 ENC Unit #1 PATH #1 PATH #0 Control Unit #1 Control Unit #0 PATH #0 PATH #1 Figure 1-6: Example of Connecting Expansion Units Hitachi AMS 2100/2300 Getting Started Guide...
-
Page 15: Connect Cables To The Base Unit
Controller 1 Controller 0 Figure 1-7: Rear of AMS 2100 Base Unit with 1 Gbps iSCSI Controller Controller 1 Controller 0 ... - Page 16 Close-up of AMS 2100/2300 Fibre Channel and iSCSI Interfaces Fibre Channel Ports 1 Gbps iSCSI Ports 10 Gbps iSCSI Ports (2 per Controller) (2 per Controller) (2 per Controller) Figure 1-9: Possible AMS 2100 Interfaces Fibre Channel Ports 1 Gbps iSCSI Ports...
- Page 17 AMS 2100/2300 Fibre Channel and iSCSI Port Assignments AMS 2100 Fibre Channel Port Assignments Version 1 Controller Version 2 Controller AMS 2100 iSCSI Port Assignments Version 1 Controller Version 2 Controller AMS 2300 Fibre Channel Port Assignments Version 1 Controller...
-
Page 18: Connect To A Modular 2U Sas Expansion Unit (Optional)
9. Connect to a Modular 2U SAS Expansion Unit (optional) AMS 2100 and AMS 2300 storage systems support connection to a 2U SAS expansion unit. This unit contains two redundant power supplies, two ENC interface units, and from two to 24 small form factor (SFF) disk drives. It can connect to additional expansion units or high-density expansion units. - Page 19 (even if the READY LED blinks). • Slow blinking = offline download processing ended (occurs during maintenance). LOCATE LED (orange) • ON = a failure occurred, but the expansion unit remains operational. Hitachi AMS 2100/2300 Getting Started Guide...
- Page 20 • Slow Blinking = a serious failure has occurred while power is on. Please contact Hitachi Data Systems Technical Support. See the Getting help section in the Preface of this manual. Locate LED (orange) — lights when a modular 2U SAS expansion unit has encountered a serious error.
-
Page 21: Power-Up The Base Unit
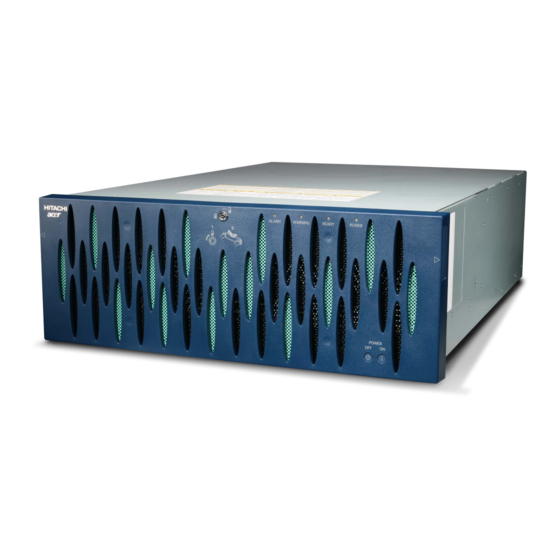
Alarm LED (red). If this LED goes ON, refer to the User’s Guide. Warning LED (orange). If this LED goes ON, refer to the User’s Guide. NOTE: When the bezel is removed, the Power switch is identified on the enclosure as MAIN SW. Hitachi AMS 2100/2300 Getting Started Guide... -
Page 22: Set Java Runtime Parameters If Necessary
3. Click the Java tab. The Java tab is displayed (see Figure 1-15). Figure 1-15: Java Tab 4. Click View in the Java Applet Runtime Settings section. The Java Runtime Settings dialog box appears. 5. In the Java Runtime Parameters field, type -Xmx464m. Hitachi AMS 2100/2300 Getting Started Guide... -
Page 23: Install And Log In To Navigator
\program\hsnm2_win\HSNM2-nnnn-W-GUI.exe • The installation process takes about 15 minutes to complete. • During the installation, the progress bar may pause for several seconds. This is normal and does not mean the installation has stopped. Hitachi AMS 2100/2300 Getting Started Guide... -
Page 24: Add Storage Systems
Click the name of the storage system you want to configure. The Account Authentication Log in page prompts you for an Account Authentication user ID and password (see Figure 1-16 on page 23). Hitachi AMS 2100/2300 Getting Started Guide... - Page 25 Without a valid password, you cannot access the storage system without reinstalling the firmware. Hitachi Data Systems Technical Support cannot retrieve the password for you. The user ID is not changeable.
- Page 26 Array Name fields for each storage system management port. Controller 0: type 192.168.0.16 Controller 1: type 192.168.0.17 NOTE: If your management console is directly connected to a management port, enter the default IP address just for that port. Hitachi AMS 2100/2300 Getting Started Guide...
-
Page 27: Perform The Initial Setup
After you run the Add Array wizard, use the following procedure to perform the initial Navigator 2 setup. 1. In the Arrays page, click the name of the storage system you want to configure. 2. In the following page, under Common Array Tasks, click Initial Setup. Hitachi AMS 2100/2300 Getting Started Guide... - Page 28 If desired, you can send a test message to confirm that email notifications will work. For more information, refer to the Storage Navigator Modular 2 Graphical User Interface User’s Guide (MK-99DF8208) and the Navigator 2 online help. Hitachi AMS 2100/2300 Getting Started Guide...
- Page 29 In the Set up Management Ports page: 1. Configure the controller management ports manually or automatically (see Figure 1-21 on page 28 Table 1-5 on page 1-28). 2. Click Next. 3. Proceed to Set up host ports on page Hitachi AMS 2100/2300 Getting Started Guide...
- Page 30 IPv4 Default Gateway Default gateway that client PCs use to access the base unit’s management port. Negotiation Use the default (Auto) setting to auto-negotiate speed and duplex mode, or select a fixed speed and duplex setting. Hitachi AMS 2100/2300 Getting Started Guide...
- Page 31 The first page that appears lets you configure the Fibre Channel ports. 1. In the first Set up Host Ports page, enter configuration information for each Fibre Channel port that will be used. Hitachi AMS 2100/2300 Getting Started Guide...
- Page 32 Loop = port is directly connected to the Fibre Channel port of an HBA installed in a server. 2. Click Next to display the following page for configuring the iSCSI ports. Then enter configuration information for each iSCSI port that will be used. Hitachi AMS 2100/2300 Getting Started Guide...
- Page 33 1. Select the drives you want to use as spares. If the drives exceed what can be shown in the Available Drives area, use the controls at the top of this area to display other pages of drives. Hitachi AMS 2100/2300 Getting Started Guide...
- Page 34 1. Select whether the date and time are to be set automatically, manually, or not at all. 2. If you select Set Manually, enter the date and time (in 24-hour format) in the fields provided. 3. Click Next. Hitachi AMS 2100/2300 Getting Started Guide...
- Page 35 Restart your browser and log in to Navigator 2 again. NOTE: Configure the console for the same subnet on which the base unit is installed. Otherwise, an error message appears when you try to access Navigator 2. Hitachi AMS 2100/2300 Getting Started Guide...
- Page 36 Click Edit Array. An Edit Array page similar to the one in Figure 1- 27 on page 35 appears. Check an Array Name Here Edit Array Button Figure 1-26: List of Arrays and Edit Array Button Hitachi AMS 2100/2300 Getting Started Guide...
- Page 37 • Microsoft Windows 2000 Server, Windows Server 2003 and 2008, Windows XP, Vista • NetWare • Red Hat Enterprise Linux, SUSE Linux Enterprise, Asianux • TruCluster • Solaris • Veritas Cluster Server • VMware Hitachi AMS 2100/2300 Getting Started Guide...
- Page 38 Groups (see Figure 1-28). Click Groups Click Host Groups Figure 1-28: Groups Page 3. When the Host Group page appears (see Figure 1-29 on page 37), check a host group in the Host Groups tab. Hitachi AMS 2100/2300 Getting Started Guide...
- Page 39 Figure 1-29: Host Groups Page 4. Click Edit Host Group. The Edit Host Group page appears (see Figure 1-30). Figure 1-30: Edit Host Group Page Hitachi AMS 2100/2300 Getting Started Guide...
- Page 40 6. From the Middleware pull-down list on the Options tab, select the middleware to be connected according to Table 1-9. Table 1-9: Middleware Settings To Use This Software Select This Middleware Setting Veritas Cluster Server HP TruCluster Server TruCluster Other Not specified Hitachi AMS 2100/2300 Getting Started Guide...
- Page 41 1. Redisplay the Groups page and click iSCSI Targets (see Figure 1-32) Click Groups Click iSCSI Targets Figure 1-32: Groups Page 2. When the iSCSI Targets page appears (see Figure 1-33 on page 40), check an iSCSI target in the iSCSI Targets tab. Hitachi AMS 2100/2300 Getting Started Guide...
- Page 42 4. Click the Options tab, then use the Platform pull-down list to select the host operating system to be connected to the storage system (see Figure 1-35 on page 41 Table 1-8 on page 1-38). Hitachi AMS 2100/2300 Getting Started Guide...
- Page 43 Registry setting on the server. When downloading the iSCSI Software Initiator from the Microsoft home page, refer to the descriptions of Microsoft Server Cluster (MSCS) in the Microsoft iSCSI Initiator 2.x Users Guide, which is a Hitachi AMS 2100/2300 Getting Started Guide...
- Page 44 If you use an alternate path (MPIO:Multipath I/O) configuration on Windows Server 2008, open MPIO on the Windows Control Panel and register HITACHI DF600F as an MPIO device. • If connecting with a Tru64 host, select Not specified from the Platform drop-down list.
- Page 45 Select Create a new RAID group if it is not selected. b. Use the drop-down lists to select a drive type, RAID level, and data + parity (D+P) combination for the RAID group. Hitachi AMS 2100/2300 Getting Started Guide...
- Page 46 Select a RAID group from the drop-down list. 5. This page also lets you configure new or existing Dynamic Provisioning (DP) pools if you installed the license key for Hitachi Dynamic Provisioning. For more information, refer to the Hitachi AMS 2000 Family Dynamic Provisioning Configuration Guide (MK-09DF8201).
- Page 47 To use host groups that have already been created: a. Select Use an existing host group. b. Use the Host Group drop-down list to select a host group. 11.Click Next. The Connect to Hosts page appears (see Figure 1-39 on page 46). Hitachi AMS 2100/2300 Getting Started Guide...
- Page 48 Array Name column. 3. Click Remove Array to remove the selected base unit from the Arrays area. 4. When the message indicates that the base unit was removed successfully, click Close to remove the message. Hitachi AMS 2100/2300 Getting Started Guide...
- Page 49 Create, edit, initialize, delete, and filter targets • Back up volumes to prevent data loss • Perform local replication tasks (create, edit, split, resync, restore, and delete pairs) • Enable license keys for any storage features that require them Hitachi AMS 2100/2300 Getting Started Guide...
-
Page 50: Additional Information
Refer to the supplied documentation CD or visit the Hitachi Web Portal: http://www.hds.com/corporate/resources/ Product Interoperability Refer to the interoperability matrix at: http://www.hds.com/products/interoperability/ Firmware (microcode) Refer to the Navigator 2 online help and to the Hitachi Web Portal: support.hds.com Troubleshooting Refer to the Hitachi Support page: http://www.hds.com/support/ Global Services... - Page 51 Manual (record your settings below) IP Address Subnet Mask Default Gateway Host Port Settings Fibre Channel Port:______ Port Address: Transfer Rate: Topology: Fibre Channel Port:______ Port Address: Transfer Rate: Topology: Fibre Channel Port:______ Port Address: Transfer Rate: Topology: Hitachi AMS 2100/2300 Getting Started Guide...
- Page 52 Subnet Mask: Default Gateway: iSCSI Port:___________ IP Address: Subnet Mask: Default Gateway: iSCSI Port:___________ IP Address: Subnet Mask: Default Gateway: LUN Settings RAID Group Free Space Capacity Stripe Size Format the Logical Unit Hitachi AMS 2100/2300 Getting Started Guide...
- Page 53 Hitachi AMS 2100/2300 Getting Started Guide...
-
Page 54: Mk-98Df8152En
Hitachi Data Systems Corporate Headquarters 750 Central Expressway Santa Clara, California 95050-2627 U.S.A. Phone: +1 408 970 1000 www.hds.com [email protected] Asia Pacific and Americas 750 Central Expressway Santa Clara, California 95050-2627 U.S.A. Phone: +1 408 970 1000 [email protected] Europe Headquarters...