
Related Manuals for Kenmore 790.8037


Summary of Contents for Kenmore 790.8037
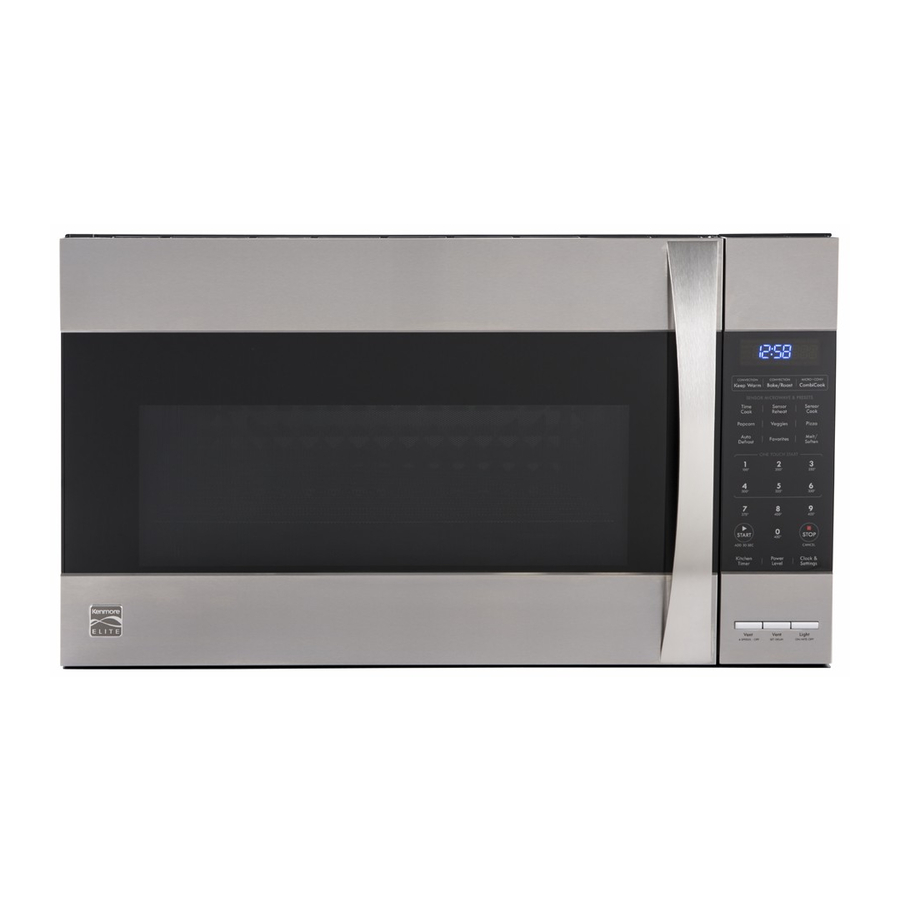
- Page 1 Use & Care Guide Manual de uso y cuidada English / Espa5ol Models / Modelos: 790.8037* P/N 316495110 Sears Brands Management Corporation Hofl:man Estates, IL 60179 U.S.A. www.kenmore.com www.sears.com www.kmart.com ®...
-
Page 2: Table Of Contents
Table of Contents Microwave Power Levels ..........Warranty ............... Microwave Oven Safety ........Using Auto Defrost ............Auto Defrost Table ..........20-21 Getting to Know Your Microwave Oven ....6 Defrosting Tips .............. How Your Microwave Oven Works ......6 Sensor Operating Instructions ........ -
Page 3: Microwave Oven Safety
Microwave Oven Safety Your safety and the safety of others is very important. We have provided many important safety messages in this manual and on your microwave oven. Always read and obey all safety messages. This is the safety alert symbol. This symbol alerts you to hazards that can kill or hurt you and others. - Page 4 iMPORTANT SAFETY iNSTRUCTiONS " The microwave oven should be serviced only • Do not store anything directly on top of the by qualified service personnel. Call an microwave oven when the microwave oven is in authorized service company for examination, operation.
- Page 5 PRECAUTIONS TO AVOID POSSIBLE EXPOSURE TO EXCESSIVE MICROWAVE ENERGY (a) Do not attempt to operate this oven with (c) Do not operate the oven if it is damaged. It is the door open. Doing so can result in harmful particularly important that the oven door closes properly exposure to microwave...
-
Page 6: Getting To Know Your Microwave
Getting to Know Your Microwave Oven This section discusses the concepts behind microwave cooking. It also shows the basics that you need to know in order to operate your microwave oven. Please read this information before using your oven. HOW YOUR MICROWAVE OVEN WORKS Microwave... -
Page 7: For The Best Cooking
FOR THE BEST COOKING RESULTS • Always cook food for the shortest cooking time recommended. Check to see how the food is cooking. needed, touch Add 30 Sec while the oven is operating, or after the cooking cycle is over (see the "Add 30 Sec"... -
Page 8: How To Use Accessories
HOW TO USE ACCESSORIES Posslble to use Recommended method Glass Turntable Metal Rack X : Do not use MICROWAVE CONVECTION COMBiNATiON © © © © © Notes: Do not operate the oven when it is empty except preheating. OPERATING SAFETY PRECAUTIONS "... -
Page 9: Specifications
SPECIFICATIONS Power Supply 120VAC, 60 Hz Rated Power Consumption 1550W Microwave Output _1050W Rated Current 15.0A Overall Dimensions(WxHxD) 297/8"X 179/16" X 161/16" Oven Cavity Dimensions(WxHxD) 211/4"X 915/_"X 1423/32" Capacity of Oven Cavity 1.8 cu.ft _IEC 60705 RATING STANDARD Specifications subject to change without prior notice. -
Page 10: Control Panel Features
CONTROL PANEL FEATURES Your microwave oven control panel Jets you select the desired cooking function quickly and easily. All you have to do is touch the necessary Command Pad. The following is a list of all the Command and Number Pads located on the control panel. -
Page 11: Tips
Microwave Cooking Tips Amount of Food Releasing Pressure in Foods * If you increase or decrease the amount of food * Several foods (for example: baked potatoes, sausages, you prepare, the time it takes to cook that food egg yolks, and some fruits) are tightly covered by a skin will also change. - Page 12 Using Aluminum Foil NOTE:Metal containers should not be used in a microwave oven. There are, however, some exceptions. If you have purchased food prepackaged in an aluminum foil container, refer to the instructions on the package. When using aluminum foil containers, cooking times may be longer because microwaves...
-
Page 13: Using Your Microwave
SETTING CONTROL LOCI( ON/OFF ( Control Panel Using Your Microwave Oven Feature 19) This section gives instructions for operating each function. Please read this section carefully. To turn ON Control Lock touch Clock & Settings twice. CLOCK 8, SETTINGS (Control Panel Feature 19) The microwave oven has settings that allow you to... - Page 14 USING CLEAN (Control Panel Feature 19) TURNING SOUND ON/OFF (Control Panel Feature 19) To enter Clean mode touch Clock & Settings Audible signals are available to guide you when four times. setting and using your oven. This is a preset timed cycle to boil water creating •...
-
Page 15: Clock &Settings
SETTING WEIGHT IB/KG (Control Panel Feature 19 SETTING DEMO MODE ON/OFF (Control Panel Feature 19) Example: To toggle weight between pounds & kilograms. Example: To enter Demo mode. Touch: Display Shows: Touch: Display Shows: PRESS AGAIN OPTIONS/ PRESS AGAIN OPTIONS/ 1. -
Page 16: Using Vent Fan
USING VENT FAN (Control Panel Feature 20) USING COOKTOP LIGHT (Contrd Panel Feature 22 The pad controls the 4-speed vent fan. If the vent fan The pad controls the cooktop light. If the light is OFF is OFF the first touch of the Vent pad will turn the fan the first touch of the light pad will turn the light ON on TURBO, second touch HIGH, third touch MEDIUM, (high), second touch Nite(Iow) -
Page 17: Using Add 30 Sec
USING ADD 30 SEC. (Control Panel Feature 15) SETTING TWO-STAGE COOKING For best results, some recipes call for different This is a time-saving pad. It is a simplified feature power levels during a cook cycle. You can that lets you quickly set and start microwave program your oven for two power level stages... -
Page 18: Microwave Power Levels
MICROWAVE POWER LEVELS For best results, some recipes call for different cook The table also tells you when to use each cook power. powers. The lower the cook power, the slower the Follow recipe or food package instructions cooking. Each number from I to 9 stands for a available. -
Page 19: Using Auto Defrost
USING AUTO DEFROST OPERATING TIPS • For best results, remove fish, shellfish, meat, and Three defrost sequences are preset in the oven. poultry from its original closed paper or plastic The auto defrost feature provides you with the best package (wrapper). -
Page 20: Auto Defrost Table
AUTO DEFROST TABLE NOTE:Meat of irregular shape and large, fatty cuts of meat should have the narrow or fatty areas shielded with foil at the beginning of the defrost sequence. MEAT SETTINGS FOOD SETTING AT BEEP SPECIAL INSTRUCTIONS BEEF Ground Beef, MEAT Remove thawed portions... -
Page 21: Auto Defrost Table
AUTO DEFROST TABLE (CONTINUED) POULTRY SETTINGS AT BEEP FOOD SETTING SPECIAL iNSTRUCTiONS CHICKEN POULTRY Turn over breast side down. Cover warm Place chicken breast-side up in a Whole areas with aluminum foil. microwave safe dish. Finish defrosting (up to 6 Ibs) by immersing in cold water. -
Page 22: Defrosting Tips
DEFROSTING TIPS • When using Auto Defrost, the weight to be entered is the • The shape of the package affects how quickly food will net weight (the weight of the food minus the container). defrost. Shallow packages will defrost more quickly than •... -
Page 23: Sensor Operating Instructions
SENSOR OPERATING INSTRUCTIONS Be sure the outside of the cooking container and the Sensor Cool< allows you to cook most of your favorite inside of the microwave oven are dry before placing foods without selecting cooking times and power levels. food in the oven. -
Page 24: Sensor Cook Table
SENSOR COOK TABLE DiRECTiON AMOUNT CATEGORY Place bacon strips on a microwave bacon rack for best Bacon results. (Use dinner plate lined with paper towels if rack 1-3 slices is not available). Place in a appropriately sized microwave container. Cover with plastic wrap. After cooking, stir and allow Frozen Dinner 10 oz./20... -
Page 25: Using Quick Touch
USING QUICK TOUCH SETTING PIZZA (Control Panel Feature |0) Your microwave has preprogrammed selections The Pizza sensor cook quick touch pad lets you reheat cook food automatically. up to four slices of pizza (based on a 5 ounce slice). SETTING POPCORN (Control Panel Feature 8) NOTE: * Place on a plate and paper towel... -
Page 26: Setting Melt/Soften
SETTING MELT/SOFTEN (Confrol panel Feature 13) MELT/SOFTEN TABLE The oven uses low power to melt and soften items. CATEGORY DIRECTION AMOUNT See the following table. 1 or 2 sticks Unwrap and place Example: To melt 2 sticks of Butter. in microwavable container. -
Page 27: Tips For Convection Cooking
TIPS FOR CONVECTION COOKING CONVECTION KEEP WARM (Control panel Feature 2 The default keep warm temperature is 170 degrees. This section gives you cooking instructions and procedures operating each convection function. Please read these Example: To keep warm for 20 minutes. instructions carefully. - Page 28 Example: To set the convection cooking at 350°F. for 20 minutes without preheating. Touch: Display Shows: pRESS AC_AIN OPTIONS O0_l_l_ CONVECTION __/,_aL'e/Doast I I_l_l II_J I_ I--t_ ITI--I--I TI--1_II7 CI_I I CI'T I CI PRESS AGAIN OPTIONS/ 17N k' i-- _17NI71- T CONVECTION CII--II\I_ J f_l_ll--I_l...
-
Page 29: Convection Baking Guidelines
CONVECTION BAKING GUIDELINES 1. Dark or non-shiny finishes, glass, and pyroceram absorb heat which may result in dry, crisp crusts. 2. Preheating the oven is recommended when baking foods by convection. 3. To prevent uneven heating and save energy, open the oven door to check food as little as possible. Comments Food Time, Min. - Page 30 CONVECTION BAKING GUIDELINES (cont'd) Food Oven Temp. Commenfs Time, Min. 400°F Frozen Pie Pies, Pastries 50 to 60 Place metal tray on rack and place in cold oven. Preheat oven, tray and rack to 400°1. When preheated, place frozen pie on metal tray and bake according to package time...
-
Page 31: Cooking
MEAT ROASTING GUIDELINES FOR CONVECTION COOKING Food Oven Temp. Time, Min. / lb. 325°F 23 to 25 Beef Rib roast, bone-in Rib roast, boneless 325°F 28 to 33 Tenderloin 300°F 15 to 20 Pot Roast 300°F 30 to 35 300°F Chuck, Rump Roast 30 to 35 400°F... -
Page 32: Tips For Combination
TI PS FOR COMBINATION COOK! NG MICRO+CONV COMBICOOK (Control panel Feature 4) This section gives you instructions to operate each combination Example: To bake 15 minutes at 325 degress default. cooking function. Please read these instructions carefully. Touch: Display Shows: Sometimes combination microwave-convection... -
Page 33: Combination Roast Cooking
COMBiNATiON ROAST COOKING GUIDE Food Oven Temp. Time, Min. / lb. Beef Turn over after half of cooking time. 325°F Rib roast, bone-in 10 to 14 Rib roast, boneless 325°F 10 to 14 Beef Tenderloin 375°F 10 to 14 300°F Chuck, Rump or Pot Roast 12 to 22 Turn over after half of cooking... -
Page 34: Favorite Recipes
FAVORITE RECIPES Chocolate Chip Cookies 2 1/2 cup oats ] cup brown sugar 2 cups aii purpose flour 2 eggs ] teaspoon vanilla 1/2 teaspoon salt 1 teaspoon baking powder 12 oz chocolate chips 1 teaspoon baking soda 1 1/2 cup chopped pecans 1 cup butter, softened 4 oz Hershey bar, melted... - Page 35 Combine potatoes, flour, salt in a zip top plastic bag; seal bag shake to coat potatoes. Transfer potatoes to a lightly greased 2 quart microwave safe casserole dish. Add milk butter, stirring well. Cover microwave on High power 12 minutes or until potatoes are tender;...
-
Page 36: Caring For Your Microwave Oven
Caring for Your Microwave Oven In order to ensure that your microwave oven looks good and works well for a long time, you should maintain it properly. For proper care, please follow these instructions carefully. Far interior surfaces: Far exterior surfaces and control Wash often with warm, sudsy panel:... -
Page 37: Caring For The Filters
CARING FOR THE FILTERS The grease filters should be removed and cleaned often; at least once a month. NOTE: Models are shipped for recirculating exhaust (To duct air outside reference the Installation Instructions book included with your microwave.). Some models have a disposable charcoal filter installed to help remove... -
Page 38: Lights
REPLACING THE COOKTOP OVEN CAVITY LIGHTS 4. Lift the bottom of the charcoal filter. Slide the filter The cookfop llghts straight out. 1. Unplug microwave oven or disconnect power. Mounting scre,_ 5. Lift upthe bulb holder. 2. Remove the bulb cover mounting screw for the specific bulb you want to replace. -
Page 39: Questions And Answers
Questions and Answers QUESTIONS ANSWERS Can I operate my microwave oven without the glass No. If you remove or turn over the glass turntable, turntable or turn the turntable over to hold a will get poor cooking results. large dish? Can I use either metal or aluminum... -
Page 40: Troubleshooting
Troubleshooting Most cooking problems often are caused by little things that you can find and fix without tools of any kind. Check the lists below and on the next page before calling for assistance or service. If you still need help, call Sears Service at 1-800-4-MY-HOME. -
Page 41: Sears Service
Sears Service Master Protection Agreement Congratulations on making a smart purchase.Your new KenmoreQ product is designed and manufactured years of dependable operation. But like all products, it may require preventive maintenance or repair from time to time.That's when having a Master Protection Agreement can save you money and aggravation. - Page 42 Your Home For troubleshooting, product manuals and expert advice: managemylife www.managemylife.com For repair - in your home - of all major brand appliances, lawn and garden equipment, or heating and cooling systems, no matter who made it, no matter who sold it! For the replacement parts, accessories owner's manuals that you need to do-it-yourself.