GE PT970 Owner's Manual
Microwave/convection cooking center, 30" double wall oven
Hide thumbs
Also See for PT970:
- Owner's manual (100 pages) ,
- User manual (101 pages) ,
- Installation instructions manual (25 pages)
Available languages
Available languages
Quick Links
See also:
User Manual, Instruction and Installation Manual
ge.com
©
Safety Instruc_tions
.........
9-9
Operating
Instruc_tions
Lower Oven Control
Panel
......
93
Lower
Oven
Controls
.......
93-38
Lower
()yen
Thermostat
.......
34
Microwave
Control
Panel
. . .]0, ]]
Microwave
Oven Controls
....
] 0-92
Probe
...................
98, 31
Sabbath
Feature
...........
39, 40
Self-Cleaning
Lower Oven
. . . 35, 36
Sensor
Controls
...........
] 6-] 8
Care and Cleaning
Door
......................
42
Light Bulb .....................
44
Microwave
Oven
.............
41
Probe
........................
43
Racks
......................
44
Troubleshooting
Tips
.....
45-48
Consumer
Support
Consumer
Support
...........
59
Product
Registration
.......
49, 50
_4'arranty
...................
51
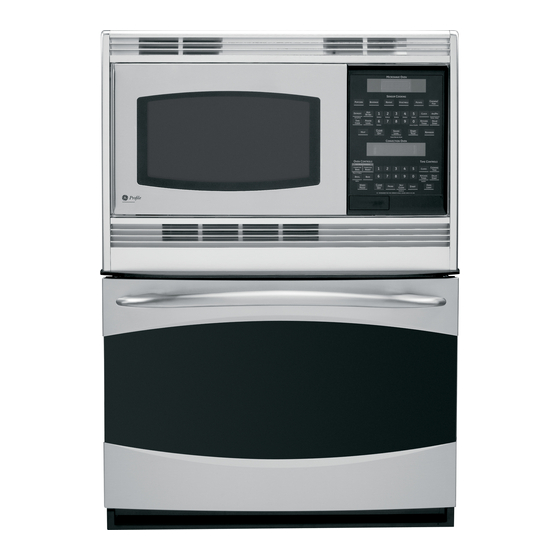
PT970-30"
Double
W(tll (_kJen
The microwave
oven in this
cooking center is I000 watts.
©
©
Write the model and serial
numbers here:
Model #
Serial #
You
can
find
them
on
a label
inside
the upper oven on the lelt side.
49-80432 02-07 JR

Related Manuals for GE PT970


Summary of Contents for GE PT970
- Page 1 Safety Instruc_tions ..© Operating Instruc_tions PT970-30" Double W(tll (_kJen Lower Oven Control Panel ..Lower Oven Controls ..93-38 Lower ()yen Thermostat ..Microwave Control Panel . . .]0, ]] Microwave Oven Controls ..] 0-92 Probe ....
- Page 2 IMPORTANT SAFETY INFORMATION. READALLINSTRUCTIONS BEFORE USING. WARNING'! For your safe_, the information in this manual must be followed to minimize the risk of fire or explosion, electric shock, or to prevent property damage, personal injury, or loss of fife. PRECAUTIONS TO AVOID POSSIBLE EXPOSURE TOEXCESSIVE MICROWAVE ENERGY Do not attempt...
- Page 3 SAFETY P RECAUTIONS When using electrical appliances, basic safety precautions should be followed, including the following: WARNtNg=ao,m.i. t.str,,ctio.s: Do [lot store fills appliance outdoors. Do not use this product [lear water-- This appliance must be connected [o a for example,...
- Page 4 IMPORTANT SAFETY INFORMATION. READALLINSTRUCTIONS BEFORE USING. A WARNING'! SAFETY P RECAUTIONS iiU'>_ ..Do not use water on grease fires. Never pick up a flaming pan. Smother flaming pan by covering pan completely with well-fitting lid, cookie sheet or fiat tray. Flaming grease outside a pan can be put out by covering with baking soda or, if available, a multi-purpose dry chemical or foam-type fire extinguisher.
- Page 5 MICflOWA VEOVEN Read and follow the specific "Precautions to Avoid Possible Exposure to Excessive Microwave Energy" section in thb manual. Toreduce the risk of fire in the oven cavity: Some products such as whole eggs and sealed containers for example,...
- Page 6 IMPORTANT SAFETY INFORMATION. READALLINSTRUCTIONS BEFORE USING. WARNING'! MICROWA V E-SAFE COOKWARE Make sure aft cookware used in your microwave oven is suitable for microwaving. Most glass casseroles, cooking dishes, measuring cups, custard cups, pottery or china dinnerware which does not have metallic trim or glaze with a metallic sheen can be used. Some cookware is labeled "suitable for microwaving."...
- Page 7 ARCING If Vou see arcing, press the CLEAR/OFF pad and correct the problem. Arcing is the microwave term for sparks in the Metal, such as twist-ties, pouluy' pins or oven. Arcing is caused by: gold-rimmed dishes in tile microwax_.
- Page 8 IMPORTANT SAFETY INFORMATION. READALLINSTRUCTIONS BEFORE USING. ALLTHESE THINGS A RENORMAL WITHYOUR MICROWAVE Steam oF xapoF escaping from aFound Some TV-Fadio inmFference might be tile dooI: noticed while using youi microwa_> oven. It's similaF to tile inmFference caused Light Feflection aFound tile dooF of tile other small appliances and does not otlteF...
- Page 9 _e. corn WARNING! SELF-CLEANING LOWER OVEN Do not use aluminum foil to line oven bottoms, except as suggested in this manual. Improper installation of aluminum foil may result in a risk of electric shock or fire. Stand away flora the oven when opening Mter broiling, always take any broiler the oxen doon Hot air or smam which...
-
Page 10: Microwave Oven Controls
Usingthe microwave oven controls. Throughout this manual, features and appearance may vary from your model. M_CROWAVE OVEN SENSOR COOKING r-7-g-TTgo_ c LJ_ MicrowaveOvenControlFeatures and Settings Display -time Defrost Use Time Defrost to defl'ost foods other Displays the time during cooking than meat, poultry and fish. - Page 11 MicrowaveOvenControlFeatures and Settings Reminder Number Pads Reminder teatm'e can be used like _Mter I)ressim" _ a flmcfion pad, press pads and it can be used an alam/clock, at any number to set the exact amount time want to cook.
- Page 12 Changingthe microwave power level. The power level may be entered or changed immediately after entering the time for 77meCook, -time Defrost or Express Cook. The power level may also be changed during time countdown. Tochange the power level... Here are some examples of uses for Press the Time Cook pad, various power levels: Enter...
- Page 13 Usingthe timedmicrowave features, gecom Time Cook I Allowsyouto microwave foranytime up to Press the Start/Pause pad. 99minutesand99seconds. Y)u may open tile door during Time Power level 10 (High) is atm,maficallv ()>ok to check the toed. (:lose tile door but xou ma_ chan,,e it fi)r more flexibility: and press the Start/Pause pad to resume cooking.
- Page 14 Using the timed microwave features. Cooking Guide For Time Cool<.Use power level High (10) unless otherwise noted. Time Comments Amount Asparagus 7 to 10 min. (freshspears) 1lb. In 11½-qt.casserole, place 1/4 cup water. Med-High(7) (frozenspears) l O-oz. p ackage 5 to 8 min. In 1-qt.casserole.
- Page 15 go.corn A dull thumping noise may be heard during defrosting. This is normal when oven is not operating at High power. Time Defrost Defrosting Tips Allows you to defrost for a selected length of time. See the Defrostlbg Guidefor suggested Foods frozen in paperorplasticcanbe tlYnes.
- Page 16 Usingthe microwave sensorcooking features. The Sensor Features detect the increasing humidity released during cooking. The oven automatically adjusts the cooking time to various types and amounts of food. Sensor Cooking The proper containei_ and co',ei_ are essential for best sensor c()oking Mwavs use microwaxe-saie containers...
- Page 17 Beverage Press the Beverage pad to heat a cup oI cofl_'e or other be',erage. Drinks heated with the Beverage feature may be very hot Remove the container with care. Reheat Some foods not recommended for use with TheReheat f eature reheats singleservings of previously cooked foodsa a plateof leftovers.
- Page 18 Usingthe microwave sensorcooking features. Toreduce time by 10%:Press the 1pad after the feature pad. To add 10% to cooking time: Press the 9pad after the feature pad. Potato ThePotato feature cooks 1/2-2/bs. of potatoes. Pierce skin _dth fork and place potatoes on the turntable.
- Page 19 Usingthe microwave auto feature, ge.oom Auto Defrost Conversion Guide UseAuto Defrost for meat, poultrg and fish up to 6 pounds.Use TimeDefrost for most other If the weight of fi)od is stated in pomMs frozenfoods. tile _lll(l o/lnces, o//nces I/l[/st Auto...
- Page 20 Usingthe other microwave features. Cooking Complete Reminder: Toremind you that you have food in the oven, the oven will display FOODIS READY and beep once a minute until you either open the oven door or press the Clear/Off pad. Clock Pressto enter the tlkneof day or to check the time of day while microwaving.
- Page 21 Child Lockout You maylockthecontrol p anelto preventthe _._q/en tile control panel is locked, an L CLEAR microwave frombeingaccidentally s tartedor will be displa}ed to tile extreme right. usedbychildren. To lock or unlock the controls, press and hold tile Clear/Off pad tot about 3 seconds.
- Page 22 Microwave terms. Definition Arcing •_rcin,*,_is the microwaxe term fin" sparks in the oxen. Arcing, is caused {{}the temperature l)r°be staving, , in the oxen but not inserted in the food. metal or fifil touching the side of the oxen. fifil that is not molded to fi)od...
- Page 23 Usingthe lower oven controls, gecom Throughout this manual, features and appearance may vary from your model. LowerOven Control, Clock andtimerFeatures a ndSettings Cleor/Off Pad Display Shows tile time of day, oven temperature, Press to cancel o',en operations except clock time_: whether oven is in the...
-
Page 24
Usingthe lower oven. To avoid possible bums, place the racks in the desired posifion before you turn the oven on. Before you begin... The rack_ have stop-locks, so that when To replace, place the end of the rack placed correctly on the they will (stoi>locl
- Page 25 How to Set the Oven for Broiling i! ¸ Close the doox: Always broil with the door Press the Broil Hi/Lo pad once fi)r HI Broil. closed. to LO Broil, press the To change Place the meat or fish on a 1)roller Broil Hi/Lo pad again.
- Page 26 Usingthe lower oven clock and timer. ToSet the Clock The clock must be set to the correct Press Clock pad. time of day fi)r the autonmtic oven Press numl)er pads. tinting tractions to work properly. time of (lay cannot be chanoed durino Press Start...
- Page 27 Usingthe lower oven timed baking and masting features, ge.com NOTE."Foods that spoil easily--such as milk, eggs, fish, stuffings, poultry and pork--should not be allowed to sit for more than 1 hour before or after cooking. Room temperature promotes the growth of harmful bacteria. Be sure that the oven light is off because heat from the bulb will speed harmful bacteria growth.
- Page 28 Usingthe lower oven probe. For many foods, especially roasts and poultry, internal food temperature is the best test for doneness. The temperature probe takes the guesswork out of roasting by cooking foods to the exact doneness you wan_ NOTE."Theprobe/s for use in the bwer ovenonly cab!e Use of probes other...
- Page 29 Usingthe lower convectionoven. gecom _n_c_n_n NOTE.'The convection tim Mll cycle on and offwhile cooking to best distribute In a convectionoven,a fan circulates hot air over, hot air in the oxen. under andaround the food The convection oven tim shuts offwhen Thisckculating hot ak /s evenly distributed the oven door is opened.
- Page 30 Usingthe lower convectionoven. Convection Roast Grid _ , Good for large tender cuts of meat, uncovered X&]_en vou convection roasting it is Broilerpan important that use a broiler pan and convection tim circulates heated grid fl)r best convection roasting results. air evenly ()vet"...
- Page 31 How to Set the Oven for Convection Roasting when Using the Probe Tile display will flash Probe and tile ()veil When tile internal teini)erature control will signal if tile probe is inserted tile ineat reaches tile tenii)erature into tile outlet,...
- Page 32 Usingthe lower oven timed features for convectioncooking. Youwill hear a fan while cooking with these features. Thefan will stop when the door b opened,but the heat will not turn off. NOTE:Foodsthat spoil easily--such as milk,eggs,fish, stuffings,poultry and pork--should not be allowed to sit for more than 1hour before or after cooking.Roomtemperaturepromotesthe growth of harmful bacteria.Be sure that the ovenlight is off because heat from the bulb will speedharmful bacteria growth.
- Page 33 How to Set a Delayed Start and Automatic Stop Youcan set the ovencontrol to delay-startthe oven, ff you would like to checkthe timesyou haveset, i ¸¸¸¸ cook fora specificlength of time and then turnoff pressthe Belay Startpadto checkthestart time...
- Page 34 Adjust the lower oven thermostat--Do it yourself! Youmay find that your new oven cooks differently than the one it replaced. Use your new oven for a few weeks to become more familiar with it. If you still think your new oven is too hot or too cold, you can adjust the thermostat yourself.
- Page 35 Usingthe self-cleaning lower oven. geoom The oven door must be closed and all controls must be set correctly for the cycle to work properly. Before a Clean Cycle re('onm/end ".enting )our kitchen Make sm'e tile oven light bull) cover with oi_en window or using, a...
- Page 36 Usingthe self-cleaning lower oven. The oven door must be closed and all controls must be set correctly for the cycle to work properly. How to Delay the Start of Cleaning ii ¸ : Tile door locks autonlatically, The display Press the Seff CIoanI)ad tor a will show the start tinle.
- Page 37 Special features of your lower oven control ge.com Yournew touch pad control has additional features that you may choose to use. The following are the features and how you may activate them. The special feature modes can only be activated while the display is showing the time of day. They remain in the control's memory until the steps are repeated.
- Page 38 Special features of yourlower oven control Tonesat the End of a Timed Cycle At theendof a timedcycle, 3 shortbeepswill Press tile Kitchen timer On/Off soundfol/owed by onebeepevery 6 seconds until pad, Tile displa)shows CON BEEP theClear/Offpadis pressedThis cont/buous (continuous beep). Press tile 6-second/)eel) maybe canceled Kitchen timer On/Off pad again.
- Page 39 Usingthe SabbathFeature. (Designedfor useon the Jewish Sabbathand Holidays.) ( onsomemodels) ge.com TheSabbathfeature can be usedfor baking/roastingonlg It cannot be usedfor convection,broiling, self-cleaningor Delay Start cooking. NOTE:Theoven light comes on automatically(on some models)when the door is opened and goes off when the door is closed.
- Page 40 Usingthe Sabbath Feature. (Designedfor useon the Jewish Sabbathand Holidays.) ( onsomemodels) How to Exit the Sabbath Feature Toud_ the Clear/Offpad. Touch Start pad, If the o_en is cooking, wait NOTE: If a power outnge occurred while for a rand(nn delay period oven was in Sabbath,...
- Page 41 Care and cleaning of the cooking center, g,.co,, Be sure electricai power is off and aiI surfaces are cool before cleaning any part of the cooidrlg center, Hew to Remove Packaging Tape Apply wkh a sol} doth m_d allow to soak. To assm'e m_o damage is dolce...
- Page 42 Careand cleaning of the cooking center. Lift-Off Oven Door Thedooris veryheavy.Be carefulwhen Bottom _:arm With tile removingand liftingthedoor. edge door at tile saine angle as ofslot, Donot lift thedoorby thehandle. the renlowd Sl0t Toremovethedoor." position, seat the indentation Fully open the dooI: tile hinge aml Indentation...
- Page 43 g_com Control Panel It's a good idea to wipe control Do not use abrasive cleansex_, strong panel atier each use. Clean with mild liquid cleane_, plastic scotwing pads soap water or vinegar water; oven cleanet_ on the control panel--they rinse with clean water...
Page 44: Light Bulb
National Parts Center cleaner or polish. _dwa)'s wipe smti_ce 1.800.6262002 in the direct.ion of the grain, Follow cleaner instructions fiw cleaning ge.com stainless steel sm'ti_ce,...Page 45: Microwave Oven
Before yeu call for service.., g,.co,, Troubleshooting -tips Save time and money! Review the charts on the following pages first and you may not need to call for service. Possible Causes What To Do Controlpanel on You forgot to press the * Press tile Start/Pause pad.- Page 46 Before you call for service... Troubleshooting -tips Possible Causes What To Do Lower oven control forgot to enter * Press Bake desired temperature or the signals after entering bake temperature Self Clean desired clean time. cooking time or cleaning time. delay start Using oven...
Page 47: Probe
What To Do Possible Causes Lower oven Oven thermostat See the Adjust the lower oven thermostat--Do it yourself! • section. temperature too needs adjustment. hot or too cold Lower oven will A fuse in your home • I_eplace tile fi/se...Page 48: Racks
Before you call for service... Troubleshooting tips Possihte Ca.ses What To De Lower oven lightdoes or replace Light bulb is loose or defective. • Tighten the bull). network • Call for service. Pad operating light is broken. "T---anda numberer You have a fm_ction •...- Page 49 GE Service Protection Plus '_' GE, a imme recog_fized _;odd_;kte fbr q_mlhy' and depeildabHhy, offers Service Protectio_ } h_s --comp_ ehe_s_ e protecti(m all yore" appliai_ces-- No Matter What Brand! We ?t Cover An Benefits Include: * Backed by GE...
- Page 50 FAILURE TO (X)MPI.ETE AND RETI RN Tt tlS (2M{I) DOES NOT DIMINISII Y()I R Appliances General Electric Company W.\RI_ \NTY RIGt tTS. Louisville, K¥/40225 For lnol*_ inft)nnation about (;EA's privacy and data usage polio> go to ge.com and click on ge.com "Pri_cy Poli_y" or call 800.626.2224.
- Page 51 USA. If the product is located in an area where service by a GEAuthorized Servicer is not available, you may be responsible for a trip charge or you may be required to bring the product to an Authorized GE Service location for service.
- Page 52 ScheduleService ge.com Expert GE repair service is only one step awa) from your doo_: Get on-line and schedule xour service at your comenience 24 hom_ any (lax of tile year'. Or call 800.GE.(:AI_ES 800.432.2737) during...
- Page 53 Instrucciones de seguridad ..Instrucciones de operaci6n PT970-Ho)7_,o de dobl_ pared de 30" Autolimpieza del horno inferior ..35, 36 Controles del horno inferior ..23-38 Conuoles del horno microondas ..10-22 Controles del sensor ....16-18...
- Page 54 INFORMACION IMPORTANTE DESEGURIDAD. LEATODAS LASINSTRUCCIONES A NTESDEUSAR. iADVERTENCIA ! Si no -sesigue exactamente la informaciSn de este manual, puede ocurrir un incendio, una explosi6n o un cortocircuito que podria causar dafios a la propiedad, lesiones personales o la muerte. PRECAUCIONES PARA EVITAR LAPOSIBLE EXPOSICION A UNA ENERGfA D EMICROONDAS EXCESIVA...
- Page 55 PRECAUCIONES DESEGURIDAD Cuando se utilizan aparatos e/#ctricos, se deben seguir las precauciones de seguridad b#sicas, incluyendo /as siguientes: No almacene este aparato a la intempei_ie. No ufilice esm producto cerca del agua, de co#exi## a tierra: como por ejemplo...
- Page 56 INFORMACI JN IMPORTANTE DESEGURIDAD. LEATODAS LASINSTRUCCIONES A NTESDEUSAR. ADVERTENCIA! UCIONES D ESEGURIDAD iiU'>_ ..No use agua para apagar incendios causados por grasa. Nunca agarre una cacerola que se est_ quemando. Sofoque las cacerolas que se est_n quemando cubri_ndolas completamente con una tapa bien ajustada, una bandeja para hornear o una bandeja plana.
- Page 57 HORNO MICROONDAS Lea y siga la secciSn especffica "precauciones para evitar una posible exposiciSn a una energfa de microondas excesiva" en este manual Para reducir el riesgo de incendio pot ejemplo,jmTas celTadas---explotarfin en la cavidM det homo: y no deben...
- Page 58 INFORMACION IMPORTANTE DESEGURIDAD. LEATODAS LASINSTRUCCIONES A NTESDEUSAR. iADVERTENCIA ! TENSILIOS DECOCINA SEGUROS PARA MICROONDAS Aseg(lrese de que tofloslosutensiliosde cocinaufilizados en su homodemicroondas seanadecuados para cocinar conmicroondas. P ueden utilizarsela mayorfade cacerolasde vMfio,platospara cocinar,tazones de meflici6n,tazones para cremas,cer#micao vajillade porcelanaque no tongaadomosmet#licoso est#bamizaflacon un lustremet#lico. Algunosutensiliosdo cocinaest#netiquetados como "aptospara cocinarconmicroondas"...
- Page 59 ARCO ELE-CTRICO Si observa un arco el6ctrico, presione el bot6n CLEAR/OFFy corrija el problem& El arco electrico es el termino de microondas Metal, como tMllas para torce_; alfileres para definir las chispas dentro del homo. para axes o platos...
- Page 60 INFORMACION IMPORTANTE DESEGURIDAD. LEATODAS LASINSTRUCCIONES A NTESDEUSAR. TODOS L OSSIGUIENTES ASPECTOS SONNORMALES C ON SUHORNO MICROONDAS Mientras est_ utilizando su homo _apor escapando ahededor de la puerta. microondas es posible que note algo de Refle]o de ]uz alrededor de la puerta o de interferencia en la TV o radio.
- Page 61 & iADVER TENCIA! AUTOLIMPIEZA DEL t-IOflNO INFERIOR No ufilice papel aluminio para recubrir la parte inferior del homo, excepto como se sugiere en este manual. La instalaciSn inapropiada del papel aluminio podda resultar en un riesgo de cortocircuito o fuego.
- Page 62 Usode los controlesdel homo microondas. A Io largo de este manual, las caracterfsticas y apariencia pueden variar con los de su model& M_CROWAVE OVEN SENSOR COOKING Caracterfst/cas y configuraciones decontrol d e/homo m/croondas Pantalla -time Defrost (fiempo de descongelamiento) Muestra el tiempo dunmte las flmciones de Udlice Time Deli'ost pare des(ongelar cocci6n, el nivel de potencia que est_ siendo alimentos distintos a la came r(!ja, (le me...
- Page 63 Caracterfsficas y con@uraciones de controldel homo microondas Reminder (Recordatorio) Botones num#ricos I,a (aracterfsfica Reminderpuede Despug_s de presionar un bot6n fllnd6n, presione botones nuln_iJcos utilizada coino I'elQj despertadoi; y puede para establecer la cantidad exacta ser utilizada en cualquier InOlnelm),...
- Page 64 Cambiodel nivel de potencia del microondas. El nivel de potencia puede ingresarse o cambiarse inmediatamente despu#s de ingresar el fiempo para -time Cook, -time Defrost o Express Cook. El nivel de potencia tambi#n puede cambiarse durante la cuenta regresiva del tiempo. Para cambiar el nivel de potencia...
- Page 65 Use de las caracteristicas cronometradasdel microondas, ge.oom Time Cook I (Tiempo de coccion I) Lepermiteufifl2ar el microondas h asta por Start/Pause. Presione el bot6n 99minutosy 99segundos. Usted puede abrir la puerta durante E1 nivel de potencia 10 (Alto) se establece Time Cook para revisar la comida.
- Page 66 Use de/as caracte#sticas cmnemetrMas dei microendas. Gufa de cocina para el tiempo de cocciSn, Ufiiice el nivel de potencia Alto (t0) a menos que se indique /o contraHo, Cantidad fiempo Comentarios Arveias (frescas, f lescascaradas) 2 Ib con lacascara 9 a 12min Enunacacerolade 1cuarto,coloque1/4 detaza deagua.
- Page 67 Duranteel descongelamiento puedeescucharse un golpeteoamortiguado. Estoes normalcuandoel homono est#funcionando enAlto. Time Defrost (Tiempo de descongelamiento) Lepermite d escongelar durante u nperiodo f ietiempo Consejos dedescongelamiento selecc/onado. Yea laGuia dedescongelamiento paralos Los alJmentos congelados enpapel o plastico p ueden s et fiempos sugeddos.
- Page 68 Usode las caracteristicas del sensorde cocciondel homo microondas. La caracterfstica Sensor detecta el aumento de la humedad liberada durante la cocci6n. El homo ajusta autom#ticamente el tiempo de cocci6n a varios tipos y cantidades de alimentos. Sensor de coccion i,os recipientes ) cul)iertas apropiados son esenciales...
- Page 69 Beverage (Bebidas) Beverage para calentar Presione el bot(m (ma taza de calc: u otra bebida. Las bebidas calentadas con la caracteristica Bebidas pueden estar muy calientes. Retire el recipiente con cuidado. Reheat (Recalentar) La caracterfsticaReheatreca/ienta porciones Algunos alimentos no son recomendados lbdMduales de ahknentosprevbmente cocinados para utilizarse con Reheat;...
- Page 70 Usode las caracteristicas del sensorde cocciondel homo microondas. Para reducir el tiempo en 10%:presione el botSn 1 despu#s del botSn de la caracterfsfica. Para afiadir un 10% al tiempo de cocci6n: presione el botSn 9 despu#s del botSn de la caracterbfica. Potato (Papas) Lacaracterfsflca P otato coclwa1/2a 2 lb de papas.
- Page 71 Usode las caracteristicas automaticas del microondas, ge.com Auto Defrost(DescongelamientoautomMico) ¸¸¸¸?¸2¸¸¸ Guia decenversi6n Utiiice Auto Defrost para came roja, aves y pescadohasta 6 libras. Utilice TimeDefrost Si el peso de la comida est:i esmblecido para ios otros ahmentos conge/ados. en libras y onzas, las onzas deben Auto Defl'ost establece convertible a d_dmas (0,1) de una libra.
- Page 72 Use de las otras caracteristicas del microondas. Recordador de cocci6n terminada: para recordarle que fiene comida en el homo, el homo mostrar4 FOOD IS READY y sonar# una alarma una vez por minuto hasta que abra la puerta del homo o presione el botSn Clear/Off. Clock (Reloj) Presionepara ingresar b hora del dfa o revlsar la hora del dfa mientras cocina con el homo...
- Page 73 Child Lockout (Bloqueode ni_os) Usted pueflebloquear e l paneldecontrol p ara Cuando el panel de control est6 CLEAR evitarqueel homorelcreondas seainic/ado bloqueado, aparecerfi accidenta/reente o utih2ado p orn/fios. el extremo derecho de la pantalla, Para bloquear o desbloquear controles,...
- Page 74 Terminos de microondas. !iii ii! iiiii!i! Definicion Arcoelectrico E1 arco el_ctfico es el t_mino de microondas para definir las chispas dentro homo. E1 arco el_ctfico es causado por: i,a sonda de temperatura est_i en el homo pero no est_i insertada en la comida.
- Page 75 Usode loscontroles del homoinferior, ge.com A Io largo de este manual, las caracterfsticas y apariencia pueden variar con los de su modelo. CONVECTION OVEN OVEN CONT TI4E CONTROLS Control de/homo inferior, c aracterfsticas y con@uraciones de/reloj (Clock) ydeltemporizador (Timer) 0 Panta//a...
- Page 76 Usodel homoinferior. Para prevenir posibles quemaduras, coloque los parrillas en la posiciSn deseada antes de encender el homo. Antes de comenzar... Para reemplazar, coloque I.as pardllas denen cietTes de tope, el extrem o de fimna tal que cuando se encuentren de la parrilla (topes de defoe) colocados...
- Page 77 C6mo configurar el homo para asar a la parrilla i__i ( :iene ]a puerta. Siempre a sea la parrilla con Presionee] bot6n BroilHi/Lo una _ez la puerta cerrada, para Asar a la parrilla HI (Ahot. Para cambiar a Asar a la parrilla LO...
- Page 78 Uso del reloj y el temporizadordel homo inferior. Para ajustar el reloj E1 I'eh_ i debe ser ajustado en la hora Clock, Presione el bot6n correcta dfa para las flu_dones Presione los botones _IIItOII/;/tic_IS cI'onoI/letI';ld_ls hoYno ntlIlleIJ('os, fimcionen apropiadamenm, hora Start hasta Presione el bot6n...
- Page 79 Uso de las caracteristicas cronometradasde horneado y asado del homo inferior. ge.com NOTA: no debeperrnitirse quelosalirnentos queseechana perderf#cilrnente--corno leche, h uevos, p escado, r ellenos, a yesy cerdo-- reposen pormdsde I horaanteso despu#s dela cocciSn, L aternperatura a mbiente prornueve e l crecirniento d e bacterias peligrosas.
- Page 80 Usede la sondadel homoinferior. Paramuchosalimentos, e specialmente la came asaday las aves,la temperaturaintema del alimentoesla meierpruebapara el puntode cocci@. Lason@ de temperaturaeliminalas conjeturasacerca de los asadosal cocinarlos alimentosen elpunto de cocci@ exactoque usteddesea. NOTA: b somaespara serutilizafla f inicamente enel homo inferior E1 usa de sondas disfintas a la suministrada con este producto puede resulmr en el dario...
- Page 81 Usodel homo de conveccion inferior. .e.co Ventilador de convecci6n NOTA: el venfilador de convecci6n se encendeM y apagarfi en el ciclo Enunhomode conveccidn, un venfilador hace mientras cocina para distribuir mejor circular airecalientesobre, d ebajo y alrededor d e el aire caliente dentro del homo.
- Page 82 Usodel homo de conveccion inferior. Asado por conveccion Rejilla Buenopara grandes cortes de came tiema, E1 aire calentado atrapa losjugos Banded para asar a la parriila destapada. rfipidamente para un producto mils hfimedo y fierno mientras, al mismo E1 ventilador de convecci6n circula tiei/lpo,...
- Page 83 Como configurar el homo para asar por conveccion cuando se utiliza la sonda pantalla parpadeaM mostrando Probe (_uando la temperatm'a interna v el control del horno indicaM si la sonda de la came alcance la temperatm'a Para mejores resultados cualTdo...
- Page 84 Usode las caracteristicas cronometradasdel homo inferior para cocinar por conveccl in. Escuchar#un ventiladormientrasest6 cocinando con estas caracterfsficas.El ventiladorse detendr#cuando /apuerta se abra, pero e/ca/or permanecer#. NOTA:no debe permitirse que los alimentosque se echan a perder f#cilmente--como leche, huevos,pescado,rellenos, aves y cerdo--reposen por mils de 1hora antes o despu#sde la cocciOn.La temperaturaambientepromueveel crecimiento de bacterias peligrosas.Aseg&ese de que la luz del homo est6 apagadaya que el calor de la bombillaacelerarfa el crecimientode bacteriaspeligrosas.
- Page 85 Come configurar un Inicio postergado y una Parada automatica Ustedpuedeconfigurarel control defhomo para Si deseaverificarel tiempoqueha configurado, i ¸¸¸¸ quepostergueel inicio,cocine duranteunpefiodo presioneel botdnDelay Start para verificarla hera especfficode tiempo y luegose apague de inicioqueha configuradoo presioneel botdn autombticamente.
- Page 86 Ajustedeltermostato delhomoinferior: i Hagaloustedmismo! Usted se puede percatar que su homo nuevo cocina distinto al que reemplaz5. Use su homo nuevo par varias semanas para familiarizarse con #L Si aOnpiensa que su homo nuevo es demasiado caliente o demasiado fr[o, usted puede ajustar el termostato usted mismo.
- Page 87 Usode la autolimpieza del homoinferior, ge.com La puerta del homo debe estar cerrada y todos los controles deben estar configurados correctamente para que el ciclo funcione apropiadamente. Antes de un ciclo de limpieza l).ecomendan/os ventilar su cocina _&segfirese de que est(_ puesta...
- Page 88 Use de la autolimpiezadel homo inferior. La puerta del homo debe estar cerrada y todos los controles deben estar configurados correctamente para que el ciclo funcione apropiadamente. Come posponer el inicio de la limpieza I,a puerta se bloquea automfificamente. Presione el bot6n Self Clean para un fiempo de limpieza de 4 horas.
- Page 89 Caracteristicasespeciales de control de su homo inferior, gecom Su nuevo control con botones sensibles tiene caracterfsticas adicionales que puede elegir utilizar. A continuaciSn se describen las caractedsticas y c6mo puede activarlas. Los modos de caracterfstica especial s61opueden activarse mientras la pantalla est# mostrando la hora del dfa. Dichos modos permanecen en la memoria del control hasta que los pasos sean repetidos.
- Page 90 Caracteristicasespeciales de control de su homo inferior. Tonesal final de un title cronometrado AI finalde uncicb cronometrado, sonar_n Presione el bot6n Kitchen Timer 3 pitidoscortosseguidos p or unpitidocada On/Off. i,a panmlla mt/estra CON HIfl.o 6 segundos h astaquesepresione el botdn BEEP (piddo continue).
- Page 91 Use de la caracteristica Sabbath. (Dise_ada para utilizarseen el Sabbathjudfo y dfas festivos).(enalgunosmodelos) ge.com La caracteristica Sabbathpuede utilizarse(micamentepara homeado/asado.No puede utilizarsepara convecciSn, asadoa la parrilla, autolimpiezao Delay Start. NORA: l a luzdel homo se enciendeautom#ticamente(en algunos modelos)cuando la puerta es abierta y se apaga cuando la puerta es cerrada.
- Page 92 Use de la caracteristica Sabbath. fOiseflada para utiliza_se en el Sabbathjudfo y dfas festivos), f en algunosmodolos) COme salir de la caracteristica Sabbath Presione el bot6n Clear/Off Start. Presione el botdn Si el homo estfi cocinando, espere NOTA:si se presentd un corte en dumnte un periodo...
- Page 93 Cuidado y limpieza del centto de cocin& ge.oom Antes de Iimpiar cualquier parte del centro de cocina aseg_rese de que ei sumirlistro elbctrico estb desconectado y todas las superficies est#n frfas. C6me quitar la cinta de emflMaje Ap]iql_e con m_ patio slmve v IPam asegm_t_se de w.:_ da6ar...
- Page 94 Cuidadoy limpieza del centro de cocina. Despegue de la puerta del homo Lapuertaes muypesada.Tengacuidado Borde Braze de la bisagra al quitary levantarla puerta. inferior la puertn en el mismo Noievante ia puertapor ia agarradera. fingulo de la ranura Ranura Pare quitar la puerta: posicidn para quit;u;...
- Page 95 g_com Panel de control Es buena idea limpiar el panel de control No ufilice limpiadores abrasiw_s, c,mjab6n despu_s de cada uso. Limpie limpiadores lkluidos fllertes, ahnohadillas suave y agua o con una soluci6n pl;isficas para restregar o limpiadores vinagre y agua, enjuague con agua limpia para hornos sol)re el panel...
- Page 96 Centro Nacional deRefacciones para acero ino_dable. abfillantador (National Parts Center) Siempre limpie la superfide 1.800.626.2002 la direcddn de las vetas. Siga las instrucdones del limpiador para limpiar ge.com la superficie de acero inoxidable.
- Page 97 Antes de llamar para so#c#ar un servicio de manteMmientOoo, ge.co,. iLos consejos para resoluciSn de problemas ahorran fiempo y dinero] Revise primero las grMcas en las siguientes p#ginas y es posible que no tenga que Ilamar para solicitar servicio de mantenimiento.
- Page 98 Antes de Ilamar para solicitar un servicio de mantenimiento... Consejos para resoluci6n de problemas Que hacer Causas posibles Se#ales decontrol Olvid6 ingresar • Presione el bot6n Bake v, la temperatura deseada del homoinferior temperatura de horneado el bot6n Self Clean v el tiempo limpieza deseado.
- Page 99 Que hacer Causas posibles La temperatura E1 tennostato del homo • Consulte la se(d6n Ajuste del termostatodel homo inferior: del homo inferior ill@ale usted mismo! necesita tm ajuste. es demasiadoalta o demasiadobaja El homo inferior Un fusible en su casa puede •...
- Page 100 Antes de Ilamar para solicitar un servicio de mantenimiento... Consejos para resoluci6n de problemas Que hacer Causas posibles La luzdel homoinferior La bombilla est,4 floja o defectuosa. * Apfiete o reemplace la bombilla. no fffnciona E1 boton de operacion * IJame para solicitar ser\icio...
- Page 101 800.626.2224 Co,_['_e e_ GE, ]hime_os e_ forma gramita e_ los EEAJ{J. a] p.,-. m:*_ Coloque en un sobre y envie a: General Electric Company Warranty Reg_tration Department P.O. Box 32150...
- Page 102 NO COMPI_E'I:kRY DEVOISVER ESI:\ TM{]E'IA NO REI)I CE NUS DERI{CttOS DE (;M_\NTiA. Louisville, KY/40225 Para mils informacidn sol)re las polfficas (le privacidad y (le uso de infi)rmacidn de (;EA, dir{iase a ge.com ge.com y haga clic en "Polflica de privacidad" o llame al 800.626.2224.
- Page 103 Estados Unidos. Si el producto est# situado en un firea que no dispone de servicio pot parte de un proveeclor de servicio autorizado de GE,podria tenet que hacerse cargo de los costes de envfo o bien podrfa solicitfirsele que Ileve el producto a un centro de servicio de GE autorizado para realizar la reparaci6n.
- Page 104 _'eb indicando todos los detalles asf como su nfimero de tel_fimo o escrfl)anos General Manage_; Customer Relations GE Appliances, Appliance Park I *)uis\ille, KY 40225 iRegislre su nuevo electrodom_stico en lfima---eumado usted prefiera! E1 registrar su producto a tiempo l Registresu electrodom#stico ge.com...