Table of Contents
Quick Links
49-80553
10-08 JR
Owner's
Manual
Professional Outdoor Grills
and 12" Professional Outdoor
Cooktop
Barbecues professionnels
et tables de cuisson
professionnelles de plein
air de 30 cm (12 po)
Manuel du propriétaire
La section française commence à la page 37
Parrillas profesionales para
el aire libre y estufa profesional
para el aire libre de 12"
Manual del propietario
La sección en español empieza en la página 73
Table of Contents

Related Manuals for GE Monogram ZGG420LBPSS


Summary of Contents for GE Monogram ZGG420LBPSS
- Page 1 49-80553 10-08 JR Owner’s Manual Professional Outdoor Grills and 12" Professional Outdoor Cooktop Barbecues professionnels et tables de cuisson professionnelles de plein air de 30 cm (12 po) Manuel du propriétaire La section française commence à la page 37 Parrillas profesionales para el aire libre y estufa profesional para el aire libre de 12"...
-
Page 2: Table Of Contents
Introduction Your new Monogram grill or cooktop makes an eloquent statement of style, convenience and outdoor planning flexibility. Whether you chose it for its purity of design, assiduous attention to detail—or for both of these reasons—you’ll find that your Monogram grill’s or cooktop’s superior blend of form and function will delight you for years to come. - Page 3 FOR OUTDOOR USE ONLY IMPROPER INSTALLATION, ADJUSTMENT, ALTERATION, SERVICE OR MAINTENANCE CAN CAUSE PROPERTY DAMAGE, INJURY OR DEATH. READ THIS MANUAL THOROUGHLY BEFORE INSTALLATION, USE OR SERVICING OF THIS EQUIPMENT. TESTED IN ACCORDANCE WITH ANSI Z21.58, LATEST EDITION STANDARD FOR OUTDOOR COOKING GAS APPLIANCES.
-
Page 4: Model And Serial Number
Before Read this manual carefully. It is intended to help using your you operate and maintain your new grill or cooktop properly. grill or Keep it handy for answers to your questions. cooktop Write On 12" cooktops you will find them on a label down the in the rear of the burner box below the burner grates or on the bottom panel of the grill head. -
Page 5: Safety Instructions
IMPORTANT SAFETY NOTICE • The California Safe Drinking Water and Toxic Enforcement Act requires the Governor of California to publish a list of substances known to the state to cause cancer, birth defects or other reproductive harm, and requires businesses to warn customers of potential exposure to such substances. - Page 6 WARNING: SAFETY PRECAUTIONS • Do not heat unopened food containers as a buildup of pressure may cause the container to burst. • Use a pot holder when opening the hood. Open the hood slowly to allow heat and steam to escape. •...
- Page 7 WARNING: SAFETY PRECAUTIONS • Do not use charcoal on the grill. • Keep any electrical supply cord and the fuel supply hose away from any heated surfaces. Electrical cords should be placed away from walkways to avoid tripping hazard. • Never touch the grill grates, hood or immediate surrounding metal surfaces with your bare hands as these areas become extremely hot during use and could cause...
- Page 8 WARNING: SAFETY PRECAUTIONS Do not use the grill until a leak test has been performed. WARNING: TEST FOR LEAKS A complete gas tightness check must be performed at the installation site. To prevent fire or explosion hazard, DO NOT use or permit sources of ignition in the area while performing a leak test.
-
Page 9: Save These Instructions
WARNING: SAFETY PRECAUTIONS SPECIAL NOTE ON WINDY CONDITIONS Never use the grill in windy conditions. If located in a consistently windy area (oceanfront, mountaintop, etc.) a windbreak will be required on the rear wall and both sides of the grill. Windbreak construction is the responsibility of the owner and must adhere to the specified clearances listed in the Installation Instructions. -
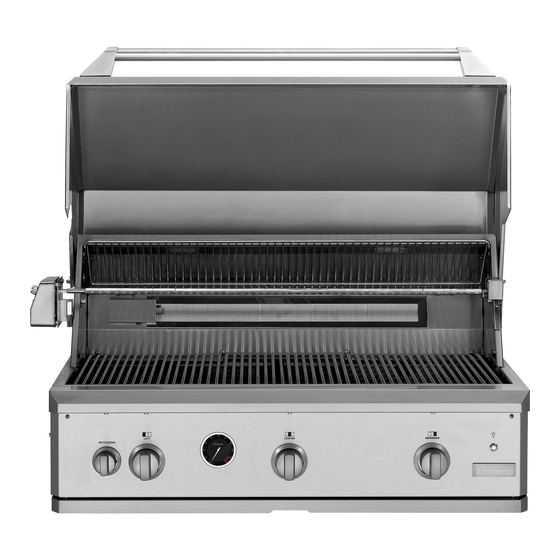
Page 10: Features
54" Built-In Feature information (Not all features are on all models. Appearance may vary throughout this Manual.) 30" Built-In 12" Built-In Cooktop Features of Your Grill and Cooktop Professional Outdoor Grills & Cooktops 42" Built-In Feature Index Grill Control(s) Rotisserie Control(s) Temperature Gauge Tank Drawer with LP Tank Retainer Loop... - Page 11 54" Free-Standing Grill with Side Burners Feature Index Side Shelf Rotisserie Motor and connector cord Rotisserie Supports Rotisserie Spit Rod and Forks Rotisserie Basting Pan Smoker Box Cutting Board Match Stick Extension Rod Fixed Wheels Caster Wheels Locking Wheel Light Switch Security Loop (located on grill chassis bottom near the back right wheel)
-
Page 12: Lighting The Grill
Location Allow 12" minimum clearance on both sides and the back of the grill to adjacent vertical combustible construction. See the Installation Instructions for complete details. To install the LP tank, fully extend the tank Tank drawer drawer and lift the retainer loop. Place the tank with LP tank on the drawer bottom, inserting the loop on retainer loop... - Page 13 To light Lighting Using the Control Knob the grill WARNING: • Always open the hood prior to lighting. • Always keep your face and body as far away from the grill as possible when lighting. Open the hood, push and turn the grill control knob to the LITE position and hold.
-
Page 14: Grilling Hints
Using Grilling requires high heat for searing and proper browning. Most foods are cooked at the HI heat the grill setting for the entire cooking time with the hood in the open position. However, when grilling large pieces of meat or poultry, it may be necessary to turn the heat to a lower setting after the initial browning. -
Page 15: Grilling Guide
Grilling This is a suggested guide only. There are many variables that will affect cooking performance. These include wind, temperature, humidity and cut of meat. Remember to pre-heat the grill with all the main burners on high guide for 10–15 minutes with the hood closed for best cooking performance. Food Fresh Vegetables Beets, carrots, turnips... -
Page 16: Infrared Sear Burner
Infrared On some models, the grill section has an infrared sear burner located on the right side. It consists sear of a stainless steel grill grate and an infrared burner with a protective screen. burner The grate provides the searing surface. (on some The infrared burner sears meat for a crispy models) -
Page 17: Cooktop Burners
Cooktop Some grills have cooktops with two surface burners. Each surface burner is rated at burners 15,000 BTU and has a spark igniter for efficient lighting. (on some models) The burner grates are cast iron for durability. The two (2) center sections are reversible, allowing the use of a wok. -
Page 18: Rotisserie
Rotisserie The rotisserie system is designed to cook items from the back of the grill using infrared heat. system The rotisserie motor has three speeds (High, Medium and Low) and is capable of turning up to a 15 lb. cut of meat or poultry. The actual capacity is limited by clearance. - Page 19 To setup 1. Open the hood. the grill for 2. Raise the warming shelf up and hook it in the self-store position (see Warming Shelf rotisserie section). cooking 3. Place the basting pan on the grill grates. 4. Assemble the rotisserie motor and spit rod. 5.
- Page 20 To light the Lighting Using the Control Knob(s) rotisserie WARNING: burner(s) • Always open the hood prior to lighting. (on some models) • Always keep your face and body as far away from the grill as possible when lighting. Open the hood. Push the ROTISSERIE knob in, turn it to the LITE/ON position and continue...
-
Page 21: Smoker System
How to use the smoker box on 30" models The smoker 1. Fill the smoker box as desired. See the Wood chips section below. 2. Remove the grill grate and heat diffuser from the right side of the grill. 3. Place the smoker box over the front and rear retaining tabs in the grill. -
Page 22: Drawer Organizers
30" Free-Standing Grill Free-standing grill drawers 42" Free-Standing Grill Organizer drawer 54" Free-Standing Grill Trash drawer Drawer Organizers Organizer Drawer Smoker box Basting pan Cutting board Tank Drawer with LP Tank Retainer Loop Use only for a connected LP tank. If not connected, do not store an LP tank in this drawer. -
Page 23: Care And Cleaning
Spider WARNING: and insect Spiders and insects can nest in the burners warning or orifices of this or any outdoor gas appliance. The presence of spiders, spider webs or other insects can cause the gas to flow away from the burner. -
Page 24: Burners
Main grill Ensure the gas supply is off, the knobs are in the OFF position and all surfaces are cool before burners removing a burner. To remove the grill burner, first remove the grill grate. Then, lift out the heat diffuser. Remove the anchor bolt and pull the burner up and slightly to the rear of the unit. -
Page 25: Cooktop Burner Grates
Infrared After each use, it is important to operate the burner on HI for 5 minutes with the hood open sear to burn away any food particles or drippings. burner Some ash may accumulate on the burner surface (on some over time. -
Page 26: Cooktop Spark Igniters And Electrode
The burner consists of the burner base and the Cooktop burner head. They can be lifted off, making them burners easy to clean. (on some WARNING: models) DO NOT OPERATE THE BURNER WITHOUT ALL BURNER PARTS IN PLACE. Surface burners should be cleaned routinely, especially after bad spillovers which can clog the slots and holes in the burner heads. -
Page 27: Basting Pan
Control Clean up spatters with a damp cloth. Remove heavier soil with warm, soapy water. panel and Do not use abrasives of any kind on the control knobs panel or knobs. The control knobs may be removed for easier cleaning. To remove a knob, pull it straight off the stem. -
Page 28: Battery Replacement
Battery The grill has a battery back-up which provides power to the grill ignition system, allowing it to replacement operate when not connected to an AC outlet or during an electrical power outage. For built-in grill models, the battery location varies depending on where the installer located it during installation. -
Page 29: Custom Grill Cover
Fuse IMPORTANT: Never install grill light bulb(s) rated higher than 10 watts. This will cause the fuse to replacement blow. 1. See Steps 1–3 of the Battery Replacement section to access the fuse in the battery/fuse mounting assembly. 2. Unscrew the fuse cover and remove the blown fuse. -
Page 30: Problem Solver
Questions? PROBLEM Use this GRILL WON’T LIGHT WHEN THE KNOB problem IS TURNED solver! BURNER FLAME IS YELLOW OR ORANGE IN CONJUNCTION WITH THE ODOR OF GAS LOW HEAT WITH CONTROL KNOB IN THE HI POSITION ROTISSERIE BURNER WON’T LIGHT THE GRILL BURNER WILL NOT SIT LEVEL INSIDE THE GRILL BOX... -
Page 31: Consumer Services
With the purchase of your new Monogram appliance, receive the assurance that if you ever need information or assistance from GE, we’ll be there. All you have to do is call—toll- free! GE Answer Center ® Whatever your question about any Monogram major appliance, GE Answer Center information service is available to help. - Page 32 Notes Professional Outdoor Grills & Cooktops...
- Page 34 Notes Professional Outdoor Grills & Cooktops...
-
Page 35: Warranty For Customers In Canada
YOUR MONOGRAM OUTDOOR GRILL OR COOKTOP WARRANTY Staple sales slip or cancelled check here. Proof of original purchase date is needed to obtain service under warranty. Please have serial number and model number available when calling for service. WHAT IS LIMITED ONE-YEAR WARRANTY COVERED For one year from date of original purchase, we will provide, free of charge, parts and service... -
Page 36: Warranty For Customers In The Usa
YOUR MONOGRAM OUTDOOR GRILL OR COOKTOP WARRANTY Staple sales slip or cancelled check here. Proof of original purchase date is needed to obtain service under warranty. Please have serial number and model number available when calling for service. WHAT IS LIMITED ONE-YEAR WARRANTY For one year from date of original purchase, we will provide, free of charge, parts and service COVERED...