Table of Contents
Quick Links
USER'S MANUAL
Colour LCD Monitor
Model Name
UT32MH70U
UT32MH70E
UT37MX70U
UT37MX70E
UT42MX70U
UT42MX70E
READ THE ENCLOSED INSTRUCTIONS CAREFULLY.
KEEP THIS USER'S MANUAL FOR FUTURE REFERENCE.
Record the serial number of your monitor for future reference.
SERIAL NO.
This serial number is located on the back of the monitor.
Ver. 1
PODR CZNIK U YTKOWNIKA
FELHASZNÁLÓI KÉZIKÖNYV
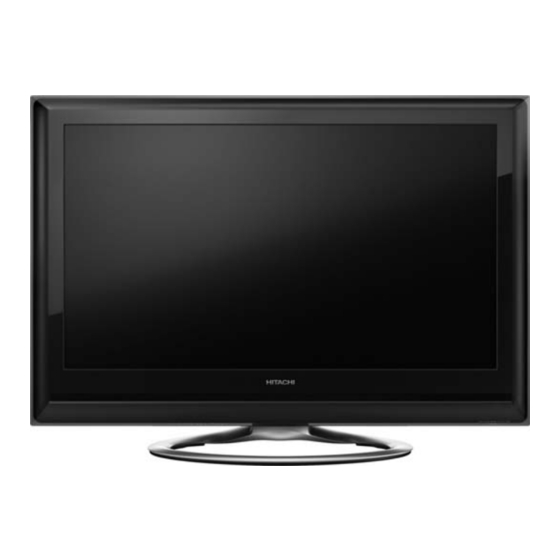
Model UT32MH70U is depicted.
USER'S MANUAL
MANUEL UTILISATEUR
BEDIENUNGSANLEITUNG
MANUAL DEL USUARIO
MANUALE D'USO
BRUKSANVISNING
BRUKERHÅNDBOK
KÄYTTÖOPAS
BRUGERVEJLEDNING
GEBRUIKSAANWIJZING
UŽIVATELSKÁ P ÍRU KA
Table of Contents

Related Manuals for Hitachi UT42MX70U


Summary of Contents for Hitachi UT42MX70U
- Page 1 USER’S MANUAL USER’S MANUAL Colour LCD Monitor MANUEL UTILISATEUR BEDIENUNGSANLEITUNG Model Name MANUAL DEL USUARIO UT32MH70U MANUALE D’USO BRUKSANVISNING UT32MH70E BRUKERHÅNDBOK UT37MX70U KÄYTTÖOPAS UT37MX70E BRUGERVEJLEDNING GEBRUIKSAANWIJZING UT42MX70U UT42MX70E UŽIVATELSKÁ P ÍRU KA PODR CZNIK U YTKOWNIKA FELHASZNÁLÓI KÉZIKÖNYV Model UT32MH70U is depicted. READ THE ENCLOSED INSTRUCTIONS CAREFULLY.
- Page 2 USER’S MANUAL Thank you for purchasing the Hitachi LCD Monitor. Please read this user’s manual carefully before operating this product. To ensure proper operation, please read and follow ALL the instructions, especially the “IMPORTANT SAFETY INSTRUCTIONS” and “SAFETY PRECAUTIONS”. Please keep this user’s manual for future reference.
-
Page 3: Table Of Contents
CONTENTS IMPORTANT SAFETY INSTRUCTIONS .....1 BASIC OPERATION .........18 INTRODUCTION..........2 Power On/Off ............18 About This Manual ............2 Volume Up/Down ............19 Trademark Credits ............2 Mute ................19 Software..............2 Input Switching to HDMI and RGB ......20 Information for users applicable in European Input Signal Screen Display........ -
Page 4: Introduction
INTRODUCTION Thank you for purchasing the Hitachi LCD Monitor. We hope that you will enjoy the peak performance of this product. This LCD Monitor has been designed to comply with international standards. However, it could cause personal injury and property damage if improperly handled. In order to prevent potential danger and obtain maximum benefi t from your set, please observe the following instructions when installing, operating, and cleaning the product. -
Page 5: Safety Precautions
SAFETY PRECAUTIONS For your safety, please read the following precautions carefully before using this product. Improper use would cause serious personal injury and/or damage to your property or the product. Important for United Kingdom IMPORTANT FOR UNITED KINGDOM WORDING FOR CLASS I EQUIPMENT INSTRUCTION BOOKS AND LABELS The mains lead on this equipment is supplied with a molded plug incorporating a fuse, the value of which is indicated on the pin face of the plug. - Page 6 SAFETY PRECAUTIONS (continued) WARNING There is a risk of fi re, electric shock, or serious injury. If serious problems occur, unplug the power cord immediately. Serious problems such as: Smoke, abnormal odor or noise emitted from the product. No picture, no sound or distorted picture on the display. Foreign matter (such as water, metals etc.) entered the unit.
- Page 7 SAFETY PRECAUTIONS (continued) WARNING There is a risk of fi re, electric shock or serious injury. Unplug the unit in the event of a lightning storm. To reduce the risk of electric shock, do not touch the product when lightning occurs. Disconnect the plug from the power outlet.
- Page 8 SAFETY PRECAUTIONS (continued) CAUTION Do not place or use the unit in a dusty location. This could cause a malfunction. Do not cover or block any ventilation holes on the product. The unit would overheat and this could cause fi re or damage to the product which may shorten its service lifetime. Install the product in accordance with the instructions in this manual.
-
Page 9: Cleaning And Maintenance
SAFETY PRECAUTIONS (continued) PRECAUTIONS Do not install the unit in locations where it will be subjected to high temperature. This could damage the cabinet or components of the product. Do not install near any heat sources such as radiators, heating grilles, stoves, or other apparatus that produce heat. Keep the unit out of direct sunlight. -
Page 10: Main Unit Installation
SAFETY PRECAUTIONS (continued) Main Unit Installation When installing the main unit, be sure to use the specifi ed mounting units in order to obtain maximum performance and maintain safety. We assume no responsibility nor liability for personal injuries or property damage caused by use of other mounting units or improper installation. -
Page 11: About Lcd Panel
ABOUT LCD PANEL Common Characteristics of the LCD Panel The following are common phenomena occurring when operating the LCD Panel, due to its structural characteristics. Please note that these are not malfunctions. Defective Spots on Panel The LCD panel is manufactured with high-precision technology. However, there might be some spots that are not illuminated, or are brighter than others, or are in different colours, etc. -
Page 12: Supplied Accessories (Including Option)
SUPPLIED ACCESSORIES (including option) Check the supplied accessories before installation. In case of missing or damaged, please contact your dealer immediately. User’s Manual Remote Control AA Size 12 13 Battery X 2 Quick Guide/ Power Cord Translation of On-Screen 14 17 Display (OSD) UK only Except UK... -
Page 13: Component Names
PC Connection Terminal (D-sub 15 Pin) Menu/Return button Reset button (See * The Control Terminal allows linked operation with a Hitachi Media Box which equips a control terminal with logo. The Control Panel Label The supplied Control Panel Label will help you to recognise the function of each button on the Control Panel more easily should you require it. -
Page 14: Remote Control
COMPONENT NAMES (continued) Main Unit (continued) Rear Panel Power Cord Socket HDMI Input Terminal Please refer to for detailed information regarding the connections. Remote Control Power On/Off Power On Press this button to switch Press this button to switch monitor On or Off standby. monitor On. -
Page 15: Preparation
PREPARATION Handling the Remote Control Remote Control Battery Installation Use the remote control within a distance of The remote control operates on 2 “AA” batteries. about 5m from the front of the unit’s remote- 1. Open the battery compartment cover control sensor and within an angle of about 30 degrees on both sides. -
Page 16: Connection
CONNECTION The unit is suitable for various kinds of connections. Make a connection in the following steps. Be sure to unplug the power cord from the wall socket fi rst when connecting external equipment. 1. Connect power cord to the rear panel. 2. -
Page 17: Connecting To Equipment With Video Output Terminal
CONNECTION (continued) 2. Connect your External Equipment (if any) to the Unit (continued) Connecting to Equipment with HDMI or DVI Output Terminal (continued) HDMI-Interfaced System With “HDMI Control” function, you can interface the connected equipment through the HDMI terminal automatically if the connected equipment meets an industry standard “HDMI CEC (Consumer Electronics Control)”. -
Page 18: Connecting To Pc
CONNECTION (continued) 2. Connect your External Equipment (if any) to the Unit (continued) Connecting to PC The PC connection terminal (D-sub 15 pin) + the PC (RGB)/DVI Analogue Audio Input terminal are connected to the PC, allowing an analogue RGB signal. [Example] D-sub 15 pin AUDIO... -
Page 19: Connect The Power Plug Into The Wall Socket
CONNECTION (continued) 3. Attach Cushion, Secure with Clamps and Fit Terminal Cover (continued) Secure the HDMI cable and power cord with clamps. Clamp Fit the terminal cover onto the monitor. Insert the hook fi rst to fi t the terminal cover. NOTE When removing the terminal cover Hook... -
Page 20: Basic Operation
BASIC OPERATION Power On/Off Turn On the power of the unit. Illumination Lamp Indicating Lamp To turn On the power to the unit: 1. Press the Power switch on the unit. The Indicating Lamp illuminates in Green, and the Illumination Lamp turns into Blue. The image will display on screen. -
Page 21: Volume Up/Down
BASIC OPERATION (continued) Volume Up/Down 1. To increase the sound volume, press the Volume Up button on the remote control or control panel. Volume Up/Down The Volume Indicator value on the screen will shift to the button right. Mute button 2. -
Page 22: Input Switching To Hdmi And Rgb
BASIC OPERATION (continued) Input Switching to HDMI and RGB By pressing the Input Select button, you can switch the input to display the image outputting from the external equipment connected to each terminal (HDMI and RGB (/Composite)). HDMI Input Select button... -
Page 23: Setup Operation
SETUP OPERATION How to Use the On-Screen Display (OSD) System You can use the On-Screen Display system to access the various kinds of the features and functions. Basic Operation Picture Audio Function 1. Press the button on the remote control or the Menu button on the Setup Language control panel of the unit. -
Page 24: Main Menu List
SETUP OPERATION (continued) Main Menu List • Please refer to supplied “Translation of On-Screen Display (OSD)” to check translation of menu items. Menu Page Picture Mode Select between 3 picture modes according to the lighting condition. Contrast Adjust to increase or decrease the picture contrast. Brightness Adjust to brighten or darken the picture. -
Page 25: Watching Images From Hdmi/Composite Input
SETUP OPERATION (continued) Watching Images from HDMI/Composite Input 1. Connect to external equipment. (See for details.) 2. Press the button to switch to HDMI mode. Press the button to switch to composite mode. 3. Press the button. Setting Picture Adjustment You can adjust the display condition such as colour settings. - Page 26 SETUP OPERATION (continued) Watching Images from HDMI/Composite Input (continued) Setting Picture Adjustment (continued) Selected Items Setup hint Enhance the colour depth of picture during HDMI input. This is not available for UT32MH70U/E model. Deep Colour Please check if the connected equipment supports Deep Colour and ensure that this operation is activated in the connected equipment before using this function.
-
Page 27: Reducing Noise
SETUP OPERATION (continued) Watching Images from HDMI/Composite Input (continued) Picture Dynamic Reducing Noise Deep Colour Contrast Mode Normal 3D Colour Management You can reduce the unwanted picture noise. Black Enhancement Select “Picture” from the Menu list. MPEG NR Cross Colour NR Game Mode Film Mode 3D Comb Filter... -
Page 28: Making The Moving Image Smooth
SETUP OPERATION (continued) Watching Images from HDMI/Composite Input (continued) Picture Dynamic Making the Moving Image Smooth Deep Colour Contrast Mode Normal 3D Colour Management Using this function helps to make the moving image smooth. Black Enhancement Select “Picture” from the Menu list. MPEG NR Cross Colour NR Game Mode... -
Page 29: Advanced Setting
SETUP OPERATION (continued) Watching Images from HDMI/Composite Input (continued) Setup Advanced Setting Video Power Save RGB Input Composite Select “Setup” from the Menu list. Colour System Auto Select On/Off Return VC143-141 06-0 [Example] Selected Items Setup hint Video Power Save for details. -
Page 30: Viewing Images From A Pc
SETUP OPERATION (continued) Viewing Images from a PC 1. Connect to the PC. (See for details of connection to PCs.) 2. Switch to RGB input by pressing the button. 3. Press the button. Picture Setting Picture Adjustment Contrast Brightness –31 You can adjust the display condition such as position adjustment and colour settings. -
Page 31: Advanced Setting
SETUP OPERATION (continued) Viewing Images from a PC (continued) Setting Picture Adjustment (continued) Setup Auto Adjust Adjust Horizontal Position Vertical Position w “Setup” Menu Horizontal Clock –20 Clock Phase Select “Setup” from the Menu list. Reset Reset Select Return Exit Selected Items Setup hint Adjusts Horizontal Position, Vertical Position, Horizontal... -
Page 32: Function
FUNCTION Size Switching Each time the button of the remote control is pressed, the screen display size is switched in sequence, and the status will be displayed at the bottom of the screen. HDMI/Composite Signal Input Size button Display Size Watching Standard Defi... -
Page 33: Position Adjustment
FUNCTION (continued) Size Switching (continued) HDMI/Composite Signal Input (continued) Position Adjustment Vertical picture position can be adjusted for Panoramic 1, Zoom 1 and Zoom 2 mode as follows. 1. Press the button whilst operating the picture size display. 2. “Position” display will appear. 3. -
Page 34: Power Save Mode
FUNCTION (continued) Power Save Mode When HDMI/Composite Input is Selected You are provided the function to save power consumption when no signal is Setup detected in HDMI/Composite input. Set to On in “Video Power Save” from the Video Power Save RGB Input Composite Setup Menu, which leads to the power save mode. -
Page 35: Troubleshooting
TROUBLESHOOTING Before calling a service technician, check the following tables fi rst. If the problem cannot be solved with the suggested procedures, contact your local dealer. For your safety, NEVER try to repair the product yourself. When the Following Messages Appear on the Screen Message Condition / Action Page... - Page 36 TROUBLESHOOTING (continued) Symptom and Checklist (continued) Symptoms Checklist Page Check the connections to external equipment. No colour-normal sound Check “Colour System” in Composite input. No picture Check if the power cord is plugged into the socket securely. The Indicating lamp Check if the power switch on the unit is on.
- Page 37 TROUBLESHOOTING (continued) Symptom and Checklist (continued) Symptoms Checklist Page The image on the screen is moving in an oblique direction. Adjust “Horizontal Clock” and “Clock Phase”. (RGB input mode only) The coarse horizontal stripes can be seen in full-display mode. Adjust “Horizontal Clock”.
-
Page 38: Product Specifications
PRODUCT SPECIFICATIONS SPECIFICATION Display dimensions Approx. 32 inches (698 (H) x 392 (V) mm, diagonal 801mm) Panel Resolution 1366 (H) x 768 (V) pixels including Stand: 814 (W) x 587 (H) x 249 (D) mm Net dimension excluding Stand: 814 (W) x 538 (H) x 39* (D) mm *thinnest part: 35mm including Stand: 13.5kg Net Weight... -
Page 39: Signal Input
PRODUCT SPECIFICATIONS (continued) Signal Input RGB terminal (D-sub 15 pin connector) Input signal G/Composite No connection No connection R.GND G.GND/Composite.GND B.GND No connection [SDA] H.sync V.sync. [SCL] HDMI connector pin specifi cations Input signal Input signal TMDS Data2+ TMDS Clock Shield TMDS Data2 Shield TMDS Clock- TMDS Data2-... -
Page 40: Recommended Signal List
PRODUCT SPECIFICATIONS (continued) Recommended Signal List With HDMI input Signal mode Horizontal Dot clock frequency frequency Remarks Signal Vertical Resolution (kHz) (MHz) Name frequency (Hz) 640 X 480 59.94 31.47 25.18 CEA-861D 576i 720(1440) X 576 50.00 15.63 27.00 CEA-861D 480i 720(1440) X 480 59.94... - Page 41 LCD Monitor. Also, record where and when you purchased this LCD Monitor. This information will help any future queries you may have and should be used in all correspondence with Hitachi service centres. SERIAL NUMBER...
- Page 42 Hitachi Ltd. Consumer Business Group Shin-Otemachi Bldg 5f, 2-1, Otemachi 2-Chome, Chiyoda-Ku, Tokyo 100-0004 Japan HITACHI EUROPE LTD. HITACHI EUROPE S.A. Consumer Affairs Department 364, Kifissias Ave. & 1, Delfon Str. PO Box 3007 152 33 Chalandri Maidenhead Athens Berkshire SL6 8ZE...