Table of Contents

Related Manuals for Honeywell MP Compact Mark III


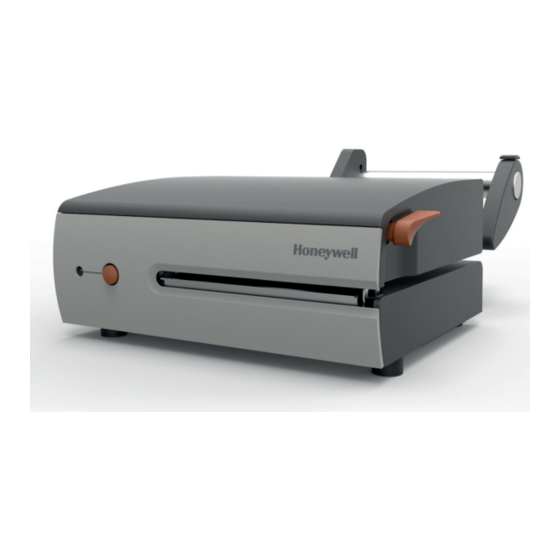
Summary of Contents for Honeywell MP Compact Mark III
- Page 1 Questo manuale d’istruzione è fornito da trovaprezzi.it. Scopri tutte le offerte per Honeywell MP Compact 4 Mobile Mark III o cerca il tuo prodotto tra le migliori offerte di Macchine per Ufficio MP Compact Mark III MP Compact4 & MP Compact4 Mobile User Guide...
- Page 2 Information in this document is subject to change without notice and does not represent a commitment on the part of Honeywell. No part of this manual may be reproduced or transmitted in any form or by any means, for any purpose other than the purchaser's personal use, without the expressed written permission of Honeywell.
- Page 3 MP Compact4 Mark III User Guide...
-
Page 4: Table Of Contents
Contents Customer Support ............vii Product Service and Repair . - Page 5 Use Cotton Swab ..........28 Replace Printhead .
- Page 6 MP Compact4 Mark III User Guide...
-
Page 7: Customer Support
For our latest contact information, please check our website. Product Service and Repair Honeywell International Inc. provides service for all of its products through service centers throughout the world. To find your service center, go to www.honeywellaidc.com and select Support > Contact Support > Service and Repair. -
Page 8: Agency Compliance And Approvals
Agency Compliance and Approvals Agency Compliance and Approvals Certification and Compliance Marks and Descriptions UL = Underwriters Laboratories USA UL60950-1 2nd Edition CSA C22.2 No. 60950-1-07 2nd Edition The manufacturer declares under sole responsibility that this product conforms to the following standards or other normative documents: •... - Page 9 Agency Compliance and Approvals Certification and Compliance Marks and Descriptions VCCI = Voluntary Control Council for Interference Japan JRL = Japan Radio Law 007-AA009B ANATEL = National Telecommunications Agency Brazil MP Compact4 Mark III User Guide...
-
Page 10: Safety Information
Safety Information Please read the following safety information prior to setting up or operating your printer. -
Page 11: Important Safety Requirements
Chapter 1 — Safety Information Important Safety Requirements Honeywell disclaims all responsibility regarding the CE directive if the printer is used, altered or installed in any way other than described in this manual. This symbol is used to indicate circumstances that may be dangerous to the user or that cause damage to the equipment. - Page 12 Chapter 1 — Safety Information • Rain or water has got into the printer. • The printer is not functioning correctly despite the user has followed the instructions for use. • You have dropped the printer or the casing has been damaged. •...
- Page 13 Chapter 1 — Safety Information MP Compact4 Mark III User Guide...
-
Page 14: About The Printer Basics
About the Printer Basics Use this chapter to learn about the MP Compact4 Mark III printer basic information, including the parts that arrive with your printer. -
Page 15: Learn About The Printer Models
Chapter 2 — About the Printer Basics Learn About the Printer Models The MP Compact4 Mark III printer family, hereafter referred to as “the printer,” blends the rugged durability of die-cast construction with state-of-the-art electronics and user-friendly features to redefine the standard in industrial thermal printers. -
Page 16: How To Set Up Your Printer
How to Set Up Your Printer Learn to use the printer features, including how to insert the media and how to connect to a power source. -
Page 17: Connect Printer To Power
Chapter 3 — How to Set Up Your Printer Connect Printer to Power Before connecting power or interface cables to the printer, ensure the power on/ off switch is in the “off” position. 1 Place the printer on a firm, level surface. 2 Ensure that the power switch on the printer is in the “off”... -
Page 18: Interface Connection
Chapter 3 — How to Set Up Your Printer Interface Connection The printer can be connected to the host via USB, serial, wired Ethernet, or optional wireless interfaces. The printer will automatically connect to the first port that delivers valid data. Once established, the printer’s power must be cycled “off”... -
Page 19: Load The Media
Chapter 3 — How to Set Up Your Printer Load the Media 1 Rotate the printhead latch (item 1) clockwise to the unlocked position. See image below: AC models (right), DC models (left). 2 Remove the media hub guide. AC Models: Move the thumb-latch (item 2) to the released position and then slide the media hub guide (item 1) off the media hub (item 3). - Page 20 Chapter 3 — How to Set Up Your Printer 4 Reinstall the media hub guide (item 1) onto the media hub (item 2). Be sure the media hub guide is lightly touching the edge of the label roll (item 3). Secure the media hub guide.
- Page 21 Chapter 3 — How to Set Up Your Printer MP Compact4 Mark III User Guide...
-
Page 22: Printer Configuration
Printer Configuration Use this chapter to learn the functions on the front panel and the printer configuration tools. -
Page 23: Front Panel
Chapter 4 — Printer Configuration Front Panel The front panel consists of LED indicator lights and one control button, as detailed in the following sections. Front Panel Display 1 Green/Orange/Red Status LED 2 Control Button LED Indicators An LED indicator light provides a quick visual reference of printer operations and conditions, as defined below: LED Reference Table LEDs... -
Page 24: Control Button
Chapter 4 — Printer Configuration Control Button The control button performs different functions depending upon the mode of the printer. Using the Control Button Ready Busy/Printing Paused Faulted Button Action (LED – Green) (LED – Green Flashing) (LED – Orange) (LED –... -
Page 25: Printer Configuration Tools
Chapter 4 — Printer Configuration Printer Configuration Tools The printer contains many user-adjustable parameters. These parameters are configurable using a few methods. The table below lists the most popular ways of configuring the printer and the advantages of each. Choose the method that best addresses your application. -
Page 26: Printer Configuration Utility (Netira Ct)
Chapter 4 — Printer Configuration Printer Configuration Utility (NETira CT) NETira CT (located on the Accessories CD) is a Windows-based configuration utility that allows the user to make changes to the existing printer setup via a direct connection to the host computer’s serial, USB or Ethernet ports. NETira CT features include: •... -
Page 27: Usb Port Connection Requirements
Chapter 4 — Printer Configuration USB Port Connection Requirements Using NETira CT with a USB connection requires a Windows driver to be installed and the driver to be set to “Print directly to the printer”. Other connections (e.g., serial and LAN) do not require the Windows driver or this setting. -
Page 28: How To Use Netira Ct Configuration Utility
Chapter 4 — Printer Configuration How to Use NETira CT Configuration Utility 1 Once installed, launch the NETira CT configuration utility. 2 Be sure the printer is turned on. Connect the host to the printer. a For serial connections: Query the printer by using the Auto Detect button. - Page 29 Chapter 4 — Printer Configuration c For Ethernet connections: Close the Open a configuration file... dialogue box. • In the toolbar, click on the TCP/IP Configuration icon. • In the TCP/IP Configuration dialogue box, enter the IP address of the printer, port: 9100, and click OK.
- Page 30 Chapter 4 — Printer Configuration 3 At this point, you may browse the Printer Component categories and make any changes necessary to the printer configuration. 4 Once complete, send the new settings to the printer using the Send button. Note: When sending the changes to the printer, only the changes displayed on the current page will be sent.
-
Page 31: Install The Windows Driver
Chapter 4 — Printer Configuration Install the Windows Driver The Windows driver is located on the Accessories CD included with your printer. For the latest version please visit our website at www.honeywellaidc.com. Note: Be sure your printer’s firmware version is 15.05_0001 or greater. Firmware is available from our website. - Page 32 Chapter 4 — Printer Configuration Important Notes The Windows driver functions the same as any other Windows printer. While built-in help files provide information on all settings, there are some important setting parameters that should be observed for trouble-free printing. Page Set Up Tab: Stock It is important that the Stock setting matches the size of the label you are using.
- Page 33 Chapter 4 — Printer Configuration MP Compact4 Mark III User Guide...
-
Page 34: Printer Maintenance
Printer Maintenance This chapter describes how to preform routine maintenance on your printer, including printer cleaning, adjustments and replacements for the printhead and roller. -
Page 35: Schedule Cleaning Intervals
Isopropyl alcohol is a flammable solvent; always take the proper precautions when using this substance. Proper cleaning is critical. To maintain peak performance of the printer, Honeywell offers a complete line of cleaning products including pens, cards, films and swabs. Visit our website at www.honeywellaidc.com to learn more. -
Page 36: Clean The Printhead
Chapter 5 — Printer Maintenance Clean the Printhead If print quality declines (symptoms include non-compliant bar codes, print dropouts and streaks (see sample label below), the typical cause is debris build-up on the printhead. Furthermore, when the build-up is not removed it may lead to element failure and reduce the service life of the printhead Faulty print quality label Note: Streaks indicate a dirty or faulty printhead. -
Page 37: Use Cotton Swab
Chapter 5 — Printer Maintenance Use Cotton Swab 1 Turn printer off and unplug the printer. Unlock the printhead latch and remove any media installed in the printer. 2 Lower the front panel (item 1). Allow the printhead to cool before proceeding. -
Page 38: Replace Printhead
Note: Printheads are fragile; use extreme care when handling and never use a sharp object on the surface. If you have questions, contact a qualified technician or Honeywell technical support before proceeding. To remove 1 Turn the printer off and unplug the printer. Unlock the printhead latch and remove any media installed in the printer. - Page 39 Chapter 5 — Printer Maintenance 5 Disconnect the printhead cable (item 2) from the rear of the printhead (item To install 1 Connect the printhead cable to the rear of the printhead (item1). 2 Position the printhead into the printhead carrier (item 2). Be sure the two screw heads on the printhead are located into the holes (item 5) of the printhead carrier.
-
Page 40: Replace Platen Roller
Chapter 5 — Printer Maintenance Replace Platen Roller To remove 1 Turn the printer off and unplug the printer. Unlock the printhead latch and remove any media installed in the printer. 2 Lower the front panel (item 1). 3 Using a pen or similar tool press (item 2) in on the top cover release (item 3) and raise the top cover (item 4). - Page 41 Chapter 5 — Printer Maintenance 5 Lift the platen roller assembly (item 1) up and out of the printer. To install 1 Insert the new platen roller assembly (item 1) into position. Be sure the belt (item 2) is routed properly around the gear (item 3), this can be viewed through the access hole.
-
Page 42: Adjust Printhead Pressure
Chapter 5 — Printer Maintenance Adjust Printhead Pressure To accommodate a variety of media types, printhead pressure is adjustable. This pressure is factory set to work with most media types, so this adjustment should only be performed after attempting to improve print quality through increasing the printer’s heat setting or decreasing the print speed setting. -
Page 43: Download Firmware
Chapter 5 — Printer Maintenance Download Firmware The operating firmware for the printer is stored in flash memory on the printer’s main PCB. When firmware is updated and/or new features are added, they can be downloaded to the printer as follows. 1 Identify the new version for your printer model from our website at www.honeywellaidc.com and download it onto your computer’s hard drive. -
Page 44: Configure Media Sensor
Chapter 5 — Printer Maintenance • Possible communications error — Check the cable connection between the host and printer and ensure that a quality, shielded cable is used. • Possible memory problem — Call for service. Configure Media Sensor To accommodate a variety of media types the printer is equipped with three sensors. - Page 45 Chapter 5 — Printer Maintenance MP Compact4 Mark III User Guide...
-
Page 46: Printer Specifications
Printer Specifications... -
Page 47: Technical Specifications
Appendix A — Printer Specifications Technical Specifications MP Compact4 and MP Compact4 Mobile Specifications Mechanical Width 230 mm (9.1”) Depth 260 mm (10.2”) Height 105 mm (4.1”); Compact4 125 mm (4.9”); Compact4 Mobile Weight 3.5 kg (7.7 lbs.); Compact4 4.5 kg (9.9 lbs.); Compact4 Mobile 5°... -
Page 48: Approved Media
To achieve optimum print quality and maximum printhead life, Honeywell specifies the use of Honeywell brand media. These supplies are specially formulated for use in our printers; use of non-Honeywell supplies may affect the print quality, performance and life of the printer or its components. - Page 49 Appendix A — Printer Specifications MP Compact4 Mark III User Guide...
-
Page 50: Wireless And Wired Lan
Wireless and Wired LAN... -
Page 51: Set Up Network Card
Appendix B — Wireless and Wired LAN Set Up Network Card Whether a wired or wireless connection is intended, it is recommended to establish a wired connection to the printer first. This will allow access to the printer’s internal web pages to configure the settings necessary for a typical wireless connection. -
Page 52: Set Up Wireless
Appendix B — Wireless and Wired LAN Once the previous steps have been successfully completed you may now use the IP Address to: • Browse to the printer’s internal web pages for wireless/advanced configuration if your printer is equipped with wireless capabilities, see “Set Up Wireless”... -
Page 53: Set Up Wireless Infrastructure
Appendix B — Wireless and Wired LAN Set Up Wireless Infrastructure After a successful setup is made via a wired connection, the wireless connection (if equipped) can now be configured in infrastructure mode using a static or DHCP issued IP address. 1 Open your web browser. - Page 54 Appendix B — Wireless and Wired LAN 4 Scroll down the page to Network Type and select Infrastructure from the drop-down box. 5 In the SSID field, type the name of the SSID of your access point. 6 Under the WIFI Security and Authentication, set any security/authentication settings necessary for your network.
- Page 55 Appendix B — Wireless and Wired LAN 12 At this point it is recommended to print a network report. This network report is generated by the printer and lists important default information such as the IP and MAC Addresses as well as SSID for wireless connections. To print the network report press the button for five seconds, see “Control Button”...
-
Page 56: Set Up Wireless Ad-Hoc
Appendix B — Wireless and Wired LAN Set Up Wireless Ad-Hoc After a successful setup is made via a wired connection, the wireless connection (if equipped) can now be configured in ad-hoc mode using a static IP address. To configure the wireless card in ad-hoc mode, you must configure your host computer to match the IP settings of the printer. - Page 57 Appendix B — Wireless and Wired LAN 10 Click on Restore Defaults/Restart on the left side of the screen. Be sure that “Restart Printer” is displayed in the Action to Execute: drop-down box. Enter the password at the top of the page (default is “sysadm”) and click Execute to restart the printer.
-
Page 58: Install The Printer Driver
Appendix B — Wireless and Wired LAN Install the Printer Driver The following screen shots are taken from Windows 2000. Other Windows versions will be similar. 1 Start Windows Add Printer Wizard program. The following screen should appear. Click Next. 2 Make sure that Local Printer is selected and then click Next. - Page 59 Appendix B — Wireless and Wired LAN 6 Make sure Standard is selected and then click Next. 7 Confirm your settings and then click Finish. 8 Click on Have Disk. 9 Insert the Accessories CD-ROM and click Browse. 10 Browse to the “\DRIVERS\Seagull” folder on the CD-ROM, select the file “for 95, 98, me, 2000, xp, 7, 8 and 10.inf”...
- Page 60 Appendix B — Wireless and Wired LAN 12 Choose your printer from the list and then click Next. 13 Name your printer in the Printer Name field. Next, select whether or not to set this printer as your default printer. Click Next. 14 Select whether or not to share this printer on your network.
-
Page 61: Printer Internal Web Pages
Appendix B — Wireless and Wired LAN 18 Your computer will now copy the necessary files from the CD-ROM. The driver and port installation is now complete. The printer can be selected through any Window’s application. Printer Internal Web Pages 1 Open your web browser. - Page 63 Honeywell www.honeywellaidc.com MP Compact4 Mark III User Guide *92-2745-01* P/N: 92-2745-01...