Table of Contents
Quick Links
Table of Contents

Related Manuals for Honeywell Intermec PD43


Summary of Contents for Honeywell Intermec PD43
- Page 1 PD 43 | PD 43c Commercial Printer User Manual...
- Page 2 Intermec by Honeywell. Information and specifications contained in this document are subject to change without prior notice and do not represent a commitment on the part of Intermec by Honeywell. © 2014 Intermec by Honeywell. All rights reserved.
- Page 3 Document Change Record This page records changes to this document. The document was originally released as Revision 001. Version Number Date Description of Change 9/2014 Added new sections : • Using the Label Dispenser • Calibrating the Label Taken Sensor •...
- Page 4 PD43 and PD43c Commercial Printer User Manual...
-
Page 5: Table Of Contents
Contents Contents Before You Begin..............xi Safety Information . - Page 6 Contents How to Set the Printer Command Language....... . 23 Set the Command Language from the Printer Web Page.
- Page 7 Contents About Test Labels ..............69 Print a Test Label in Start Up Mode.
- Page 8 Contents How to Configure the Printer ........... . . 95 View the Configuration Summary .
- Page 9 Contents Upgrade Firmware from the Printer Web Page ......121 Upgrade Firmware from a USB Storage Device ......121 Upgrade Firmware from the USB Menu .
- Page 10 Contents Media Settings............159 Print Quality Settings .
-
Page 11: Before You Begin
Before You Begin Before You Begin This section provides you with safety information, technical support information, and sources for additional product information. Safety Information Your safety is extremely important. Read and follow all warnings and cautions in this document before handling and operating Intermec equipment. -
Page 12: Global Services And Support
Before You Begin • Do not spray the printer with water. If you are using a hose to clean the premises in an industrial environment, remove the printer or carefully protect it from spray and moisture. • You must implement both hardware and software safety precautions to prevent the possibility of undefined system states. -
Page 13: Send Feedback
Your feedback is crucial to the continual improvement of our documentation. To provide feedback about this manual, please contact the Intermec Technical Communications department directly [email protected]. Telephone Support In the U.S.A. and Canada, call 1-800-755-5505. Outside the U.S.A. and Canada, contact your local Intermec representative. -
Page 14: Patent Information
Before You Begin 3 Using the Products menu, navigate to your product page. For example, to find the PD43 product page, click Printers > Industrial Printers > PD43. 4 Click the Manuals tab. If your product does not have its own product page, click Support > Manuals. -
Page 15: About The Printers
About the Printers This chapter introduces the PD43 printers, and includes descriptions of printer features and basic operation. -
Page 16: About The Pd43
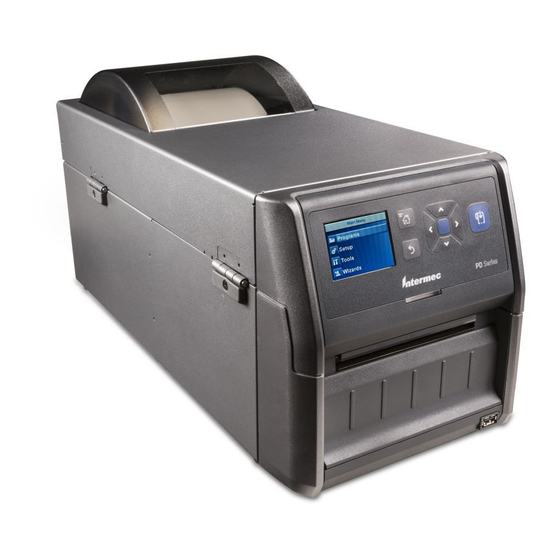
Chapter 1 — About the Printers About the PD43 The PD43 and PD43c printers are compact, rugged industrial printers intended for use in commercial or warehouse applications. The printers can be connected to a single desktop PC for stand-alone operation, or to a wired or wireless network for ease of connectivity. Both printers are available in direct thermal (DT) models. - Page 17 Chapter 1 — About the Printers PD43 and PD43c Front Panel PD43 and PD43c Front Panel and Side Feature Descriptions (LCD Model) Feature Description Directional pad Home button LCD screen Back button Ready-to-Work LED Print/Feed button USB host port Power switch PD43 and PD43c Commercial Printer User Manual...
- Page 18 Chapter 1 — About the Printers PD43 and PD43c Front Panel Features and Descriptions (Icon Model) PD43 and PD43c Front Panel and Side Feature Descriptions (Icon Model) Feature Description Icon front panel Ready-to-Work LED Print/Feed button USB host port Power switch PD43 and PD43c Commercial Printer User Manual...
- Page 19 Chapter 1 — About the Printers PD43 Rear Panel PD43 Rear Panel Feature Descriptions Feature Description Dome top window Wi-Fi antenna (optional) Media compartment door Configuration label Media lock location External media feed slot AC power connector PD43 and PD43c Commercial Printer User Manual...
- Page 20 Chapter 1 — About the Printers PD43c Rear Panel PD43c Rear Panel Feature Descriptions Feature Description Power switch Configuration label USB host port USB device port Ethernet port (optional) Power connector Rear media feed guides (optional) PD43 and PD43c Commercial Printer User Manual...
- Page 21 Chapter 1 — About the Printers PD43 Bottom Panel PD43 Bottom Panel Feature Descriptions Feature Description Cable guide USB device port USB host port Ethernet connector (optional) PD43 and PD43c Commercial Printer User Manual...
- Page 22 Chapter 1 — About the Printers PD43 Media Compartment Features PD43 Media Compartment Feature Descriptions Feature Description Ribbon takeup roller (PD43 TTR models only) Print mechanism release button Media holder guides Printhead Sensor bar Media guides Platen roller Label stop sensor PD43 and PD43c Commercial Printer User Manual...
-
Page 23: About The Front Panel
Chapter 1 — About the Printers About the Front Panel There are two front panels available for the printers: • LCD (liquid crystal display) • Icon (no display) Both versions of the front panel include the Print button and the Ready-to-Work™... -
Page 24: About The Icon Front Panel
Chapter 1 — About the Printers About the Icon Front Panel The icon front panel includes a graphical panel and a Print button. As you use the printer, the icons turn on or off to indicate printer status. Icon Front Panel - Status Icons Icon Color and Description Printer Models... -
Page 25: About The Lcd Front Panel
Chapter 1 — About the Printers Icon Front Panel - Status Icons (Continued) Icon Color and Description Printer Models On: Ribbon is jammed or empty TTR only Off: No error On: Media is jammed or empty Off: No error On: Print mechanism is open or not latched properly Off: Print mechanism is closed correctly On: Printhead too hot... -
Page 26: About The Ready Screen
Chapter 1 — About the Printers About the Ready Screen After you turn the printer on, the Ready screen appears when the printer finishes starting up. Ready Fingerprint 01/04/2014 10.200.27.89 12:00 Ready Screen Note: Icons for Wi-Fi and Bluetooth status appear only when the optional Wi-Fi/Bluetooth module is installed. - Page 27 Chapter 1 — About the Printers Information and Status Icon Descriptions (Continued) Icon Description Wi-Fi Connection icon. This icon appears when the Wi-Fi/Bluetooth module is installed in the printer and shows the strength of the Wi-Fi connection: - Strong. - Good. - Weak.
-
Page 28: View Basic Printer And Connection Information
Chapter 1 — About the Printers View Basic Printer and Connection Information In the Ready screen, use the control panel buttons to select an icon in the status bar at the top of the screen to view printer or connection information. -
Page 29: About The Main Menu
Chapter 1 — About the Printers About the Main Menu In the printer Ready screen, press to view the Main Menu. Main Menu Programs Settings Tools Wizards Press to highlight Main Menu items, and then press select that item: • Select Programs to see a list of programs installed on the printer. -
Page 30: Navigate In The Main Menu
Chapter 1 — About the Printers Navigate in the Main Menu Use the navigation buttons to select menus and menu items. In the Main Menu: • Press to toggle between the Main Menu and the Ready screen. • Press to return to the Ready screen. In the Programs, Settings, Tools, or Wizards menus: •... -
Page 31: About The Onscreen Keypads
Chapter 1 — About the Printers About the Onscreen Keypads When you are changing settings, you may need to use the alphanumeric or numeric keypads on the screen. Password v w x Alphanumeric Keypad - Alphabetic Characters Password & < “... -
Page 32: About The Printer Wizards
Chapter 1 — About the Printers For either keypad: • Press , , , or to select a character, and then press to enter that character. • Press to delete the last character you entered. For the alphanumeric keypad only: •... - Page 33 Chapter 1 — About the Printers Printing Wizards (Continued) Name Description Loading Ribbon (TTR printers only) Shows how to load a roll of ribbon. Communications Wizards Name Description Line Analyzer Logs all incoming data on all communications channels and saves the data to a log file.
-
Page 34: Use A Wizard
Chapter 1 — About the Printers Use a Wizard The available wizards depend on the hardware you have installed in the printer. 1 From the Ready screen, press . The Main Menu appears. 2 Select Wizards and press 3 Select a category and press 4 Select a wizard from the list and press . -
Page 35: About Fingerprint
Chapter 1 — About the Printers About Fingerprint Fingerprint is a BASIC-inspired general purpose printer language. Use Fingerprint to design custom label formats and write printer application software. If you plan to run Smart Printing applications directly on the printer, without connecting to a PC, select Fingerprint as your printer command language. -
Page 36: About Zsim
Chapter 1 — About the Printers About ZSim ZSim (ZPL command language simulator) interprets Zebra™ programs (ZPL II or later) without requiring any host programming changes. If you are sending ZPL label files to the printer, select ZSim as your printer command language. For more information, see the ZSim Command Reference Manual. -
Page 37: How To Set The Printer Command Language
Chapter 1 — About the Printers The printer command language is saved to memory, and remains set to ESim/ZSim until you change this setting. How to Set the Printer Command Language You can use one of these methods to change the printer command language: •... -
Page 38: Set The Command Language From The Main Menu
Chapter 1 — About the Printers Set the Command Language from the Main Menu If you have an LCD printer, you can change the printer command language from the Main Menu. 1 Make sure that the printer has media and ribbon (if necessary) installed. -
Page 39: Printer Options And Accessories
Chapter 1 — About the Printers 6 When you see the language you want to use, release 7 The printer automatically reboots and starts in the command language you selected. Printer Options and Accessories You can use these printer options and accessories (sold and ordered separately) with the PD43 and PD43c printers. - Page 40 Chapter 1 — About the Printers PD43 Printer Options and Accessories (Continued) Option or Accessory Description Cutter Provides automatic cutting as labels are printed. Cutter Tray Holds up to 20 labels as they are cut. Installs on Cutter. Boarding Pass Tray Holds airline boarding pass media.
- Page 41 Chapter 1 — About the Printers PD43 Printer Options and Accessories (Continued) Option or Accessory Description Ticket shelf Shelf holds fanfold boarding pass media (up to 500). Installs on external media holder for PD43c. Replacement parts Replacement parts include: • 203-dpi printhead •...
- Page 42 Chapter 1 — About the Printers PD43 and PD43c Commercial Printer User Manual...
-
Page 43: Set Up The Printer
Set Up the Printer This chapter explains how to load media and ribbon, print test labels, and adjust the print quality. -
Page 44: About Media
Chapter 2 — Set Up the Printer About Media The printers can print on labels, tickets, tags, and continuous stock. The procedure you use to load media depends on how you are operating the printer and the options you have installed. About Linerless Media If you are printing on linerless media, follow these guidelines for best results:... -
Page 45: Load Media For Tear-Off Printing
Chapter 2 — Set Up the Printer Note: Feed adjust values for simulator command languages like ESim, ZSim, and DSim are preset. Recommended Feed Adjust Values for Tear-Off Printing Printer Setting 203 dpi 300 dpi Distance PD43 Start Adjust -133 -197 -16.7 mm (0.66 in) Stop Adjust... - Page 46 Chapter 2 — Set Up the Printer 2 If there is an empty media core in the media compartment, remove and discard the core. 3 Place the media between the guides on the media bar. If necessary, slide the guides apart to adjust for the media width. 4 Slide the guides to the sides of the media roll.
- Page 47 Chapter 2 — Set Up the Printer If you are using media stored outside the printer, feed the media through the external media feed slot. External media feed slot 5 Press the release button and raise the print mechanism. PD43 and PD43c Commercial Printer User Manual...
- Page 48 Chapter 2 — Set Up the Printer 6 Slide the media below the sensor bar and between the media guides. 7 If necessary, adjust the label stop sensor to line up with the marks on the media. 8 Slide the guides to the side edges of the media. 9 Press the print mechanism down to lock it in place.
-
Page 49: About Cut-Off Printing
Chapter 2 — Set Up the Printer 11 Press the Print button to advance the media. If you have not yet calibrated the media feed, press and hold the Print button. The printer feeds one label and then prints a media configuration test label. -
Page 50: Load Media For Cut-Off Printing
Chapter 2 — Set Up the Printer Load Media for Cut-Off Printing Cut-off printing is supported when the optional media cutter accessory is installed in the printer. 1 Open the top of the printer first and then open the media compartment door. - Page 51 Chapter 2 — Set Up the Printer 4 Slide the guides to the sides of the media roll. The guides move togther automatically to center the roll on the media bar. If you are using large rolls of media stored outside the printer, such as in an external media holder, feed the media through the external media feed slot.
- Page 52 Chapter 2 — Set Up the Printer 5 Press the release button and raise the print mechanism. 6 Slide the media below the sensor bar and between the media guides. PD43 and PD43c Commercial Printer User Manual...
- Page 53 Chapter 2 — Set Up the Printer 7 If necessary, adjust the label stop sensor to line up with the marks on the media. 8 Slide the guides to the side edges of the media. 9 Slide the media through the cutter. 10 Press the print mechanism down to lock it in place.
-
Page 54: About The Label Dispenser
Chapter 2 — Set Up the Printer About the Label Dispenser The label dispenser accessory, which includes the Label Taken Sensor, removes the liner from self-adhesive label stock as each label is printed. You manually remove the label at the front of the printer. After you load media, you need to configure the feed adjust settings. - Page 55 Chapter 2 — Set Up the Printer 1 Open the top of the printer first and then open the media compartment door. 2 If there is an empty media core in the media compartment, remove and discard the core. 3 Place the media between the guides on the media bar. If necessary, slide the guides apart to adjust for the media width.
- Page 56 Chapter 2 — Set Up the Printer 4 Slide the guides to the sides of the media roll. The guides move together automatically to center the roll on the media bar. If you are using media stored outside the printer, feed the media through the external media feed slot.
- Page 57 Chapter 2 — Set Up the Printer 5 Press the release button and raise the print mechanism. 6 Slide the media below the sensor bar and between the media guides. PD43 and PD43c Commercial Printer User Manual...
- Page 58 Chapter 2 — Set Up the Printer 7 If necessary, adjust the label stop sensor to line up with the marks or gaps on the media. 8 Slide the guides to the side edges of the media. 9 Press the side buttons on the label dispenser to open the front door. 10 Remove the label closest to the end of the liner.
- Page 59 Chapter 2 — Set Up the Printer 11 Route the liner through the slot in the front door of the label dispenser. Do not pull on the media to take up the slack. The liner should be over the roller in the printer and under the roller in the front door of the label dispenser.
-
Page 60: Load External Media For The Pd43
Chapter 2 — Set Up the Printer Load External Media for the PD43 To use large rolls of media or tag stock, you can load the media from outside the printer. 1 Place the media behind the printer and feed the media into the printer through the external media feed slot. -
Page 61: Set The Pd43C Rear Feed Guides
Chapter 2 — Set Up the Printer Set the PD43c Rear Feed Guides Note: This section applies to the PD43c printer with the rear feed guides option installed. If you use the same media width all the time in the PD43c printer, you can lock the rear feed guides in place to make loading media easier. -
Page 62: Load External Media Rolls For The Pd43C
Chapter 2 — Set Up the Printer Load External Media Rolls for the PD43c If you have the external media roll holder for the PD43c, follow this procedure to load media rolls on the holder. 1 Place the media on the bar between the guides, and then slide the guides to the sides of the media roll. -
Page 63: Load Boarding Passes For The Pd43C
Chapter 2 — Set Up the Printer Load Boarding Passes for the PD43c If you have the ticket shelf accessory, follow this procedure to load boarding pass media for the PD43c printer. 1 Place the media in the ticket shelf. 2 Feed the media over the top guide of the ticket shelf and into the printer external media feed slot. -
Page 64: Load Airline Media
Chapter 2 — Set Up the Printer Load Airline Media If your PD43c printer includes the optional rear feed guides, follow this procedure to load media for airline use such as bag tags or boarding passes. 1 Position the media at the rear of the printer. If you have the optional boarding pass ticket shelf, place the media on the shelf and feed it over the top of the guide into the printer. - Page 65 Chapter 2 — Set Up the Printer 2 Adjust the feed guides by sliding the guides to match the width of your media. Guides 3 Slide the media into the printer. 4 If this is the first time you have used this media width, open the printer top and slide the media guides to match the media width.
-
Page 66: Adjust The Label Stop Sensor
Chapter 2 — Set Up the Printer Adjust the Label Stop Sensor For best performance, adjust the label stop sensor to line up with the black marks on your media. 1 Open the top of the printer. 2 Press the release button and raise the print mechanism. 3 Slide the label stop sensor to line up with the black marks on your media. -
Page 67: About Ribbon
Chapter 2 — Set Up the Printer About Ribbon Thermal transfer printing provides a durable printout that is less vulnerable to chemicals, heat, and sunlight than direct thermal printing. Make sure you select a ribbon type that matches the media you are using and that you configure the printer for thermal transfer media. -
Page 68: Load Ribbon
Chapter 2 — Set Up the Printer Load Ribbon 1 Open the top of the printer and the media compartment door. 2 Press the release button and raise the printhead. By default, the printer is set to “ink out” operation when you use ribbon. - Page 69 Chapter 2 — Set Up the Printer 5 Place the new ribbon roll between the rear ribbon holders. • For “ink out” operation (default), the ribbon should come off the back of the roll. • For “ink in” operation, the ribbon should come off the front of the roll.
- Page 70 Chapter 2 — Set Up the Printer 7 Press the release button and raise the print mechanism. 8 Route the ribbon under the print mechanism and up to the takeup core. 9 Press the printhead down to lock it in place. PD43 and PD43c Commercial Printer User Manual...
- Page 71 Chapter 2 — Set Up the Printer 10 Attach the end of the ribbon to the takeup core and turn the slack-wheel to take up slack in the ribbon. 11 Close the media door and the top of the printer. 12 If you have already configured the printer for thermal transfer printing, continue with the next step.
-
Page 72: Change The Ink Direction
Chapter 2 — Set Up the Printer Change the Ink Direction By default, the printer is set to “ink out” operation. Follow this procedure to set the printer to “ink in” operation. 1 Open the top of the printer. 2 Open the media compartment door. 3 Press the release button and raise the print mechanism. -
Page 73: Use The Notchless Ribbon Core Adapter
Chapter 2 — Set Up the Printer Use the Notchless Ribbon Core Adapter Use the optional ribbon core adapter to load media without notches in the core. The ribbon core adapter is sold separately. For information on purchasing this accessory, contact your local sales representative. 1 Insert one adapter into the media core and one adapter into the takeup core. - Page 74 Chapter 2 — Set Up the Printer 4 Place the ribbon roll and adapter into the rear media holders. For “ink out” operation (default), the ribbon should come off • the back of the roll. • For “ink in” operation, the ribbon should come off the front of the roll.
- Page 75 Chapter 2 — Set Up the Printer 7 Attach the ribbon to the takeup core. 8 Turn the slack-wheel to take up slack in the ribbon. PD43 and PD43c Commercial Printer User Manual...
-
Page 76: Connect The Printer To Power
Chapter 2 — Set Up the Printer Connect the Printer to Power The PD43 printer connects directly to AC power. The PD43c uses an external AC adapter. Caution: Use only the AC power adapter supplied with the printer. The use of a power adapter not approved by Intermec voids the product warranty and may damage the printer. - Page 77 Chapter 2 — Set Up the Printer For the PD43c: a Connect the AC power adapter to the power connector on the printer. AC power connector b Connect the power adapter to AC power. When the adapter is connected to AC power, the green LED in the adapter connector turns on and stays on.
-
Page 78: Use The Setup Wizard
Chapter 2 — Set Up the Printer Use the Setup Wizard This section explains how to use the Setup Wizard to configure the LCD printer. You must configure the printer this way after turning it on for the first time, after upgrading the firmware, or after resetting all defaults. -
Page 79: Set Up An Icon Printer Without A Network Option
Chapter 2 — Set Up the Printer Set Up an Icon Printer without a Network Option Follow this procedure to set up an icon printer that does not have the Ethernet or Wi-Fi network options. You configure printer settings through the Windows print driver. Note: Before you begin, use InterDriver to install the driver for the printer on your desktop PC. -
Page 80: Set Up An Icon Printer With Ethernet
Chapter 2 — Set Up the Printer Set Up an Icon Printer with Ethernet If your icon printer includes the Ethernet network option, follow this procedure to obtain the printer IP address and configure settings through the web page interface. Note: Before you begin, use InterDriver to install the driver for the printer on your desktop PC. -
Page 81: Calibrate The Media Feed And Print Test Labels On The Icon Printer
Chapter 2 — Set Up the Printer Calibrate the Media Feed and Print Test Labels on the Icon Printer For the icon printer, follow this procedure to automatically calibrate the media feed and print test labels. 1 Make sure that the printer has media and ribbon (if necessary) installed. -
Page 82: Calibrate The Label Taken Sensor
Chapter 2 — Set Up the Printer Calibrate the Label Taken Sensor If your printer has the optional label taken sensor or the label dispenser (which includes the sensor), use the wizard to calibrate the sensor for your media. Note: For best results, calibrate the sensor each time you load media or move the printer to a different environment. -
Page 83: About Test Labels
Chapter 2 — Set Up the Printer Before you calibrate the sensor, load media and ribbon in the printer as necessary. 1 In the Main Menu, select Wizards > Calibration > Label Taken Sensor. 2 Follow the prompts to calibrate the sensor. About Test Labels You can print a test label to check print quality and get configuration information, including lists of the fonts, images, and applications... -
Page 84: Print A Test Label In Idle Mode
Chapter 2 — Set Up the Printer Print a Test Label in Idle Mode You can print a test label when the printer is in Idle mode. 1 Make sure that the printer has media and ribbon (if necessary) installed. 2 On the icon printer, press and hold until the test label starts to print. -
Page 85: Pause Or Cancel A Batch Print Job On The Lcd Printer
Chapter 2 — Set Up the Printer Pause or Cancel a Batch Print Job on the LCD Printer During a batch print job, a Pause button appears on the LCD printer screen: 2 of 5 Fingerprint 01/04/2014 10.200.27.89 12:00 You can pause a batch print job by pressing the Print button. You can also cancel a batch print job from the front panel. -
Page 86: Pause A Batch Print Job On The Icon Printer
Chapter 2 — Set Up the Printer Pause a Batch Print Job on the Icon Printer During a batch print job, press to pause the print job. When a print job is paused, the Pause icon flashes. Pause icon Series Press to resume printing. -
Page 87: How To Print On Rfid Media
Chapter 2 — Set Up the Printer How to Print on RFID Media If you have an LCD printer with the optional RFID module installed, you can print on RFID media. Media containing RFID tags is slightly thicker where the RFID tag is located. The slight thickness of this part of the label may affect print quality. -
Page 88: Run The Rfid Calibration Wizard
Chapter 2 — Set Up the Printer Run the RFID Calibration Wizard Run the RFID calibration wizard to determine the best Tag Position and Output Power (UHF inlays, only) for RFID media. Note: After you determine the correct RFID media settings, you can save these settings to a printer profile and load the profile when you need to print on the specific RFID media. -
Page 89: Calculate Rfid Tag Position
Chapter 2 — Set Up the Printer Calculate RFID Tag Position You can perform a manual calculation to come up with an estimate of the RFID Tag Position. Because this value is an estimate, you may need to slightly adjust the calculated value to achieve the best results. 1 Make sure Start Adjust and Stop Adjust are set to 0. - Page 90 Chapter 2 — Set Up the Printer PD43 and PD43c Commercial Printer User Manual...
-
Page 91: Connect The Printer
Connect the Printer This chapter explains how to connect the PD43 printers to a PC and to an Ethernet or wireless network. -
Page 92: About Printer Drivers
PC. Drivers enable the printer to communicate with your PC and with software applications such as Honeywell PrintSet 5. Note: Although Windows may auto-detect the printer when you connect it to a PC through a USB port, you must still install printer drivers on the PC for correct printer operation. -
Page 93: How To Connect The Printer To Your Pc
Chapter 3 — Connect the Printer 7 When you reach the InstallShield Wizard Complete page, click Next. The InterDriver Wizard appears. 8 From the Welcome to InterDriver Wizard page, make sure Install printer drivers is selected and then click Next. 9 Follow the onscreen instructions in the InterDriver Wizard. - Page 94 Chapter 3 — Connect the Printer 2 Connect one end of the USB cable to the USB device port on the back of the printer, and connect the other end to your PC. A “USB Host Connected” message appears on the printer screen. For the PD43, use the cable guides on the underside of the printer for cable strain relief.
-
Page 95: Connect The Printer Using A Serial Or Parallel Cable
Chapter 3 — Connect the Printer Connect the Printer Using a Serial or Parallel Cable If you have the optional USB-to-Serial adapter cable or USB-to-Parallel adapter cable for the printer, you can connect the printer to the serial or parallel port on a PC. 1 Connect the adapter cable to the USB host port on the printer. -
Page 96: How To Connect The Printer To Your Network
Chapter 3 — Connect the Printer 2 For a USB-to-Serial adapter, connect the adapter cable to the serial port on your PC. Continue with the next step. For a USB-to-Parallel adapter, connect the adapter cable to the parallel port on your PC. The printer is ready to communicate with your PC. - Page 97 Chapter 3 — Connect the Printer 1 Connect an Ethernet cable to the Ethernet port on the rear of the printer and to your network. Ethernet port For the PD43, use the cable guides on the underside of the printer for cable strain relief.
-
Page 98: About Wi-Fi Communications
Chapter 3 — Connect the Printer 2 Get the IP address for your printer: • For an LCD printer, from the Main Menu select Settings > Communications > Ethernet and find the IP address. • For an icon printer, press and hold until the test label with the IP address starts to print. -
Page 99: Connect The Printer To A Wireless Network
Chapter 3 — Connect the Printer Connect the Printer to a Wireless Network Before you begin, you should be familiar with the settings you need for your network. If you are using a DHCP network, turn the printer on. The printer automatically connects to the wireless network. - Page 100 Chapter 3 — Connect the Printer 1 From the printer Ready screen, press . The Main Menu appears. Main Menu Programs Settings Tools Wizards 2 Select Settings > Communications > Wireless 802.11. Wireless 802.11 General Security Network 3 Select General to configure these wireless network settings: •...
-
Page 101: Configure Wi-Fi Communications From The Printer Web Page
Chapter 3 — Connect the Printer Configure Wi-Fi Communications from the Printer Web Page You can use the printer web page to configure wireless communications on the printer. Note: To configure the printer from the web page, the printer must be turned on and connected to your Wi-Fi or Ethernet network. -
Page 102: About Bluetooth Communications
Chapter 3 — Connect the Printer About Bluetooth Communications The printer supports Bluetooth communications when the optional Wi-Fi/Bluetooth module is installed. When Bluetooth is enabled, you can connect the printer to other Bluetooth devices, such as bar code scanners and keyboards. You can also make the printer discoverable by Bluetooth-enabled devices such as mobile computers. -
Page 103: Connect To A Bluetooth Device By Reading A Bar Code
Chapter 3 — Connect the Printer Connect to a Bluetooth Device by Reading a Bar Code To connect a Bluetooth-enabled bar code scanner to the printer, use the scanner to read the “Scan to Connect” bar code. 1 Make sure your printer is ready to print. 2 On your desktop PC, start a web browser. -
Page 104: Configure Bluetooth Communications From The Main Menu
Chapter 3 — Connect the Printer Configure Bluetooth Communications from the Main Menu This section explains how to configure Bluetooth settings from the printer Main Menu. You may need to configure these settings if you want to connect to a mobile computer through Bluetooth. 1 From the Ready screen, press . -
Page 105: About The Usb Host Port
Chapter 3 — Connect the Printer About the USB Host Port You can use the USB host interface port on the printer to connect these peripheral devices: USB Peripheral Devices Device Description Keyboard Use a standard USB keyboard to send Fingerprint printer language commands directly to the printer or to enter information if you are running a Smart Printing application. -
Page 106: Connect A Usb Device
Chapter 3 — Connect the Printer Connect a USB Device The printer has two USB host ports that you can connect a USB device 1 If you are connecting a USB storage device, make sure the device has a single partition and is formatted as FAT16 or FAT32. 2 Connect the device to one of the USB host ports. -
Page 107: Configure The Printer
Configure the Printer This chapter explains how to view and change printer settings by using the Main Menu or the printer web pages. -
Page 108: About Printer Configuration Settings
Chapter 4 — Configure the Printer About Printer Configuration Settings Printer configuration settings determine how the printer operates. Printer Configuration Settings Setting Type Description Communications All communications and network settings: • Serial (appears when using serial connection to PC. Includes virtual COM port settings.) •... -
Page 109: How To Configure The Printer
Chapter 4 — Configure the Printer How to Configure the Printer Use one of these methods to view and change printer settings: • Printer web page • Main Menu (LCD printers) • PrintSet 5 • Programming commands • SmartSystems View the Configuration Summary If you are using Ethernet or Wi-Fi communications, you can view a complete summary of all printer configuration settings from the printer web page. -
Page 110: Configure The Printer From The Web Page
Chapter 4 — Configure the Printer 4 Click Configuration Summary. The configuration summary appears. Configure the Printer from the Web Page If you are using Ethernet or Wi-Fi communications, you can change printer configuration settings from the printer web page. You should have already connected your printer to your network and obtained an IP address. - Page 111 Chapter 4 — Configure the Printer 3 Click Login in the upper right corner of the screen. The Login page appears. 4 Type your Username and Password in the entry fields, and then click Login. The default username is itadmin and the default password is pass.
-
Page 112: Configure The Printer From The Main Menu
Chapter 4 — Configure the Printer Configure the Printer from the Main Menu If you have an LCD printer, you can view or change configuration settings from the Main Menu. 1 From the Ready Screen, press 2 Select Settings and press . -
Page 113: How To Configure The Printer With Programming Commands
Chapter 4 — Configure the Printer How to Configure the Printer with Programming Commands You can change configuration settings by sending programming commands directly from your PC to the printer through a terminal program (such as HyperTerminal), a serial connection, or a network connection. -
Page 114: About Printer Profiles
Chapter 4 — Configure the Printer About Printer Profiles After you change printer default settings to meet your needs, you can save those settings as a printer profile. The printer supports multiple profiles that you can save and load at any time. For example, you can create one profile to use when you are printing on continuous label stock, and a different profile to use when you are printing on label stock with gaps. -
Page 115: Load A Printer Profile From The Web Page
Chapter 4 — Configure the Printer Load a Printer Profile from the Web Page You can load a saved profile from the printer web page. Note: This procedure assumes you have already logged in to the printer web page. 1 In the printer web page, click the Manage tab. 2 Click Profiles. -
Page 116: Manage Printer Profiles From The Web Page
Chapter 4 — Configure the Printer Manage Printer Profiles from the Web Page You can activate and delete profiles or download profiles to your PC from the printer web page. Note: This procedure assumes you have already logged in to the printer web page. -
Page 117: Save A Printer Profile From The Main Menu
Chapter 4 — Configure the Printer Save a Printer Profile from the Main Menu You can save current printer settings for an LCD printer as a printer profile and load that profile on another printer. 1 From the Ready screen, press . -
Page 118: How To Load A Printer Profile With Programming Commands
Chapter 4 — Configure the Printer How to Load a Printer Profile with Programming Commands You can load a saved LCD printer profile to another printer by sending programming commands directly from your PC to the printer through a terminal program (such as HyperTerminal), a serial connection, or a network connection. -
Page 119: Print A File From A Usb Storage Device
Chapter 4 — Configure the Printer USB Storage Device File Directories (Continued) File Type Place in This Directory Fingerprint script /scripts Firmware /firmware Installation package (UFF resource file) Root of USB storage device Start file Root of USB storage device Print a File from a USB Storage Device If you are uploading image files to the printer from a USB storage device, you can print an image file. -
Page 120: Export Applications And Files To A Usb Storage Device
Chapter 4 — Configure the Printer 4 To upload all files to the printer, select Install All and then press . All valid files are uploaded to the printer memory. To upload only one file at a time: a Select the type of item you want to upload (Applications, Fonts, Forms/Layout, Web Forms, Images, Fingerprint Programs, or Display) and then press b Select the file from the list and then press... -
Page 121: Install A Configuration File From A Usb Storage Device
Chapter 4 — Configure the Printer 4 Select Tools > USB Menu. 5 Select Configuration. 6 Select Export Configuration. A list of the available files appears. 7 Select the file to export and then press . The file is exported to the USB memory device. -
Page 122: Upload Or Delete Applications And Resources From The Printer Web Page
Chapter 4 — Configure the Printer Upload or Delete Applications and Resources from the Printer Web Page From the printer web page, use the Manage page to upload or delete applications, fonts, images, label formats, or web forms. Note: You can only delete applications and resources you downloaded to the printer memory. - Page 123 Chapter 4 — Configure the Printer 5 To upload an application or file to the printer: a Click Browse to locate your application or file. b Double-click the file to select it. c Click Upload. The application or file uploads to the printer. To delete an application or file, click the file name in the Customer Downloaded list and then click Delete.
- Page 124 Chapter 4 — Configure the Printer PD43 and PD43c Commercial Printer User Manual...
-
Page 125: Troubleshoot The Printer
Troubleshoot the Printer This section explains how to troubleshoot the PD43 printers. -
Page 126: Call Product Support
Chapter 5 — Troubleshoot the Printer Call Product Support If you cannot find the answer to your problem in the “Troubleshooting” section, go to the Intermec technical knowledge base (Knowledge Central) at intermec.custhelp.com to review technical information or to request customer support. If you still need help after visiting Knowledge Central, call Product Support. -
Page 127: Locate The Printer Configuration And Serial Numbers
Chapter 5 — Troubleshoot the Printer Locate the Printer Configuration and Serial Numbers The printer configuration and serial numbers can be found on the product label located on the back panel of the printer. Problems and Possible Solutions Use this table to understand and troubleshoot some common problems you may encounter. - Page 128 Chapter 5 — Troubleshoot the Printer Problems and Possible Solutions (Continued) Problem Possible Solution The printer is connected to my PC Make sure that bidirectional support is using a virtual COM port, and disabled. From the printer properties printing stops. But, there are no dialog box, click the Ports tab, and then clear the Enable bidirectional support errors to indicate that something...
- Page 129 Chapter 5 — Troubleshoot the Printer Problems and Possible Solutions (Continued) Problem Possible Solution There are white vertical lines on Try these possible solutions in order: the printout. • The printhead may be dirty. Clean the printhead. • There may be missing dots on the printhead.
- Page 130 Chapter 5 — Troubleshoot the Printer Problems and Possible Solutions (Continued) Problem Possible Solution The ribbon breaks. Try these possible solutions in order: • Make sure your media setting is appropriate for the type of media you are using. • Make sure that the ribbon is fitted correctly.
- Page 131 Chapter 5 — Troubleshoot the Printer Problems and Possible Solutions (Continued) Problem Possible Solution Printing on regular media (not RFID is enabled. Disable RFID from the RFID) is slow and halted in web page or the Main Menu. between labels. I am using an application to write Try these possible solutions: to RFID tags and the printer is...
-
Page 132: How To Restore Default Settings
Chapter 5 — Troubleshoot the Printer Problems and Possible Solutions (Continued) Problem Possible Solution My printer does not Windows may not have installed the communicate with my desktop driver. Follow these steps: PC when they are connected with Connect the adapter cable to the the USB-to-parallel adapter cable. -
Page 133: Restore Defaults From The Main Menu
Chapter 5 — Troubleshoot the Printer 6 Select the settings you want to restore: • Check the Network settings check box to restore defaults for all network connections, such as IP address and network name. • Check the User files check box to erase all files you uploaded to the printer memory. -
Page 134: How To Upgrade The Printer Firmware
Chapter 5 — Troubleshoot the Printer 5 To continue, press . The default settings are restored and the printer restarts. When the printer finishes starting up, the Setup Wizard begins. Follow the instructions to complete the Wizard. To return to the Main Menu without restoring any defaults, select No. -
Page 135: Upgrade Firmware From The Printer Web Page
Chapter 5 — Troubleshoot the Printer Upgrade Firmware from the Printer Web Page You can upgrade the printer firmware from the printer web page. To configure the printer from the web page, the printer must be turned on and connected to your Wi-Fi or Ethernet network. 1 On your PC, open a browser. -
Page 136: Upgrade Firmware From The Usb Menu
Chapter 5 — Troubleshoot the Printer 5 Restart the printer. The upgrade file is loaded into the printer memory. This may take several minutes. For the LCD printer, after the upgrade file is loaded, the printer restarts and the Ready screen appears. The printer is ready to use. For the icon printer, as the upgrade file is loaded, all icons in the icon panel turn on and then turn off, except for the Maintenance icon. -
Page 137: About Alerts
Chapter 5 — Troubleshoot the Printer About Alerts To help maintain the printer, you can configure the printer to send alert messages when certain conditions occur. For example, the printer can send a message when the odometer reaches a certain value, or if the printhead is lifted during printing. -
Page 138: Maintenance And Error Alert Messages
Chapter 5 — Troubleshoot the Printer 5 Click the Configure tab > Alerts. 6 Click Error to configure error alerts. Click Warning to configure warning alerts. Click Information to configure information alerts. 7 Change alert settings as necessary. When you are finished, click Save. - Page 139 Chapter 5 — Troubleshoot the Printer Maintenance and Error Alert Messages (Continued) Message Description and Solution Ribbon Installed The printer is configured as a direct thermal printer and thermal transfer ribbon is installed. Remove the ribbon or configure the printer for thermal transfer media.
-
Page 140: About Printer System Information
Chapter 5 — Troubleshoot the Printer Maintenance and Error Alert Messages (Continued) Message Description and Solution Upgrading Firmware The printer is going to start upgrading the firmware. Do not try to send anything to the printer. Printer is Rebooting The printer is going to restart. Wait until the printer is ready before attempting to communicate with it. -
Page 141: View Printer Statistics
Chapter 5 — Troubleshoot the Printer View Printer Statistics If your printer is connected to an Ethernet or Wi-Fi network, you can view printer statistics in the printer web page. 1 On your PC, open a browser. 2 In the Location or Address bar, type the printer IP address and press Enter. -
Page 142: Check The Printer Odometer
Chapter 5 — Troubleshoot the Printer Check the Printer Odometer You can check the odometer from the printer web page to see the printhead usage and how the current values compare to the alert values. To check the printer odometer from the printer web page, the printer must be turned on and connected to your Wi-Fi or Ethernet network. -
Page 143: Maintain The Printer
Maintain the Printer This section explains how to perform basic maintenance on the PD43 printers. -
Page 144: Clean The Printhead
Chapter 6 — Maintain the Printer Clean the Printhead Cleaning the printhead on a regular basis is important for the life of the printhead and for the print quality. You should clean the printhead each time you replace the media. Follow this procedure to clean the printhead using the cleaning card. -
Page 145: Replace The Printhead
Chapter 6 — Maintain the Printer Replace the Printhead You need to replace the printhead periodically when it wears out due to the rapid heating and cooling process used during printing. How often you need to replace the printhead depends on factors such as what type of images you print, the type of media or ribbon you use, the amount of energy to the printhead, the print speed, and the ambient temperature of the room you print in. - Page 146 Chapter 6 — Maintain the Printer 6 Carefully slide the printhead out of the mechanism. The printhead is still attached to the mechanism by a ribbon cable. 7 Disconnect the cable from the printhead and remove the printhead from the printer. Warning: Do not touch the printhead surface area.
-
Page 147: Clean The Platen Roller
Chapter 6 — Maintain the Printer 11 Tilt the printhead up into the print mechanism and press it into place. When the printhead is in the correct position, the printhead latches snap into place on the sides of the printhead. 12 For a thermal transfer printer, install the ribbon. -
Page 148: Clean The Exterior Of The Printer
Chapter 6 — Maintain the Printer 7 Pull the latches up to remove the platen roller from the printer. 8 Remove any adhesive residue from the roller with a cotton swab moistened with isopropyl alcohol. 9 Reverse Steps 6 and 7 to install the roller. 10 Press the latches into the printer until they snap into place. -
Page 149: Specifications
Specifications This appendix contains specifications for the printers. -
Page 150: Printer Specifications
Appendix A — Specifications Printer Specifications PD43 and PD43c Physical Specifications Dimensions: PD43c 20.5 cm x 21.1 cm x 23.6 cm (8.1 in x 8.3 in x 9.29 in) PD43c with external media 20.5 mm x 21.1 cm x 43.3 cm (not holder including media) (8.1 in x 8.3 in x 17.0 in) - Page 151 Appendix A — Specifications Print Speed, Resolution, and General Media Specifications Label Length (minimum): 6.35 mm (.25 in) Gap Length Between Labels: 2 to 25.4 mm (0.08 to 1.0 in) Black Mark Length 3 to 26 mm (0.12 to 1.02 in) centered between tickets, 15% maximum reflectance Media Thickness:...
- Page 152 Appendix A — Specifications General Specifications Specification Description • Memory 128 MB flash • 128 MB SDRAM • (Optional) USB memory device, up to 32 GB • Supported command languages Fingerprint • Direct Protocol • Intermec Printer Language (IPL) • DSim •...
-
Page 153: Supported Bar Code Symbologies
Appendix A — Specifications General Specifications (Continued) Specification Description • Localization fonts Simplified Chinese (optional) • Traditional Chinese (optional) • Cyrillic • Korean (Optional) • Latin • Greek • Turkish • Hebrew • Arabic • Baltic • Baltic Rim • Vietnamese •... - Page 154 Appendix A — Specifications • Code 128: • Code 128 Subset A • Code 128 Subset B • Code 128 Subset C • Code 128 UCC • DUN-14/16 • EAN: • EAN-8 • EAN-13 • EAN 128 • EAN 128 subset A EAN 128 Subset B •...
- Page 155 Appendix A — Specifications • UPC: • UPC-A • UPC-D1 • UPC-D2 • UPC-D3 • UPC-D4 • UPC-D5 • UPC-E • UPC Shipping container Code Add-on bar code symbologies: • Add-on 2 Add-on 5 • • UPC-5 digits Add-on code 2D bar code symbologies: •...
- Page 156 Appendix A — Specifications • PDF417 • Planet • Plessey • Postnet • QR Code • USPS 4-State Customer Bar Code Composite bar code symbologies: EAN-8 Composite (CC-A, CC-B) • • EAN-13 Composite (CC-A, CC-B) • GS1 Composite (previously called EAN.UCC Composite) •...
-
Page 157: Test Labels
Appendix A — Specifications Test Labels This section describes test label information. A typical test label looks like this: Sample Configuration Label for Fonts Resource Labels Label Description Applications All Intermec utility programs and user-installed applications. Fonts Resident and user-installed fonts. Bar Codes(Barcodes) Resident bar codes (partial label shown). - Page 158 Appendix A — Specifications Printer Information Labels Label Description Installed Hardware List of hardware modules in the printer, including: • Main logic board configuration number • Wireless 802.11 MAC address • Ethernet • Serial Port • USB Device • USB Host •...
- Page 159 Appendix A — Specifications Printer Settings Labels Label Description Media and Printing Current settings for media handling, including: • Media width, length, and X-margin • Selected media type • Printing method (TTR or DT) and speed • Start Adjust and Stop Adjust values •...
- Page 160 Appendix A — Specifications Printer Settings Labels (Continued) Label Description • Wi-Fi General IP address and assignment method • Subnet mask • Default router • DHCP Response • IPv6 address and assignment method • 802.11 MAC address • Network name (SSID) and type •...
-
Page 161: Print Quality Labels
Appendix A — Specifications Print Quality Labels Note: Although you can print test labels on any size media, the labels are designed to be printed on 10.16 cm x 15.24 cm (4 in x 6 in) media. Print Quality Labels Label Description Chess... - Page 162 Appendix A — Specifications Print Quality Labels (Continued) Label Description Pitch Ruler Bar Code(Barcode) PD43 and PD43c Commercial Printer User Manual...
- Page 163 Appendix A — Specifications Print Quality Labels (Continued) Label Description Wrinkle PD43 and PD43c Commercial Printer User Manual...
- Page 164 Appendix A — Specifications PD43 and PD43c Commercial Printer User Manual...
-
Page 165: Default Settings
Default Settings This appendix contains all of the default settings for the printer. -
Page 166: Default Configuration
Appendix B — Default Settings Default Configuration Use this appendix to view the default settings on the printer. The following tables list the default settings for the printers. If you restore the printer to factory default settings, it will use the values listed here. The order of the settings reflects the organization of the printer web page and Main Menu. -
Page 167: Display And Audio Settings
Appendix B — Default Settings Display and Audio Settings This section describes display and audio settings for the printer. To view these settings: From the printer Main Menu, select Settings > System Settings > • Display or Audio. • From the printer web page, click the Configure tab, System Settings >... -
Page 168: Error, Information, And Warning Alert Settings
Appendix B — Default Settings Error, Information, and Warning Alert Settings This section describes error, information, and warning alerts and settings. To view these settings, from the printer web page, click the Configure tab, Alerts > Error, Warning, or Information. Note: These alert settings cannot be configured from the printer Main Menu. - Page 169 Appendix B — Default Settings Error Alert Default Settings (Continued) Delay Error Alert Status Repeat Delay Unit Message Printhead Enable Occurrences Error - Printhead lifted Lifted Printhead Not Disable Occurrences Error - Printhead not Detected detected Information Alert Default Settings Delay Information Alert Status...
-
Page 170: Error Alerts
Appendix B — Default Settings Error Alerts Error alerts are sent when a condition occurs that prevents the printer from printing, such as running out of media. These alerts include: • Out of Media • Out of Ribbon • Printer in Pause Mode •... -
Page 171: Ethernet Settings
Appendix B — Default Settings • Faulty Dot (Sent when a faulty dot is detected in the printhead, which can lead to lower print quality) Ethernet Settings This section describes the Ethernet IPv4 and IPv6 settings. To view these settings: •... -
Page 172: General System Settings
Appendix B — Default Settings General System Settings This section describes general system settings. To view these settings: • From the printer Main Menu, select Settings > System Settings > General. • From the printer web page, click the Configure tab, System Settings >... -
Page 173: Media Settings
Appendix B — Default Settings Media Settings This section describes media settings for the printer. To view these settings: From the printer Main Menu, select Settings > Printing > Media. • • From the printer web page, click the Configure tab, Printing > Media. - Page 174 Appendix B — Default Settings Media Settings (Continued) Setting Description Default Media Width Sets the width of the printable area Variable measured from the media margin (X) across the printhead. Unit of measurement is defined in the Unit of Measure parameter. *935-044-001* INTERMEC 6001 36th Ave W...
- Page 175 Appendix B — Default Settings Media Settings (Continued) Setting Description Default Clip Default Determines if the printer prints items outside the printable area of the label. When this is set to Off, the printer returns an error if any part of a bar code label cannot be printed because that part extends beyond the printable area.
-
Page 176: Print Quality Settings
Appendix B — Default Settings Media Settings (Continued) Setting Description Default Head Down Sets the action when you close the print No Action Action mechanism after opening it: • No Action • Formfeed - The printer feeds one label. • Testfeed - The printer prints a configuration label. -
Page 177: Serial Port Settings
Appendix B — Default Settings Serial Port Settings This section describes the serial port settings. To view these settings: • From the printer Main Menu, select Settings > Communications > Serial > COM1. • From the printer web page, click the Configure tab, Communications >... -
Page 178: Virtual Com Settings
Appendix B — Default Settings Virtual COM Settings This section describes the virtual COM port settings. To view these settings: From the printer Main Menu, select Settings > Communications • > Serial > Virtual COM. • From the printer web page, click the Configure tab, Communications >... -
Page 179: System I/O Settings
Appendix B — Default Settings Virtual COM Settings (Continued) Setting Description Default New Line Character Defines the characters that the printer CR/LF echoes to the host to indicate that it has moved to a new line. RS-485 Printer Sets the RS-485 protocol address of the Address printer. -
Page 180: System Network Services
Appendix B — Default Settings System Network Services This section lists the network services you can manage from the printer. You will only see Manage Services from the menus if you have an Ethernet or Wireless module installed in the printer. To view these services: •... -
Page 181: System Maintenance Alert Settings
Appendix B — Default Settings System Maintenance Alert Settings This section describes the system maintenance alert settings, such as the odometer distance. To view these settings: From the printer Main Menu, select Settings > System Settings > • Maintenance Alerts. •... -
Page 182: Wireless 802.11 General Settings
Appendix B — Default Settings Wireless 802.11 General Settings This section describes the 802.11 general settings. To view these settings: From the printer Main Menu, select Settings > Communications • > Wireless 802.11 > General. • From the printer web page, click the Configure tab, Communications >... -
Page 183: Wireless 802.11 Network Settings
Appendix B — Default Settings Wireless 802.11 Network Settings This section describes the 802.11 IPv4 and IPv6 settings. To view these settings: From the printer Main Menu, select Settings > Communications • > Wireless 802.11 > Network > IPv4 or IPv6. •... -
Page 184: Wireless 802.11 Security Settings
Appendix B — Default Settings Wireless 802.11 Security Settings This section describes the 802.11 security settings. To view these settings: From the printer Main Menu, select Settings > Communications • > Wireless 802.11 > Security. • From the printer web page, click the Configure tab > Communications >... - Page 185 Appendix B — Default Settings Wireless 802.11 Security Settings (Continued) Setting Description Default Inner Selects the authentication method MSCHAPv2 Authentication that is used when the EAP type is EAP-FAST, PEAP, or TTLS. CA Certificate Sets the name of the Certificate intermec.pem Authority (CA) that verifies the server certificate.
- Page 186 Appendix B — Default Settings Wireless 802.11 Security Settings (Continued) Setting Description Default Acquire PAC Determines if automatic PAC file provisioning is on for EAP-FAST authentication. Fast Roaming Determines if the printer can roam Disable (CCKM) from one access point to another without reauthenticating with the server.
-
Page 187: Print Labels With Inprint
Print Labels with INPrint This section explains how to use the INPrint feature to print labels. -
Page 188: About The Inprint Page
Appendix C — Print Labels with INPrint About the INPrint Page The INPrint page features sample web forms you can use to quickly and easily print single labels if you are using the Fingerprint or Direct Protocol language on your printer. You select a web form from the lists and enter information in the fields for that label. -
Page 189: Predefined Inprint Label Formats
Appendix C — Print Labels with INPrint Predefined INPrint Label Formats Predefined INPrint Label Formats and Sample Illustrations Format Name Sample 203_returnadd_3x1.lbx 203_demo_4x6.lbx 203_shipaddr_4x6.lbx PD43 and PD43c Commercial Printer User Manual... - Page 190 Appendix C — Print Labels with INPrint Predefined INPrint Label Formats and Sample Illustrations Format Name Sample 203_packslip_4x6.lbx PD43 and PD43c Commercial Printer User Manual...
- Page 191 Linux Copyright Information This software is provided in pertinent parts by the following copyright holders: Copyright or License Text Link to Source Code BlueZ - Bluetooth protocol stack for Linux http://www.bluez.org LPRng, IFHP, and LPRng Tool License http://www.lprng.com pslash - a lightweight framebuffer http://git.yoctoproject.org/cgit/cgit.cgi/psplash splashscreen for embedded devices udhop DHCP client...
- Page 192 Copyright or License Text Link to Source Code Copyright (C) 1994-2008 Lua.org, PUC- http://www.lua.org/ Rio. Copyright (C) 2004, 2005 WIDE Project. http://www.racoon2.wide.ad.jp/w/ Copyright (C) 1995, 1996, 1997, 1998, and http://ipsec-tools.sourceforge.net/ 1999 WIDE Project. Copyright 1989, 1991, 1992 by Carnegie http://www.net-snmp.org/ Mellon University Derivative Work - 1996, 1998-2000 Copyright 1996, 1998-2000 The Regents...
-
Page 193
Copyright or License Text Link to Source Code Copyright 2006 Richard Wilson http://www.netsurf-browser.org/projects/libnsbmp/
- Page 194 6001 36th Avenue West Everett, Washington 98203 U.S.A. tel 425.348.2600 fax 425.355.9551 www.intermec.com © 2014 Intermec by Honeywell All rights reserved. PD43 and PD43c Commercial Printer User Manual * 9 3 5 - 0 8 2 - 0 0 2 * P/N 935-082-002...