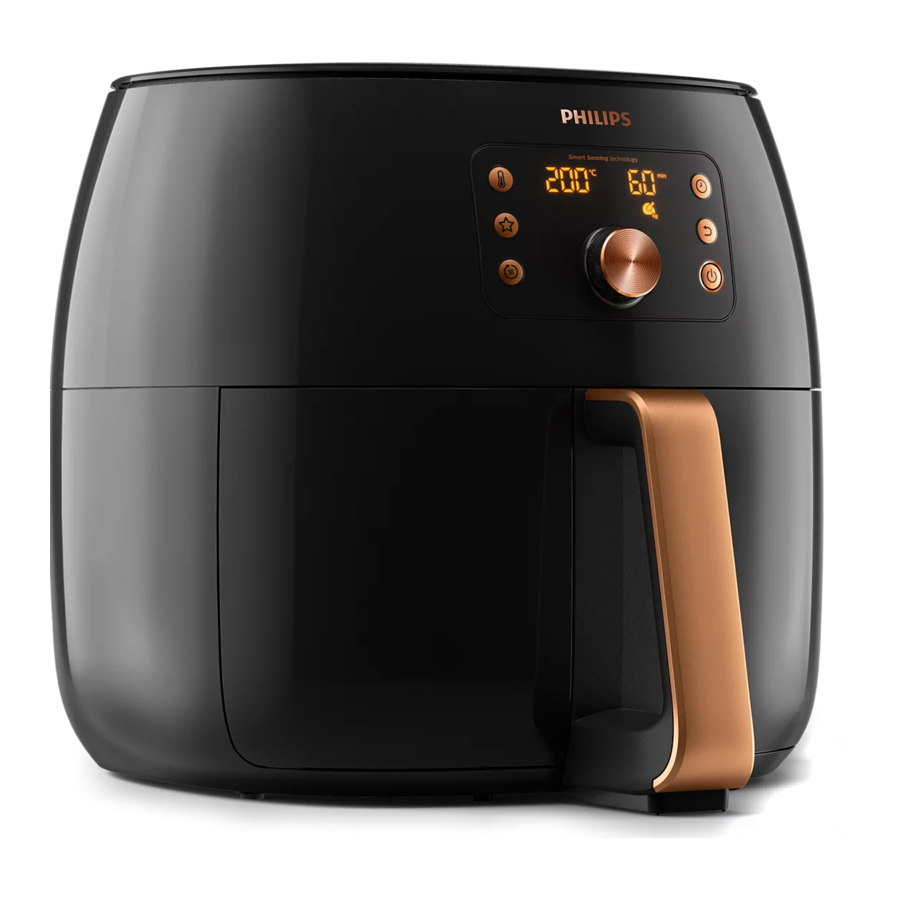
Philips HD9867 Premium Airfryer Manual
- User manual (112 pages) ,
- User manual (28 pages)
Introduction
Congratulations on your purchase and welcome to Philips! To fully benefit from the support that Philips offers, register your product at www.philips.com/welcome.
With Philips Airfryer, you can now enjoy perfectly cooked fried food—crispy on the outside tender on the inside—Fry, grill, roast and bake to prepare a variety of tasty dishes in a healthy, fast and easy way.
For more inspiration, recipes and information about the Airfryer, visit www.philips.com/kitchen or download the free NutriU App* for IOS ® or Android™.
*The NutriU app may not be available in your country. In this case please download the Airfryer App.
General description

- Basket with removable mesh bottom
- Removable mesh bottom
- Fat reducer
- Pan
- Cord storage compartment
- Air outlets
- MAX indication
- Power cord
- Air inlet
- Control panel
- Temperature indication
- Temperature button
- Favorites button
- Keep warm button
- Keep warm indication
- QuickControl dial
- Power On/Off button
- Return button
- Smart Chef programs: Frozen fries/home-made fries/ whole fish/chicken drumsticks/whole chicken
- Shake indication
Before first use
- Remove any stickers or labels (if available) from the appliance.
- Thoroughly clean the appliance before first use, as indicated in the cleaning chapter.
Preparing for use
Placing the removable mesh bottom and fat reducer
- Open the drawer by pulling the handle.
![]()
- Remove the basket by lifting the handle.
![]()
- Place the fat reducer into the pan.
![]()
- Insert the removable mesh bottom into the slot on the right bottom side of the basket. Push the mesh bottom down until it locks into position ("click" on both sides).
![]()
- Put the basket in the pan.
![]()
- Slide the drawer back into the Airfryer by the handle.
![]()


Note
Food table for manual time/temperature settings
The table below helps you select the basic settings for the types of food you want to prepare.
Note
| Ingredients | Min.– max. amount | Time (min) | Temperature | Note |
| Home-made fries (12 x 12 mm/0.5 x 0.5 in) | 200–1400 g 7–49 oz | 18–35 | 180°C/350°F | |
| Homemade potato wedges | 200–1400 g 7–49 oz | 20–42 | 180°C/350°F | |
| Frozen snacks (chicken nuggets) | 80–1300 g/ 3–46 oz (6–50 pieces) | 7–18 | 180°C/350°F | |
| Frozen snacks (small spring rolls around 20 g/0.7 oz) | 100–600 g/ 4–21 oz (5–30 pieces) | 14–16 | 180°C/350°F | |
| Chicken breast Around 160 g/6 oz | 1–5 pieces | 18–22 | 180°C/350°F | |
| Chicken fingers bread crumbed | 3–12 pieces (1 layer) | 10–15 | 180°C/350°F | |
| Chicken wings Around 100 g/3.5 oz | 2–8 pieces (1 layer) | 14–18 | 180°C/350°F | |
| Meat chops without bone Around 150 g/6 oz | 1–5 chops | 10–13 | 200°C/400°F | |
| Hamburger Around 150 g/6 oz (diameter 10 cm/4 in) | 1–4 patties | 10–15 | 200°C/400°F | |
| Thick sausages Around 100 g/3.5 oz (diameter 4 cm/1.6 in) | 1–6 pieces (1 layer) | 12–15 | 200°C/400°F | |
| Thin sausages Around 70 g/2.5 oz (diameter 2 cm/0.8 in) | 1–7 pieces | 9–12 | 200°C/400°F | |
| Pork roast | 500–1000 g/ 18–35 oz | 40–60 | 180°C/350°F | |
| Fish filets Around 120 g/4.2 oz | 1–3 (1 layer) | 9–20 | 160°C/325°F | |
| Shellfish Around 25–30 g/0.9–1 oz | 200–1500 g/ 7–53 oz | 10–25 | 200°C/400°F | |
| Cake | 500 g/18 oz | 28 | 180°C/350°F | |
| Muffins Around 50 g/1.8 oz | 1–9 | 12–14 | 180°C/350°F | |
| Quiche (diameter 21 cm/8.3 in) | 1 | 15 | 180°C/350°F | |
| Pre-baked toast / bread rolls | 1–6 | 6–7 | 180°C/350°F | |
| Fresh bread | 700 g/25 oz | 38 | 160°C/325°F | |
| Fresh rolls Around 80 g/2.8 oz | 1–6 pieces | 18–20 | 160°C/325°F | |
| Chestnuts | 200–2000 g/ 7–70 oz | 15–30 | 200°C/400°F | |
| Mixed vegetable (roughly chopped) | 300–800 g/ 11–28 oz | 10–20 | 200°C/400°F | |
Using the appliance
Airfrying


- Place the appliance on a stable, horizontal, level and heatresistant surface. Make sure the drawer can be opened completely.
Note
- Pull the power cord out of the cord storage compartment at the back of the appliance.
![]()
- Put the plug in the wall outlet.
![]()
- Open the drawer by pulling the handle.
![]()
- Put the ingredients in the basket.
![]()


Note
- Slide the drawer back into the Airfryer by the handle.
![]()

- Never use the pan without the fat reducer or basket in it. If you heat up the appliance without basket, use oven gloves to open the drawer. The edges and inside of the drawer become very hot.
- Do not touch the pan, fat reducer or basket during and for some time after use, as they get very hot.
- Press the power On/Off button
![]() to switch on the appliance.
to switch on the appliance.
![]()
 to switch on the appliance.
Note
- Press the temperature button
![]() .
.
![]()
![]() The temperature indication blinks on the screen.
The temperature indication blinks on the screen.
 .
.
 The temperature indication blinks on the screen.
Note
- If you press the timer button
![]() first, the appliance will start cooking right after the cooking time has been confirmed.
first, the appliance will start cooking right after the cooking time has been confirmed.
 first, the appliance will start cooking right after the cooking time has b
- Turn the QuickControl dial to choose your desired cooking temperature.
![]()
- Push the QuickControl dial to confirm the selected temperature.
![]() After the temperature is confirmed, the time indication starts blinking on the screen.
After the temperature is confirmed, the time indication starts blinking on the screen.
![]()
- Turn the QuickControl dial to choose your desired cooking time.
![]()

 After the temperature is confirmed, the time indication starts blinking on the screen.

Note
- If you press the favorite button
![]() you will save this cooking temperature and time as your favorite cooking settings. Any previously saved settings will be overwritten. For more details, refer to chapter "Save your favorite setting".
you will save this cooking temperature and time as your favorite cooking settings. Any previously saved settings will be overwritten. For more details, refer to chapter "Save your favorite setting".
 you will save this cooking temperature and time as your favorite cooking settings. Any
 - Push the QuickControl dial to confirm the selected time.
![]()
- The appliance starts cooking after the cooking time has been confirmed.

Tip
- To cancel any ongoing process and go back to the main menu, press the return button
![]() .
.
 .
.Note
- If you set the timer to half the cooking time, when you hear the timer bell it is time to shake or turn the ingredients. Be sure to reset the timer to the remaining cooking time.
![]()

- When you hear the timer bell, the cooking time has elapsed.
![]()
- Open the drawer by pulling the handle and check if the ingredients are ready.
![]()


Note
- To remove small ingredients (e.g. fries), lift the basket out of the pan by the handle.
![]()

- After the cooking process, the pan, the fat reducer, the basket, interior housing and the ingredients are hot. Depending on the type of ingredients in the Airfryer, steam may escape from the pan.
- Empty the basket contents into a bowl or onto a plate. Always remove the basket from the pan to empty contents as hot oil may be in bottom of the pan.
![]()

Note
- Depending on the type of ingredients cooking, you may want to carefully pour off any excess oil or rendered fat from the pan after each batch or before shaking or replacing the basket in the pan. Place the basket on a heat-resistant surface. Wearing oven-safe gloves, lift the pan off tracks and place on heat-resistant surface.
Carefully remove the fat reducer from the pan using rubber tipped tongs. Pour off excess oil or rendered fat. Return the fat reducer to the pan, the pan to the drawer and the basket to the pan.
When a batch of ingredients is ready, the Airfryer is instantly ready for preparing another batch.
Note
Food table for Smart Chef programs
Note
| Smart Chef programs for |  | Directions | |
 Frozen fries | Thin (7x7mm) Medium (10x10mm) Frozen potato based snacks | 200–1400g | |
 Homemade fries | Home made cut (10x10mm) | 500–1400g | |
 Fish | Salmon fillet | 2–5 pcs (150–200g/pc) up to 750g | |
| A whole fish | 1 – 4 pcs (300–1600g) | ||
| Flat fish | 1 pc (up to 800g) | ||
 Drumsticks | Drumsticks Chicken breast | 2–16 pcs (200–2000g) 1–5 pcs (up to 150g /pc) | |
 A whole chicken | A whole chicken Half chicken | 1000–1800g >1000g | |
Cooking with Smart Chef programs
Season your ingredients as desired. Put the food inside the basket and slide the basket inside the appliance.
Note
- Press the On/Off button
![]() to switch on the appliance.
to switch on the appliance.
![]()
- To change the Smart Chef program, turn the QuickControl dial until the desired icon is blinking.
![]()
- To confirm the Smart Chef program, press the QuickControl dial.
![]() The appliance automatically calculates the ideal cooking temperature and time. The screen displays the first estimated cooking temperature and time after a few minutes. During this time the appliance has already started cooking. As long as the screen displays the blinking bars and the temperature/time alternately, the appliance is still calculating the cooking time, and the appliance will automatically adjust the time during cooking.
The appliance automatically calculates the ideal cooking temperature and time. The screen displays the first estimated cooking temperature and time after a few minutes. During this time the appliance has already started cooking. As long as the screen displays the blinking bars and the temperature/time alternately, the appliance is still calculating the cooking time, and the appliance will automatically adjust the time during cooking.
![]()
 to switch on the appliance.

 The appliance automatically calculates the ideal cooking temperature and time. The screen displays the first estimated cooking temperature and time after a few minutes. During this time the appliance has already started cooking. As long as the screen displays the blinking bars and the temperature/time alternately, the appliance is still calculating the cooking time, and the appliance will automatically adjust the time during cooking.
Note
- When you hear the bell and see the shake indication blinking, open the drawer and turn the ingredients or shake the basket with the ingredients. Then slide the basket back into the appliance.
![]()
- When you hear the bell and the timer has elapsed to 0, the food is ready.

Note
Making home-made fries
To make great home-made fries in the Airfryer:
- Peel the potatoes and cut into sticks (10 x 10 mm/0.4 x 0.4 in thick).
- Soak the potato sticks in a bowl of lukewarm water (~40°C/100°F) for 3 minutes.
- Empty the bowl and dry the potato sticks with a dish towel or paper towel.
- Pour 1–3 tablespoons of cooking oil in the bowl, put the sticks in the bowl and mix until the sticks are coated with oil.
- Remove the sticks from the bowl with your fingers or a slotted kitchen utensil so excess oil remains in the bowl.
Note
- Put the sticks in the basket.
- Start the Smart Chef program for home-made fries
![]() .
.
When shaking of the fries is needed, you will hear the timer bell and see the blinking shaking icon![]() on the display.
on the display.
 .
. on the display.
Note
Choosing the keep warm mode
- Press the keep warm
![]() button (you can activate the keep warm mode at any time).
button (you can activate the keep warm mode at any time).
![]() The keep warm indication lights up with pulsing effect.
The keep warm indication lights up with pulsing effect.
![]()
![]() The keep warm timer is set to 30 minutes. To change the keep warm time (1–30 min), press the timer button turn the QuickControl dial and then push it to confirm.
The keep warm timer is set to 30 minutes. To change the keep warm time (1–30 min), press the timer button turn the QuickControl dial and then push it to confirm.
You cannot adjust the keep warm temperature.
![]()
- To pause the keep warm mode, push the QuickControl dial.
To resume the keep warm mode, push the QuickControl dial again. - To exit the keep warm mode, press the return button
![]() or the On/Off button
or the On/Off button ![]() .
.
 button (you can activate the keep warm mode at any time).
 The keep warm indication lights up with pulsing effect.


 or the On/Off button
  .
.Tip
Note
Save your favorite setting
- Press the On/Off button
![]() to switch on the appliance.
to switch on the appliance.
![]()
- Press the temperature button
![]() .
.
![]()
- Turn the QuickControl dial to select the temperature.
![]()
- Press the QuickControl dial to confirm the chosen temperature.
![]()
- Turn the QuickControl dial to select the time.
![]()
- Press the favorite button
![]() to save your setting. You will hear a beep after the setting is saved.
to save your setting. You will hear a beep after the setting is saved.
![]()
- Press the QuickControl dial to start the cooking process.
![]()
 to switch on the appliance.
 .
.


 to save your setting. You will hear a beep after the setting is saved.

Cooking with a favorite setting
- Press the On/Off button
![]() to switch on the appliance.
to switch on the appliance.
![]()
- Press the favorite button
![]() .
.
![]()
- Press the QuickControl dial to start the cooking process.
![]()
 to switch on the appliance.
 .
.

Note
- To exit the favorite mode, press the return button
![]() .
.
 .
.Cleaning

- Let the basket, pan, fat reducer and the inside of the appliance cool down completely before you start cleaning.
- Remove the fat reducer from the pan using rubber tipped tongs.
Do not remove using your fingers as hot fat or oil collects under the fat reducer. - The pan, basket, fat reducer and inside of the appliance have a non-stick coating. Do not use metal kitchen utensils or abrasive cleaning materials as this may damage the non-stick coating.
Clean the appliance after every use. Remove oil and fat from the bottom of the pan after every use.
- Press the power On/Off button
![]() to switch off the appliance, remove the plug from the wall outlet and let the appliance cool down.
to switch off the appliance, remove the plug from the wall outlet and let the appliance cool down.
 to switch off the appliance, remove the plug from the wall outlet and let the appliance cool down.
 Tip
- Remove the fat reducer from the pan using rubber tipped tongs. Dispose of rendered fat or oil from the bottom of the pan.
- Clean the pan, basket and fat reducer in a dishwasher. You can also clean them with hot water, dishwashing liquid and a non-abrasive sponge (see 'cleaning table').
Tip
- Wipe the outside of the appliance with a moist cloth.
![]()

Note
- Clean the heating element with a cleaning brush to remove any food residues.
![]()
- Clean the inside of the appliance with hot water and a non-abrasive sponge.
![]()


Cleaning table

Storage
- Unplug the appliance and let it cool down.
- Make sure all parts are clean and dry before storing.
- Insert the cord into the cord storage compartment.
Note
Recycling
- This symbol means that this product shall not be disposed of with normal household waste (2012/19/EU).
- Follow your country's rules for the separate collection of electrical and electronic products. Correct disposal helps prevent negative consequences for the environment and human health.
![]()

Guarantee and support
If you need information or support, please visit www.philips.com/support or read the separate worldwide guarantee leaflet.
Troubleshooting
This chapter summarizes the most common problems you could encounter with the appliance. If you are unable to solve the problem with the information below, visit www.philips.com/support for a list of frequently asked questions or contact the Consumer Care Center in your country.
| Problem | Possible cause | Solution |
The outside of the appliance becomes hot during use | The heat inside radiates to the outside walls. | This is normal. All handles and knobs that you need to touch during use stay cool enough to touch. |
| The pan, basket, fat reducer, and the inside of the appliance always become hot when the appliance is switched on to ensure the food is properly cooked. These parts are always too hot to touch. | ||
If you leave the appliance switched on for a longer time, some areas get too hot to touch. These areas are marked on the appliance with the following icon: As long as you are aware of the hot areas and avoid touching them, the appliance is completely safe to use. | ||
| My home-made fries do not turn out as I expected. | You did not use the right potato type. | To get the best results, use fresh floury potatoes. If you need to store the potatoes, do not store them in a cold environment like in a fridge. Choose potatoes whose package states that they are suitable for frying. |
| The amount of ingredients in the basket is too big. | Follow the instructions in this user manual to prepare home-made fries (see 'Food table for Smart Chef programs' or download the free Airfryer App). | |
| Certain types of ingredients need to be shaken halfway through the cooking time. | Follow the instructions in this user manual to prepare home-made fries (see 'Food table for Smart Chef programs' or download the free Airfryer App). | |
The Airfryer does not switch on | The appliance is not plugged in. | Check if the plug is inserted in the wall outlet properly. |
| Several appliances are connected to one outlet. | The Airfryer has a high wattage. Try a different outlet and check the fuses. | |
| After starting a Smart Chef program the appliance stopped the calculation phase. | The cooking chamber temperature is too high either because the appliance is pre-heated or has not cooled down sufficiently between two batches. | Keep the drawer open for some minutes to cool it down. Close it and start the Smart Chef program again. |
| The drawer is opened during the calculation phase. | Close the drawer and proceed cooking with the manual mode. | |
| The drawer is not closed properly. | Make sure that the drawer is closed properly. | |
| None of the above. | Unplug the appliance and wait for one to two minutes before plugging in again. Restart the Smart Chef program. | |
| The appliance has stopped cooking with the Smart Chef program. | The drawer is opened during the calculation phase. | Do not pull out the drawer as long as the appliance is calculating the cooking time, which is indicated by blinking bars on the display. |
| I see some peeling off spots inside my Airfryer. | Some small spots can appear inside the pan of the Airfryer due to the incidental touching or scratching of the coating (e.g. during cleaning with harsh cleaning tools and/or while inserting the basket). | You can prevent damage by lowering the basket into the pan properly. If you insert the basket at an angle, its side may knock against the wall of the pan, causing small pieces of coating to chip off. If this occurs, please be informed that this is not harmful as all materials used are food-safe. |
White smoke comes out of the appliance | You are cooking fatty ingredients and the fat reducer is not put in the pan. | Carefully pour off any excess oil or fat from the pan, place the fat reducer in the pan and then continue cooking. |

Documents / Resources
References
![www.philips.com]() Product registration | Philips
Product registration | Philips![www.philips.com]() Philips Kitchen Appliances - Air Fryers, Blenders & More | Philips
Philips Kitchen Appliances - Air Fryers, Blenders & More | Philips![www.philips.com]() Support Home | Philips
Support Home | Philips
Download manual
Here you can download full pdf version of manual, it may contain additional safety instructions, warranty information, FCC rules, etc.
Thank you! Your question has been received!


Need Assistance?
Do you have a question about the HD9867 that isn't answered in the manual? Leave your question here.