Table of Contents
Quick Links
Table of Contents

Related Manuals for Philips HD9867/90


Summary of Contents for Philips HD9867/90
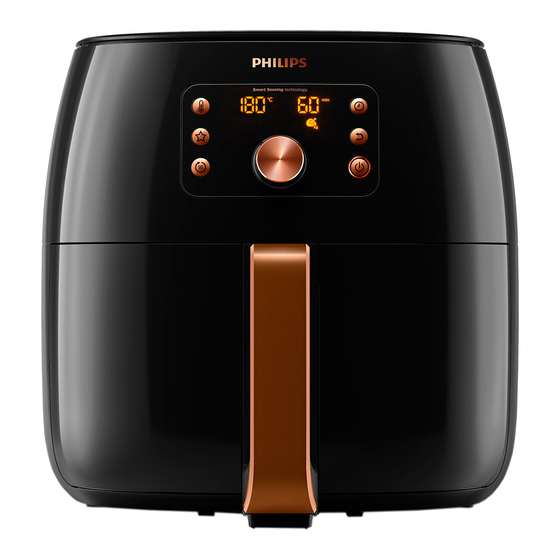
- Page 1 HD9867 User manual...
-
Page 2: Table Of Contents
ENGLISH TABLE OF CONTENTS Important Introduction General description Before first use Preparing for use Placing the removable mesh bottom and fat reducer Food table for manual time/temperature settings Using the appliance Airfrying Food table for Smart Chef programs Cooking with Smart Chef programs Making home-made fries Choosing the keep warm mode Save your favorite setting... -
Page 3: Important
- If the mains cord is damaged, you must have it replaced by Philips, a service centre authorised by Philips or similarly qualified persons in order to avoid a hazard. - This appliance can be used by children... - Page 4 ENGLISH supervision or instruction concerning use of the appliance in a safe way and understand the hazards involved. Children shall not play with the appliance. Cleaning and user maintenance shall not be made by children unless they are older than 8 years and supervised.
- Page 5 ENGLISH - The pan, basket and accessories inside the Airfryer become hot during use. Be careful when you handle them. - Do not place the appliance on or near a hot gas stove or all kinds of electric stove and electric cooking plates, or in a heated oven.
- Page 6 - Be careful when cleaning the upper area of the cooking chamber: Hot heating element, edge of Metal parts. Electromagnetic fields (EMF) This Philips appliance complies with all applicable standards and regulations regarding electromagnetic fields. Automatic shut-off This appliance is equipped with an automatic shut-off function.
-
Page 7: Introduction
ENGLISH Introduction Congratulations on your purchase and welcome to Philips! To fully benefit from the support that Philips offers, register your product at www.philips.com/welcome. With Philips Airfryer, you can now enjoy perfectly cooked fried food—crispy on the outside tender on the inside—Fry, grill, roast and bake to prepare a variety of tasty dishes in a healthy, fast and easy way. - Page 8 ENGLISH...
-
Page 9: Before First Use
ENGLISH Before first use Remove all packing material. 2 Remove any stickers or labels (if available) from the appliance. 3 Thoroughly clean the appliance before first use, as indicated in the cleaning chapter. Preparing for use Placing the removable mesh bottom and fat reducer Open the drawer by pulling the handle. -
Page 10: Food Table For Manual Time/Temperature Settings
10 ENGLISH 5 Put the basket in the pan. 6 Slide the drawer back into the Airfryer by the handle. Note Never use the pan without the fat reducer or the basket in it. • Food table for manual time/temperature settings The table below helps you select the basic settings for the types of food you want to prepare. - Page 11 ENGLISH Min.– max. Time Ingredients Tem per a ture Note amount (min) Chicken breast 1–5 pieces 18–22 180°C/350°F Around 160 g/6 oz Chicken fingers bread 3–12 pieces 10–15 180°C/350°F Add oil to the • crumbed (1 layer) breadcrumbs. Ready when golden yellow.
-
Page 12: Using The Appliance
12 ENGLISH Min.– max. Time Ingredients Tem per a ture Note amount (min) Chestnuts 200–2000 g/ 15–30 200°C/400°F Shake, turn, or stir halfway • 7–70 oz Mixed vegetable (roughly 300–800 g/ 10–20 200°C/400°F Set the cooking time • chopped) 11–28 oz according to your own taste. - Page 13 ENGLISH 4 Open the drawer by pulling the handle. 5 Put the ingredients in the basket. Note The Airfryer can prepare a large range of ingredients. Consult the • ‘Food table’ for the right quantities and approximate cooking times. Do not exceed the amount indicated in the ‘Food table’ section or •...
- Page 14 14 ENGLISH 9 Turn the QuickControl dial to choose your desired cooking temperature. 10 Push the QuickControl dial to confirm the selected temperature. » After the temperature is confirmed, the time indication starts blinking on the screen. 11 Turn the QuickControl dial to choose your desired cooking time.
- Page 15 ENGLISH Note If you do not set the required cooking time within 30 minutes, the • appliance automatically shuts off for safety reasons. If “- -” is selected as the time indication, the appliance goes into • preheating mode. Some ingredients require shaking or turning halfway through the •...
-
Page 16: Food Table For Smart Chef Programs
16 ENGLISH 17 Empty the basket contents into a bowl or onto a plate. Always remove the basket from the pan to empty contents as hot oil may be in bottom of the pan. Note To remove large or fragile ingredients, use a pair of tongs to lift out •... -
Page 17: Cooking With Smart Chef Programs
ENGLISH Smart Chef programs for Directions Use floury, raw potatoes. Do • not pre-cook potatoes. Home made cut Do not use potatoes stored • 500–1400g (10x10mm) below 6°C. Home- Follow the fresh fries recipe for • made fries best results. 2–5 pcs (150–200g/pc) Salmon fillet up to 750g... -
Page 18: Making Home-Made Fries
18 ENGLISH 3 To confirm the Smart Chef program, press the QuickControl dial. » The appliance automatically calculates the ideal cooking temperature and time. The screen displays the first estimated cooking temperature and time after a few minutes. During this time the appliance has already started cooking. -
Page 19: Choosing The Keep Warm Mode
ENGLISH 3 Empty the bowl and dry the potato sticks with a dish towel or paper towel. 4 Pour 1–3 tablespoons of cooking oil in the bowl, put the sticks in the bowl and mix until the sticks are coated with oil. -
Page 20: Save Your Favorite Setting
20 ENGLISH 3 To exit the keep warm mode, press the return button the On/Off button If food like French fries loses too much crispness during the keep • warm mode, either shorten the keep warm time by switching off the appliance earlier or crisp them up for 2–3 minutes at the temperature of 180°C. - Page 21 ENGLISH 4 Press the QuickControl dial to confirm the chosen temperature. 5 Turn the QuickControl dial to select the time. 6 Press the favorite button to save your setting. You will hear a beep after the setting is saved. Press the QuickControl dial to start the cooking process. Cooking with a favorite setting Press the On/Off button to switch on the appliance.
-
Page 22: Cleaning
22 ENGLISH 2 Press the favorite button 3 Press the QuickControl dial to start the cooking process. Note You can overwrite your favorite setting by applying the same • procedure as mentioned above. Pressing the favorite button in the manual mode will overwrite •... - Page 23 ENGLISH 3 Clean the pan, basket and fat reducer in a dishwasher. You can also clean them with hot water, dishwashing liquid and a non-abrasive sponge (see ‘cleaning table’). If food residues stuck to the pan, fat reducer or basket, you can •...
-
Page 24: Cleaning Table
24 ENGLISH Cleaning table Storage Unplug the appliance and let it cool down. 2 Make sure all parts are clean and dry before storing. 3 Insert the cord into the cord storage compartment. Note Always hold the Airfryer horizontally when you carry it. Make sure •... -
Page 25: Guarantee And Support
This chapter summarizes the most common problems you could encounter with the appliance. If you are unable to solve the problem with the information below, visit www.philips.com/support for a list of frequently asked questions or contact the Consumer Care Center in your country. - Page 26 26 ENGLISH Problem Possible cause Solution Certain types of Follow the instructions in this user ingredients need to be manual to prepare home-made shaken halfway through fries (see ‘Food table for Smart Chef the cooking time. programs’ or download the free Airfryer App).
- Page 27 ENGLISH Problem Possible cause Solution The pan still contains White smoke is caused by greasy greasy residues from residues heating up in the pan. Always previous use. clean the pan, basket and fat reducer thoroughly after every use. Breading or coating did Tiny pieces of airborne breading not adhere properly to can cause white smoke.
- Page 28 © 2021 Philips Domestic Appliances Holding B.V. All rights reserved...