Table of Contents
Quick Links
SH1
Basic Guide
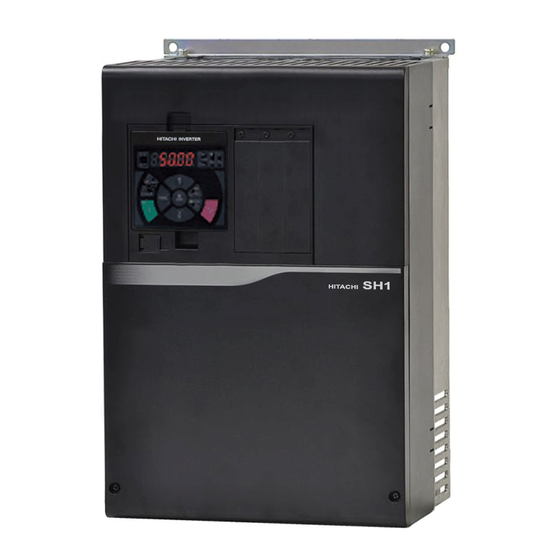
HITACHI SH1 Series Inverter
SH1
If you have any inquiry or problem,
Refer to Chapter 5 Troubleshooting
or
Contact to the Technical Inquiry Service
for Inverter.
Introduction
Contents
Chapter 1: Safety Instructions
Chapter 2: Installation and Wiring
Chapter 3: Operation Setting and Examples
of I/O Adjustment
Chapter 4: Settings
Chapter 5: Troubleshooting
Chapter 6: Maintenance and Inspection
Chapter 7: Specifications
Index
When making a contact, inform
the reference number on below.
NT9401 X
NT2511
Table of Contents

Related Manuals for Hitachi SH1 Series


Summary of Contents for Hitachi SH1 Series
- Page 1 Introduction Basic Guide Contents HITACHI SH1 Series Inverter Chapter 1: Safety Instructions Chapter 2: Installation and Wiring Chapter 3: Operation Setting and Examples of I/O Adjustment Chapter 4: Settings Chapter 5: Troubleshooting Chapter 6: Maintenance and Inspection Chapter 7: Specifications...
- Page 2 Introduction Cautions Proper use of the inverter Thank you for purchasing Hitachi SH1 Series Inverter. This is a user guide for basic handling and maintenance of Please read the Basic Guide, User's Guide and optional Hitachi SH1 Series Inverter.
- Page 3 Product Warranty • In order to receive warranty service, you should present the • The product SH1 Series inverter will be warranted by Hitachi recipe issued by product supplier or any other document that Industrial Equipment Systems (China) Co., Ltd.afterward permit to check the purchase date.
- Page 4 • For optional product refer attached instruction. • Contact to your supplier or local Hitachi distributor or service • This warranty term will not restrict a legal right of customer station for fare-paying services. who has purchased the product.
-
Page 5: Table Of Contents
Contents Contents ● Method of Inquiry and Product Warranty ..0-2 ● Introduction ............0-1 ● Contents ............... 0-4 ● Cautions ..............0-1 Chapter 1 Safety Instructions Types of Warnings ..........1-1 Precautions for Maintenance/Inspection ....1-4 Description of Safety Symbols ......1-1 Precautions for Dispolsal .......... - Page 6 Contents Contents (Memo)
-
Page 7: Cautions
Safety Instructions Chapter 1 Chapter 1 Safety Instructions 1.1 Types of Warnings 1.2 Description of Safety Symbols In the Basic Manual, the severity levels of safety It describes annotation of the symbols in context. Be sure precautions and residual risks are classified as: "DANGER", to follow and pay attention of content. -
Page 8: Precautions For Installation
Safety Instructions Chapter 1 1.3.1 Caution DANGER • • Many of the drawings in the Basic Guide show the Incorrect handling may result in personal death or severe injury, or may result in damage to the inverter with covers and/or parts blocking your view as removed to illustrate the details. -
Page 9: Precautions To Run And Test Running
Safety Instructions Chapter 1 WARNING ● You run the risk of fire! ● You run the risk of injury or fire! Injury Fire Fire • Do not connect AC power supply to any of the • Do not use a single-phase input. •... - Page 10 Safety Instructions Chapter 1 WARNING ● You run the risk of injury and damage to ● You run the risk of burn injury. machine. Burn • Inverter heat sink will heat up during operation. • The inverter easily allows you to control the Injury Do not touch the heat sink.
- Page 11 Total harmonic distortion (THD) of voltage must be ±10% or less. 2. Installation requirement a. SH1 series includes a built-in EMC filter. The built-in EMC filter must be activated. b. According to EN61800-3 it is mandatory to mention that...
- Page 12 Safety Instructions Chapter 1 Table 1 Cable Carrier Model Cat. Length Frequency (kHz) SH1-00041-H ( SH1-007H) SH1-00054-H (SH1-015H) SH1-00083-H (SH1-022H) SH1-00126-H (SH1-037H) SH1-00175-H (SH1-055H) SH1-00250-H (SH1-075H) SH1-00310-H (SH1-110H) SH1-00400-H (SH1-150H) SH1-00470-H (SH1-185H) SH1-00620-H (SH1-220H) SH1-00770-H (SH1-300H) SH1-00930-H (SH1-370H) SH1-01160-H (SH1-450H) SH1-01470-H (SH1-550H) SH1-01760-H...
- Page 13 Safety Instructions Chapter 1 (Memo)
-
Page 14: Chapter 2 Installation And Wiring
Input/Entrée :50Hz,60Hz 380–460V 3ph ** /** /** A Output/Sortie : 0- 590Hz 380–460V 3ph ** /** /** A Output ratings MFG No. 7617****** 00001 Date:**** (Frequency/voltage/No. of NE18404-*** Hitachi Industrial Equipment phases/Rate current) HINC (Nanjing)Co.,Ltd. MFG No.; factory serial No. -
Page 15: Install The Inverter
Chapter 2 Installation and Wiring 2.2 Install the Inverter Install inverter on nonflammable Transportation (e.g. metal) surface. • The inverter is made of plastics component. When • The inverter will reach a high temperature (up to carrying the inverter, handle it carefully to prevent about 150°C) during operation. - Page 16 Chapter 2 Installation and Wiring Installation environment Reduction of enclosure size • • Avoid installing the inverter in a place where the External heat sink installation may reduce internal inverter is subject to dust, corrosive gases, heat emission and reduce the enclosure size. explosive gases, flammable gases, grinding fluid External heat sink mounting for the inverter mist, or salt water.
-
Page 17: Dimensions Drawing
Chapter 2 Installation and Wiring 2.3 Dimension Drawing If you add optional parts to the inverter, some extra (Eg.) See "Chapter 7 Specifications" for details. space is required in the direction of the depth of the VLD rated current for00041-H(007H) is 4.1A, inverter depending on the wiring layout. - Page 18 Chapter 2 Installation and Wiring Model Model SH1-*****-*(SH1-****) SH1-*****-*(SH1-****) 400V class: 00930-H(370H), 01160-H(450H), 01470-H(550H), 400V class: 01760-H(750H), 02130-H(900H) W(mm) H(mm) D(mm) Dimension W(mm) H(mm) D(mm) Dimension Model SH1-*****-*(SH1-****) 400V class: 02520-H(1100H), 03160-H(1320H) W(mm) H(mm) D(mm) Dimension...
-
Page 19: Inverter Wiring
Installation and Wiring 2.4 Inverter Wiring Applicable peripheral equipment Notes: • The description of peripheral equipment is for Hitachi 3-phase, 4-pole squirrel-cage motor. Power • Select breakers with proper interrupting capacity. (Use inverter-ready breakers) supply • Use earth-leakage circuit breakers (ELB or MCB) to ensure safety. -
Page 20: Wiring Of The Main Circuit
Chapter 2 Installation and Wiring 2.5 Wiring of the main circuit Wire the main circuit of the inverter. The following illustration shows the power supply and wiring connections to a motor only. Open a terminal block cover to wire the terminal block in the main circuit. - Page 21 Chapter 2 Installation and Wiring 2.6 Recommended wire gauges, wiring accessories, and crimp terminals 400V class Power line cable External braking Applicable SH1 Grounding Power line cable Tightening Rating AWG(mm2) resistor Crimp inverter model cable Terminal screw torque setting R,S,T,U,V,W, between P and terminal...
- Page 22 Applicable motor capacity is based on Hitachi 400Vac, 60Hz, 4 pole operation. When selecting oversize inverter capacity compare to motor rating, IE3 motor.
- Page 23 Chapter 2 Installation and Wiring 2.8 Chopper Braking Resistor • SH1 Series can offer when desired a built-in chopper braking circuit in models below. SH1 Series has a built-in chopper braking circuit in model below. SH1-01160-H (450H) to SH1-01470-H (550H) SH1-00041-H (007H) to SH1-00930-H (370H) •...
- Page 24 Chapter 2 Installation and Wiring 2.9 Wiring When J51 connector is removed, charge lamp doesn't indicate R0-T0 status. Please make sure that power is off and care for safety. For own safety, make sure to power To enable the EMC filter, fix the grounding screw equipped with short off before handling the inverter.
- Page 25 Chapter 2 Installation and Wiring Model SH1- *****-*(SH1-****) Model SH1- *****-*(SH1-****) 400V class: 00930-H(370H) 400V class: 00770-H(300H) Charge lamp Short circuit connector for EMC Filter Charge Lamp Short circuit Disable connector for EMC Filter Disable Screw size R0,T0 : M4 Ground Terminal : M8 Screw size Other : M8...
- Page 26 Chapter 2 Installation and Wiring Model SH1- *****-*(SH1-****) Model SH1- *****-*(SH1-****) 400V class: 01160-H(450H) 400V class: 01470-H(550H) Charge lamp Charge lamp (Turn-on while energized) (Turn-on while energized) Short circuit bar Disable Disable Short circuit bar for EMC Filter for EMC Filter Screw size Screw size Enable...
- Page 27 Disable Screw size Enable page. R0,T0: M4 Note:About the model that is not recorded in this Basic Guide, Ground terminal: M6 Screw size please contact the Hitachi distributor. Disable Enable Other terminals: M8 R0,T0: M4 Disable Enable Disable Ground terminal: M6...
- Page 28 Chapter 2 Installation and Wiring 2.10 Wiring of the control circuit An example for sink logic. Control circuit terminal 24V power Alarm relay section supply terminal 1C contact points 1/RS (SW6) 2/SCHG (SW5) Sink 3/JG Sink or source logic 24V power for input terminal is supply terminal...
- Page 29 Chapter 2 Installation and Wiring ■ Recommended terminals for wiring • The following ferrule terminals are recommended for ・The contral circuit terminal adopts screw type wiring signal cable for easy wiring and improved reliability of terminal blocks. connectivity. Ferrule terminal with sleeves Power cable size Ferrule terminal ...
- Page 30 Chapter 2 Installation and Wiring 2.11 Control circuit wiring section ■ Input terminals • All COMs have the same electric potential. Control circuit terminal • Change SW5 to external power source (EX) to connect the power source between Input terminals 1 to 9, A or B, and COM.
- Page 31 Chapter 2 Installation and Wiring ■Output terminals Control circuit terminal (Wiring example) Output Alarm relay Output terminal terminal [OL] [IRDY] [FA2] [FA1] [RUN] [AL] Output terminal : Equipment including lamps, relays and PLC Output : Relays terminal • [] it means factory default settings. Terminal Terminal name Description...
- Page 32 SW4 SW3 SW2 SW1 Chapter 2 Installation and Wiring SW4 SW3 SW2 SW1 ■Analog input/output SW4 SW3 SW2 SW1 SW4 SW3 SW2 SW1 Control circuit terminal (Wiring example) SW4 SW3 SW2 SW1 Analog input/output SW4 SW3 SW2 SW1 • When variable resistor is connected on H-Ai1-L terminal, voltage input is given to inverter, Sw1 for analog input 1 (Ai1) is to be set on "voltage"...
- Page 33 Chapter 2 Installation and Wiring ■FM output terminals Control circuit terminal (Wiring example) Digital output Frequency meter (PWM) • FM output is selectable from PWM output with a fixed cycle of 6.4ms or pulse output with a variable cycle. • FM output is adjustable by parameter settings.
- Page 34 Chapter 2 Installation and Wiring ■Serial communication Control circuit terminal (Wiring example) Modbus communication • SP and SN with the same name are internally connected, which are available for a plurality of wiring. • For the use of Modbus communication, refer to the “User’s guide” to obtain a more detailed description.
- Page 35 Chapter 2 Installation and Wiring 2.12 Residual risk Parts subject to residual risk Please check for any residual risk upon completion of the installation before power on. ■Residual risk checklist No. Name of part DANGER WARNING CAUTION Main circuit 8,10 terminal block Heat sink Input/output...
- Page 36 Chapter 2 Installation and Wiring Operational Residual ✓ Work Part Details of harm or damage Preventive measures phase risk When the motor wiring distance exceeds Motor insulation damage due to surge □ Installation Wiring ‐ DANGER 20m or more, try to shorten the wiring. caused by long distance motor wiring.
- Page 37 Chapter 2 Installation and Wiring (Memo) 2-24...
-
Page 38: Operation Setting And Examples Of Io Adjustment
Chapter 3 Operation Setting and Examples of I/O Adjustment Chapter 3 See “Chapter 4 Settings” for detailed operating Operation Setting and instructions Examples of I/O Adjustment Basic settings 2 3.2 Set the motor data This chapter describes basic settings, frequency source required for operation, examples of run command •... - Page 39 Chapter 3 Operation Setting and Examples of I/O Adjustment The frequency source and run command source are necessary to drive the motor. Frequency source 1 Run command source 1 3.3 Frequency setting from keypad 3.4 Run using the operator keypad •...
- Page 40 Chapter 3 Operation Setting and Examples of I/O Adjustment Run command source 2 Frequency source 2 3.5 Multispeed terminals command 3.6 Operate using FW/RV terminal • • While multispeed command is off, the speed command Select [AA111] = 00 [FW][RV] terminal from parameter will follow the parameter setting [AA101].
- Page 41 Chapter 3 Operation Setting and Examples of I/O Adjustment Run command source 3 Frequency source 3 3.7 Potentiometer frequency command 3.8 Operate using 3WIRE terminal • • Select [AA101] = 01 Ai1 terminal input from parameter Select [AA111] = 01 to 3WIRE function from parameter setting screen.
- Page 42 Chapter 3 Operation Setting and Examples of I/O Adjustment Example for adjusting I/O terminals 2 Example for adjusting I/O terminals 1 3.9 Adjust the analog input (Ai1/Ai2) 3.10 Adjust the analog output (Ao1/Ao2/FM) E.g.) Adjust operation (E.g. for Ai1) •...
- Page 43 [CC-29] ■Parameter 16A-16C *1) [CC-30] [CC-31] Parameter AL1-AL0/ Details [CC-32] [CC-33] AL2-AL0 Adjust -10V on the reference line for [Cb-34] *1) SH1 Series do not have this terminal. -10V/10V and the frequency. [Cb-35] Adjust the slope of the reference line.
-
Page 44: Chapter4 Settings
Chapter 4 Settings Chapter4 Settings 4.1 Keypad overview 4.1.1Names and Functions of components How to operate the digital operator Monitor(5-digit LEDdisplay) Monitor lamps Monitor lamps Up key VR lamp POWER lamp Frequency Control VR Program lamp ALARM lamp RUN key enable LED STOP/RESET key Run key Storage key... - Page 45 Chapter 4 Settings 4.1.2 Code display system The initial display on the monitor screen after power-on depends on the setting of function”UA-91”.When the setting of function”UA-91”= . , “dA-01”(factory setting),the monitor initially show as the setting of “dA-01” . Pressing the key in this status changes FUNC ...
- Page 46 Chapter 4 Settings 4.1.3 Transition of the monitored data on display FUNC FUNC . FUNC FUNC FUNC FUNC . FUNC FUNC FUNC FUNC FUNC FUNC FUNC FUNC...
- Page 47 Chapter 4 Settings 4.1.4 Procedure for directly specifying or selecting a code You can specify or select a code or data by entering each digit of the code or data instead of scrolling.The following shows an example of the procedure for changing the monitor mode code to extended function code. ①...
- Page 48 Power-on and Confirm that the LED is lighting up. Adapter Inverter Example:SH1 series 4.1.5.2 Installing the standard operator into the control cabinent Installing it According to the following dimensions of the standard operator and Installation dimension diagram. Installation dimension diagram Note: When installing into the control cabinet, please use the communication cable that meets the following specifications.
-
Page 49: Monitor Naming
Option slot-3 status dA-34 *3) 0.00~600.00(kW) 10:(P1-FS) Output power monitor *1) The parameter is about Safety function,is not suitable for SH1 series. dA-36 Accumulated output *2) dA-60 is available also for the terminals of the option terminal board 0.00~100000.00 (kWh) power monitor *3)This option is not suitable for SH1 series. - Page 50 Firmware ver. Monitor db-61 0.0~100.0 Current PID P-Gain monitor *1) Refer to users guide for detail db-62 *2) The parameter is about Safety function,is not suitable for SH1 series. 0.0~3600.0(s) Current PID I-Gain monitor db-63 0.0~100.0(s) Current PID D-Gain monitor db-64 0.00~100.00(%)
- Page 51 Chapter 4 For parameter configuration [dE-01]~[dE-50] [FA-01]~[FA-40] ■ Variable mode monitor (F code) Code/Name Range (unit) ・If a [FA] parameter that can be modified is selected, it can be modified dE-01 0~65535 times Trip Counter in the display monitor. Factor,frequency(±),current,voltage Code/Name Range (unit) dE-11~20...
- Page 52 Chapter 4 For parameter configuration [AA101]~[AA106] Parameter naming (Nomenclature) AA 1 01 Parameter explanation ・To set parameters, please read an understand the SH1 user’s guide first. ・For the motor protection, the following Working parameters are necessary to be set. parameters Parameter Internal number -[Hb102]~[Hb108](If [IM])
- Page 53 Chapter 4 For parameter configuration [AA111]~[AA115][bb-40] [AA121]~[AA223] RUN command selection Control mode selection Code/Name Range (unit) Initial value Code/Name Range (unit) Initial value 02(JPN)/ AA121 AA111 Control mode RUN command 00~12 *2) 00(EU) 00~06 selection, input source (USA) 1st-motor selection, (ASIA) *2) IM control: 00 (VF control (Constant torque)) /01 (VF 1st-motor...
- Page 54 Chapter 4 For parameter configuration [Ab-01]~[Ab-25] [Ab210][AC-01]~[AC-02] ・For the 8 speeds selection, set [Ab-03]=01 assigning the Scaled Output Frequency gain monitor [dA-06] intelligent terminals 007[SF1] to 013[SF7] makes Code/Name Range (unit) Initial value available the use of the speeds 0 to 7. Ab-01 Frequency 0.00~100.00...
- Page 55 Chapter 4 For parameter configuration [AC-03]~[AC117] [AC120]~[AC126] Acceleration/deceleration curve selection Acceleration/deceleration time setting Initial Unit Code/Name Range (unit) Code/Name Range (unit) value value AC120 AC-03 00(Linear)/ Acceleration time Acceleration curve 30.00 01(S-curve)/ setting 1, 1st-motor selection 02(U-curve)/ AC122 Deceleration time AC-04 03(Inverted-U-curve)/ 30.00...
- Page 56 Chapter 4 For parameter configuration [AC-30]~[AC-88] [AC215]~ [Ad-15] 2nd motor When Intelligent Input terminal 024[SET] is enabled. Setting for two-stage Acc/Decel time Code/Name Range (unit) Initial value Code/Name Range (unit) Unit value AC215 Select method to switch to Same as AC115 AC-30 0.00 Acc.
- Page 57 Chapter 4 For parameter configuration [AE-01]~[AE-13] [AE-20]~[AE-62] Position control Absolute position control Initial Code/Name Range (unit) Initial value Code/Name Range (unit) value AE-20 Position reference 0 AE-01 00(Feedback)/ Electronic gear AE-22 Position reference 1 01(Reference) setting point selection AE-24 Position reference 2 AE-02 Electronic gear ration 1~10000...
- Page 58 Chapter 4 For parameter configuration [AE-64]~[AE-76] [AF101]~[AF109] Positioning function adjustment DC braking (DB) function Code/Name Range (unit) Initial value Initial Code/Name Range (unit) value AE-64 Deceleration stop 50.00~200.00(%) 100.00 AF101 00(Disable)/01(Enable)/ DC braking distance calculation gain 02(Frequency reference) selection, 1st-motor AE-65 Deceleration stop 0.00~655.35(%)
- Page 59 Chapter 4 For parameter configuration [AF120]~[AF144] [AF150]~[AF254] Brake control function Initial Initial Code/Name Range (unit) Code/Name Range (unit) value value 00(Disable) AF150 AF120 Brake open delay time, Contactor control 0.00 2.00(s) 0.20 ~ 01(Enable: primary side) 1st-motor enable, 1st-motor 02(Enable: secondary side) AF151 Brake close delay time, AF121...
- Page 60 Chapter 4 For parameter configuration [AG101]~[AG113] [AG-20]~[AG213] Resonant frequency avoidance (Jump) Jogging function Initial Initial Code/Name Range (unit) Code/Name Range (unit) value value AG101 AG-20 0.00 590.00(Hz) 0.00 Jump frequency 1, 1st-motor ~ 0.00~10.00(Hz) 6.00 Jogging AG102 Jump frequency width 1, 0.00 10.00(Hz) 0.00...
- Page 61 Chapter 4 For parameter configuration [AH-01]~[AH-06] [AH-07]~[AH-50] Initial Code/Name Range (unit) PID1 function value AH-07 Code/Name Range (unit) Initial value Target value 1 reference 00~13 *2) 00(Disable)/ selection for PID1 AH-01 01(Enable)/ PID1 enable AH-10 0.00 PID1 target value-1 02(Enable:inverted output) AH-12 0.00 ・Validates the PID1 operation.
- Page 62 Chapter 4 For parameter configuration [AH-51]~[AH-54] [AH-60]~[AH-70] Range (unit) Initial Initial Code/Name Code/Name Range (unit) value value AH-51 AH-60 00(Constant gain [1])/ Input source selection PID1 gain 01([PRO] terminal) of process data 1 for PID1 change method selection AH-52 AH-61 Input source selection PID1 00~06/08~13 *1)
- Page 63 Chapter 4 For parameter configuration [AH-71]~[AH-74] [AH-75]~[AH-92] Code/Name Range (unit) Initial value Initial Code/Name Range (unit) value AH-71 0.00~100.00(%) 0.00 PID1 output variable AH-75 00(Disable)/ PID soft start function 01(Enable) enable PID Output (%) PID Output variable range AH-76 PID soft start target 0.00~100.00(%) 100.00 level...
- Page 64 Chapter 4 For parameter configuration [AH-93]~[AH-96] [AJ-01]~[AJ-10] PID2 function Initial Code/Name Range (unit) Initial value Code/Name Range (unit) value 01(Deviation)/ AJ-01 00(Disable)/01(Enable)/ PID2 02(Falling feedback)/ AH-93 02(Enable:inverted output) PID sleep trigger enable 03( [WAKE] terminal) selection ・Validates the PID2 operation. AH-94 ・If [AJ-01]=01 when the PID output reaches a negative 0.00...
- Page 65 Chapter 4 For parameter configuration [AJ-13]~[AJ-19] [AJ-21]~[AJ-30] Initial PID3 function Code/Name Range (unit) value Initial Code/Name Range (unit) AJ-13 0.0~100.0 value PID2 proportional gain AJ-21 AJ-14 00(Disable)/01(Enable)/ 0.0~3600.0(s) PID3 PID2 integral time constant 02(Enable:inverted output) enable AJ-15 0.0~100.0(s) PID2 derivative gain ・Validates the PID3 operation.
- Page 66 Chapter 4 For parameter configuration [AJ-33]~[AJ-39] [AJ-41]~[AJ-52] Initial PID4 function Code/Name Range (unit) value Initial Code/Name Range (unit) AJ-33 0.0~100.0 value PID3 proportional gain AJ-41 AJ-34 00(Disable)/01(Enable)/ 0.0~3600.0(s) PID4 PID3 integral time constant 02(Enable:inverted output) enable AJ-35 0.00 0.0~100.00(s) PID3 derivative gain ・Validates the PID4 operation.
- Page 67 Chapter 4 For parameter configuration [AJ-53]~[AJ-59] [bA101]~[bA116] ■Parameter mode (b code) Initial Code/Name Range (unit) value Frequency limit AJ-53 0.0~100.0 Initial PID4 proportional gain Code/Name Range (unit) value AJ-54 0.0~3600.0(s) PID4 integral time constant bA101 AJ-55 0.0~100.0(s) PID4 derivative gain 0~13 *1) Frequency upper limit select, ・Sets the PID4 gain.
- Page 68 Chapter 4 For parameter configuration [bA120]~[bA128] [bA-30]~[bA145] Overcurrent suppression function setting Deceleration / stop at power loss (Non-stop) Initial Code/Name Range (unit) Initial value Code/Name Range (unit) value 00(Disable)/ 01(Decel. stop)/ bA120 00(Disable)/ bA-30 Overcurrent Selection of 02(Decel. stop: with 01(Enable) suppression enable, 1st-motor deceleration/stop in the...
- Page 69 Chapter 4 For parameter configuration [bA146]~[bA149] [bA-60]~[bA-63] [bA-70]~[bA249] Cooling-fan operation Overvoltage suppression - Over-excitation Initial Code/Name Range (unit) Initial value Code/Name Range (unit) value bA146 00(Disable)/01(Always ON)/ Over 00(Always ON)/ bA-70 02(Only at deceleration)/ Cooling fan magnetization 01(While inverter operates)/ 03(Operation at set level)/ control selection function selection...
- Page 70 Chapter 4 For parameter configuration [bb101]~[bb-23] [bb-24]~[bb-42] Reduction of electromagnetic sound Initial Initial Code/Name Range (unit) Code/Name Range (unit) value value bb-24 [Ub-03]=02:ND Selection of restart mode at 0.5~16.0(kHz) Instantaneous power failure/ [Ub-03]=01:LD under-voltage trip bb101 Carrier 0.5~12.0(kHz) bb-25 Allowable under-voltage frequency, 1st-motor [Ub-03]=00:VLD 0.3~25.0(s)
- Page 71 Chapter 4 For parameter configuration [bb-43]~[bb-64] [bb-65]~[bb260] Active frequency matching Phase loss detection Code/Name Range (unit) Initial value Initial Code/Name Range (unit) value bb-43 Inverter rated Inverter bb-65 current rated 00(Disable)/01(Enable) Input phase loss enable Restart level Active ×(0.20~2.00) current×1.00 frequency matching bb-66 00(Disable)/01(Enable)
- Page 72 Chapter 4 For parameter configuration [bC110]~[bC125] [bC210]~[bC225] (Example) When [bC111]=01, Inverter rated current:64A, [bC110]=64(A), Electronic thermal protection Base frequency[Hb103]=60Hz, Output frequency=2.5Hz Code/Name Range (unit) Initial value Reduction Motor rated Motor rated bC110 scale Electronic thermal level current × current X1.0 setting, 1st-motor (0.00~3.00) ×1.00...
- Page 73 Display selection at STO 01(No display) input change time 00(Trip)/ bd-04 01(Maintain current Action selection after STO state)/ input change time 02(Disable) ・For more information, refer to the user’s guide. *1)The parameter is just about Safety function, not suitable for SH1 series. 4-30...
- Page 74 Chapter 4 For parameter configuration [CA-41]~[CA-55] [CA-01]~[CA-31] Output terminal chatter prevention ■Parameter mode (C code) Range Initial Code/Name Input terminal settings (unit) value Initial CA-41 Input terminal [1] response time Code/Name Range (unit) value CA-42 Input terminal [2] response time CA-01 Input terminal [1] function CA-43...
- Page 75 Chapter 4 For parameter configuration [Input terminal function list] [Input terminal function list] Functio Symb Function Function Description Symbol Function name Description n code name code Overload Switches between Overload limit Not use restriction 1(OFF) and 2(ON). Activating (ON) only one of them Forward rotation ⇒[bA122]~[bA128] selection...
- Page 76 Chapter 4 For parameter configuration [Input terminal function list] [Input terminal function list] Function Function Symbol Function name Description Symbol Function name Description code code P/PI control mode For drooping control, switches EzCOM ECOM If ON, activates EzCOM. selection activation between PI control (OFF) and P Program RUN If ON, EzSQ is executed.
- Page 77 Chapter 4 For parameter configuration [CA-60]~[CA-84] [CA-90]~[CA-99] [FUP]/[FDN] operations Pulse train input terminal Initial Initial Code/Name Range (unit) Code/Name Range (unit) value value 00(Disable)/01(Frequency CA-60 00(Speed reference) FUP/FDN overwrite CA-90 reference)/ 01(PID) target selection feedback : 02(Speed Pulse train detection CA-61 00(No save)/ FUP/FDN data save...
- Page 78 [Ai1] Voltage/Current zero-bias 200.00(%) ・The functions for the output terminals 11~15,16A,AL are assigned in adjustment [CC-01]~[CC-05],[CC-06],[CC-07]. Cb-31 ~ -200.00 [Ai1] Voltage/Current gain *1)SH1 series do not have this terminal. 100.00 200.00(%) adjustment Output terminal NO/NC settings Cb-32 ~ -200.00 [Ai2] Voltage/Current...
- Page 79 ON if torque is exceeded Instantaneous until it actually become responsive. ON if control power drops power failure *1)SH1 series do not have this terminal. Undervoltage ON if main voltage drops Torque limited ON if torque limit operates IP-Non stop function...
- Page 80 Chapter 4 For parameter configuration [Output terminal function list] [Output terminal function list] Function Function Symbol Function name Description Symbol Function name Description code code Zero speed ON if output frequency is General-purpose detection less than set value output 1 Speed deviation ON if speed deviation General-purpose...
-
Page 81
Chapter 4 For parameter configuration [CC-40]~[CC-60] [Cd-01]~[Cd-35] Combinational output terminal Analog output terminal adjustment Initial Initial Code/Name Range (unit) Code/Name Range (unit) value value
01(Frequency) wave form selection target 1 selection of LOG1 reference Cd-02... - Page 82 Chapter 4 For parameter configuration [CE-10]~[CE-31] [CE101]~[CE107] Frequency arrival signal Low-current detection signal Range Initial Code/Name Code/Name Range (unit) Initial value (unit) value 00(During Acc/Decel and CE-10 0.00 CE101 Arrival frequency for acceleration 1 Low-current constant-speed operation) CE-11 indication signal mode 0.00 01(only during Frequency arrival for deceleration 1...
- Page 83 Chapter 4 For parameter configuration [CE-33]~[CE-55] [CF201]~[CF223] If [CE-51][CE-53][CE-55]=02 0Hz speed detection signal Ai1/Ai2/Ai3 Input Initial Code/Name Range (unit) Max(100%) value Hysteresis width [CE-42]/[CE-45]/[CE-48] CE-33 Maximum-limit level 0.00 0.00~100.00(Hz) Zero speed detection level of window comparator ・Sets the level in which the Inverter outputs the 0Hz CF-70/CF-73/CF-76 Analog adopted value detection signal 040[ZS]...
- Page 84 Chapter 4 For parameter configuration [CF-01]~[CF-08] [CF-20]~[CF-50] Modbus communication EzCOM peer to peer communication Initial Initial Code/Name Range (unit) Code/Name Range (unit) value value 03(2400bps)/ CF-20 01~08 EzCOM Start node No. 04(4800bps)/ CF-21 01~08 05(9600bps)/ EzCOM End node No. CF-01 06(19.2kbps)/ 00(Terminal RS485 communication baud...
- Page 85 Chapter 4 For parameter configuration [HA-01]~[HA115] [HA120]~[HA134] ■Parameter mode (H code) Control response gain Auto-tuning Initial Code/Name Range (unit) Initial value Code/Name Range (unit) value HA120 00([CAS] terminal)/ ASR gain switching 00(Disable)/ 01(Change set) HA-01 mode selection, 1st-motor 01(No-rotation)/ HA121 Auto-tuning selection 02(Rotation)/ Gain switching time,...
- Page 86 ASR gain mapping I-gain 2, Same as HA129 [Hb103] are changed, the motor characteristics are set 2nd-motor according to the internal Hitachi table values. HA230 ASR gain mapping P-gain 2 at Same as HA130 ・The output is decided by setting the frequency and P-control, 2nd-motor voltage.
- Page 87 Motor constant J, setting 1st-motor ・If the motor capacity[Hb102] and number of poles [Hb103] are changed, the motor characteristics are set according to the internal Hitachi table values. [Hb141] Output Reverse ・For no-rotation auto-tuning, the following variables Forward frequency are acquired:[Hb110]~[Hb114].
- Page 88 Chapter 4 For parameter configuration [Hb150]~[Hb180] [Hb202]~[Hb280] 2nd motor When Intelligent Input terminal 024[SET] is enabled. Free V/f setting Range Initial Initial Code/Name Code/Name Range (unit) (unit) value value Hb202 Capacity selection, 2nd-motor Same as Hb102 0.00 ~ Hb150 0.00 Hb203 Number of poles, 2nd-motor Same as Hb103 Free-V/f frequency 1,...
- Page 89 Chapter 4 For parameter configuration [HC101]~[HC121] [HC201]~[HC221] 2nd motor When Intelligent Input terminal 024[SET] is enabled. Automatic torque boost adjustment Range Initial Initial Code/Name Code/Name Range (unit) (unit) value value HC201 Automatic torque boost voltage HC101 Same as HC101 Automatic torque boost 0~255(%) compensation gain, 2nd-motor voltage compensation gain, 1st-motor...
- Page 90 IVMS Wait time for open 0~1000 phase switching changed, the motor characteristics are set according to Hd-48 Limitation of decision about the internal Hitachi table values. 00(disable)/01(enable) the drive direction, SM(PMM)-IVMS ・By auto-tuning at stop, values of [Hd110]~[Hd114] Hd-49 open phase voltage detection 0~1000...
- Page 91 Chapter 4 For parameter configuration [Hd202]~[Hd237] [oA-10]~[oA-33][ob-01]~[ob-04] ■Parameter mode (o code) 2nd motor When Intelligent Input terminal 024[SET] is enabled. ・o parameters are displayed by the [UA-22] = 01. This Range Initial Code/Name configuration is not necessary except when option is used. (unit) value ・For more information, refer to the User’s guide of the...
- Page 92 Chapter 4 For parameter configuration [ob-10]~[ob-16] [oC-01]~[oC-28] [oE-01]~[oE-33] P1-FB Pulse train input terminal setting P1-AG Optional analog input setting Initial Initial Code/Name Range (unit) Code/Name Range (unit) value value 00(Frequency reference)/ oE-01 ob-10 Pulse train 1~500(ms) 01(Pulse count)/ Filter time constant of [Ai4] detection object 02(Speed feedback: oE-03...
- Page 93 Chapter 4 For parameter configuration [oE-35]~[oE-49] [oE-50]~[oE-70] P1-AG Window comparators output condition P1-AG Optional analog output adjustment Initial Initial Code/Name Range (unit) Code/Name Range (unit) value value oE-35 oE-50 Window comparator for [Ao3] monitor output dA-01 0~100(%) [Ai4] higher level selection] oE-36 oE-51...
- Page 94 Chapter 4 For parameter configuration [oH-01]~[oH-34] [oJ-01]~[oJ-40] P1-EN Optional Ethernet setting Optional Interface Group A option I/F flexible command Initial Code/Name Range (unit) value Initial Code/Name Range (unit) value 00(Group 1)/ oH-01 IP-address selection 01(Group 2) oJ-01 0000~FFFF 0000 Register writing 1 Gr.A oH-02 00(Auto-negotiation)/ Communication speed...
- Page 95 Chapter 4 For parameter configuration [oJ-41]~[oH-60] [oL-01]~[oL-36] Group C option I/F flexible command Initial Initial Code/Name Range (unit) Code/Name Range (unit) value value oJ-41 oL-01 0000~FFFF 0000 0~255 Register writing 1 Gr. C IPv4 IP-address (1) Gr.1 oJ-42 oL-02 0000 0000~FFFF 0~255 Register writing 2 Gr.
- Page 96 Chapter 4 For parameter configuration [oL-40]~[oL-76] Initial Code/Name Range (unit) value oL-40 0~255 IPv4 IP-address (1) Gr.2 oL-41 0~255 IPv4 IP-address (2) Gr.2 oL-42 0~255 IPv4 IP-address (3) Gr.2 oL-43 0~255 IPv4 IP-address (4) Gr.2 oL-44 0~255 IPv4 sub-net mask (1) Gr.2 oL-45 0~255 IPv4 sub-net mask (2) Gr.2...
- Page 97 Chapter 4 For parameter configuration [PA-01]~[PA-05] [PA-20]~[PA-29] ■Parameter mode (P code) Em-force mode settings Simulation mode settings Initial Initial Code/Name Range (unit) Code/Name Range (unit) value value PA-01 PA-20 00(Disable)/ Mode selection Simulation 00(Disable)/01(Enable) 01(Enable) for emergency force drive mode enable PA-02 PA-21 Frequency...
- Page 98 User-parameter 24 selection 01(Able to R/W) selection UA-55 User-parameter 25 selection ・Restricts the copy function(Read/Write). UA-56 User-parameter 26 selection ・SH1 series do not have this function. UA-57 User-parameter 27 selection Keypad low battery warning *1) UA-58 User-parameter 28 selection Initial Code/Name...
- Page 99 Chapter 4 For parameter configuration [UA-90]~[UA-94][Ub-01]~ [Ud-01]~[Ud-37] Trace function [Ub-05][UC-01] Initial Unit selection Code/Name Range (unit) value Initial 00(Disable)/ Code/Name Range (unit) Ud-01 Trace function enable value 01(Enable) UA-90 00(Stop)/ Ud-02 Trace start 01(Start) 0~60(min) QOP indication off waiting Ud-03 time Trace data number 1~8...
- Page 100 Chapter 4 For parameter configuration [Ud-38]~[Ud-60] [UE-01]~[UE-48] Initial EzSQ Code/Name Range (unit) value Initial Code/Name Range (unit) Ud-38 00 (Input: [Ud-39])/ value Trace signal 6 01 (Output: [Ud-40]) Input/Output selection 00(1ms)/ UE-01 01(2ms: SJ700/L700 Ud-39 EzSQ execution timing compatible) Similar to [CA-01] Trace signal 6 Input terminal 00(Disable)/ UE-02...
- Page 101 Chapter 4 For parameter configuration [Unit table] [UE-49]~[UF-32] Number Unit Number Unit Code/Name Range (unit) Initial value UE-49 0~65535 U(39) °F UE-50 U(40) 0~65535 UE-51 0~65535 U(41) l/min UE-52 0~65535 U(42) m3/s UE-53 0~65535 U(43) m3/min UE-54 m3/h 0~65535 U(44) kg/s UE-55 0~65535...
-
Page 102: Chapter 5 Troubleshooting
Chapter 5 Troubleshooting Chapter 5 Troubleshooting 5.1 Error events Next are the descriptions of the basic errors that may occur. For more information, refer to the user’s guide. ■Trip event screen Alarm lamp is blinking ■Error events Code Details Corrective actions Related parameter ・... - Page 103 E093 ※For others errors not shown above, refer to the user’s guide. *1)STO function is not suitable for SH1 series. ■ Warning events ※Regarding the warnings, please refer to the user’s guide. Fixing the parameter details shown in the panel screen...
- Page 104 Troubleshooting 5.3 Possible errors and solutions If the corrective action does not solve the problem, refer to the user's guide, where there are more detailed descriptions, please contact your Hitachi distributor. Event ▶ Estimated cause ▶ Corrective action ・Press a key of the Keypad and the screen will light up ・Keypad in idle mode...
- Page 105 Chapter 5 Troubleshooting Event ▶ Estimated cause ▶ Corrective action ・ If output current is high, the overload restriction function ・Overload restriction function is [bA122] lowers the frequency. To increase the acceleration in use time [AC120], it is necessary to suppress the current increase. ・The upper limit [bA102] setting may be low, and it should ・Frequency is being limited be increased.
-
Page 106: Chapter 6 Inspection And Maintenance
The periodic inspection is a vital point that has to be carried out, for any periodic inspection, please ✓ Details contact your Hitachi distributor. Voltage supply fluctuation □ ✓ Details Line-to-line voltage balance □... -
Page 107: Daily And Periodic Inspections
Inspection and maintenance Chapter 6 6.2 Daily and periodic inspections Inspection cycle Inspected Inspection Every Details of inspection Inspection method Criterion Tester device part entry Daily year years Ambient temperature, level of Thermometer Surrounding Check the ambient temperature, ○ Refer to the installation guide. humidity are withing the range. - Page 108 Inspection and maintenance Chapter 6 6.3 Insulation resistance test ・ When performing a insulation resistance test, remove all cables ・To perform an insulation resistance test of the inverter main circuit, start by removing the inverter internal filter to external circuits and the components connected to the terminals, to prevent it to be exposed to the test voltage.
- Page 109 Inspection and maintenance Chapter 6 6.5 Checking method for inverter/converter ・Using the multimeter, you can check if the inverter or *1) Before checking the circuits, measure the voltage across terminals P and N with the multimeter in DC voltage range converter unit are defective or non-defective.
- Page 110 Inspection and maintenance Chapter 6 6.6 Smoothing capacitor life span curve ※80% of the ND rated current value for continuous drive. Ambient temperature (°C) For continuous supplying power of 24h a day Capacitor life span (years) 2) The smoothing capacitor has a limited life because of 1)The ambient temperature is considered to be measured the chemical reactions occurring inside the capacitor around 5 cm of the bottom centre of the inverter...
- Page 111 Inspection and maintenance Chapter 6 6.8 Input/output voltage, current and power measurement methods Standard equipment for measuring input/output voltage, current, and power measurement. Inverter Power Motor Supply Measured Measuring point Measuring instrument Remarks Standard reference values data Input R-S, S-T, Effective value 200V class:200~240V 50/60Hz Moving-iron voltmeter or...
-
Page 112: Chapter 7 Specifications
*5) The values for the sensorless vector control are assigned according rated output current. The value of the impedance at the supply side to the values in the ND rating of the Hitachi standard motor table. changes due to the wiring, breaker, input reactor, etc. - Page 113 Specifications Chapter 7 7.2 Common specifications PWM system Sine-wave PWM system 0.00~590.00Hz Output frequency range *1) Frequency accuracy For the highest frequency, digital±0.01%, analogue±0.2% (25±10℃) Digital: 0.01Hz Analogue: Max. frequency/4000 Frequency resolution (Ai1 terminal/Ai2 terminal:12bit/0~+10V or 0~+20mA, Ai3 terminal 12bit/-10~+10V) V/f control (constant torque/reduced torque/free), automatic boost control Control system *2) Cascade type sensorless vector control, 0Hz sensorless vector control...
- Page 114 Specifications Chapter 7 7.2 Common specifications (continue) Transistor output terminal 5, 1a contact relay 1 point, 1c contact relay 1 point Intelligent output RUN(While in run), FA1~5(Reached frequency signal), IRDY(Inverter ready), FWR(Forward rotation), RVR(Reverse rotation), FREF(panel terminals frequency reference), REF(panel motion operation), SETM(2nd-motor selected), OPO(Option-Output), AL(Alarm signal), MJA(Major failure signal), OTQ(Over-torque)*7), IP(Power loss), UV(Undervoltage), TRQ(Torque limited), IPS(Decel.
- Page 115 Index FA1, FA2, FA3, FA4, FA5 ........4-36 FBV ..............4-37 absolute position control ........4-14 FM ..............2-20 accel/decal cureve selection ......4-12 FOC ..............4-33 acceleration curve constant ......4-12 forcible operation ..........4-33 acceleration time ..........4-13 forcing ...............
- Page 116 Index STP ..............4-32 main circuit terminal ..........2-7 major failure signal ........... 4-36 manual torque boost ......... 4-44 Temporary frequency addition ......4-9 MI1, MI2, MI3, MI4, MI5, MI6, MI7, MI8 .... 4-33 test run ............... 1-3 MO1, MO2, MO3, MI4, MO5, MO6 ....4-37 thermistor ............
- Page 117 Index (memo) Appendix - 3...
-
Page 118: Index
Index Revised record Version No. Contant Update date NT9401 X Initial version 2018/4 ※We will Correct the incorrect words,missing words and so on without prior notice. Appendix - 4...