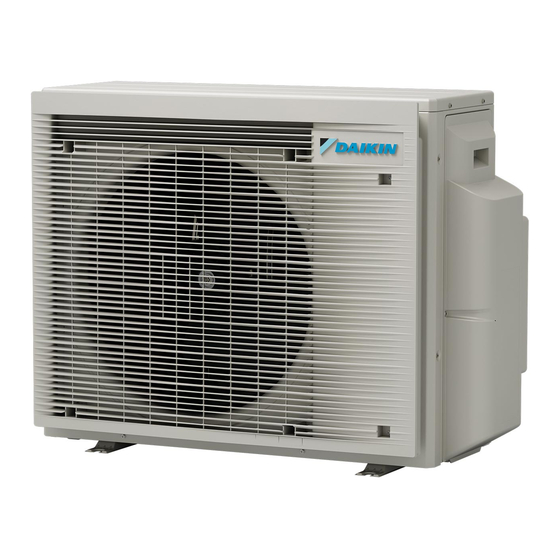
Summary of Contents for Daikin 2MXM40A2V1B
- Page 1 Installation manual R32 Split series Installation manual 2MXM40A2V1B English R32 Split series 2MXM50A2V1B...
- Page 2 2P630134-9H...
- Page 3 2P630134-9H...
- Page 4 3P475203-20P...
-
Page 5: Table Of Contents
10.3 Trial operation and testing............16 10.3.1 To perform a test run ..........16 ▪ The full set of latest technical data is available on the Daikin Business Portal (authentication required). 11 Maintenance and service 12 Disposal 13 Technical data 13.1... -
Page 6: Specific Installer Safety Instructions
2 Specific installer safety instructions Charging refrigerant (see "6 Charging refrigerant" [ 4 11]) Specific installer safety WARNING instructions ▪ The refrigerant inside the unit is mildly flammable, but Always observe the following safety instructions and regulations. normally does NOT leak. If the refrigerant leaks in the room and comes in contact with fire from a burner, a installation" [ 4 7]) Unit installation (see... -
Page 7: About The Box
3 About the box DANGER: RISK OF ELECTROCUTION DANGER: RISK OF EXPLOSION All electrical parts (including thermistors) are powered by ▪ Use a pipe cutter to remove the compressor. the power supply. Do NOT touch them with bare hands. ▪ Do NOT use the brazing torch. DANGER: RISK OF ELECTROCUTION ▪... -
Page 8: Additional Installation Site Requirements Of The Outdoor Unit In Cold Climates
4 Unit installation >100 >150 >50 >50 (mm) ▪ Wall facing 3 sides: >150 >50 >300 (mm) Air outlet Air inlet Allow 300 mm of work space below the ceiling surface and 250 mm for piping and electrical servicing. Snow cover or shed Pedestal Prevailing wind direction Air outlet... -
Page 9: To Install The Outdoor Unit
5 Piping installation Drain port Bottom frame Drain plug Hose (field supply) Piping installation Preparing refrigerant piping 5.1.1 Refrigerant piping requirements CAUTION Piping and joints of a split system shall be made with permanent joints when inside an occupied space except joints directly connecting the piping to the indoor units. -
Page 10: Refrigerant Piping Length And Height Difference
5 Piping installation 5.2.1 Connections between outdoor and indoor Pipe outer diameter Insulation inner Insulation thickness (Ø diameter (Ø unit using reducers 9.5 mm (3/8") 12~15 mm ≥13 mm Total indoor unit capacity class that can be connected to this 12.7 mm (1/2") 14~16 mm ≥13 mm outdoor unit: Ø... -
Page 11: Checking The Refrigerant Piping
6 Charging refrigerant WARNING NOTICE Connect the refrigerant piping securely before running the Connect the vacuum pump to both the service ports of the compressor. If the refrigerant piping is NOT connected and gas stop valves. the stop valve is open when the compressor is run, air will 1 Vacuum the system until the pressure on the manifold indicates be sucked in. -
Page 12: To Determine The Additional Refrigerant Amount
7 Electrical installation WARNING To fix the fluorinated greenhouse ▪ Do NOT pierce or burn refrigerant cycle parts. gases label ▪ Do NOT use cleaning materials or means to accelerate 1 Fill in the label as follows: the defrosting process other than those recommended by the manufacturer. -
Page 13: Specifications Of Standard Wiring Components
7 Electrical installation WARNING Component Residual current device MUST comply with ▪ Do NOT use locally purchased electrical parts inside applicable legislation the product. ▪ Do NOT branch the power supply for the drain pump, etc. from the terminal block. This could result in To connect the electrical wiring to electrical shock or fire. -
Page 14: Finishing The Outdoor Unit Installation
8 Finishing the outdoor unit installation 9 Reattach the switch box cover and the service cover. Finishing the outdoor unit installation To finish the outdoor unit installation DANGER: RISK OF ELECTROCUTION ▪ Make sure that the system is earthed properly. ▪... -
Page 15: To Turn On Heat Mode Lock
Next commissioning instructions in this chapter, a general commissioning checklist is also available on the Daikin 8× Business Portal (authentication required). The general commissioning checklist is complementary to the instructions in this chapter and can be used as a... -
Page 16: Checklist During Commissioning
Daikin website (publicly accessible). 3 First check operation of each unit individually, then check simultaneous operation of all indoor units. Check both heating ▪ The full set of latest technical data is available on the Daikin and cooling operation. Business Portal (authentication required). -
Page 17: Piping Diagram: Outdoor Unit
13 Technical data Symbol Meaning Symbol Meaning Symbol Meaning Circuit breaker Protective earth Swing motor MR*, MRCW*, MRM*, MRN* Magnetic relay Neutral n=*, N=* Number of passes through ferrite core Connection Protective earth (screw) Pulse-amplitude modulation Connector Rectifier PCB* Printed circuit board Earth Relay connector Power module... - Page 18 13 Technical data 2MXM50 7.9CuT 6.4CuT (6.4CuT) 6.4CuT 7.9CuT 6.4CuT 6.4CuT 6.4CuT (6.4CuT) 4.8CuT 4.8CuT 9.5CuT 9.5CuT 9.5CuT (9.5CuT) 9.5CuT 9.5CuT 9.5CuT 9.5CuT (12.7CuT) 9.5CuT HPS1 9.5CuT Room A Field piping (liquid) Room B Liquid stop valve 4-way valve ON: heating Thermistor (liquid) High pressure switch with automatic reset Filter...
- Page 20 3P600450-5L 2021.12 Verantwortung für Energie und Umwelt...


