Hitachi C 10FCH2 Handling Instructions Manual
Compound miter saw
Hide thumbs
Also See for C 10FCH2:
- Handling instructions manual (108 pages) ,
- Technical data and service manual (67 pages) ,
- Instruction manual (52 pages)
Table of Contents
Quick Links
Compound M iter Saw
M odel C 10FCH2
Handling instructions
Note:
Before using this Electric Pow er Tool, carefully read through these
HANDLING INSTRUCTIONS to ensure efficient, safe operation. It is
recom m ended that these INSTRUCTIONS be kept readily available
as an im portant reference w hen using this pow er tool.
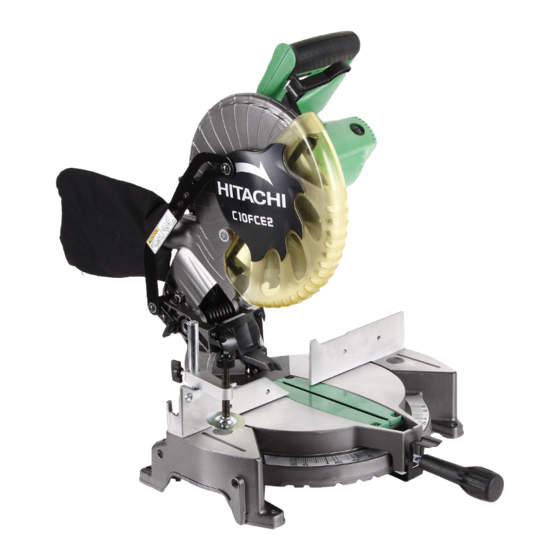
C 10FCE2
•
Table of Contents

Related Manuals for Hitachi C 10FCH2


Summary of Contents for Hitachi C 10FCH2
- Page 1 Compound M iter Saw M odel C 10FCH2 C 10FCE2 • Handling instructions Note: Before using this Electric Pow er Tool, carefully read through these HANDLING INSTRUCTIONS to ensure efficient, safe operation. It is recom m ended that these INSTRUCTIONS be kept readily available...
-
Page 2: General Operational Precautions
14. M aintain tools w ith care. Keep cutting tools sharp Use only original HITACHI replacem ent parts. and clean for better and safer perform ance. Follow 10. Th i s t o o l sh o u l d o n l y b e d i sassem b l ed f o r i n st r u ct i o n s f o r l u b r i cat i o n an d ch an g i n g replacem ent of carbon brushes. -
Page 3: Specifications
37. Shut off pow er and w ait for saw blade to stop before 23. Use only saw blades recom m ended by HITACHI. servicing or adjusting tool. 24. The saw blades should be from 235 m m to 255 m m 38. -
Page 4: Standard Accessories
2. Pow er sw itch STANDARD ACCESSORIES Ensure that the pow er sw itch is in the OFF position. If the plug is connected to a receptacle w hile the trigger (1) 255 m m TCT Saw blade (m ounted on tool) ..... 1 sw itch is in the ON position, the pow er tool w ill start (2) Dust bag .............. -
Page 5: Adjusting The Power Tool Prior To Use
(2) During bevel and compound cutting, attach the dust bag at a right angle to the base surface as shown in Fig. 3. Dust bag Duct Line Line Right angle Warning sign Base Fig. 3 CAUTION Em pty the dust bag frequently to prevent the duct and the low er guard from becom ing clogged. - Page 6 4. Using the Vise Assembly (Standard accessory) (Fig. 6) WARNING (1) The vise assem bly can be m ounted on either the left In the case of left bevel cutting, rotate the sub fence fence {Fence (B)} or the right fence {Fence (A)} by (B).
- Page 7 (1) Light up the laser marker and make a groove of about 5 If the sw itch trigger is pulled inadvertently, the saw mm deep on the workpiece that is about 38 mm in height blade can rotate and result in unexpected accidents. and 89 mm in width.
- Page 8 sunlight. Under such circum stances, m ove to a place CAUTION that is not directly under the sunlight and engage in Fo r m ax i m u m d i m en si o n s f o r cu t t i n g , r ef er t o the operation.
- Page 9 (2) After adjustm ent, firm ly tighten the w ing nut and fasten the holder w ith the 6 m m knob bolt (optional accessory). If the length of Height Adjustm ent Bolt 6 m m is insufficient, spread a thin plate beneath. M ake Indicator sure the end of Height Adjustm ent Bolt 6 m m does (for bevel scale)
- Page 10 Position crow n m olding w ith its WALL CONTACT NOTE EDGE ag ai n st t h e g u i d e f en ce an d i t s CEILIN G If the spindle lock cannot be easily pressed in to lock CONTACT EDGE against the Crow n m olding Stoppers the spindle, turn the bolt w ith 10 m m box w rench as show n in Fig.
-
Page 11: Maintenance And Inspection
N ev er at t em p t t o i n st al l saw b l ad es ex cep t on this tool should ONLY be perform ed by a Hitachi 235 m m – 255 m m in diam eter. - Page 12 D : Rem arks CAUTION Repair, m odification and inspection of Hitachi Pow er Tools m ust be carried out by a Hitachi Authorized Service Center. Especially laser device should be m aintained by the authorized agent by laser m anufacturer.
- Page 14 C10FCH2 (1/2)
- Page 15 C10FCH2 (1/2) 326-748 322-902 –––––––– 323-976 “ 61” 307-956 M 6 × 10 322-957 ” 602-607” 323-208 M 6 × 20 998-836 M 6 × 11 322-935 –––––––– 322-936 M 10 306-985 318-934 964-851 322-889 304-043 M 4 × 10 322-965 321-551 M 10 ×...
- Page 16 C10FCH2 (2/2)
- Page 17 C10FCH2 (2/2) 998-335 M 7 × 17.5 –––––––– 308-789 958-308Z 308-789 944-458 323-133 “ 104-108” 940-543 990-430 M 4 × 10 322-955 322-919 600-3VV 322-918 322-917 987-512 M 5 × 16 980-523 935-196 M 4 × 12 949-819 M 5 × 10 961-729 949-340 M 6 ×...
- Page 18 C10FCE2 (1/2)
- Page 19 C10FCE2 (1/2) 307-956 M 6 × 10 322-957 ” 602-607” 323-208 M 6 × 20 998-836 M 6 × 11 322-935 –––––––– 322-936 M 10 306-985 318-934 964-851 322-889 304-043 M 4 × 10 322-965 321-551 M 10 × 54 322-890 322-713 ”...
- Page 20 C10FCE2 (2/2)
- Page 21 C10FCE2 (2/2) 998-335 M 7 × 17.5 958-308Z 308-789 940-543 308-789 322-955 323-133 “ 104-108” 990-430 M 4 × 10 322-919 600-3VV 322-918 322-917 987-512 M 5 × 16 949-819 M 5 × 10 961-729 949-340 M 6 × 16 935-196 M 4 ×...
- Page 24 Hitachi Koki Co., Ltd. Code No. C99153911 Printed in China...