Table of Contents
Quick Links
Table of Contents

Related Manuals for Electrolux EPM09CRC-A1


Summary of Contents for Electrolux EPM09CRC-A1
- Page 1 EPM09CRC-A1 EPM12CRC-A1 EN AIR CONDITIONER USER MANUAL...
-
Page 2: Table Of Contents
�������������������������������������������������������������������������������������������������� 24 WE’RE THINKING OF YOU Thank you for purchasing an Electrolux appliance. You’ve chosen a product that brings with it decades of professional experience and innovation. Ingenious and stylish, it has been designed with you in mind. So whenever you use it, you can be safe in the knowledge that you’ll get great results every time. -
Page 3: Safety Information
ENGLISH SAFETY INFORMATION Symbol Note Explanation This symbol shows that this appliance uses a ammable refrigerant. If the refrigerant is leaked WARNING and exposed to an external ignition source, there is a risk of re. This symbol shows that the operation manual CAUTION should be read carefully. - Page 4 • There are local council rules regarding maximum allowable noise levels emitted by air conditioners� • If the power cord is to be replaced, replacement work shall be performed by authorised personnel only� • Installation work must be performed in accordance with the national wiring standards by authorised personnel only(if applicable)�...
- Page 5 ENGLISH • In the event of any abnormality with the air conditioner (eg� a burning smell), do not pull out the plug directly, open the window for ventilation firstly, then turn the unit off and disconnect the power supply� CAUTION! Warning - Power cord •...
- Page 6 1.3 Usage cautions • Be sure to turn the unit off and disconnect the power supply cord before performing any maintenance or cleaning� • Do not put unit near any heat source or open fire when you replacing the filters�...
- Page 7 ENGLISH PLEASE NOTE: CHECK THE PLATE FOR THE TYPE OF REFRIGERANT GAS USED IN YOUR APPLIANCE� WARNING! Specific information regarding appliances with R290 refrigerant gas� • Thoroughly read all of the warnings� • When defrosting and cleaning the appliance, do not use any tools other than those recommended by the manufacturer�...
-
Page 8: Safety Instruction
2. SAFETY INSTRUCTION 2.1 Notes on Operation • Allow 4 minutes for the compressor when the unit is set close to 18°C in to restart cooling� If you turn the air low ambient temperature conditions, conditioner off and immediately restart especially at night�... - Page 9 ENGLISH warning meaning Plug in power plug properly Otherwise, it may cause electric shock, fire and explosion due to excess heat generation Do not operate or stop the unit by inserting It may cause electric shock, fire and or pulling out the power plug explosion due to heat generation Do not use a damaged or unspecified It may cause electric shock, fire and...
- Page 10 10 www.electrolux.com CAUTION! caution meaning When the air filter is to be removed, do not It may cause an injury touch the metal parts of the unit Do not clean the air conditioner with water Water may enter the unit and degrade the insulation�...
-
Page 11: Unit Description
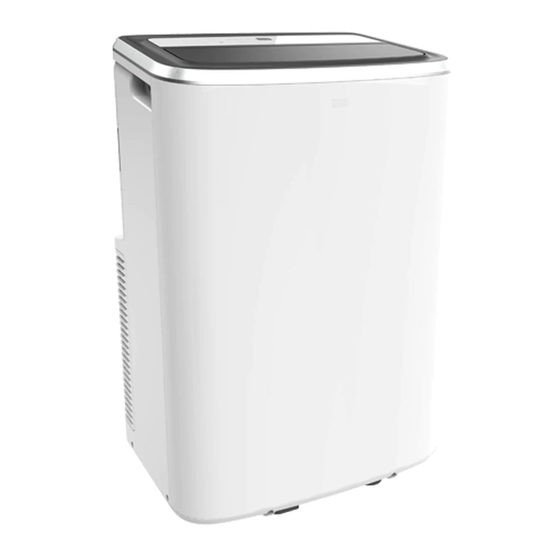
ENGLISH 3. UNIT DESCRIPTION Remote control Continuous drain outlet Signal receiver Pump drain outlet Room air outlet Bottom drain outlet Control panel Air exhaust Carrying handle(both sides) Power plug socket Power cord Air intake Castor 4. ACCESSORIES PARTS PARTS NAME: QUANTITY: Adaptor A, Exhaust duct, 1 set... -
Page 12: Installation Instructions
12 www.electrolux.com 5. INSTALLATION INSTRUCTIONS 5.1 Exhausting hot air 4. Using the 4 buckles on adaptor B to affix the adaptor into the window slider In the Cool Mode the appliance must be kit and seal� (Fig� 5&6) placed close to a window or opening so that the warm exhaust air can be ducted outside�... - Page 13 ENGLISH 5.2 Installation in a double-hung sash window 1. Cut the Foam seal* (adhesive type) 5. Secure the window slider kit to the to the proper lengths and attach them window sill (Fig� 11): to the window and stool� (Fig� 8) A: For wooden window: Use 19mm screws for securing�...
- Page 14 14 www.electrolux.com 5.3 Installation in a sliding sash window 1. Cut the Foam seal* (adhesive type) 5. Drive two 19mm screws to secure the to the proper lengths and attach them window slider kit to the window frame� to the window frame� See Fig� 14�...
-
Page 15: Air Conditioner Features
ENGLISH 6. AIR CONDITIONER FEATURES 6.1 Control Panel Displays temperature/time Mode Selection Power ON/OFF Sleep Filter Reset Timer Fan Speed Swing Adjust Temperature or Timer * Heat mode is not applicable to all models� 7. OPERATING INSTRUCTIONS Some of the following instructions can only be used by using the Control Panel�... - Page 16 16 www.electrolux.com Fan mode "timer" button again and the display will show the remaining time� Press the button In this mode, there is no need to use the again to quit the function� You can also exhaust hose or drainage hose�...
- Page 17 ENGLISH 7.2 Remote Control To replace the old batteries(which have been used up) with two new R03P “AAA” 1�5V batteries, repeat the steps above� If the remote control unit is replaced or discarded, the batteries must be removed and disposed of in accordance with local legislation as they do harm to the environment�...
- Page 18 18 www.electrolux.com How to Use the Remote Control Fan mode Press the “mode” button until the left side Turning the unit on of LCD screen displays “fan”� In this mode, you can select fan speed Plug in the unit, then press the “on/ “high”, “mid”...
- Page 19 ENGLISH Sleep mode When the unit is in Cool, Heat or auto mode, you can press the “sleep” button to make the unit run in Sleep mode� In this mode, the fan speed will be set as “auto” automatically, which cannot be changed� In Cool/Heat mode the selected temperature will increase/decrease by 1 °C 30 minutes after the mode is selected�...
- Page 20 Garden hose If the display reads "AS" , "CS" and "ES", the temperature sensor has failed� Contact Drain hose your Authorised Electrolux Service Centre� Fig. 21 NOTE: If the display reads "L3" , the condenser • Condensate may flow out after removing DC fan motor has failed�...
-
Page 21: Care & Cleaning
ENGLISH Replace the drain cap to the continuous drain outlet when no condensate flows out� Put the drip tray under the bottom drain outlet, then remove the rubber stopper from the drain outlet, to allow the condensate to flow into the drip tray� If your drip tray can’t hold all the condensate, a Fig. -
Page 22: Trouble Shooting
22 www.electrolux.com 2. Wash the filter using liquid dishwashing 2. Remove and clean the filter, allow it to detergent and warm water under 40°C� dry completely, then reinstall it� Rinse filter thoroughly� Gently shake 3. Remove the batteries from the remote excess water from the filter�... -
Page 23: Environmental Concerns
ENGLISH • Exhaust duct not connected or blocked� • Unit recently turned on in hot room� See "5.1 Exhausting hot air" Section� Allow additional time to remove “stored heat” from walls, ceiling, floor and Air conditioner cooling, but room is furniture�... - Page 24 Electrolux Repair or replace warranty: During the Warranty Period, return to service centre, Electrolux or its ASC will, at no extra charge if your Appliance is readily accessible for service, without special equipment and subject to these terms and conditions, repair or replace any parts which it considers to be defective.
- Page 25 www.electrolux.com/shop...