
Related Manuals for Electrolux ESV09CRU-A1


Summary of Contents for Electrolux ESV09CRU-A1
- Page 1 ESV09CRU-A1 ESV12CRS-B1 ESV09CRR-B4 ESV09CRR-B5 ESV12CRU-A1 ESV18CRS-B1 ESV12CRR-B4 ESV12CRR-B5 ESV24CRS-B1 ESV15CRR-B4 ESV18CRR-B5 ESV18CRU-A1 ESV09CRT-A1 ESV18CRR-B4 ESV24CRR-B5 ESV12CRT-A1 ESV18CRT-A1 EN AIR CONDITIONER USER MANUAL...
-
Page 2: Table Of Contents
13. CORRECT DISPOSAL OF THIS PRODUCT ............24 WE’RE THINKING OF YOU Thank you for purchasing an Electrolux appliance. You’ve chosen a product that brings with it decades of professional experience and innovation. Ingenious and stylish, it has been designed with you in mind. So whenever you use it, you can be safe in the knowledge that you’ll get great results every time. -
Page 3: Safety Instructions
WARNING! contact an Electrolux service agent. If Risk of suffocation, injury or this abnormal status continues the air permanent disability. conditioner may be damaged or even cause electric shock or fire. - Page 4 4 www.electrolux.com • For safety, be sure to turn off the • Do not step on the top of the outdoor circuit breaker before performing any unit or place heavy things on it. It may maintenance or cleaning or when the cause damage or injury.
-
Page 5: Product Description
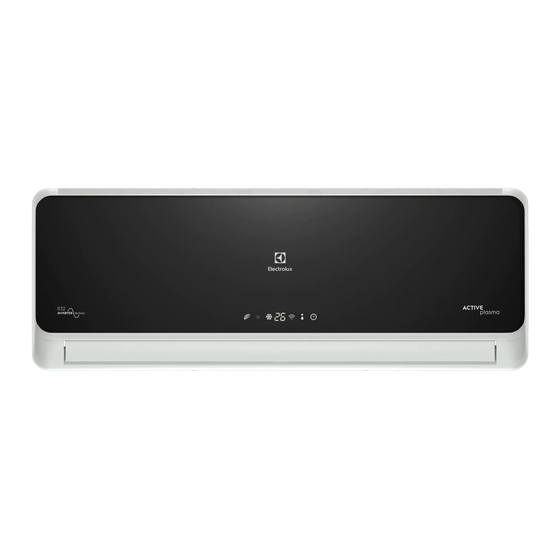
ENGLISH 2. PRODUCT DESCRIPTION All the pictures in this manual are for explanation purposes only. The actual shape of the indoor unit you purchased may be slight different on front panel and display window. The actual shape shall prevail. Air inlet Air Outlet Air inlet (side) Air inlet (rear) -
Page 6: Indoor Unit Display
6 www.electrolux.com 3. INDOOR UNIT DISPLAY On/Off indication lamp Lights up when the unit is work. Heat mode indication lamp Type A Lights up when Heat mode is activated. Cool mode indication lamp Lights up when Cool mode is activated. - Page 7 ENGLISH 4.2 Location of the Remote Controller • Keep the remote controller where its signal can reach the receiver of the indoor unit (a maximum distance of 8 m is allowed). • When the remote controller sends out a signal, the symbol will blink on the display.
-
Page 8: Remote Controller Description
8 www.electrolux.com 5. REMOTE CONTROLLER DESCRIPTION 1. MODE BUTTON feedback received by the indoor unit when you press the button. Press the button to set the operation mode: Auto, Cool, Dry, Heat and Fan. 4. TURBO BUTTON Default setting: AUTO. - Page 9 ENGLISH 14. HEALTH BUTTON Press the button to enable or disable the I Feel function. Press the button to enable or disable Health function. Default setting: OFF. 7. I CLEAN BUTTON • For models with Wireless Press the button to enable or disable the I function, continuous pressing Clean function.
-
Page 10: How To Use The Remote Controller
10 www.electrolux.com 6. HOW TO USE THE REMOTE CONTROLLER Ensure the unit is plugged in and power is available. The OPERATION indicator on the display panel of the indoor unit illuminates. Basic Operation 1. Press the ON/OFF button (A) to start the air conditioner. - Page 11 ENGLISH Swing Operation Press the Swing button (A) and the Swing button (B) to adjust the desired airflow direction. 1. Left/Right direction can be adjusted with the button (A) on the remote controller. Press the button, the louver will swing left and right automatically.
- Page 12 12 www.electrolux.com • When setting the Timer on or Timer off functions, up to 10 hours, the time will increase in 30 minute increments with each press. After 10 hours and up to 24, it will increase in 1 hour increments.
- Page 13 ENGLISH Advanced Functions Operations 1. °C/°F switch function °C/°F can be switched by pressing Mode buttons at the same time for 3 seconds. 2. Turbo function Press the Turbo button to enable or disable the turbo function. The Turbo function makes the unit work extra hard to reach your set temperature in the shortest time as soon as possible.
- Page 14 14 www.electrolux.com 5. X-Fan function 7. Sleep function In power on mode, press X-Fan button, Press sleep button to enter sleep mode. after 5 continuous and display twinkles Then, in cool or heat mode, the set with “SC”, the function will activate temperature will increase(cooling) or successfully.
-
Page 15: How To Use The Indoor Unit
ENGLISH 7. HOW TO USE THE INDOOR UNIT 1. Adjust the air flow direction properly otherwise it might cause discomfort or cause uneven room temperatures. 2. Adjust the horizontal louver using the remote controller. 3. Adjust the vertical louver using the remote controller. -
Page 16: Operating Temperature
16 www.electrolux.com 8. OPERATING TEMPERATURE Operating temperature ranges Model climate Type Ambient temperature (Cooling) Ambient temperature (Heating) 18°C~43°C -7°C~43°C Important! 2. If the air conditioner runs for a long time 1. Optimum performance will be achieved in cooling mode and the humidity is within these operating temperatures. -
Page 17: Cleaning And Maintenance
ENGLISH 10. CLEANING AND MAINTENANCE 10.1 Before Maintenance Turn the system off before cleaning. To clean, wipe with a soft, dry cloth. Do not use bleach or abrasives. WARNING! Power supply must be disconnectd before cleaning the indoor unit. Dust filter handle •... - Page 18 18 www.electrolux.com 5. Install the air freshening filter back into 3. Install a new air freshening filter. position. 4. Reinstall the air filter and securely close the front panel. 10.6 Preparation for extended non-operation If you plan to idle the unit for a long time, perform the following: 1.
-
Page 19: Operation Tips
ENGLISH 11. OPERATION TIPS The following events may occur during 5. Abnormal noise of the air normal operation. conditioner 1. Protection of the air conditioner • You may hear a low hissing sound Compressor when the compressor is running or has just stopped running. - Page 20 20 www.electrolux.com turn off the unit automatically. Auto-restart function Dripping water may generate on the • Power failure during operation will stop surface of the indoor unit when cooling the unit completely. in a high relatively humidity (relative • For the unit without Auto-restart humidity higher than 80%).
-
Page 21: Troubleshooting
ENGLISH 12. TROUBLESHOOTING OPERATION (RUN) indicator The unit may stop operation or other indicators continue or continue to run in a safety flashing. condition(depending on models). Waiting for about 10 minutes, the fault may be recovered If one of the following code automatically, if not, disconnect the appears on the display area: power and then connect it in again. - Page 22 สารบั ญ 1. ข อ แนะนำเพื อความปลอดภั ย ..........................3 2. คำอธิ บ ายผลิ ต ภั ณ ฑ .............................5 3. จอแสดงผลบนตั ว เครื องภายในอาคาร ........................6 4. รี โ มทควบคุ ม ................................6 5. คำอธิ บ ายเกี ่ ย วกั บ รี โ มทควบคุ ม ..........................8 6.
-
Page 23: ข อ แนะนำเพื อความปลอดภั ย
ภาษาไทย ข อ แนะนำเพื อความปลอดภั ย โปรดอ า นคำแนะนำที ่ ใ ห ม าอย า งละเอี ย ดถี ่ ถ ว นก อ นติ ด ตั ้ ง การดำเนิ น งานติ ด ตั ้ ง ต อ งเป น ไปตามมาตรฐานการ และใช... - Page 24 เพื อความปลอดภั ย โปรดป ด สวิ ต ช เ บรกเกอร ก อ น ห า มเหยี ย บบนคอมเพรสเซอร ห รื อ วางสิ ่ ง ของ ดำเนิ น การบำรุ ง รั ก ษาหรื อ ทำความสะอาดใดๆ หรื อ ที ่ ม ี น ้ ำ หนั ก มากไว ด า นบน เพราะอาจทำให เ กิ ด ความ...
-
Page 25: คำอธิ บ ายผลิ ต ภั ณ ฑ
ภาษาไทย 2. คำอธิ บ ายผลิ ต ภั ณ ฑ รู ป ภาพทั ้ ง หมดในคู ม ื อ เล ม นี ้ ม ี ไ ว เ พื อการอธิ บ ายเท า นั ้ น รู ป ร า งจริ ง ของตั ว เครื องภายในอาคารที ่ ท า นซื ้ อ อาจมี... -
Page 26: จอแสดงผลบนตั ว เครื องภายในอาคาร
3. จอแสดงผลบนตั ว เครื องภายในอาคาร ไฟแสดงสถานะการเป ด /ป ด เครื อง สว า งขึ ้ น เมื อเครื องปรั บ อากาศกำลั ง ทำงาน ไฟแสดงสถานะโหมด Heat (ทำความร อ น) แบบ A สว า งขึ ้ น เมื อเป ด โหมด Heat (ทำความร อ น) ไฟแสดงสถานะโหมด... - Page 27 ภาษาไทย 4.2 ตำแหน ง ของรี โ มทควบคุ ม เก็ บ รี โ มทควบคุ ม ไว ใ นบริ เ วณที ่ ส ั ญ ญาณรี โ มท ควบคุ ม สามารถส ง ถึ ง ตั ว รั บ สั ญ ญาณของ เครื องภายในอาคาร (เว น ระยะห า งได ส ู ง สุ ด 8 ม.) ขณะที...
-
Page 28: คำอธิ บ ายเกี ่ ย วกั บ รี โ มทควบคุ ม
5. คำอธิ บ ายเกี ่ ย วกั บ รี โ มทควบคุ ม 1. ปุ ม MODE 4. ปุ ม TURBO กดปุ ม นี ้ เ พื อตั ้ ง ค า โหมดการทำงาน ซึ ่ ง ได แ ก โหมด Auto, กดปุ... - Page 29 ภาษาไทย 7. ปุ ม I CLEAN 14. ปุ ม HEALTH กดปุ ม นี ้ เ พื อเป ด หรื อ ป ด ฟ ง ก ช ั ่ น I Clean ค า เริ ่ ม ต น : OFF กดปุ...
-
Page 30: วิ ธ ี ก ารใช ง านรี โ มทควบคุ ม
10 www.electrolux.com 6. วิ ธ ี ก ารใช ง านรี โ มทควบคุ ม ตรวจสอบว า เสี ย บปลั ๊ ก เครื องปรั บ อากาศเรี ย บร อ ยแล ว และมี ก ระแสไฟฟ า ไฟแสดงสถานะการทำงาน บนส ว นแสดงผลของเครื องภายในอาคารจะสว า งขึ ้ น... - Page 31 ภาษาไทย การใช ง านฟ ง ก ช ั ่ น Swing กดปุ ม Swing (A) และปุ ม (B) เพื อปรั บ ทิ ศ ทางลมที ่ ต อ งการ 1. สามารถปรั บ ทิ ศ ทางซ า ย/ขวาได ด ว ยปุ ม (A) บนรี...
- Page 32 12 www.electrolux.com เมื อตั ้ ง ค า ฟ ง ก ช ั ่ น Timer on หรื อ Timer off ในระยะ 10 ชั ่ ว โมงแรก ทุ ก ครั ้ ง ที ่ ก ดปุ ม เวลา จะเพิ ่ ม ขึ ้ น ครั ้ ง ละ 30 นาที หลั ง จาก 10 ชั ่ ว โมง...
-
Page 35: วิ ธ ี ก ารใช ง านตั ว เครื องภายในอาคาร
ภาษาไทย 7. วิ ธ ี ก ารใช ง านตั ว เครื องภายในอาคาร 1. ปรั บ ทิ ศ ทางลมให เ หมาะสม มิ ฉ ะนั ้ น อาจทำให ร ู ส ึ ก ไม ส บายหรื อ ทำให อ ุ ณ หภู ม ิ ภ ายในห อ ง ไม... -
Page 36: อุ ณ หภู ม ิ ก ารทำงาน
16 www.electrolux.com 8. อุ ณ หภู ม ิ ก ารทำงาน ช ว งอุ ณ หภู ม ิ ก ารทำงาน ประเภทสภาพอากาศ อุ ณ หภู ม ิ โ ดยรอบ (ระบบทำความเย็ น ) อุ ณ หภู ม ิ โ ดยรอบ (ระบบทำความร อ น) ที... -
Page 37: การทำความสะอาดและการบำรุ ง รั ก ษา
ภาษาไทย 10. การทำความสะอาดและการบำรุ ง รั ก ษา 10.1 ก อ นการบำรุ ง รั ก ษา โปรดป ด เครื องก อ นทำความสะอาด ใช ผ า ที ่ น ุ ม และแห ง เช็ ด ทำความสะอาด ห า มใช ส ารฟอกขาวหรื อ สารที ่ ม ี ฤทธิ... - Page 38 18 www.electrolux.com 5. ติ ด ตั ้ ง แผ น กรองปรั บ อากาศกลั บ เข า ที ่ เ ดิ ม 3. ติ ด ตั ้ ง แผ น กรองปรั บ อากาศอั น ใหม 4. ติ ด ตั ้ ง แผ น กรองอากาศกลั บ เข า ที ่ แ ละป ด แผง...
-
Page 39: ข อ แนะนำในการใช ง าน
ภาษาไทย 11. ข อ แนะนำในการใช ง าน เหตุ ก ารณ ต อ ไปนี ้ อ าจเกิ ด ขึ ้ น ระหว า งการใช ง านตาม 5. เครื องปรั บ อากาศมี เ สี ย งผิ ด ปกติ ปกติ อาจได ย ิ น เสี ย งหวื อ ต่ ำ เมื อคอมเพรสเซอร ก ำลั ง 1. - Page 40 20 www.electrolux.com 10. ให ค วามร อ นไม เ พี ย งพอ (สำหรั บ รุ น ที ่ ม ี ร ะบบ 11. ฟ ง ก ช ั ่ น Auto-restart ทำความเย็ น และระบบทำความร อ นเท า นั ้ น ) หากเกิ...
-
Page 41: การแก ไ ขป ญ หา
ภาษาไทย 12. การแก ไ ขป ญ หา เครื องปรั บ อากาศอาจหยุ ด การทำงานหรื อ ไฟแสดงสถานะการทำงาน (ทำงาน) ทำงานต อ ไปในสภาวะรั ก ษาความปลอดภั ย หรื อ ไฟแสดงสถานะอื นๆ ยั ง คงกะพริ บ (ขึ ้ น อยู ก ั บ รุ น ) ให ร อประมาณ 10 นาที หากรหั... - Page 42 ศู น ย บ ริ ก ารลู ก ค า อี เ ลคโทรลั ก ซ ให บ ริ ก ารข อ มู ล รั บ แจ ง ซ อ ม แนะนำวิ ธ ี ก ารใช ส ิ น ค า...