Christie D4K40-RGB Installation And Setup Manual
Hide thumbs
Also See for D4K40-RGB:
- Technical reference (57 pages) ,
- Installation and setup manual (56 pages) ,
- Replacement instructions manual (17 pages)
Table of Contents
Quick Links
Table of Contents

Related Manuals for Christie D4K40-RGB


Summary of Contents for Christie D4K40-RGB
- Page 1 Installation and Setup Guide 020-102961-03 4K40-RGB D4K40-RGB, Roadie 4K40-RGB...
- Page 2 The warranty does not apply to any product where the serial number has been removed or obliterated. The warranty also does not apply to any product sold by a reseller to an end user outside of the country where the reseller is located unless (i) Christie has an office in the country where the end user is located or (ii) the required international warranty fee has been paid.
-
Page 3: Table Of Contents
Turning off the projector..........28 4K40-RGB Installation and Setup Guide–D4K40-RGB, Roadie 4K40-RGB 020-102961-03 Rev. 1 (08-2019) Copyright 2019 Christie Digital Systems USA, Inc. All rights reserved. ©... - Page 4 Running Auto Setup to optimize display settings......37 Configuring 4K40-RGB to work with Christie Link....... 37 Connecting devices and establishing communication.
- Page 5 Environmental........... . 51 4K40-RGB Installation and Setup Guide–D4K40-RGB, Roadie 4K40-RGB 020-102961-03 Rev. 1 (08-2019) Copyright 2019 Christie Digital Systems USA, Inc. All rights reserved. ©...
-
Page 6: Introduction
This projector is intended for use in a non-cinema environment. This projector must be operated in an environment that meets the operating range specification. Use only the attachments and/or accessories recommended by Christie. Use of others may result in the risk of fire, shock, or personal injury. -
Page 7: Installation Safety And Warning Guidelines
Possible hazardous optical radiation emitted from this product. (Risk group 3) • High leakage current present when connected to IT power systems. • Christie products must be installed and serviced by Christie qualified technicians. • Do not operate the product without all of its covers in place. •... -
Page 8: Ac Power Precautions
• ELECTRICAL and BURN HAZARD! Use caution when accessing internal components. • Only Christie qualified technicians are authorized to use the tools provided in the toolbox. AC power precautions Read all safety and warning guidelines before connecting to AC power. -
Page 9: Light Intensity Hazard Distance
E—Represents the top view of the projector. • F—Represents the side view of the projector. The following table lists the hazard distance for the Christie projector lens with the zoom adjusted to its most hazardous position. 4K40-RGB Installation and Setup Guide–D4K40-RGB, Roadie 4K40-RGB 020-102961-03 Rev. - Page 10 Permanent show installations containing Risk Group 3 laser-illuminated projectors must meet the following conditions: • Installed by Christie or by Christie-authorized and trained installers. Refer to the Laser Illuminated Projector - Class 1 Risk Group 3 Installation training (Course code: CF-LIPI-01) on the http://www.christieuniversity.com site.
-
Page 11: Product Labels
• Temporary show installations containing Risk Group 3 laser-illuminated projectors may be installed by Christie or sold or leased only to valid laser light show variance holders (laser light show manufacturers) for image projection applications. Such manufacturers may currently hold a valid variance for production of Class IIIb and IV laser light shows and/or for incorporation of the Risk Group 3 laser-illuminated projectors into their shows. - Page 12 Indicates the presence of a protective earth ground. Laser labels CLASS 1 LASER PRODUCT IEC 60825-1 FDA laser variance (US projectors only) 4K40-RGB Installation and Setup Guide–D4K40-RGB, Roadie 4K40-RGB 020-102961-03 Rev. 1 (08-2019) Copyright 2019 Christie Digital Systems USA, Inc. All rights reserved. ©...
-
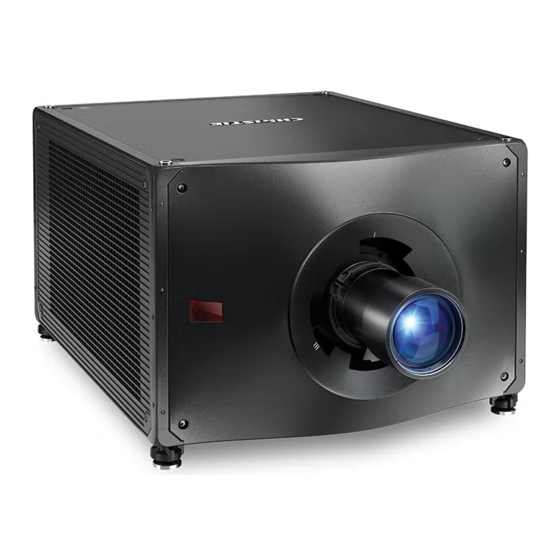
Page 13: Projector Overview
Christie TruLife electronics, the 4K40-RGB is the go-to solution for demanding, large venue events and applications. 4K40-RGB Installation and Setup Guide–D4K40-RGB, Roadie 4K40-RGB 020-102961-03 Rev. 1 (08-2019) Copyright 2019 Christie Digital Systems USA, Inc. All rights reserved. ©... -
Page 14: Contact Your Dealer
Introduction Contact your dealer Record the information about your projector and keep this information with your records to assist with the servicing of your projector. If you encounter a problem with your Christie projector, contact your dealer. Purchase record Dealer:... -
Page 15: Product Documentation
Introduction Product documentation For installation, setup, and user information, see the product documentation available on the Christie website. Read all instructions before using or servicing this product. D4K40-RGB and Roadie 4K40-RGB 1. Access the documentation from the Christie website: •... -
Page 16: Installation And Setup
A 30 A maximum rated, certified wall circuit breaker is required. It must be part of the building and easily accessible. Connect to AC power using the power cord provided with the projector. 4K40-RGB Installation and Setup Guide–D4K40-RGB, Roadie 4K40-RGB 020-102961-03 Rev. 1 (08-2019) Copyright 2019 Christie Digital Systems USA, Inc. All rights reserved. ©... -
Page 17: Projector Components
AC input For use with projector power cord. Breaker switch Circuit breaker switch to shut off AC power. 4K40-RGB Installation and Setup Guide–D4K40-RGB, Roadie 4K40-RGB 020-102961-03 Rev. 1 (08-2019) Copyright 2019 Christie Digital Systems USA, Inc. All rights reserved. ©... -
Page 18: Display Panel Components
Provides access to the list of test patterns. Input Displays the signal for the currently selected input. Provides access to the list of input signals. 4K40-RGB Installation and Setup Guide–D4K40-RGB, Roadie 4K40-RGB 020-102961-03 Rev. 1 (08-2019) Copyright 2019 Christie Digital Systems USA, Inc. All rights reserved. ©... -
Page 19: Ir Remote Keypad
The IR remote keypad controls the projector by way of wireless communications from a battery- powered infrared (IR) transmitter. Button Description Powers on the projector light source. Opens the aspect ratio dialog. 4K40-RGB Installation and Setup Guide–D4K40-RGB, Roadie 4K40-RGB 020-102961-03 Rev. 1 (08-2019) Copyright 2019 Christie Digital Systems USA, Inc. All rights reserved. ©... -
Page 20: Required Tools
Make sure the following tools are available during the installation. • 12 in. screwdrivers: Phillips #2 (magnetic) and flat • 2.5mm, 3mm, and 5mm hex drivers 4K40-RGB Installation and Setup Guide–D4K40-RGB, Roadie 4K40-RGB 020-102961-03 Rev. 1 (08-2019) Copyright 2019 Christie Digital Systems USA, Inc. All rights reserved. ©... -
Page 21: Preparing The Installation Site
5. Install the screws and tighten to a torque of 120 to 150 in-lb. The following shows the rigging handles installed when the projector is positioned in portrait orientation. 4K40-RGB Installation and Setup Guide–D4K40-RGB, Roadie 4K40-RGB 020-102961-03 Rev. 1 (08-2019) Copyright 2019 Christie Digital Systems USA, Inc. All rights reserved. ©... -
Page 22: Lifting And Positioning The Projector
Only use the holes located on the handles for installing the feet in portrait mode. 6. To assist with stability and prevent sway, Christie recommends installing two 2-inch ProBurger clamps on each handle. Orient the clamps on either side of the projector's center of gravity. -
Page 23: Installing The Projector Lens
2. Align the guides on the front cover and the lens marked by a red line. 4K40-RGB Installation and Setup Guide–D4K40-RGB, Roadie 4K40-RGB 020-102961-03 Rev. 1 (08-2019) Copyright 2019 Christie Digital Systems USA, Inc. All rights reserved. ©... - Page 24 The second click indicates the lens is fully locked in position. The top center label should face up and be aligned to the lens guide on the front cover. 4K40-RGB Installation and Setup Guide–D4K40-RGB, Roadie 4K40-RGB 020-102961-03 Rev. 1 (08-2019) Copyright 2019 Christie Digital Systems USA, Inc. All rights reserved. ©...
-
Page 25: Calibrating The Lens Motor
To calibrate the lens: 1. Select MENU > Configuration > Lens Settings > Lens Calibration. 2. Select Enter. 4K40-RGB Installation and Setup Guide–D4K40-RGB, Roadie 4K40-RGB 020-102961-03 Rev. 1 (08-2019) Copyright 2019 Christie Digital Systems USA, Inc. All rights reserved. ©... -
Page 26: Removing The Projection Lens
SHOCK HAZARD! Do not attempt operation if the AC supply is not within the specified voltage and current, as specified on the license label. 4K40-RGB Installation and Setup Guide–D4K40-RGB, Roadie 4K40-RGB 020-102961-03 Rev. 1 (08-2019) Copyright 2019 Christie Digital Systems USA, Inc. All rights reserved. ©... -
Page 27: Projector Led Status Indicators
Projector will proceed to shut down. AC off The AC power is off. 4K40-RGB Installation and Setup Guide–D4K40-RGB, Roadie 4K40-RGB 020-102961-03 Rev. 1 (08-2019) Copyright 2019 Christie Digital Systems USA, Inc. All rights reserved. ©... -
Page 28: Projector Led Shutter Indicators
6. With a framing pattern on screen, double-check projector leveling so the top edge of the image is parallel to the top edge of the screen. 4K40-RGB Installation and Setup Guide–D4K40-RGB, Roadie 4K40-RGB 020-102961-03 Rev. 1 (08-2019) Copyright 2019 Christie Digital Systems USA, Inc. All rights reserved. ©... -
Page 29: Adjusting Offset
The boresight adjustment balances the tilt of the lens mount to compensate for screen-to-projector tilt. 1. Close the shutter on the projector. 2. Unlock the three lens mount stabilization screws. 4K40-RGB Installation and Setup Guide–D4K40-RGB, Roadie 4K40-RGB 020-102961-03 Rev. 1 (08-2019) Copyright 2019 Christie Digital Systems USA, Inc. All rights reserved. ©... - Page 30 5. To focus the bottom boresight guide, adjust the blue boresight screw. Adjust the screw 1/4 inch. If you get to the end, further unlock the corresponding stabilization screw. 4K40-RGB Installation and Setup Guide–D4K40-RGB, Roadie 4K40-RGB 020-102961-03 Rev. 1 (08-2019) Copyright 2019 Christie Digital Systems USA, Inc. All rights reserved. ©...
-
Page 31: Optimizing The Integrator Zoom And Focus
Optimizing the integrator zoom and focus 1. From the Test Pattern menu, select the Integrator Rod test pattern. 4K40-RGB Installation and Setup Guide–D4K40-RGB, Roadie 4K40-RGB 020-102961-03 Rev. 1 (08-2019) Copyright 2019 Christie Digital Systems USA, Inc. All rights reserved. ©... - Page 32 3. Unlock the Zoom and Focus paddles. 4. Adjust the magnification using the Zoom paddle. Make sure you do not see any corners. 4K40-RGB Installation and Setup Guide–D4K40-RGB, Roadie 4K40-RGB 020-102961-03 Rev. 1 (08-2019) Copyright 2019 Christie Digital Systems USA, Inc. All rights reserved. ©...
-
Page 33: Adjusting The Fold Mirror
1. Set the projector to minimum power. 2. From the Test Pattern menu, select the Integrator Rod test pattern. 4K40-RGB Installation and Setup Guide–D4K40-RGB, Roadie 4K40-RGB 020-102961-03 Rev. 1 (08-2019) Copyright 2019 Christie Digital Systems USA, Inc. All rights reserved. ©... - Page 34 5. To make horizontal adjustments, use the orange knob labeled Horizontal. 6. To make vertical adjustments, use the purple knob labeled Vertical. 4K40-RGB Installation and Setup Guide–D4K40-RGB, Roadie 4K40-RGB 020-102961-03 Rev. 1 (08-2019) Copyright 2019 Christie Digital Systems USA, Inc. All rights reserved. ©...
-
Page 35: Adjusting Dmd Convergence
2. From the Test Pattern menu, select the RGB-4K-Convergence test pattern and display it full screen. 4K40-RGB Installation and Setup Guide–D4K40-RGB, Roadie 4K40-RGB 020-102961-03 Rev. 1 (08-2019) Copyright 2019 Christie Digital Systems USA, Inc. All rights reserved. ©... - Page 36 5. Use the Convergence test pattern to assist with adjusting the horizontal and vertical lines. Horizontal adjustments are controlled by adjusting knob 3. Vertical convergence and rotation are controlled by adjusting knobs 1 and 2. Christie recommends rotating a single knob a maximum of a quarter rotation before adjusting the second knob a quarter rotation.
-
Page 37: Aligning The Image With Lens Zoom And Focus
The system optimizes the active signal and displays a progress message on screen. Configuring 4K40-RGB to work with Christie Link Configure 4K40-RGB to work with Christie Link, which provides a fully integrated fiber solution for long range video transport. 1. Turn on 4K40-RGB. - Page 38 From the side panel home page, select Input. b) On the Input selection page, select the appropriate input marked Christie Link. More than one input source may be listed as Christie Link, depending on how many signals are being sent from Christie Link.
-
Page 39: Connecting Devices And Establishing Communication
The IMXB has a variety of ports that can be used for control, 3D sync, upgrading, retrieving interrogators, and connecting audio. 4K40-RGB Installation and Setup Guide–D4K40-RGB, Roadie 4K40-RGB 020-102961-03 Rev. 1 (08-2019) Copyright 2019 Christie Digital Systems USA, Inc. All rights reserved. ©... -
Page 40: Connecting A Video Source Using 3G Input Card
Physically connects a remote control to the projector. 3D Sync In/3D Sync Out Supported for 3D-enabled projectors. Ethernet Connects to the web user interface and can send Christie serial commands. RS232 Sends Christie serial commands using a standard RS232 serial cable. -
Page 41: Connecting A Video Source Using Dvi
TDPIC cards or one QDPIC card. Each DisplayPort input QDPIC card supplies one of two columns of a 4K input image. 4K40-RGB Installation and Setup Guide–D4K40-RGB, Roadie 4K40-RGB 020-102961-03 Rev. 1 (08-2019) Copyright 2019 Christie Digital Systems USA, Inc. All rights reserved. ©... -
Page 42: Connecting A Video Source Using Hdmi
One THIC card THIC card (in any slot). In this configuration, the HDMI input supplies the entire video raster. 4K40-RGB Installation and Setup Guide–D4K40-RGB, Roadie 4K40-RGB 020-102961-03 Rev. 1 (08-2019) Copyright 2019 Christie Digital Systems USA, Inc. All rights reserved. ©... -
Page 43: Connecting A Video Source Using Hbmic
Related information HBMIC video formats (on page 46) Connecting a video source using TSIC The Terra SDVoE (TSIC) input card accepts digital video data from a Christie Terra Transmitter. Part number: 144-132107-XX The input configuration listed below is supported. Input configuration Description... -
Page 44: Connecting A Video Source Using Hdbaset
Connecting to a computer or server Communicate with a remote computer, server, or an existing network using a RJ-45 cable. The RS232 port located on the IMXB faceplate uses Christie-proprietary protocol and is intended for Christie accessories or automation controllers only. -
Page 45: Configuring The Rs232 Port
Ethernet is setup to obtain an IP address automatically if a DHCP server is on the network, modify IP settings, or manually enter an address. Christie recommends using the Ethernet port on the IMXB as the HDBaseT port is limited to 100 Mb/s. You cannot change the IP settings using the web interface. -
Page 46: Signal Connectivity Specifications
The list of formats listed below are not exhaustive and other formats may be supported. For more information, contact Christie Technical Support. For a list of supported Christie Link video formats, see the Christie Link User Manual (P/N: 020-102234-XX). HBMIC video formats Identify the video formats for the HBMIC card. -
Page 47: Tsic Video Formats
Identify the video formats for the Terra SDVoE (TSIC) input card. The TSIC (HDMI 2.0) interface supports HDCP 1.x and 2.2. 4K40-RGB Installation and Setup Guide–D4K40-RGB, Roadie 4K40-RGB 020-102961-03 Rev. 1 (08-2019) Copyright 2019 Christie Digital Systems USA, Inc. All rights reserved. ©... -
Page 48: Tdpic Video Formats
Cannot use both TDPIC inputs at once; requires two separate TDPICs 3840x2160 1920 1080 50, 60 RGB/4:4:4 8/10bpc — 4K40-RGB Installation and Setup Guide–D4K40-RGB, Roadie 4K40-RGB 020-102961-03 Rev. 1 (08-2019) Copyright 2019 Christie Digital Systems USA, Inc. All rights reserved. ©... -
Page 49: Ddic Video Formats
Sampling Bit-depth 1280x720 1280 24, 25, 30, 50, 60 RGB/4:4:4/4:2:2 8/10/12bpc 1920x1080i 1920 1080 50, 60 RGB/4:4:4/4:2:2 8/10/12bpc 4K40-RGB Installation and Setup Guide–D4K40-RGB, Roadie 4K40-RGB 020-102961-03 Rev. 1 (08-2019) Copyright 2019 Christie Digital Systems USA, Inc. All rights reserved. ©... -
Page 50: 3Gic Video Formats
1920 1080 24, 25, 30 RGB/4:4:4 10/12bpc Level-A recommended 4096x2160 2048 1080 50, 60 4:2:2 10bpc Level-A recommended 4K40-RGB Installation and Setup Guide–D4K40-RGB, Roadie 4K40-RGB 020-102961-03 Rev. 1 (08-2019) Copyright 2019 Christie Digital Systems USA, Inc. All rights reserved. ©... -
Page 51: Regulatory
China Ministry of Information Industry (along with 7 other Government Agencies) Order No.32 (01/2016) on the control of pollution caused by electronic information products, hazardous 4K40-RGB Installation and Setup Guide–D4K40-RGB, Roadie 4K40-RGB 020-102961-03 Rev. 1 (08-2019) Copyright 2019 Christie Digital Systems USA, Inc. All rights reserved. ©... - Page 52 Regulation (EC) No. 1907/2006 on the registration, evaluation, authorization and restriction of chemicals (REACH) and the applicable official amendment(s). 4K40-RGB Installation and Setup Guide–D4K40-RGB, Roadie 4K40-RGB 020-102961-03 Rev. 1 (08-2019) Copyright 2019 Christie Digital Systems USA, Inc. All rights reserved. ©...
- Page 53 Corporate offi ces Worldwide offi ces Christie Digital Systems USA, Inc. Africa United Kingdom Columbia Korea (Seoul) ph: 714 236 8610 ph: +27 (0)11 510 0094 ph: +44 (0) 118 977 8000 ph: +57 (318) 447 3179 ph: +82 2 702 1601 Christie Digital Systems Canada Inc.