
Related Manuals for UFO Quasar UFOQUA3080-A


Summary of Contents for UFO Quasar UFOQUA3080-A
- Page 1 UFO LIGHTING FIBER OPTIC & LED LIGHTING SYSTEMS REVISION QUASAR ILLUMINATOR RANGE USER GUIDE PLEASE READ THIS USER GUIDE BEFORE INSTALLING OPERATING OR PERFORMING MAINTENANCE ON THE ILLUMINATOR UNIT...
- Page 2 INTRODUCTION Thank you for purchasing this UFO illuminator To ensure that the illumaintor is set up optimally and gives a long service life, please read this user guide before installing, operating or performing any maintenance on the unit. Please keep this user guide for future reference.
- Page 3 Warning: Never look directly at the luminaire through the fiber port of the illuminator. Warning: The luminaire should be positioned so that staring into the luminaire at a distance closer than 2.7 meters (8.9 ft) in not expected. UFO LIGHTING...
-
Page 4: Installation
INSTALLATION MODEL TYPES The Quasar LED illuminator incorporates a range of LED arrays to provide optimum display and illumination within the following optical range. Model Color Temperature Lumen Output UFOQUA3080 >80 3000°K 17974 UFOQUA4080 >80 4000°K 18438 UFOQUA5080 >80 5000°K 18653 UFOQUA5780 >80... - Page 5 Plug the IEC connector into the IEC socket and then plug the mains connector into a local mains supply. Switch on power the mains indicator will illuminate and the illuminator is ready for use. If no light is produced consult the TROUBLESHOOTING section in this manual. UFO LIGHTING UFO LIGHTING...
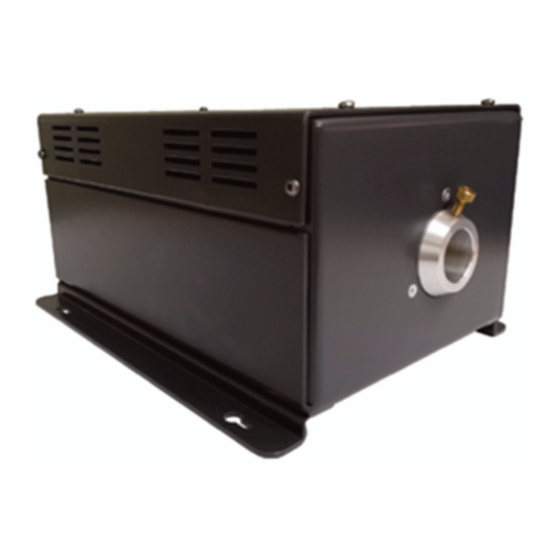
- Page 6 INSTALLATION CONNECTION FOR REMOTE MANUAL OPERATION This connection method allows the luminaire to be dimmed remotely using a simple passive potentiometer control. There are three connections required – the fiber port, the remote dimmer cable and the mains supply cable. The fiber port should be connected first before the mains supply. Connect and secure the fiber optic connector into the collar and the front of the unit and secure using the M5 knurled locking screw.
- Page 7 • Use a 10kΩ linear potentiometer connected across pins 4, 5 and 7 as detailed on page 6. See Accessories in Technical Specification section at end of this document for UFO CVD1 • The CVD1 is designed to be fitted to the back of a one gang faceplate...
- Page 8 INSTALLATION FOR 0 10 V ( CURRENT SOURCE ) OPERATION CONNECTION There are three connections required – the fiber port, the 0-10V cables and the mains supply cable. The fiber port should be connected first before the mains supply. Connect and secure the fiber optic connector into the collar and the front of the unit and secure using the M5 knurled locking screw.
- Page 9 5. WHITE/BLUE 6. BLUE 7. WHITE/BROWN ORANGE/WHITE -VE 8. BROWN GREEN/WHITE +VE RJ45 CONNECTOR A (LEFT HAND) - DIMMING RJ45 Pin No. Wire Color Polarity Function Green/White Positive (10V) 0-10V Current Sink Dimming Orange/White Negative (0V) 0-10V Current Sink Dimming UFO LIGHTING...
- Page 10 • Always use an approved CAT5 cable • Ensure correct connection polarity at all times • See Accessories in Technical Specification section at end of this document for UFO CVD3 compliant dimmer • The CVD3 is designed to be fitted to the back of a one gang faceplate...
-
Page 11: Operation
All Quasar models can be manually controlled as detailed in the following section. WHITE LIGHT MODELS On power up the display will momentarily display “Universal Fibre Optics” with the current model version letter, then the firmware version (example below) before displaying the current status of the unit. UFO LIGHTING... - Page 12 OPERATION USER CONTROLS DECORATIVE MODELS On power up the display will momentarily display “Universal Fibre Optics” together with the current model version letter, then the firmware version (example below), then it will go into initialising whilst it checks the decorative wheel, before displaying the current status of the unit. The model version code letters displayed momentarily on power up are as follows: 1.
- Page 13 Press enter to select When set to Master, Use + & - buttons to Decorative Twinkle Wheel Reset Options None allows unit to be display YES or NO. manually reset Press enter to select UFO LIGHTING...
- Page 14 OPERATION Quasar Model Version Main Menu Sub Menu Description Instructions Use + & - buttons to Decorative Color Wheel DMX Address None Sets DMX address display chosen address. Press enter to select When set to Master, Decorative Color Wheel Control Mode Master allows manual control Press enter to select of illuminator Allows DMX control of...
-
Page 15: Manual Operation
The Quasar twinkle wheel has an open cut out segment. When moving, the wheel rotates backwards and forwards across the solid section of the wheel to ensure a smooth twinkle effect. When the wheel is stopped, the wheel will turn to stop at the open section for maximum uninterrupted light output. UFO LIGHTING... - Page 16 OPERATION COLOR WHEEL CONTROL With the luminaire in Master Control Mode, the decorative wheel can be controlled via the main and sub menus. Sub menu options are as follows: SELECT PROGRAM MODE Menu Sub Menu Description Select Program PA01 Color wheel snap to color 0 (Clear/White) Select Program PA02 Color wheel snap to color 10/color 1 (Blue)
-
Page 17: Dmx Operation
• For all DMX operation modes the luminaire DMX address must be set using the DMX Address menu and the luminaire must be set to DMX in the Control Mode sub menu. Control Mode > > > > MENU SCROLL UP DOWN SELECT DMX Address > > MENU SCROLL UP DOWN TO SELECT ADDRESS UFO LIGHTING... - Page 18 OPERATION DMX OPERATION Applicable to Address DECORATIVE VERSION - 5 CHANNEL DMX CONTROL Channel Function Desired Effect Model Value LED Dimming 0-255 0-100% dimming across range Color wheel variable colour 1 Color Wheel Color 1 (Clear/White) displayed Color wheel variable colour 2 Color Wheel Color 2 (Blue) displayed Color wheel variable colour 3...
- Page 19 1 CHANNEL 0-10V CONTROL EMERGENCY WHITE LIGHT Chan 0-10V Value Function Applicable to Model Desired Effect (DC Volts) LED Dimming Emergency White Light Max. light output LED Dimming Emergency White Light No light output LED Dimming Emergency White Light 1.5-10 Min. to max. light output UFO LIGHTING...
-
Page 20: Master/Slave Operation
OPERATION 1-10 V OPERATION Only Quasar standard white light models can be 1-10V (current sink) dimmed as detailed in the Programmable Function Table in the preceding section and in the following sections. NOTE: • For all 1-10v current sink dimming the luminaire must be set to 1-10V in the Control Mode sub menu. -
Page 21: Maintenance Log
MAINTENANCE MAINTENANCE LOG Date Maintenance Undertaken Note: A record of all maintenance MUST be kept in the table above, indicating what maintenance was undertaken and when. This MUST be dated for warranty purposes. UFO LIGHTING... -
Page 22: Troubleshooting
& LCD display is out IEC blown fuse Check fuse & replace if necessary Mains supply cable faulty Get replacement cable from UFO Select dim level option & manually set Unit in Master mode & dimming at 0% dimming level ALL MODELS... - Page 23 - if there is varying 0-10V voltage, change dimmer for a current sink type 1-10V MODELS Dim level changes with remote Incompatible current sink dimmer Contact UFO dimming, light out put range inaccurate or reduced 0-10V MODELS Check 0-10V control voltage at controller &...
-
Page 24: Technical Specifications
White light - 308mm x 192mm x 158mm (12.1” x 7.7” x 6.2”) Dimensions (L x W x H) Decorative - 308mm x 221mm x 187mm (12.1” x 8.7” x 7.4”) UFO Unidim CVD1 - Remote Manual Dimmer c/w plate Accessories UFO Unidim CVD3 - Remote Current Sink Dimmer c/w plate... - Page 25 NOTES UFO LIGHTING...
- Page 26 NOTES UFO LIGHTING...
- Page 27 NOTES UFO LIGHTING...
- Page 28 Europe • DESIGN SPECIFY BUILD INSTALL UFO Licht GmBH Universal Fiber Optic Lighting USA LLC Universal Fibre Optics Ltd Raum 2.38, Friendsfactory AG, 6119A Clark Center Avenue Home Place Gutenberstraße 1, Sarasota, FL34238 Coldstream, TD12 4DT Munchen 85737, Deutschland...