
Related Manuals for Kaba E-Flash 680


Summary of Contents for Kaba E-Flash 680
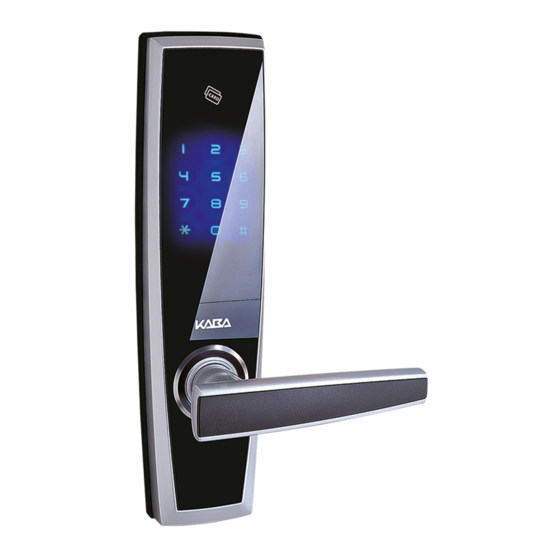
- Page 1 E-Flash 680 Please read these instructions carefully before you use the product. Functions and design of this product are subject to change without prior notice due to product improvement.
- Page 2 ● Disassembly, rework and reverse engineering are prohibited without a written approval of KABA except for normal installation of the product. ●...
-
Page 3: Table Of Contents
Table of Contents Components 3-16.Open a Door From Inside 3-17.Lock a Door From Inside Name of Parts 3-18.Lock a Door From Outside 2-1.Outside Lock (Front Body) 3-19.Turn on Wireless Communication 2-2.Inside Lock (Main Body) 3-20.Turn off Wireless Communication 3-21.Language Setting How to Use 3-22.Passage Mode Setting 3-1.Factory Reset... - Page 4 To ensure your own safety and prevent any damage or accident caused by the inappropriate use of the product, please read carefully before you start to use the product. Children should be Safety Regulations under the guidance of an adult to ensure the safety use of the product. Keep this manual in a safe place for future reference.
- Page 5 Installation Do not press a button too Do not wash the product with Do not disassemble, reassemble or hard or use a foreign object water as electronic circuit may repair the product by yourselves. to hit it. This may cause the break down in contact with water.
- Page 6 N. B for Installation Do not clean the product Do not wear gloves Keep the keypad clean Use a new alkaline battery with direct contact with to touch the keypad and away from foreign (AA size). Otherwise, it water, or wipe it with as the system substance at all times may cause the malfunction...
-
Page 7: Components
Components Basic Components (EF680) screw (4 nos) Strike Box(2nos) mortise Strike user manual Option Outside part (front body) inside part (main body) screw (3nos) screw (4nos) battery(AA) (4 nos) remote control ГЛ°ЧЦРП Г ± Spindle ° К Ц Р П battery(AAA) (2 nos) Product components are ЈU N I T S Јm m Ј... -
Page 8: Name Of Parts
Name of Parts Outside Lock (front body) Keypad Card Reader Emergency Power Supply Socket For you to enter a Identifies a card key. number such as a PIN When the battery is fully discharged, a 9V code, user ID and menu battery can be used to supply power to operate selection, it also the product temporarily as an emergency... -
Page 9: 2-2.Inside Lock (Main Body)
Inside Lock (Main Body) Battery Cover Management Button [M] Reset a admin PIN code and factory default. Privacy Mode Light Clear Button [E] Displays the status of the Privacy Mode. Delete all information (except admin PIN Privacy Mode Switch code) and reset factory default. When you slide the [Privacy Mode] switch to the right and Mortise press the switch, it can either set or clear the privacy mode. -
Page 10: How To Use
How to Use Factory Reset Press [M] and [E] button and Remove one piece Open the battery cover. put back the battery of battery simultaneously.Voice guide Voice guide: “Please Input PIN Code” Input 8-digit admin PIN code and press “#” button Please to touch the The system will be restart after factory reset keypad to make sure... -
Page 11: 3-2.Reset Admin Pin Code
Delete All User Information Reset Admin PIN Code Open the battery cover and Input 8-digit admin PIN Input a new 8-digit PIN Open the battery cover and press [E] for 10 seconds code and press “#” button code and press “#” button press [M] for 10 seconds Voice guide Voice guide... -
Page 12: 3-4.How To Enter The Menu
How to Enter the Menu Enter the menu by admin PIN code Enter the menu by admin card key Input admin PIN code and press “#” button Swipe the admin card key on the card reader Voice guide “2 Card Key Management, 3 PIN Code Management, 4 Wireless Communication Setting, 5 System Setting, press Voice guide... -
Page 13: 3-5.Instruction Overview
Instruction Overview Card Management Wireless Communication Setting Card key General card Swipe the card key Card Input user ID management key registration on the card reader registration Turn on wireless Wireless Communication communication Swipe the card key Temporar y card Setting Input user ID... -
Page 14: 3-6.Card Key Registration
Card Key Registration Press 1 and # Enter the menu and press Swipe a card key on the Choose the user category on the keypad 2 and # button on the keypad card reader Voice guide Voice guide Voice guide “Please input user ID”... -
Page 15: 3-7.Delete An Individual Card Key
Delete an Individual Card Key Delete All Card Keys Input the user ID you wish Enter the menu and press 2 Enter the menu and press 2 Choose the user category to delete and press # button and # button on the keypad and # button on the keypad Voice guide Voice guide... -
Page 16: 3-9.Pin Code Registration
PIN Code Registration Enter the menu and press 3 Press 1 and # on the Input 8-digit PIN code twice Choose the user category and # button on the keypad keypad Voice guide Voice guide Voice guide “Please input user ID” “1 PIN code registration, 2 “User PIN code, one-time PIN Voice guide... -
Page 17: 3-10.Delete An Individual Pin Code
Delete an Individual PIN Code Delete All PIN Codes 3-11 3-10 Enter the menu and press 3 Input the user ID you wish Enter the menu and press 3 Choose the user category and # button on the keypad to delete and press # button and # button on the keypad Voice guide Voice guide... -
Page 18: 3-12.Remote Control Registration
Remote Control Registration 3-12 Press two button on remote control Enter the menu and press 4 and # Press 3 and # on the keypad simultaneously button on the keypad Voice guide “Please input user ID” Voice guide Voice guide “1 Turn on wireless communication, 2 Turn “Operation succeeded”... -
Page 19: 3-13.Remote Control Deletion
Remote Control Deletion 3-13 Sound Volume Setting 3-14 Input the user ID and Enter the menu and press 4 Enter the menu and press 5 Choose the sound volume press # button and # button on the keypad and # button on the keypad category Voice guide Voice guide... -
Page 20: 3-15.Open A Door From Outside
3-15 Open a Door From Outside Open a Door with a card key Open a Door with a PIN code Open a Door with a Remote Control 1.Swipe a registered card key 1.Press [ ] button on the registered 1.Touch the keypad with your palm on the card reader remote control 2. -
Page 21: 3-16.Open A Door From Inside
3-16 Open a Door From Inside 3-17 Lock a Door From Inside A door can be opened when you turn the [LOCK] Mode Open a Door with a Mechanical Key door handle downward 1.Slide the handle cover 2.Insert the mechanical key and rotate 90 degree. Then push down the handle to unlock the door. -
Page 22: 3-18.Lock A Door From Outside
Lock a Door From Outside 3-18 [LOCK] Mode [PASSAGE] Mode In [PASSAGE] mode, door will not be locked when With a built-in sensor in the mortise, a door will be the door is closed. locked automatically once the door is closed. Voice guide “Passage mode”... -
Page 23: 3-19.Turn On Wireless Communication
3-19 Turn on Wireless Communication 3-20 Turn off Wireless Communication Enter the menu and press 4 Press 1 and # on the Enter the menu and press 4 Press 2 and # on the and # button on the keypad keypad and # button on the keypad keypad... -
Page 24: 3-21.Language Setting
Language Setting 3-21 Press 3 and # on the Enter the menu and press 5 Choose the language and # button on the keypad keypad category Voice guide Voice guide Voice guide “2 Sound volume setting, “1 Chinese, 2 English” “... -
Page 25: 3-24.Trespassing/Damage Alarm
3-24 Trespassing/Damage Alarm When the door is securely locked, an alarm will be activated if an outsider tries to break into the premises by forcibly opening a door or damaging the door lock. Damage alarm Trespassing alarm An alarm will be activated if an outsider An alarm will be activated if an outsider tries to break into the premises by tries to break into the premises by... -
Page 26: 3-25.Keypad Lockout Alarm
Keypad Lockout Alarm 3-25 If an wrong PIN code or card key is entered for 3 times consecutively, this will activate the alarm and the lock will The alarm will last for 15 minutes and the go into lockout for 15 minutes. The alarm will deactivate automatically. -
Page 27: Trouble Shooting
Trouble Shooting How to Replace a Battery When the product is being used and the battery needs to be replaced, the battery change LED light on the lower left will illuminate if the keypad is touched. Voice guide Please change the battery Replace the battery Open the cover of the main body Unfasten the screw on the battery cover by... -
Page 28: 4-2.Solutions To Malfunction Of The Product
Solutions to Malfunction of the Product How to use a 9V battery ● If the product stops working due to the battery discharge, insert a 9V square battery and use a password or a card key to open the door. ●... -
Page 29: 4-3.Trouble Shooting
Trouble Shooting 4- 3 If the product is not working properly, please ensure that you have read the following table carefully before you go to contact After Sales Service. If a problem persists, please contact After Sales Service for further assistance. Classifi... - Page 30 Classifi Problem Check Points cation A card key is lost In case a card key is lost, delete all the card keys and re-register the remaining of the card keys to prevent outsiders from using the lost card No sound Check if the volume adjusting switch is set as Mute When you open a door with Check if the Inside Compulsory Lock is set from inside, a door cannot be...
-
Page 31: Product Specification
Product Specification Part Standard Remark Front Body 26.9(D) 74(W) 285(H) Zinc die casting Zinc die casting Main Body 27.9(D) 74(W) 285(H) Rated Voltage DC 6V Can use 1 year on a basis of using 10 times per day (can use 10-month durability if it is a model with remote controller) Working Temperature -15 ~ 55...