
Related Manuals for Kaba ILCO Generation E-760 Series


Summary of Contents for Kaba ILCO Generation E-760 Series
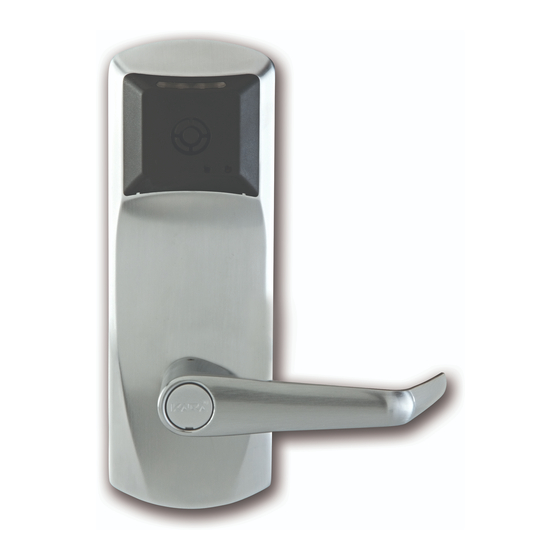
- Page 1 ILCO Generation E-760 Series ILCO 770 Series ILCO 790 Series INSTALLATION GUIDE ILCO Generation E-760/770/790 Series Retrofit Installation Guide - Unican System 700 to E-760/770/790 PK2915-T...
- Page 2 © 2014 Kaba Ilco, Inc. All trademarks and registered trademarks are the property of their respective owners. PK 29 15 -T 07 _20 14 E- 7 60 /77 0/7 90 SE R I ES R ET R OF I T I NS T ALL AT I ON GU I DE...
- Page 3 1 • CHE CKL I S T A N D E XP LO D E D VIE WS ASM Office: Use L3, L4 ASM/ESM Storeroom: Use L2, L4 Install L3 on L4, then slide both Install L2 on L4, then slide both parts onto the thumbturn together.
- Page 4 These instructions are designed for use by maintenance professionals or lock installers who are familiar with common safety practices and competent to perform the steps described. Kaba Ilco is not responsible for damage or malfunction due to incorrect installation, however arising.
- Page 5 System 700 components for support plate to the front housing, and remove the return shipment to Kaba Ilco. support plate from the door. PK 29 15 -T 07 _20 14 E- 7 60 /77 0/7 90 SE R I ES R ET R OF I T I NS T ALL AT I ON GU I DE...
- Page 6 4 • DRI L L N E W M O U N T IN G H O LES IN DO OR Insert the metal jig spindles in the hubs on the mortise, so that the guides for the two holes are at the top, and the guide for the single hole is at the bottom.
- Page 7 5 • INSTALL THE E-760/770/790 OUTSIDE HOUSING AND INSIDE TRIM ASSEMBLY Install the Outside Housing (For E-760/770/790 with mechanical override see page 12) Insert the slotted end of the short half-spindle (G) into the lever on the outside housing (at an angle of 45°), until it clips in place. Insert the grooved end of the thumbturn spindle (E) in the upper hub of the outside housing.
- Page 8 5 • INSTALL THE E-760/770/790 OUTSIDE HOUSING AND INSIDE TRIM ASSEMBLY Install the Outside Lever Access Hole Assemble the lever on the outside housing, in the horizontal rest The lever is field reversible. If the hand- position appropriate to the handing of the door as shown. Simply push ing is incorrect, insert a small pick or the lever onto the tube until it clicks in place.
- Page 9 6 • TE S T THE O PE R AT I O N OF T HE E - 760/77 0/ 790 L O CK Test the Lock Before Programming Caution! Perform the following procedures in order, Normal Entry: Verify that the deadbolt is retracted. Use the Test key- with the door OPEN unless otherwise indicated.
- Page 10 7• P R OGRA M T H E E - 760 / 7 7 0 /79 0 LOC K After retrofitting a door with an E-760/770/790 lock, transfer the security information from a neighbouring lock to the new lock by using the Reset Addresses function (see Reference Manual).
- Page 11 8 • OPE RATI N G T H E EL E CT R O NIC O VER RID E Steps to activate the E-760/770/790 electronic override: 1. Insert the communication cable into the lock. Wait 2 seconds, then connect the cable to serial port A of the FDU. 2.
- Page 12 9 • Installing the key-in-knob mechanical override model Parts and Tools List Tools Required: Cylinder (J, provided with lock) or equivalent ( T ) Small flat scewdriver (less that 1/8") Diagram of lock: (A) Lock housing (E) Drive tube Cylinder (B) Inside drive hub (F) Lever catch (K) Cylinder plug...
- Page 13 9 • Installing the key-in-knob mechanical override model Upon unpacking, the E-760/770/790 lock housing with mechanical override should look like the diagram below with: (A) The small indents on the cross of the override Important: Assemble the lever, cylinder and lock shaft in line Horizontally components before affixing the entire unit to the door.
- Page 14 9 • Installing the key-in-knob mechanical override model Preparing the lever handle and cylinder for Steps to attach the lever handle to the installation lock housing *NOTE: the position of the key is 3. Insert the cylinder (J) without key (N) into the lever handle very important (H) (see Fig.3) 6.
- Page 15 9 • Installing the key-in-knob mechanical override model Attaching the Lever Handle to the Lock (with the key as shown in Fig. 6 & Fig. 7) 7. Fit the lever handle (H) onto the drive tube (E) see page 12. If it is not possible to turn the key (N) counter-clockwise It should rest approximately 1/16"...
- Page 16 9 • Installing the key-in-knob mechanical override model Verify the attachment of the lever handle Test the mechanical override function (Complete all tests in Section 4, pages 14 & 15 after lock is assembled on the door) Very Important: To verify that the lever handle has been correctly attached to the housing: * This test can only be performed when the lock is not affixed to the door.
- Page 17 9 • Installing the key-in-knob mechanical override model Test the Mechanical Override Function (continued) How to change lock cylinders 23a. Loosen the set screw (01) to free the lever using Allen Key Verify the functionality of the override after the (P1) (Approx.
- Page 18 9 • Installing the key-in-knob mechanical override model How to change lock cylinders (continued) Important: The Key Override itself does not retract the latch or deadbolt. Do not use too much force when turn- 31. Re-insert the cylinder plug (K) (Fig. 19) ing the key as this may damage the unit.
- Page 19 9 • Installing the key-in-knob mechanical override model The Recodable Cylinder with 3 different keys (for E-760/770/790 Series with override only) Fig. 22 Important: Read the following instructions before using Right-handed lock any of the 3 keys supplied (Shown in Fig. 21) The E-760/770/790 with a recodable cylinder can be operated with three different keys.
- Page 20 Kaba Ilco Inc. 7301 Boul. Décarie Montréal (QC) H4P 2G7 Technical Support: 1.514.340.9025 Customer Service: T: 1.514.735.5410 F: 514.735.6589 General Information: www.kabalodging.com Online Consumable Orders: www.ilcostore.com To access all of our easy steps, please visit our Support Website: www.ilcosupport.com...