
Related Manuals for Philips CED1700/93


Summary of Contents for Philips CED1700/93
- Page 1 Register your product and get support at www.philips.com/welcome User manual ZH-CN ZH-TW Manual del usuario PT-BR Manual do Usuário CED1700...
-
Page 2: Table Of Contents
Contents 1 Important Safety Notice Introduction What’s in the box Overview of the main unit Overview of the remote control 2 Get started Install the car audio Install remote control battery Turn on Set date and time 3 Listen to radio Tune to a radio station Store radio stations in memory Tune to a preset station... -
Page 3: Important
® The Bluetooth word mark and logos are registered trademarks owned by Bluetooth SIG, Inc. and any use of such marks by Philips is under license. Manufactured under license from Dolby Laboratories. “Dolby” and the double-D symbol are trademarks of Dolby Laboratories. -
Page 4: Introduction
Philips reserves the right to change products at any time without being obliged to adjust earlier supplies accordingly. Congratulations on your purchase, and welcome to Philips! To fully benefit from the support that Philips offers, register your product at www.philips.com/welcome. Introduction... -
Page 5: What's In The Box
Besides, you can make/receive phone calls with Bluetooth-enabled devices and quickly find the destination you seek with external GPS navigation box (Philips model CEA100). What’s in the box Check and identify the contents of your package: a Main unit and front panel... -
Page 6: Overview Of The Main Unit
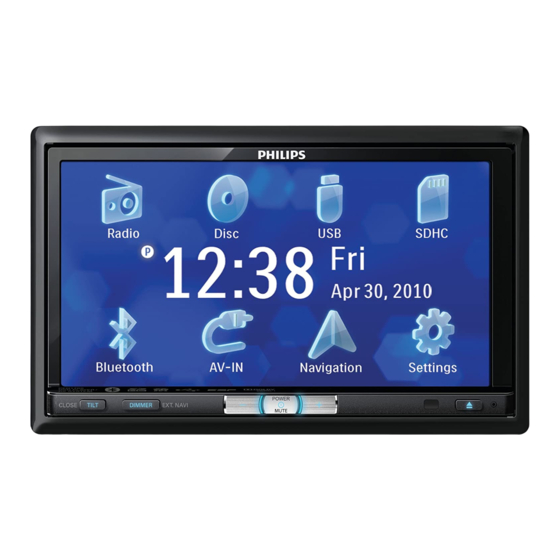
Overview of the main unit a RESET • Open the front panel to insert/eject disc/card. c Remote sensor d Touch panel /MUTE • Turn the unit on or off. • Turn mute on or off. f +/- • Increase/decrease volume. g DIMMER •... - Page 7 i Built-in microphone j SD/SDHC/MMC card slot k Disc slot...
-
Page 8: Overview Of The Remote Control
Overview of the remote control • Mute or unmute audio. • Open the front panel to insert/eject disc/card. c VOLUME +/- • Adjust volume. /REJECT • Terminate call. • Reject incoming call. • Return to previous menu or exit. • Adjust repeat mode. -
Page 9: Get Started
These instructions are for a typical installation. However, if your car has different requirements, make the corresponding adjustment. If you have any questions regarding installation kits, consult your Philips car audio dealer. Caution • This unit is designed for negative ground (earth) 12 V DC operation only. - Page 11 Black wire A metal surface of the First connect the black ground (earth) lead, then connect the yellow and red power supply leads. Red wire The +12V power terminal which is live in the accessory (ACC) position of the ignition switch If there is no accessory position, connect to the +12V car battery terminal...
- Page 12 R-CH L-CH Connector/ Connect to/with Obeject Pink wire Extension wire 2.5m extension Parking brake (-) wire(Not included) R-CH L-CH 8 9 0 ! " Brake switch Ground ISO wires Grey wire § & Connected in step 1 above. Rear line out Left/ Right...
- Page 13 Connect the radio antenna to the car antenna. Connect external navigation box This unit supports GPS navigation by connecting Philips CEA100 external GPS navigation box. Note • Please consult your Phillips dealer or distributer to purchase the CEA100 external navigation box.
-
Page 14: Install Remote Control Battery
• Since the unit cannot be used if the dashboard opening’s slant angle is above 20 degrees: Ensure that the horizontal slant of the car dashboard opening is between 0 and 20 degrees. Slide the unit into the dashboard until a click sound is heard. -
Page 15: Turn On
Turn on Caution • Risk of road accidents! Never watch video or adjust settings while you drive. Press to turn on the unit. » The available OSD (On-Screen Display) languages are displayed. Touch a language to select. » The OSD language is changed to the selected language immediately. -
Page 16: Listen To Radio
3 Listen to radio Tune to a radio station Touch to display home menu. Touch [Radio]. » Radio screen displays. Touch on FM or AM repeatedly on the left of the screen to select band: • FM band options: FM1, FM2, FM3 •... -
Page 17: Play With Rds
Play with RDS The RDS (Radio Data System) function operates only in areas with FM stations broadcasting RDS signals. If you tune to an RDS station, an RDS icon and the station name are displayed. Activate AF/TA/REG/CT functions Under radio mode, Touch . »... - Page 18 Religion Religion Phone In Phone In Travel Travel Leisure Leisure Jazz Jazz Music Country Country Music Nation M National Music Oldies Oldies Music Folk M Folk Music Document Documentary Test Alarm Test Alarm Alarm...
-
Page 19: Play
4 Play Load discs You can play video, audio or images stored on the following discs: • DVD video, DVD-R, DVD-RW • • Audio CD, CD-R, CD-RW Note • Ensure that the disc contains playable content. Insert the disc into the disc slot with label side facing up. -
Page 20: Insert Sd/Mmc Card
Insert SD/MMC card Note • Ensure that the card contains playable content. Press the button on the front panel. » front panel opens. Insert the card into the card slot until a click sound is heard. » Play starts automatically. Remove the SD/MMC card Press the button to open the front panel. -
Page 21: Search Within A Title/Folder
Search within a title/folder Search by step Touch anywhere on the screen to display control bar. Touch to skip to the previous or next chapter/track. Direct search Touch anywhere on the screen to display control bar. Touch on the left lower corner of the screen. -
Page 22: Rotate Pictures
• You may also press DVD TITLE on the remote control repeatedly to select subtitle language. Rotate pictures When you view pictures, touch anywhere on the screen to display control bar. Touch repeatedly to rotate the picture. Zoom You can zoom in pictures for a close view. During viewing pictures, touch anywhere on the screen to display menu bar. -
Page 23: Play With Bluetooth Device
5 Play with Bluetooth device You can make or receive phone calls with Bluetooth-enabled phones through the unit. You can also listen to music from a Bluetooth- enabled device. Pair the Bluetooth-enabled devices To connect your Bluetooth device to the unit, you need to pair the device to the unit. -
Page 24: Receive Call
» The dial screen displays. Touch number icons directly to input phone number. • Touch to delete last input • Touch to access Bluetooth option menu. • Touch to go back to previous screen. After the phone number entered, touch »... -
Page 25: Adjust Sound
In Bluetooth menu, touch » The option menu is displayed. Touch an option to change the setting. 6 Adjust sound Adjust volume Press +/- on the front panel to increase/ decrease volume. Mute During play, press /MUTE on the front panel. -
Page 26: Adjut Fader/Balance
Touch to select an EQ. Touch to adjust below settings: • [Bass] bass range: -15 to +15 • [Mid] middle range: -15 to +15. • [Treb] treble range: -15 to +15 • [LPH] low pass filter range: 60Hz, 80Hz, 100Hz, 200Hz. •... -
Page 27: Adjust Settings
7 Adjust settings Adjust general settings Touch to display home menu. Touch [Settings]. » Setting menu displays. Touch to access 2nd page. Touch on an option to display/select the option. General Options Description settings [Dimmer] [High] / [Mid- Turn on the screen dle] / [Low] dim high/middle/ low. -
Page 28: Others
8 Others Listen to other devices You can connect an external audio/video device to the unit. Connect the car audio to the device through the REAR OUT L/R connector (see “Connect wires” section) Touch to display the home menu. Touch [AV-IN]. Operated the connected the device (see the instructions manual of the device). -
Page 29: Product Information
If the fuse gets damaged immediately after it has been replaced, there may be an internal malfunction. In such case, consult your Philips dealer. 9 Product information Note • Product information is subject to change without prior notice. General Power supply... - Page 30 System DVD / CD audio / MP3 system Frequency response 20 Hz - 20k Hz Signal/noise ratio >75dB Total harmonic Less than 1% distortion Channel separation >55dB Video signal format NTSC only Video output 1 +/- 0.2V Tuner Frequency range - FM 87.5 - 108.0 MHz (Europe) Frequency range - 522 - 1620 KHz...
-
Page 31: Troubleshooting
If you encounter problems when using this apparatus, check the following points before requesting service. If the problem remains unsolved, go to the Philips web site (www. philips.com/welcome). When you contact Philips, ensure that the apparatus is nearby and the model number and serial number are available. -
Page 32: About Bluetooth Device
• Disc is upside down. Ensure the printed side is upwards. • Disc is dirty. Clean the disc with a clean, soft, lint-free cloth. Wipe the disc outwards from the center. • Disc is defective. Try another disc. • incompatible disc is used. Try another disc. -
Page 33: Glossary
11 Glossary Bite rate The max data transfer through the USB port. Bluetooth ® Bluetooth is a short-rang wireless protocol that is meant to allow mobile devices to share information and applications without the worry of cables or interface incompatibilities. The name refers to a Viking King who unified Denmark. - Page 34 © 2010 Koninklijke Philips Electronics N.V. All rights reserved. CED1700_00_UM_V5.0...