
Related Manuals for Philips CED1800BT


Summary of Contents for Philips CED1800BT
-
Page 1: User Manual
Always there to help you Register your product and get support at www.philips.com/support CED1800BT Question? Contact Philips User manual... -
Page 3: Table Of Contents
Contents 8 Use Bluetooth devices Activate the Bluetooth function Pair a device 1 Safety Play audio from a connected device Make a call 2 Your car entertainment system 9 Adjust sound Introduction Playable media Adjust the volume level What's in the box Mute sound Overview of the main unit Enable the MAX Sound feature... -
Page 4: Safety
1 Safety The product/remote control may contain a coin/button type battery, which can be swallowed. Keep the battery out of reach of children at all Read and understand all instructions before you times! If swallowed, the battery can use the device. If damage is caused by failure to cause serious injury or death. -
Page 5: Your Car Entertainment System
Versions: V4, V7, V8, V9 (L1 and L2) Sampling frequencies: 44.1 kHz, 48 kHz Congratulations on your purchase, and Bitrates: 64-192 kbps and variable bitrates support that Philips offers, register your product ID3 tag V2.0 or later at www.philips.com/welcome. Introduction .m4p, .mp4, and .aac) -
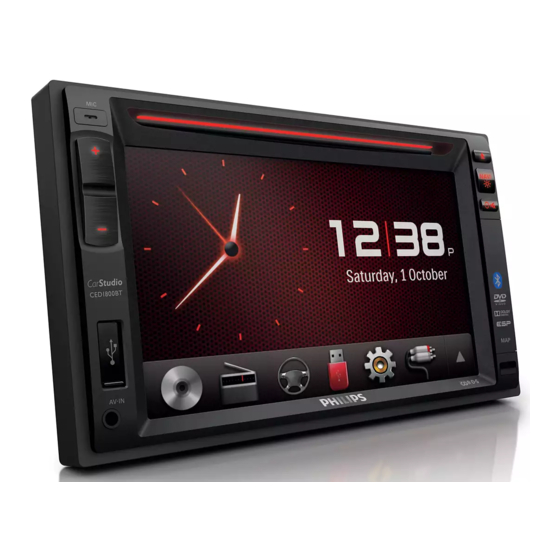
Page 6: Overview Of The Main Unit
Overview of the main unit Connect to a USB storage device. Press to eject the disc. i LCD screen Press to access the navigation system. j +/- Press and hold to adjust the brightness Press to increase or decrease the of LCD screen. -
Page 7: Overview Of The Remote Control
Overview of the remote Enable or disable the FullSound effect. control i DVD AUDIO Select an audio language or audio channel. j DBB Enable or disable the DBB (Dynamic Bass Boost) sound effect. k EQ Select a preset sound equalizer. l MUSIC ZONE Select a music listening zone. -
Page 8: Install The Car Entertainment System
3 Install the car /PRESET +/PRESET - Tune to the previous or next preset entertainment radio station. Skip to the previous or next folder. system Press to power on the system. Press and hold to power off the system. Always follow the instructions in this chapter in Press to mute the speakers or release sequence. -
Page 9: Connect Wires
Connect other wires if necessary. Connect wires Caution Note To avoid an accident, the driver must not watch video Make sure that all loose leads are insulated with while driving. By design, this system disallows watching electrical tape. video during drive. Park your car in a safe place and Consult a professional to connect wires as instructed engage the parking brake before watching video. - Page 10 Connectors and External sockets sockets on rear panel or connectors VIDEO IN (Yellow Video output socket) socket of an external player VIDEO OUT 1 Video input (Yellow socket) socket of an external display device VIDEO OUT 2 Video input (Yellow socket) socket of an external display device...
- Page 11 b c d e...
-
Page 12: Mount Into The Dashboard
Slide the unit into the dashboard until a Mount into the dashboard click sound is heard. Note Make sure that wires are correctly connected before you mount the main unit into a car. If preset radio stations are lost when the ignition key is turned OFF and then back ON, reconnect the red leads crosswise to the yellow ones. -
Page 13: Get Started
4 Get started Turn on Press » PHILIPS logo and a progress bar are displayed while boot-up. Caution To turn off the system, press and hold Risk of car accidents! Never watch video or operate for 3 seconds. this system while driving. -
Page 14: Use The Home Menu
[SWC]: Access the interface to Use the home menu assign functions to buttons on the steering wheel. [Settings]: Access the system menu. Note Customize the home menu is displayed when you touch an icon, it indicates that the selected media or feature is unavailable at the current time. -
Page 15: Adjust The Screen Brightness
Tap [Clock mode] to select a time format. Switch display designs [24hr]: 24-hour time format [12hr]: 12-hour time format Select a preset display design. Tap [Date] to display the interface for In any mode, tap , and then [Display setting the date. Design]. -
Page 16: Play From Hard Media
5 Play from hard Region code media This system can play DVD discs marked with the following region code. DVD region Countries and regions code You can use this system to listen to audio, watch videos, and view photos that are stored on a disc or USB storage device. -
Page 17: Control Play
VCD/SVCD: [Repeat one] (repeat the Control play current track) or [Repeat all] (repeat all tracks). [Repeat one] (repeat [Repeat folder] Videos folder), or [Repeat all] (repeat all video : Select an aspect ratio. : Tap to display the brightness bar, and then tap on the bar to adjust the screen brightness. - Page 18 in the current folder. (highlighted): Repeat all tracks. : Select random play ( highlighted) or sequential play ( in gray). Pictures : Display the list of audio tracks or : Return to the home menu. folders. : Zoom in or out of the picture. : Rotate the picture clockwise or anti- folders.
-
Page 19: Listen To Radio
6 Listen to radio Tap [Distance] or [Local] to select a tuner sensitivity. [Distance]: Stations with strong and weak signals can be tuned to. [Local]: Only stations with strong signals can be tuned to. Switch to radio mode Enable the RDS feature switches to radio mode automatically. -
Page 20: Store Radio Stations In Memory
Store radio stations in Use RDS related features memory Note You can store up to 6 stations in each band. Only after RDS feature is enabled, you can use RDS related features. Store radio stations manually Select a band. Tune to the target radio station. type Tap and hold one of the channels (1 to 6) over two seconds. - Page 21 CULTURE Culture, religion and society SCIENCE Science VARIED Entertainment programs Tap TA to enable or disable the TA function. POP M Pop music TA (highlighted): The function is enabled. ROCK M Rock music MOR M Light music the system automatically switches to LIGHT M Light classical music radio mode and begins to broadcast the...
-
Page 22: Use The Navigation System
7 Use the 8 Use Bluetooth navigation devices system With this system, you can listen to audio from a player and make a call through Bluetooth. Insert the map data card Activate the Bluetooth Note function The map data card is not included in the packaging. Before using the map data card, update the map data if necessary. - Page 23 on this system to search for other : Tap it to display the list of paired Bluetooth devices. mobile phones. If a mobile phone is connected, the keypad is displayed on this system. In the device list, tap the name of your Bluetooth device, and then tap behind : Tap it to display the list of paired...
-
Page 24: Play Audio From A Connected Device
Tap [New pairing] to start searching for , or . Bluetooth devices. Repeat steps 3 to 5 that are indicated in If you want to manually reconnect a device after the connection is interrupted, disable the function of complete the connection. automatic connection (see 'Adjust Bluetooth settings' on page 29). -
Page 25: Make A Call
Make a call Note Keep the Bluetooth connection active between the Tap number icons to enter the phone system and your mobile phone. number. To clear the last digit, tap To clear all digits, tap Locate the external microphone To return to the previous screen, tap You can connect an external microphone for to send the call. - Page 26 Manage the phone book Transfer a phone call to mobile phone Tap the name of a contact from the list. By default, the voice comes from the loudspeakers during a call. » The following options are displayed. [Delete one]: Delete the selected contact. [Delete all]: Delete all contacts.
-
Page 27: Adjust Sound
This feature is unavailable when you listen to radio. video, follow the instructions below to adjust sound. Philips FullSound restores the audio details that are lost due to compression. It enriches the Adjust the volume level music signals so that what you hear is the full sound with every nuance of emotion and every detail of musical genius. -
Page 28: Others
[80 Hz]/[120 Hz]/[160 Hz]: Tap to select a Others Select a listening zone Philips’ innovative Zone technology enables the on the playback interface. driver or passengers to enjoy music with the » The setup interface is displayed. best speakers balance and experience more vivid spacial effect as the artist is intended to create. -
Page 29: Adjust Settings
10 Adjust settings Adjust general settings Access system setup menus > to display all feature icons. Settings Options Description [Radio Select a radio Region] region that matches your location. [Beep] [On] Turn the beep sound on. Each time [Settings]. you press a button »... -
Page 30: View System Information
View system information Adjust Navigation settings [Navigation Program Path]: Tap [Enter] to Settings Options access the Navigation Program Path mode. [ARM version] [Navigation Voice]: Tap [Enter] to display [Servo version] the [Navigation Voice] interface. [MCU version] [Bluetooth View the version of version] Bluetooth. -
Page 31: Adjust Bluetooth Settings
11 Others Adjust Bluetooth settings Play external audio/video input You can connect an external audio/video player Bluetooth Options Description to this system. settings [New Search for new Pairing] devices. [Auto [On] When a paired Connect] device is within effective range, the system reconnects with the device Connect a composite AV cable to... -
Page 32: Use Buttons On The Steering Wheel
Use buttons on the steering Set the rear view camera wheel If a rear view camera is connected, you can view on the screen what the camera takes. You can assign a function to a button on the > to access the full menu with all steering wheel, and then control the system feature icons displayed. - Page 33 (the exact wording of this link name may vary in different languages). Log in with your account on the prompt Web page. If you have no account for Club Philips, Search your product with "CED1800BT/98" as the keyword. Click the link of search result to access the Web page for registering your product.
-
Page 34: Product Information
12 Product Radio information Frequency range 87.5 - 108.0 MHz (50 kHz - FM per step) Frequency range 522 - 1620 kHz (9 kHz per - AM(MW) step) Note Usable sensitivity 2 uV - FM Product information is subject to change without prior Usable sensitivity 25 uV notice. -
Page 35: Troubleshooting
Parking wire connection is incorrect. Check product, check the following points before the wiring. requesting service. If the problem remains unsolved, go to the Philips Web page (www. philips.com/support). When you contact Video connection is improper. Check the Consumer Care, make sure that the product connections. -
Page 36: Notice
Please inform yourself about the local rules on separate collection of batteries. The correct disposal of batteries helps prevent potentially negative consequences on the environment and human health. Please visit www.recycle.philips.com for additional information on a recycling center in your area. -
Page 37: Trademark Notice
2014 © WOOX Innovations Limited. All rights Trademark notice reserved. Philips and the Philips’ Shield Emblem are registered trademarks of Koninklijke Philips N.V. The Bluetooth word mark and logos are ® and are used by WOOX Innovations Limited registered trademarks owned by Bluetooth under license from Koninklijke Philips N.V. - Page 38 Specifications are subject to change without notice. 2014 © WOOX Innovations Limited. All rights reserved. Philips and the Philips’ Shield Emblem are registered trademarks of Koninklijke Philips N.V. and are used by WOOX Innovations Limited under license from Koninklijke Philips N.V.