
Related Manuals for Honeywell Home C-Wire Adapter


Summary of Contents for Honeywell Home C-Wire Adapter
-
Page 1: Online Guides
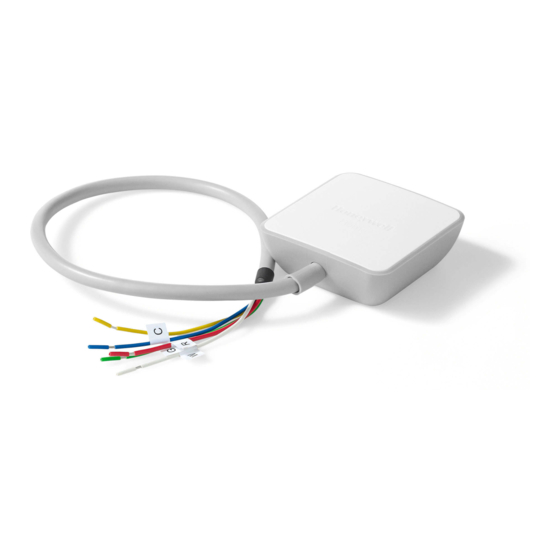
C-Wire Adapter Guide Only use the C-Wire Adapter if you previously answered No to Step 12 of the Installation Guide Online Guides honeywellhome.com... - Page 2 Read before installing. Overview This product replaces the need for a C-wire (common wire) to power a thermostat. Only install if you do not have a C-wire available to connect to your thermostat. BEFORE Furnace Thermostat AFTER Furnace C-Wire Adapter Thermostat...
- Page 3 Compatibility Check Confirm you have a G and Y wire Look at your wires. Do you have BOTH a G and Y wire labeled? YES - This means your system is compatible. Proceed to Step 2. NO - Your system is not compatible with the C-Wire Adapter.
- Page 4 Remove cover of furnace or heating system Open the furnace or heating system’s cover to find the control board. Note: You may need to unscrew the cover (top or bottom). Leave the power off. Locate the bundle of wires that are the same as the ones at your thermostat...
- Page 5 Take a picture of the wiring Take multiple pictures from different angles to capture all of the letters next to the terminals. W or W1 (not in all systems) Y or Y1 Be sure to include the terminal labels and wires. You may need to reference this image later.
- Page 6 Label the wires Use the provided stickers to label the wires connected to the following terminals: W or W1 (not in all systems) Y or Y1 Note: If multiple wires are connected to a terminal, only label the wires running to your thermostat. EXAMPLE W or W1 Y or Y1...
- Page 7 Disconnect the labeled wires Be sure you have taken a photo of your wires before disconnecting. Disconnect only the wires that you just labeled. Do not disconnect any unlabeled wires. If unlabeled wires disconnect, replace immediately. Note: You may need a screwdriver to release wires from terminals.
- Page 8 Connect wires to the C-Wire Adapter Firmly depress the terminal tabs and insert the labeled wires into the “Thermostat” side of your C-Wire Adapter. Insert the wires into their corresponding terminals as shown below. Wires Terminals THERMOSTAT This will convert the G into C and Y into K wires at your thermostat.
- Page 9 Ensure the wires are connected Gently tug on the wires to be sure they are connected to the C-Wire Adapter. Connect wires to control board Take the wires from the “Equipment” side of your C-Wire Adapter and connect them to the control board. Be sure to remove the plastic tips and insert the wires into their corresponding terminals as shown...
- Page 10 Mount C-Wire Adapter Use the included mount and adhesive pad to mount the C-Wire Adapter inside your furnace or heating system. Note: Make sure your wires are not over extended or strained. a) Clean the surface b) Firmly press the adhesive c) Mount the C-Wire Adapter Surface Adhesive...
- Page 11 Close the cover to the furnace or heating system Be sure the cover is completely closed. Some systems will not power up if the cover is not fully closed. Leave the power off. You’ve connected the C-Wire Adapter. Go back to the “Installing Your New Thermostat”...
-
Page 12: Electrical Specifications
INPUT: 24V~@60Hz, 0.2A Resideo Inc., 1985 Douglas Drive North Golden Valley, MN 55422 www.resideo.com ©2018 Resideo Technologies, Inc. All rights reserved. The Honeywell Home trademark is used under license from Honeywell International Inc. 33-00422ES—01 M.S. 11-18 Printed in U.S.A. 33-00422ES-01... - Page 13 Guía del adaptador del cable C Use el adaptador del cable C solamente si respondió No en el paso 12 de la Guía de instalación Guías en línea honeywellhome.com...
- Page 14 Leer antes de instalar. Descripción general Este reemplaza la necesidad de un cable de alimentación C (común) para alimentar el termostato. Instálelo solamente si no tiene un cable de alimentación C disponible para conectar al termostato. ANTES Caldera Termostato DESPUÉS Caldera Adaptador del cable C...
- Page 15 Verificación de compatibilidad Confirme si tiene un cable G e Y Mire los cables. ¿Tiene un cable etiquetado G e Y? SÍ. Esto significa que su sistema es compatible. Continúe con el paso 2. NO. Su sistema no es compatible con el adaptador del cable C.
- Page 16 Quite la cubierta del sistema de caldera o calefacción Abra la cubierta del sistema de caldera o calefacción para hallar la tarjeta de control. Nota: Es posible que necesite desatornillar la cubierta (de la parte superior o inferior). Deje la alimentación desconectada.
- Page 17 Tome una fotografía del cableado Tome varias fotografías desde ángulos diferentes para capturar todas las letras que se encuentran al lado de los terminales. W o W1 (no en todos los sistemas) Y o Y1 Asegúrese de incluir los cables y las etiquetas de los terminales.
- Page 18 Etiquete los cables Use las etiquetas autoadhesivas suministradas para etiquetar los cables conectados a los siguientes terminales: W o W1 (no en todos los sistemas) Y o Y1 Nota: Si varios cables se conectan a un terminal, etiquete solamente los que van al termostato.* EJEMPLO...
- Page 19 Desconecte los cables etiquetados Antes de desconectarlos, asegúrese de haber tomado una fotografía de los cables. Desconecte solamente los cables que acaba de etiquetar. No desconecte ningún cable que no esté etiquetado.* Si se desconecta algún cable que no esté etiquetado, vuelva a colocarlo de inmediato.* Nota: Es posible que necesite un destornillador para liberar los cables...
- Page 20 Conecte los cables al adaptador del cable C Presione firmemente las pestañas de los terminales e inserte los cables etiquetados del lado del adaptador del cable C etiquetado “Termostato”. Inserte los cables en los terminales correspondientes, como se indica a continuación.
- Page 21 Asegúrese de que los cables estén conectados Tire suavemente de los cables para asegurarse de que estén conectados al adaptador del cable C. Conecte los cables a la tarjeta de control Tome los cables que salen del lado del adaptador del cable C etiquetado “Equipo” y conéctelos a la tarjeta de control.
- Page 22 Monte el adaptador del cable C Use el montaje y la almohadilla adhesiva incluidos para montar el adaptador del cable C dentro del sistema de caldera o calefacción. Nota: Asegúrese de que los cables no estén sobreextendidos o estirados. a) Limpie la superficie b) Presione con firmeza el adhesivo c) Monte el adaptador del cable C Superficie...
- Page 23 Cierre la cubierta del sistema de caldera o calefacción Asegúrese de que la cubierta se encuentre cerrada por completo. Algunos sistemas no se encenderán si la cubierta no se encuentra cerrada por completo. Deje la alimentación desconectada. Ha conectado el adaptador del cable C.
- Page 24 Resideo Inc., 1985 Douglas Drive North Golden Valley, MN 55422 www.resideo.com ©2018 Resideo Technologies, Inc. Todos los derechos reservados. La marca comercial Honeywell Home se utiliza en virtud de la licencia emitida por Honeywell International Inc.. 33-00422ES—01 M.S. 11-18 Impreso en EE. UU. 33-00422ES-01...